How-to Make Bamboo Border Cookies
Adding a royal icing bamboo border is one of my new favorite cookie additions. I first tried it around Father’s Day on these Hawaiian Shirt cookies and have been looking for a reason to do it again. Luckily summer is luau season.
To make a royal icing bamboo border you will need:
- square or round cookies
- white piping and flood icing
- bamboo brown 20-second icing {I mixed warm brown, egg yolk yellow, and a touch of black to make this color}
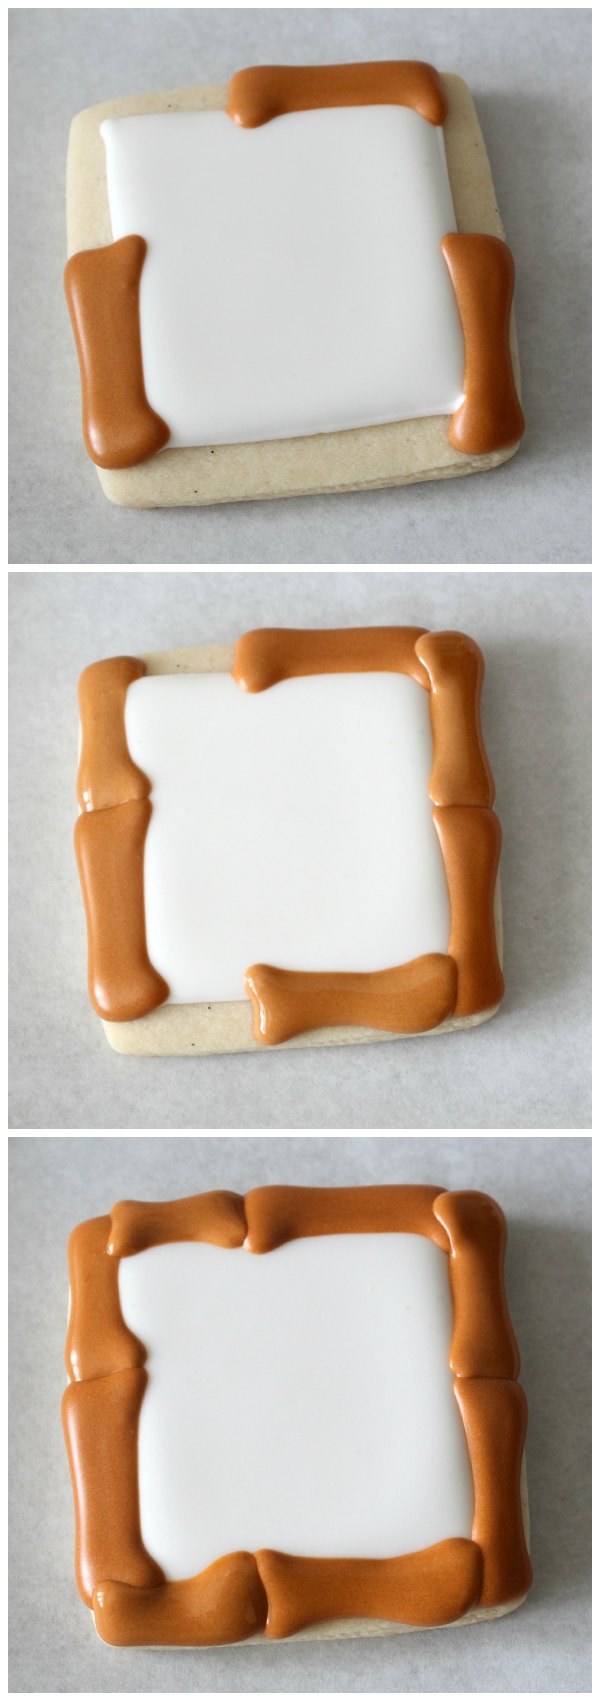
Begin by piping a square onto the base cookie. Leave enough space to add the size border you would like. Sometimes squares can be a little intimidating, but don’t let them stress you. I like to pipe a dot in each corner to use as a little guide. Just pipe from one to another. Even if the square isn’t perfectly perfect, that’s okay, because the bamboo will cover it up. Let these dry for quite awhile, overnight is best if you have the time.
Once the middles are dry it’s time to add the border. Use twenty-second icing and a #2 tip to add the first pieces of bamboo. I like to make each section about half the length of the cookie.
Let dry for about 20-30 minutes then fill in the next section.
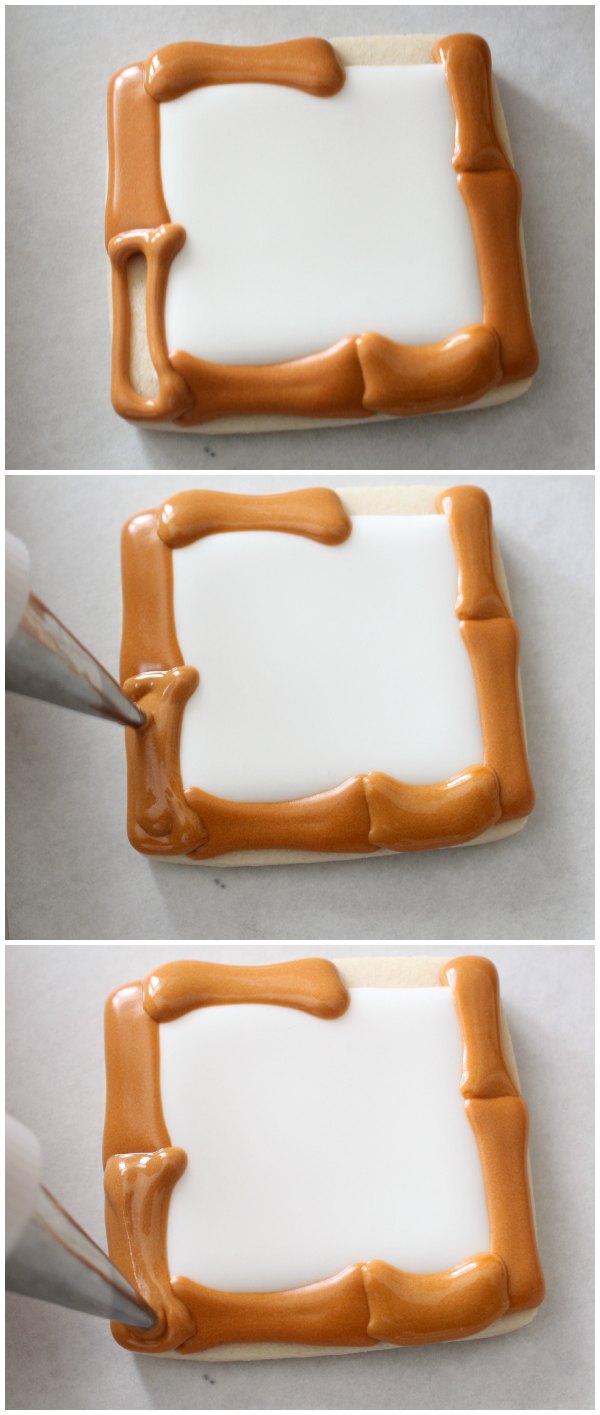
Here’s a closer look at making each piece with the twenty second icing. Remember, consistency is KEY. whether you call it 10, 15, or 20 second icing, it MUST be thick enough that it doesn’t run off of the side of the cookie while piping.
First outline, then quickly go back and fill the open space so that the icing all runs together.
Allowing the sections to dry between applications is important because that add dimension. See what a difference each addition makes?
 After the border dries, I like to add a few final details with a #1.5 tip. This is also a GREAT way to hide craters!
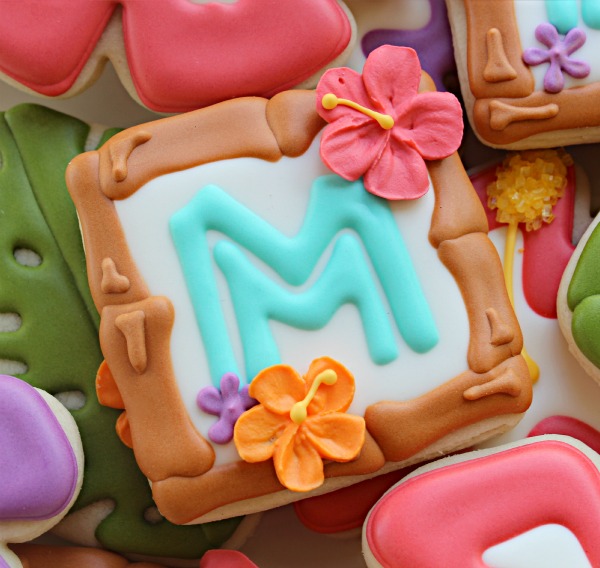
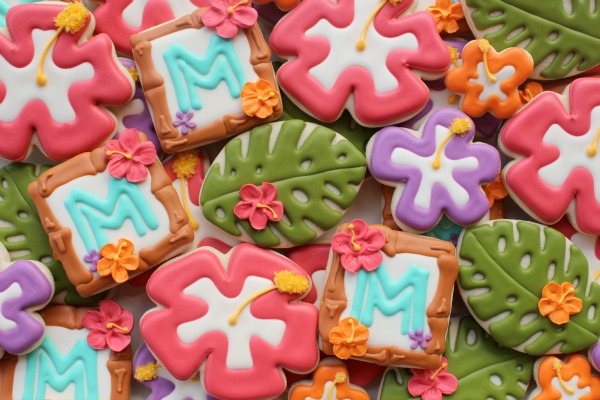
Once the border is dry, you can decorate the cookies any way you like. I added a Tiki monogram and little hibiscus flower that I made using Wilton’s apple blossom tutorial and a #102 tip.
If you would like to make cookies like these, you may find these posts helpful:
- Special Fonts for Kopykake Projectors
- How to make Hibiscus Cookies {in this case I skipped the brush embroidery step}
If you like these cookies, be sure to check out these adorable tropical treats:
- How to Make Pretty Luau Cookies by Glorious Treats
- Mini-Luau Cookie Using Common Cutters
- Luau Cookies via A Dozen Eggs
- Flip Flop Cookies by SweetSugarBelle via Tidy Mom
- Tiki Cookie by Life’s a Batch
- Hawaiian Shirt Cookies
Hope everyone had a wonderful weekend!


Wow, how beautiful, Callye!! They are perfect!!
I love this technique, Callye! I bet you could use the same technique to make a bone border for a Halloween cookie – I’m totally going to try it! 🙂
What a good idea!!! Cannot wait to see!!!
These are beautiful and would be perfect for my daughter’s luau birthday party! Now… if you could just make up a bunch and ship them to me, I’d be all set! 🙂
How beautiful are these!? They actually make me feel like I’m IN Hawaii!
I have looked high and low for a hibiscus flower cookie cutter. where did you get yours. i have been using a starfish one, it’s ok but i need another! thanks. love the cookies! all of them.
Love these!
Oooh! Not many luau’s in Holland, but I love the idea. I especially like the leaves!
MAHALO! Just lovely.
These are so darn cute…I could have used this tip for a Tropical Bridal Shower…but I will stash it away for another occasion! You are so clever!
Gah! Callye! These are GORGEOUS!!!
How do you manage to make these look so easy every time?!?
I love these, but I have a question about the flowers on the cookies. I have searched and looked all over the internet and can’t find how to make them. I am talking about the teeny tiny ones. LOVE the cookies!
Those are pretty. Without that extra little bit they could pass for dog bones. lol
These are soooo stinkin’ cute!! Love your blog 🙂
I am so glad I’ve stumbled onto here via Sweetapolita (also forever thankful stumbled onto there too). I’m in the UK and baking is a much different animal here, icing and decoration are pretty minimal for the most part, so when I was looking to make a decorated cookie for a wedding favour I looked across the pond. However flavour is very important to me and the idea of only having one flavour cookie smothered in just the plain royal icing didnt really hit the mark no matter how pretty. What joy to discover so many different cookie flavours here AND flavoured icing too! Of course your decoration of said cookies is not too shabby either. I am not worthy but I shall do my best. Thank you for sharing.
These are SO CUTE!
It looks great
Andreja
So pretty sweet Callye!
That is one beautiful platter of cookies! Always a pleasure reading your posts and learning more from the BEST! 🙂
I love this border! There are so many techniques you’ve done that I haven’t gotten to try. I’m adding this one to the list. Great tutorial!!!
I remember your Father’s Day cookies and loved the bamboo border back then and I think that this collection is just simply beautiful Callye.
How colorful these cookies are, so perfect for summer. The tutorial for the bamboo is so helpful for an upcoming proyect I have.
Oh, my gosh, I should have known you would have the perfect solution for a bamboo cookie. I love it! Thank you!
Pingback: Tropical Themed Party Ideas for the SummerTiny Prints Blog