Decorating Using Piped Cookie Dough with Miss Cuit {Guest Post}
Here’s another sweet surprise. I hadn’t planned on a guest post, but when I came across THIS IDEA on Mis Cuit’s Facebook page {THANK YOU, JILL} I was so intrigued, I just had to ask her to share.
One of my favorite things about the cookie community is that I am constantly amazed and inspired by others. I hope y’all are as excited to try this technique as I am!
My name is Yamina, but in the world of cookies, you can call me Miss Cuit! In case you’re wondering how to pronounce my name, “Miss Cuit” which sounds very similar to “biscuit”, the French word for cookie. It also means “Miss bakes” :o)
It is a great honor to be featured on Sweet Sugarbelle’s fantastic blog. Especially since I’m usually the one who reads her posts and stares at her genius creations!
Recently I have been experimenting with a new decorating technique, and today I am here to share it with you. Did you guys know you could decorate cookies with … cookies? I’m still far from being an expert, but I am definitely learning. This technique is perfect for those who don’t like icing or can’t eat too much sugar (the ideal little treat for a dear friend of mine who suffers from diabetes) and it’s easy to do! It’s also much quicker than decorating with royal icing. You’ll save time on preparation and drying. I was recently informed that this trick was a Wilton suggestion. I suppose no matter how hard I try, Wilton is always going to be ahead of me. In any case, this is what I do.
Here is what you will need:
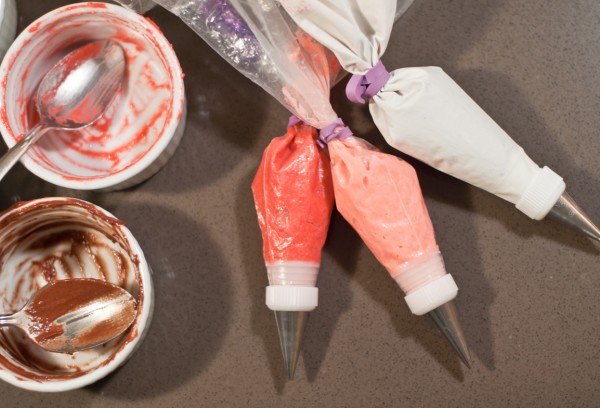
- piping bags
- couplers
- piping tips #2 or #3
- food gel coloring
Steps:
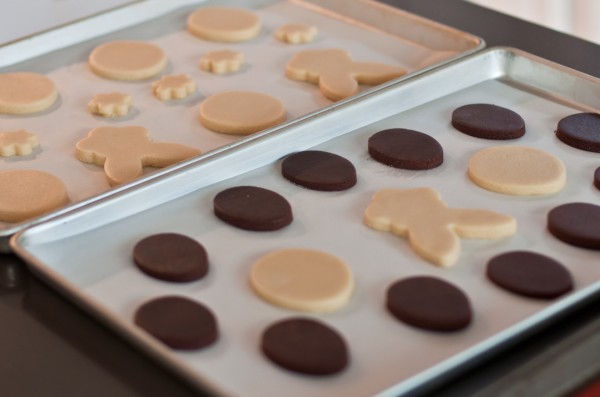
1) Cut your shapes as usual.
2) Separate leftover dough into small portions. Make as many colors as you want.
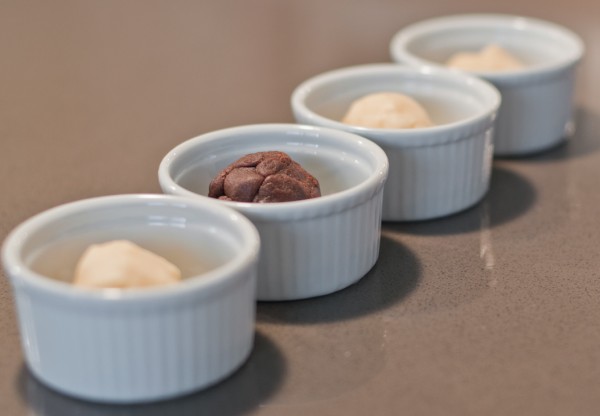 I should note, I only use leftover dough (I don’t keep dough right from the beginning for my decoration.) I might be wrong, but I think that since the leftovers were rolled again and again (more flour into it), it might prevent the piped dough from spreading to much when baking. I also omitted baking powder from my sugar cookie recipe.
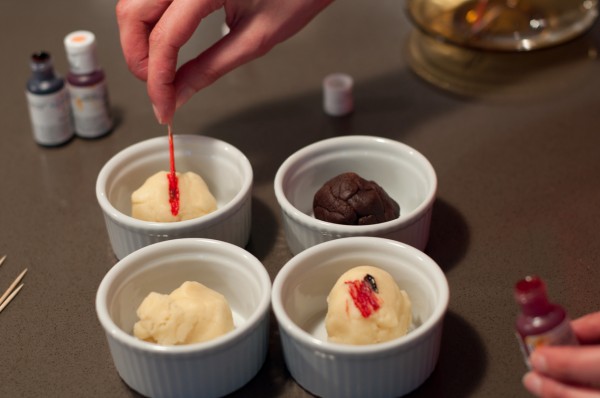
3) Add food coloring like you would do with icing. Don’t add to much if you want to prevent bleeding issues.
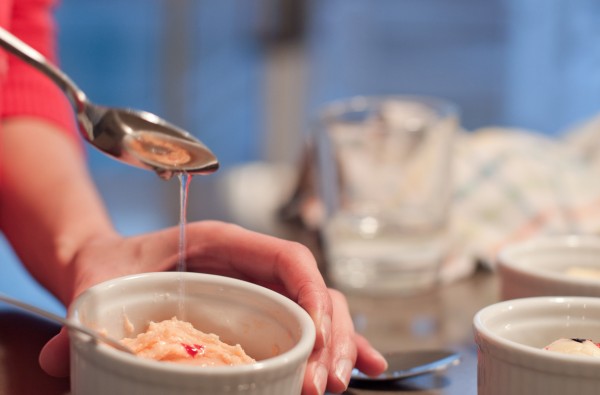
4) Thin down your leftover dough by adding water. Mix well. You want to reach a consistency that will flow easily out of your tip, but that will still hold its shape. Unlike royal icing, finding the right consistency isn’t a big deal!
5) Use bags and tips #2 or #3 as you would normally do.
I haven’t tried piping with squeeze bottles but I think the dough might stick on the inside… so probably not the best option for this technique.
6) Have fun decorating unbaked cookies!
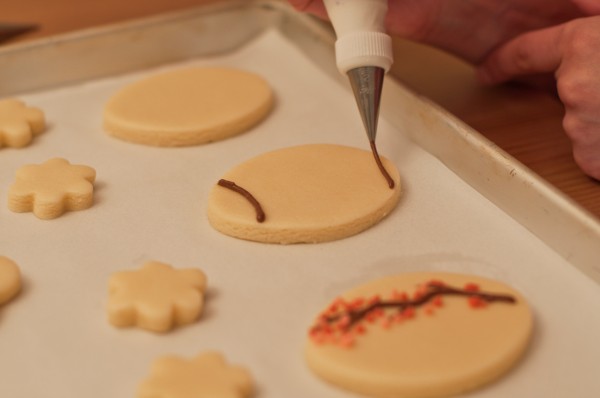 You will notice it is kind of hard to stop a line because of the dough’s elasticity. Intricate designs are pretty difficult to achieve. On the otherhand, it is somehow forgiving since the imperfections and peaks tend to flatten out when baking. If you make a mistake while decorating, you can carefully remove it with a toothpick.
7) Bake your cookies like you would normally do. Enjoy!
Make sure you clean well your piping bags to remove any grease residue, especially if your using the same ones with royal icing afterwards.
There are many possibilities! I guess this little trick could be used to add dimension underneath fondant decorations. You could make “transfer”, as with royal icing, for a crispy tasteful cupcake toppers for instance. Just don’t overbake it! I’ve tried with a couple of different cookie recipes (shortbread, sugar cookie and Lila Loa’s awesome chocolate recipe) and it worked each and every time!
Thank you so much Callye for inviting me and thanks to all of you for reading!!! I would love to know it if some of you try this technique!
You can reach me on my Facebook page. Click HERE to join me!
![]() Thank you again for sharing, Yamina! I cannot wait to try this.
Thank you again for sharing, Yamina! I cannot wait to try this.
Have a great weekend everyone!





Very clever, indeed!! Great guest post.
GENIUS!!! It is soooo cool! Love this technique, thanks for sharing 🙂
Your cookies are so cute. I bought some cookie cutters from Ann Clark and decorated them. I have them posted on my blog. I have not tried that technique but I have made cake pops. I must try the chocolate recipe, I love chocolate.
Wow what a great idea – I love that once they are baked all the work is done! Will definitely give this a try!
What a fun idea, gonna give it a try-thanks:@)
Amazing, never thought of it. I wonder whether thinning the dough using simple syrup could improve the piping consistency.
My head is spinning with ideas right now! This is such a cleaver way to use cookie dough:) Love it!!!
Oh my gosh that is the smartest thing ever!
What a unique and amazing idea! It opens up even more possibilities with cookie decorating! Thanks for sharing, Yamina and Callye!
What a great idea! Thanks for sharing. This would be great to do for the little ones. Too much sugar makes them bounce. I’m going to have to try this technique.
I love your cookies, thanks for sharing!! 🙂
I love this! Why didn’t I think of this? I never eat the cookies I decorate because I don’t like frosting of any kind. No more boring, plain cookies for me!! Thank you so much for sharing your clever idea!
It’s fantastic!! I don’t like royal icing taste, so it can be the solution!! I will try it!! Thanks for share!!
It is funny that you are posting this, I’ve been playing with this idea for a while now, but as per usual I overcomplicated the whole process this looks so easy and really anyone can do it, thanks so much.
Thanks for the mention, Callye! Miss Cuit’s idea is genius and has endless possibilities!
Awesome!! I am so excited to try this!!!! I don’t really care for royal icing. I noticed all of the cookies in the pictures just had details piped with the cookie dough. Can this technique also be used for flooding cookies?
Well, the dough tends to hold its shape, so I’m not sure about flooding, unless you don’t mind if you don’t have a smooth surface.
These are so cute!!! I love this idea because one of my kids can not stand icing. We’ll have to try it!
What a wonderful idea. Thanks for sharing
This is brilliant! My grandma doesn’t like frosted cookies so I’m going to make her some special Easter cookies with this recipe! Thank you!
lol..I see a few comments on how people dont eat the cookies they decorate becasue they dont like the icing! Im the same way. My husband gives me a hard time because I dont eat the cookies I sell. But the taste of royal icing just isnt my thing. Ive even tried adding various flavors to it. Almond was my fave, but I still prefer a naked cookie, or maybe some sanding sugar. But I like the enjoy the flavor of the actual cookie, which is taken over by he sometimes bitterness of the RI.
What an amazing technique!
I love th
I love this idea….it’s so awesome ans simple, with such great results! Thank you Soooooooo much for sharing!
That is so cool! I will have to give it a try.
That’s a great idea for those who thinks they don’t like icing on cookies!
AWESOME!!!!
This is great, thanks for sharing!
What a great technique, LOVE it!!!
Cool! I have only used that technique for bricks on gingerbread houses. Can’t wait to try some fun colors.
This is SUCH a fun idea!!! Thanks for sharing it!!
Maravillosa y sorprendente forma de trabajar el fondant con la galleta. Saludos
MissCuit, I saw this on your flickr account, which led me to FB. I was so intrigued. And still am! Thank you for sharing!
are you kidding?! this is amazing! i have trouble with RI so i’m going to give this a try. thank you!! xoxo
I’ve been experimenting with this technique for the a week or two (thought it was an original thought of mine, darn it!). I was looking for a vegan alternative to royal icing, so I made up a separate dough and colored it several colors. It was great! I like that other people are thinking about it too.
I don’t like alot of frosting, so these would be perfect, especially if they are chocolate!!
Brilliant!!!! This ones going in the part of my brain strictly reserved for cookie making!
Thank you do much ladies for a wonderful post. I love te beauty of royal icing but for my son the added sugar isn’t necessary. What a wonderful way to add color to his little sugar cookies. Thank you!
This is such a lovely new idea for decorating! Simple and beautiful… thank you both!
PS – What tip number did you use? I imagine a very small one will make it harder to pipe but in the same way, if its too wide the decorations don’t come out as nicely. Thanks!
For these ones, I used Ateco size 2.
Thank you!
How unique and interesting is this!
Wow! I would have never thought of that! Really cool! I love the new Easter title with Easter cookies!
I made a huge batch of cookies last Christmas but never got around to making the icing (but they were still consumed). This is much better. By the way, when you mentioned cleaning out the piping bags, I just had to share this: http://www.karenscookies.net/Cookie-Decorating-Video-Color-Mixing-Bag-Filling_ep_74-1.html
What a clever idea…especially for those not allowed much sugar. Even for our children …we all know what sugar does to them!!! 🙂 Great guest post, Callye!!
This is truly genius. I can’t wait to try it out.
Hello man knows the things with you purchase and if which the costs are and as I get those the things I speak only German and can write also only German –
Awesome Idea!!! I love it!!!
Especially thinking of Easter Eggs… Can’t wait to try it! Thank you!
What a brilliant idea!! I love this and never would have thought of it. Thank you for sharing this fantastic technique!
Now that is totally cool!
Pingback: Friday Links
I love this idea! I hate royal icing- too sugary, so I never decorate my sugar cookies. I will definitely give this a go. Thanks for the post!
This is an amazing idea, thanks for sharing!
Pingback: Koekjes gedecoreerd met deeg/ cookie dough decorated cookies « missgefreubel
That technique looks epic! I’ll have to try it soon 🙂
I was SOOOOOOOO impressed!
OMG I have to try this!!!! my mom is diabetes to! soo this is super!!! thanks
OH thank you thank you! I did this when my kids were little and could not find or remember how we did it. So it really is watered down cookie dough. I thought I was forgetting something important!
I find this is so much easier with kids.
Thanks again!
Pingback: Weekend Recap | Peachy Plum
Pingback: Décorer des biscuits sans glaçage - Miss Cuit - Misscuit
Wow great post Yam! This is such a great technique and has such a great end result!
Pingback: Tutorial: Icing-free filigree hearts - Miss Cuit
This is genius! I usually make royal icing using lemon juice instead of water. Would it be okay to substitute lemon juice in this application as well?