Cupcake Cookies
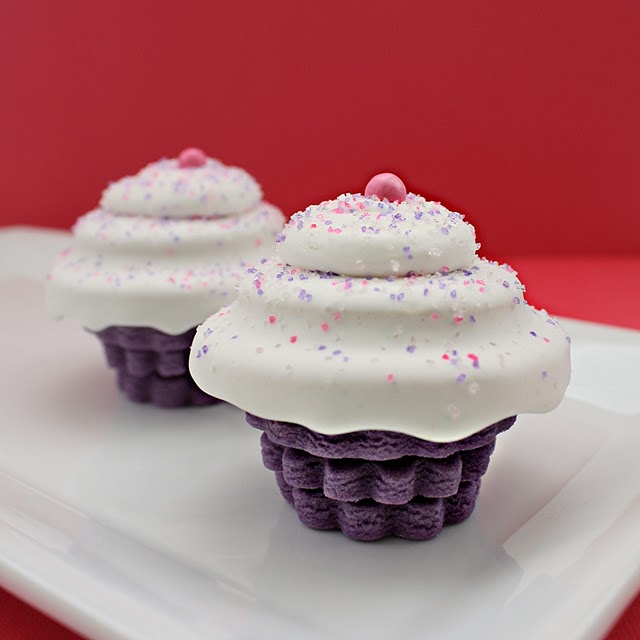
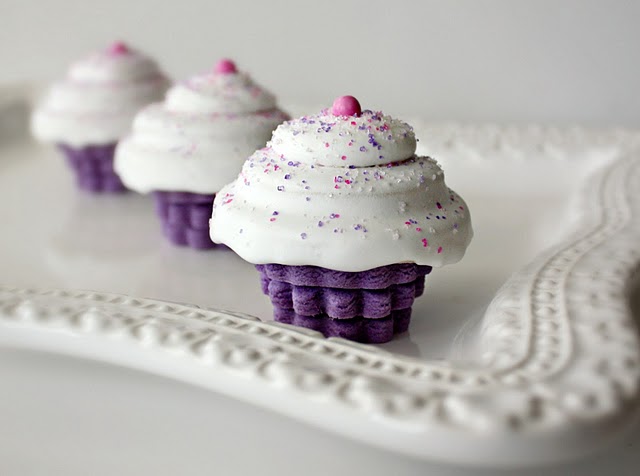
It only took five or six tries, but I finally feel confident enough of my 3-D cupcake cookie to share!
To begin you need to have your cookies baked and ready. They can be as large or small as you would like, as long as the circles are graduated.
For each top, you will need 2-3 round cookies, the largest one being slightly larger than the biggest fluted cookie {I really really hope that made sense, LOL}
For the bottoms, I like fluted cookies best, because the resemble cupcake liners. For the record, I used Americolor gels to tint the dough that I used. I just added a few drops directly to my dough before baking.
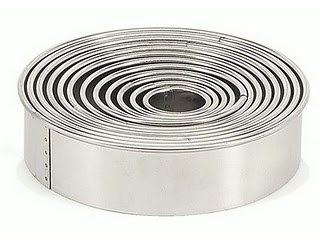
It REALLY helps to have a good set of graduated round cutters for this project. I got mine from Fancy Flours. These are a little pricey, but if I were stranded on a deserted island, and could only take two sets of cutters, I’d pick these! They are stainless steel, so they don’t rust, and they hold up to years of heavy use. {If you would like to get your own, just click on the photo below. It will take you directly to the Fancy Flours website.}
*Hopefully, I’d get to take my oven to this desert island*
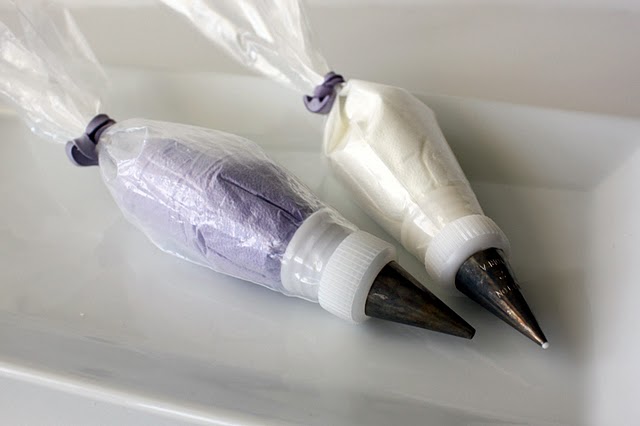
Anyway, to construct the cupcakes, you will need two colors of piping consistency icing. They will act as your “glue”.
I used white for the cap {or any color as long as long as it is close to the color icing you plan to coat your cupcake top with} and a purple shade VERY close to the color of the cookie base. This is to ensure a clean even appearance just in case you have any overflow when you connect them.
I began construction by connecting the top pieces of the cupcake cookie. Simply place a dime size circle of royal icing on the larger cookie and place the smaller one on top.
Keep in mind, that icing is like glue. My pre-K teacher Mrs. North had a glue mantra that she repeated every single time we touched it, and it seems very appropriate now… A little goes a long way!
So, take it EASY. If you go overboard, the icing will seep out the sides and make a mess. Try to use the smallest amount possible to connect the cookies.
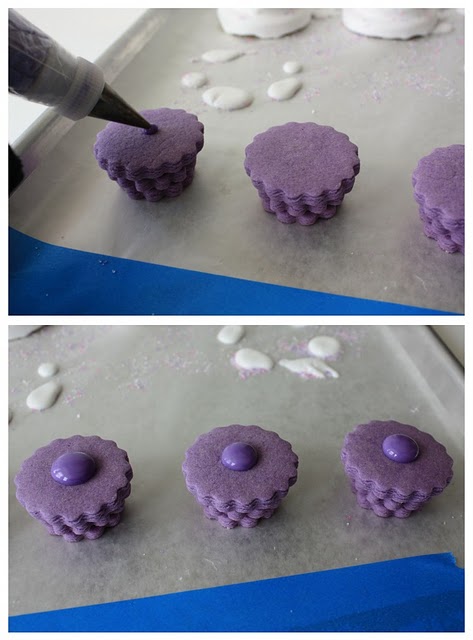
When the tops are all connected, set them aside to dry and begin working on the bottoms. I lay mine out in their graduated order so all I have to do is pipe and press.
Follow the steps below to connect them in the same fashion that you connected the top cookies. Be sure to put the smallest round on the bottom and work up.
When I finished this step, I picked mine up to make sure that they were all centered and even lined up with one another.
At this point, let them dry for an hour or two.
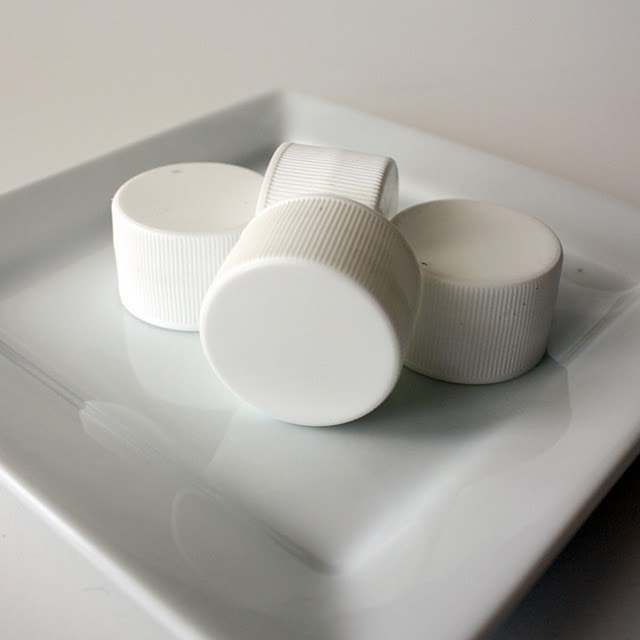
Okay, remember a week or two ago, I said I found something to do with those lids I never used? Well, this is it!
To coat my cupcake tops, first I used a tiny bit of RI to “glue” the cookie to the lid. This was a lesson I learned from experience and wanted to pass on to you. It helps to keep the cookie from sliding off as you work. Don’t worry about it sticking, they pop right off when the cookie is dry. Just don’t use a whole lot. Shop-Chopsticks
for a better grip to use them to eat your cupcakes later.
Let the tops dry for a little while until they are securely attached to the lid, then the are ready to be coated.
This step is the most TEDIOUS part of this whole task. Now, if you really sit and think about it, it’s technically a lot quicker then actually piping, filling and decorating a flat cookie, but it sure felt like it took forever.
Just a little side note…if you don’t want to go through the trouble of coating I have a few alternative suggestions
-
tint the dough you are using for the top, and skip this step altogether
-
dip them in melting chocolate
OR
-
cover the tops in fondant as my quick thinking friend, Glory, suggested
Now, I did try doing this with glaze once, and it worked well, but since RI is kind of my thing, I stuck with that =)
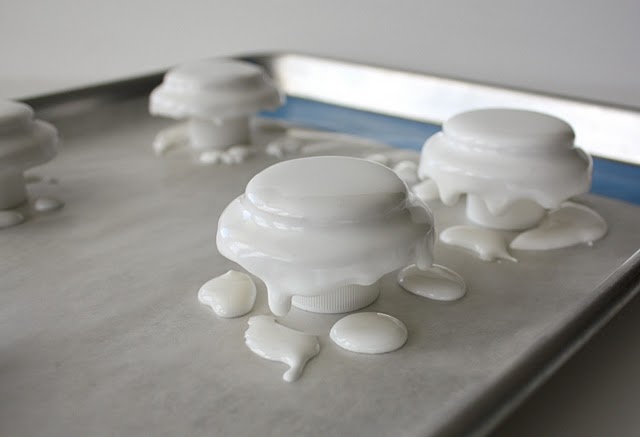
For coating, I used royal icing that was thinned to about the consistency of honey, and following the steps below, I guided the icing to coat the cookie.
This part really does take a bit of patience. As the icing drips down, use your spatula or toothpicks, or maybe even a chopstick to make sure the drips eventually disconnect from the top.
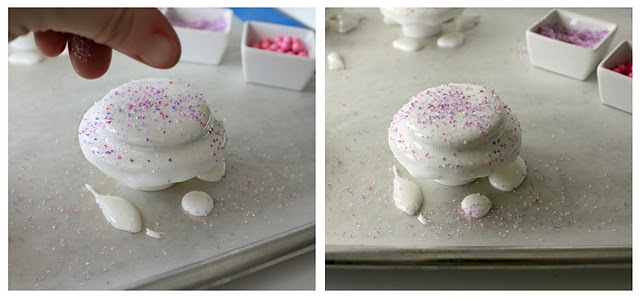
As the RI stiffens, they should begin to look like this. Work quickly because it doesn’t take the icing long to reach the point of showing blemishes. At which point you should LEAVE THEM ALONE!
When the drips are all gone and the icing has firmed up a tiny bit, sprinkle them with the embellishment of your choice. I used colored sanding sugar this time, but really, the possibilities are ENDLESS!
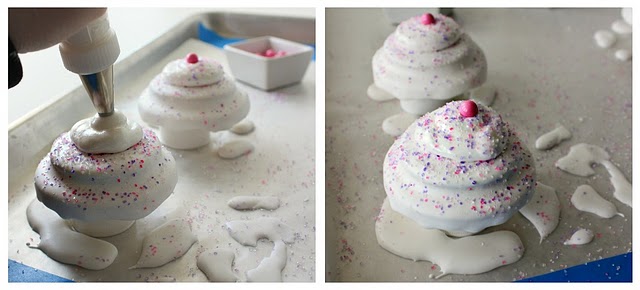
After all of my experimentation, I decided it looked best to make the top swirl out of royal icing.
Using a larger round tip, I think mine was an eight, blob it on {so technical} Dairy Queen ice cream cone style!
Then, use tweezers to add a “cherry” and sprinkle a little sugar on the swirl.
For the “cherries” I used 8mm candy beads. I got those at Fancy Flours also, in both RED and PINK. Click on the picture below for the link.
Then, let the tops dry, for at least eight hours or longer, {think overnight}. When they are dry they are ready to be removed from the lids and connected to the cupcake bases.
See, they pop right off =)
Pipe a small amount of icing onto the top of the cupcake liner cookie using the purple icing that connected the base pieces. REMEMBER, a little goes a long WAY!!!
At this point they will need to dry again. Probably four or five hours at least…
When they dry you will be left with gorgeous little cookie cupcakes that will dazzle.
I’m REALLY excited about these because the possibilities are endless! They can be cute, elegant, or anything in between. They are a unique and fun treat for the times when you want something just a little different than a cupcake. I cannot wait to see the creations that these inspire! All of the experimentation was worth it!
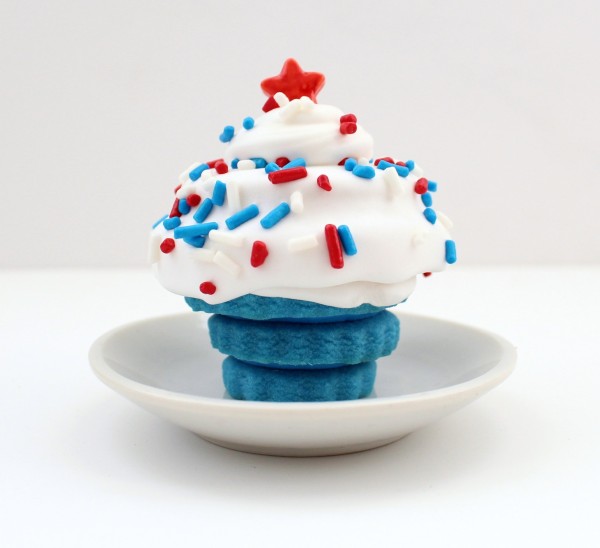
For the Independence Day version of these treats, head on over to Hostess with the Mostess to view a step-by-step tutorial!
Happy Baking!?











So….I discovered this most awesome blog and spent ALL last week pouring through entry after entry and you inspired me – REALLY inspired me. I started baking and mixing and tinting and piping and flooding – and I must now lay it all down for a moment and say , "YOU ARE AMAZING….SERIOUSLY AMAZING!" I can't even bake my cookies as evenly as you do…much less pipe and flood and draw and be creative. HOLY MOLY! Host a cookie weekend….I'll come all the way from Maryland just to learn from you.
Now…about THESE cupcake cuties….SO CLEVER! I would have never even considered doing this. I can only imagine a child's delight to have not ONE but a whole stack of cookies!!
Pingback: Culinary Concoctions by Peabody – Directions? What are those…
Pingback: Scalloped Round Cookie Cutters {WFMW}
Absolutely LOVE this idea and I can’t wait to try it!! Now tell me this; would you eat all of those cookies at once (say, at a party or wherever you decide to showcase them) or would you pick them apart and just eat one or two?
These are adorable!!! Love them.
Love them!!
So so cute!!! Can’t wait to try this as well. I’m so happy I found your site, your such an inspiration. Since I don’t have a lot of time to do things I can just sit down, read and drool over your lovely creations and think – one day I’ll try that – lol.
Wow, what a great idea ! Thanks
I love these! how perfect for a birthday party.
LOVE these!
They are definitely on my list of things to do when I have time to make whatever kind of cookies I want. 🙂
I made these for a cookie club event. They were a huge hit! I didn’t have enough lids (I had to make 50) to lift the tops up so I used cheap plastic shot glasses. The tapered sides kept them stable and they worked like a charm! Thanks for such an inspiring blog. I love it.
Hello, you are amazing!!! I was wondering what is the retail price you charge for one of these BEAUTIES? are they cheaper by the dozen?
Thanks!
Emailed ya =)
So cool looks great.
Check my blog out i would love your imput.
Pingback: Glorious Treats » 3-D Pumpkin Cookies (with a surprise inside)
Pingback: ¿Galletas formando cupcakes o cupcakes hechos de galletas? | Tastery
Wow, what a nice and yummy cakes, i am crazing about it. Such a mouthwatering dish 🙂
Have you ever tried to use cake stencils for cupcake personalization . It would add another dimension to it https://www.kakewalk.com/Stencils-Supplies