Slice and Bake Candy Corn Cookies
I have a problem.
Little things bug me. A LOT.
It’s true. I cannot let the little things go.
I’ve been wanting to make these cookies since I ran across them on Pinterest.
But I should really say, I’ve wanted to FIX these cookies since I saw them on Pinterest. Now most people wouldn’t give this a second thought, but it kills me that all the candy corns don’t really look like candy corns. They are supposed to be yellow on the bottom, orange in the middle, with a little white tip. But, if you make them like the instructions say, they don’t work out that way. Every other corn ends up with a yellow tip and white bottom.
Trivial yes, but I couldn’t let it go. That left me with two options…eat the duds, or fix them.
At first I figured I’d WE’D just eat the rejects, but besides messing up the diet I go on once a week, I’d have to bake two batches to equal one, so I put on my thinking cap and came up with another way to fix the problem.
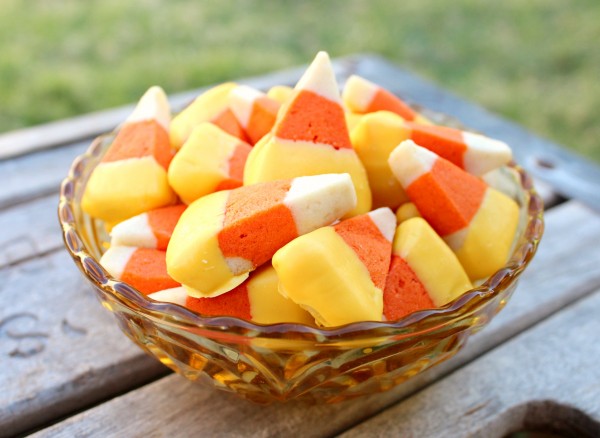
Pretty, and perfect. Two things I like…except in the case of supermodels. That’s just unfair. But that’s another story.
Anyway, I’m going to tell you how to make these. First of all because I like y’all, and second of all, because these aren’t as simple to make as the recipe led me to believe. I figured by explaining how I did this, I could make things a little easier for everyone else.
For the cookie dough, I used the recipe from Land o’ Lakes adapted just a tiny bit to suit my taste this week. By the way, in my defense, I think backward candy corns bugged the Land O Lakes people too because I noticed that they only used the good ones in their recipe picture.
Ingredients
- 2 sticks of butter, softened
- 1 cup confectioners sugar
- 1 egg
- 2 teaspoons vanilla
- 2 teaspoons almond extract
- 2 teaspoons orange juice
- 1/4 teaspoon salt
- 3 cups all-purpose flour
- 1/2 teaspoon baking soda
Instructions
- Cream together sugar and butter. Add egg, vanilla, almond extract, and orange juice. Whip until light and fluffy. Sift together flour, baking soda, and salt and add slowly to the wet ingredients until well incorporated. When the dough is formed, remove it from the bowl, and divide it into thirds. Tint one third of the dough orange {I used egg yolk yellow and tulip red Americolor} and leave the other two-thirds uncolored.
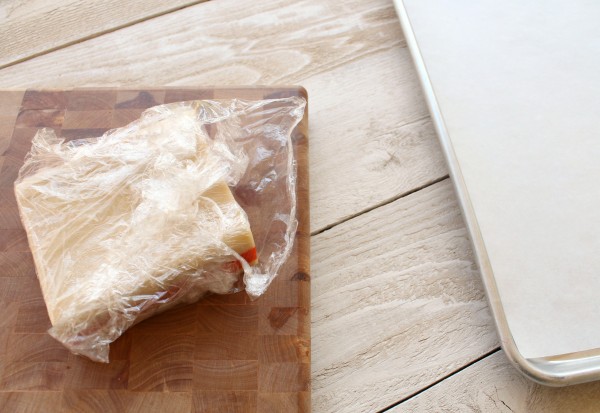
- Afterward, line a 9×5 loaf pan with plastic wrap. Press one third of the white dough into a flat layer on the bottom. Next, add the orange dough on top creating the second layer. Finally, use the last of the uncolored dough to make layer three. Cover the top with the overhanging plastic wrap, and chill, preferably overnight. Slice into “candy corns” and bake at 375 for 7-10 minutes.
As I mentioned before, things didn’t go as expected. If I had gone by the written instructions ONLY, I might have thought I was a HUGE failure. I made things work, but it took a little more brain power on my part than I liked. Nothing was precise.
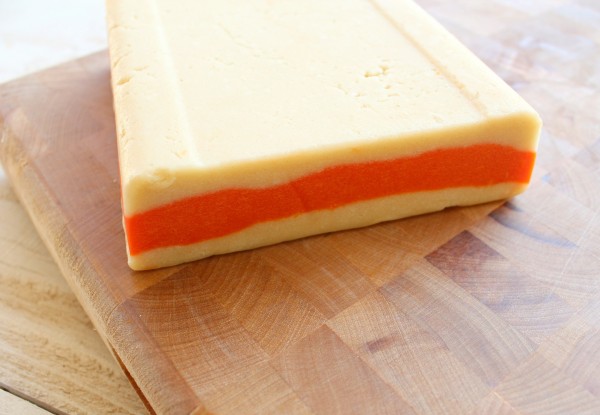
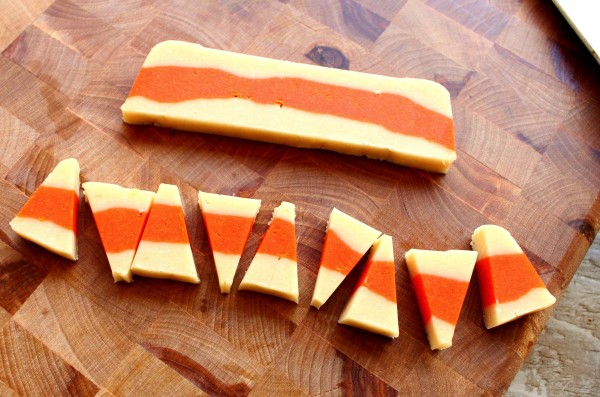
I started with this brick of dough. That was the first surprise.
I thought it was pretty, but it definitely didn’t have the height I had anticipated. Maybe it was the fact that my pan was a teensie bit bigger than 9×5. Only by decimals, and I don’t know how much of a difference it makes, but my cookies were way smaller than they appeared in the picture I saw.
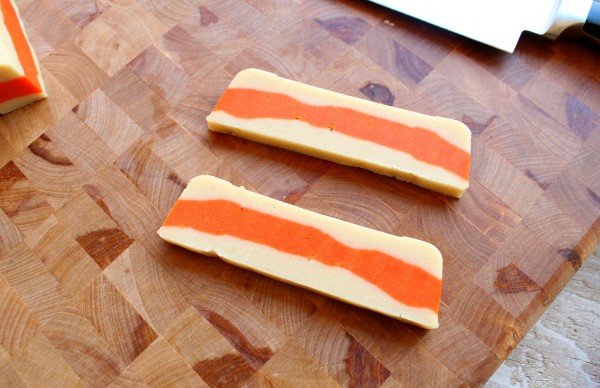
Anyway, I took this “brick of dough” and sliced it into quarter inch slices with my big ol’ butcher knife.
Then, I sliced them again to make candy corns. This was discrepancy #2. The recipe says to slice each strip into six sections, but when I did that they looked funny. So, I did about eight sections. It worked, but I don’t like it when things like that happen, because it always makes me think I messed something up.
Turns out, this is perfectly normal and okay, but I didn’t know that until later. {Thank you instructional video that I found AFTER I finished!}
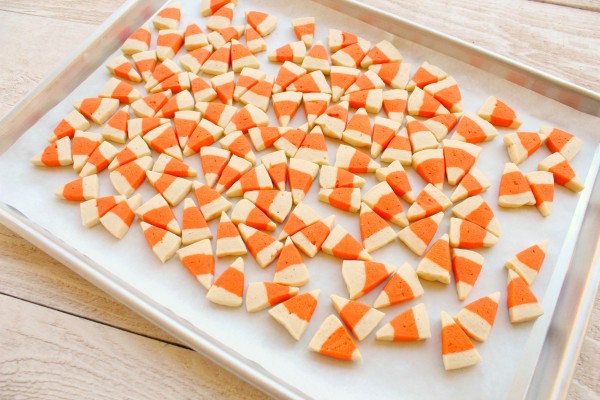
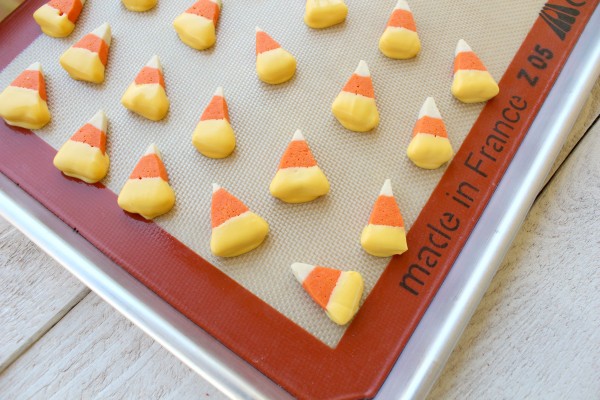
Anyway, I baked them, and ended up with a whole bunch of these,
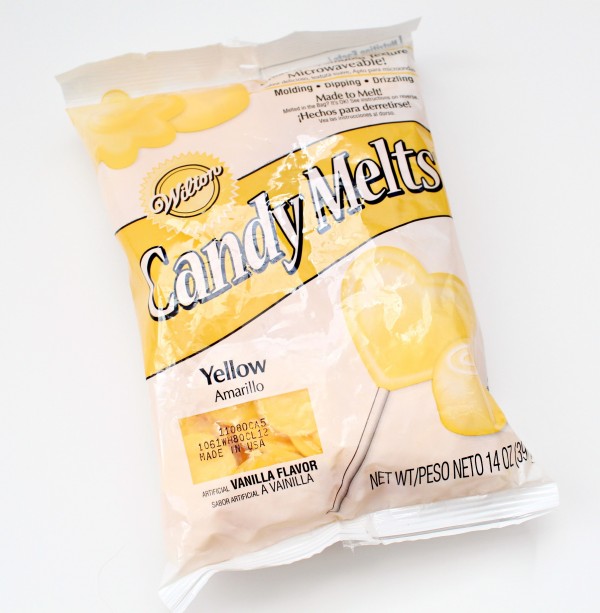
which brought me to the whole OCD fixing the candy corn thing, which required a bag of yellow candy melts.
You can get your own HERE, and believe me you may need to. Another thing I have learned from this project is that there seems to be a shortage of yellow candy melts in crafts stores. At first I was perplexed, but then I decided to blame the cake ball gals. I have a theory that some yellow cake ball creation has surged in popularity and that the cake pop girls have snatched up all the yellow. But that’s just a theory…
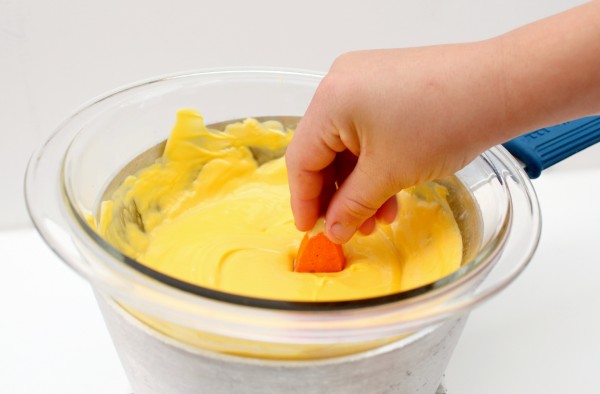
Anyway, the fun part of this, is that the kiddos can help. After scorching the first bag, {I do stuff like that sometimes} I followed the instructions on the back of the melts and then I let my oldest do the dipping. Hypothetically younger kids can help, but in my experience they get a little overzealous when it comes cookie dunking, so mine got assigned to eating the “oopsies” and Evan did all the real work.
Once they were dipped, I let them cool on a Silpat. You can use wax paper, but for some reason, I seem to have the amazing ability to make things stick to wax paper…so after a little mishap, I decided to stick, or UNSTICK, rather, with silicone.
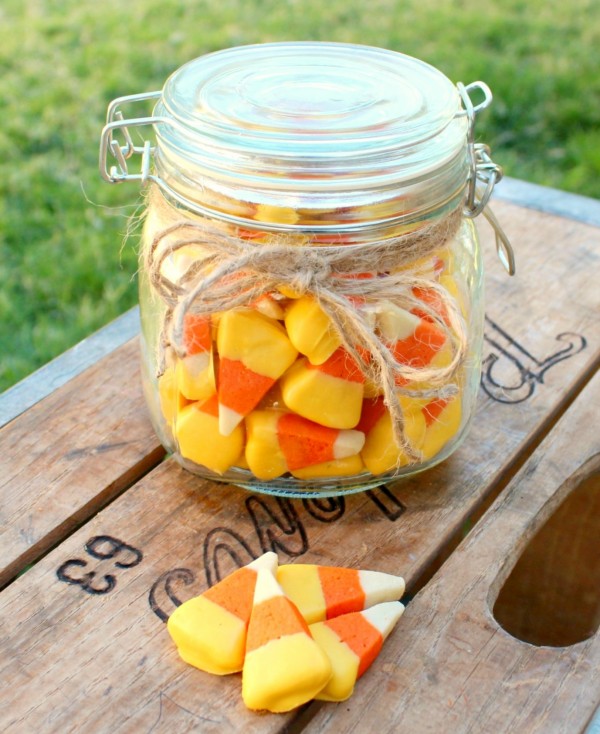
After all the dipping, I let them cool, and put some of them into a little jar I found at the dollar store. I thought they would make a perfect little thank you gift for my neighbor, who just hooked me up with some cool vintage baking gear.
And, that’s that. Easy breezy OCD slice and bake candy corn cookies. Talk about a mouthful!
PS… Did I mention that all my friends like candy corn too? That’s one of the reasons we’re friends, of course! You should check out their candy corn creations.
My buddy Glory put together a gorgeous Candy Corn Cheesecake Mousse. Kristan made the CUTEST Candy Corn Meringues I’ve EVER seen…and Shelly, well Shelly did that thing she does and made Bugles into something amazing! Her Candy Corn Bugle Snack Mix is sooo cute, and frankly I am a little bit envious of her ability to use wax paper like a normal person.
Between the three of us, you should be busy all week. If not, I’m sure we’ll think of several other things to add to your to-do list!
Happy Monday everyone, thanks for coming to see me today. Here’s to a GREAT week!


Pingback: Glorious Treats » Candy Corn Cheesecake Mousse
Pingback: Candy Corn Ideas
Pingback: Creative CynchronicitySecond Annual Candy Corn Roundup #2 » Creative Cynchronicity
Just as a sidenote, maybe try dipping them in the yellow candy melts for the base, let them dry, then dip them again (holding the yellow side) in orange ones, let dry, and then in white for the tip? Make a candy covered candy corn cookie? Is this feasable?
Pingback: Glorious Treats » Candy Corn Krispie Treats
Pingback: 31 Spooky Sweet Halloween Desserts!
Pingback: Candy Corn Sweets & Treats – Bites From Other Blogs
Why didn’t you just color the third layer yellow instead of going to all that trouble of dipping in candy melts?
Kara — when you cut the ribboned bar of dough, the base of the candy corn shape alternates from top to bottom. So, you’ll end up with some cookies that have yellow tips and white bases, and some that are white tipped with yellow bases (which is the traditional color for candy corn). I like Audrey’s suggestion of a ‘roll’ of dough with the three colors — cutting them into circles and then wedges. There was a whole ‘bulls-eye’ cookie article in one of the Christmas editions of MS Living; I believe the process is spelled out online, too, and surely would be adaptable for this approach. Either way, I am going to make some of these this fall season!
Somewhere I saw a candy corn cookie recipe where they divided the dough, colored, and stacked it into a triangle shape, with the bottom orange layer being the largest and the smallest white layer on top. Then the cookies were sliced off and all had the same color pattern.
Pingback: Pining for Pins on Pinterest « spontaneity and second guesses
I’m wondering why you didn’t just tint 1/3 of the dough yellow? That would’ve been easier and more cost-effective than doing the candy melts, yeah?
because diana then half the cookies would have been backwards with the yellow on the top and white on the bottom. that’s what she meant about changing the recipe.
Thank you for the fix on color! I’m incredibly anal and was only going to use the correct ones. When I made the cookies I used my own sugar cookie recipe which I’ve been using for 30 years. My problem was the colors baked apart in the oven. I am planning to use an egg wash between the colors to try to “glue” them together. Do you have any other suggestions?
Pingback: Candy Corn Cookies
I just made this recipe…love it…one thing I did different was to add a little LurAnn Lemon flavoring oil to the candy melts (used lemon because I couldn’t find an orange flavor in my Hobby Lobby or Michaels). They turned out really tasty!
Pingback: 31 Candy Corn Cupcakes, Treats and Crafts
My son LOVES candy corn. I think we will be making these this evening. Thanks for the variation ideas. I am pinning this to my Food, Glorious Food!! board (http://pinterest.com/ksimons73/food-glorious-food/).
Pingback: Slice & Bake Cookies: Halloween | Hungry Girl in Korea
Pingback: Happy Halloween! | byrachelho
I made these today, but I used refrigerator sugar cookie dough instead and I rolled the dough in sugar before I baked them, they are a little flatter then the ones pictured but I think they turned out pretty good
I tinted the dough orange with regular food coloring and it worked fine.
I love this recipe! Too bad I can only make it once a year.
Pingback: Candy Corn Sugar Cookies | Bitching, Books and Baking
Hi, I’m from the UK and I just love love LOVE your cookie recipes and I so want to try them but I normally make the aftermath of WW Baking and I just wanna tell you something that is sooooooo awesome (BTW I’m only 12).
Round here we’ve got circles of shortbread biscuits (I just found out that they’re called petticoat tails) that are like break and share ones because they’re scored and then you break them. They kinda look like candy corn so yeah. You could try it but let me know how it goes cos I always pop round.
Hi,
I’m trying to make these. I put the first few in the oven and they spread out. They don’t look like anything!lol Why would they do that?
Thanks a lot!
Pingback: Halloween Cookies 5 GREAT IDEAS
Pingback: 10 Candy Corn Dessert Recipes | Skip To My Lou
Why don’t you just use 8″ round springform pans? Put a ball of white dough in the middle, a ring of orange, then a bigger ring of yellow. Use your fingers to flatten and spread it out until it looks like a bulls-eye. Bake, then slice like pizza. Although I do like the idea of dipping in yellow candy melts!
I LOVE candy corn! However, it drives me crazy when I see candy corn cookies that are made by stacking and cutting triangles. Usually, those cookies end up with yellow on the top and white on the bottom of half of the cookies. THAT IS NOT WHAT A CANDY CORN LOOKS LIKE! So, thank you, thank you, thank you! I love the way yours turned out!!!
Pingback: Getting in a Halloween Frame of Mind for Tasty Tuesday | Kol's Notes
I found your yumminess on pinterest and shared it at Katherines Corner. ?
Pingback: candy corn sugar cookies | bake.love.give.
Couldn’t you have just tinted the third layer yellow? I thought I would from the start of reading the recipe, because, otherwise, of course it’s going to end up with two white parts when you leave two pieces uncolored..
That’s why I dipped them. You can make them in a round cake pan so you don’t have to worry about that. Personal preference.
Since you planned to dip the bottoms in yellow candy melts, to make it a teensy bit faster/simpler, couldn’t you have skipped the step of making the third layer? Simply left 1/3 (the top) white and tinted the rest orange, and then eyeballed dipping to the right depth?
Pingback: Candy Corn (or Easy Cheesy) Treats for Dogs | Kol's NotesKol's Notes
Pingback: How Do You Do That? A Tasty Tuesday Feature in the Making. | Kol's NotesKol's Notes
Pingback: 30 Candy Corn Sweet Treats - The Crafted Sparrow
Looks interesting and tasty. Thanks for sharing..
Pingback: 50+ Candy Corn Recipes - Kendall Rayburn
The pin you link to no longer exists. You can link to the original blog post instead: http://alwaysexpectmoore.com/2012/10/easy-mini-candy-corn-cookies.html
The blog post shows rolling the dough into a log, which is how you get all 3 layers. 😉
Pingback: Candy Corn (70 Images) | Church of Halloween
or just make them this way
Simple solution for consistent color order. Instead of a brick, I shaped the dough in a triangular log. Chilled, sliced and baked!
Add yellow coloring to more than a third of the dough and orange to less than a third. Shape yellow dough into a long strip on plastic wrap ~1 1/2″ wide. Shape orange dough into slightly narrower strip and lay on top of yellow dough ~1″ wide. Last shape remaining white dough into long roll and lay on top of other two strips. Wrap the plastic around dough and work the dough into a triangular log.
Wish I could insert a picture to show how simple it is!
Pingback: Candy Corn Sweet Treats - 12thBlog
Pingback: Sweet Treat Tuesday: 10 Candy Corn Desserts - KATARINA'S PAPERIE
I have always made them this way – stack- shape- chill -slice http://www.tasteofhome.com/recipes/candy-corn-cookies