Baking the Perfect Sugar Cookie
*This is my basic sugar cookie recipe converted to grams. For the original, standard American measurements, click here.
A good cookie base is an essential component of perfectly decorated sugar cookies. It takes a little practice, but with the right recipe and a few tips it’s very easy to bake perfect sugar cookies very time.
First of all, I would like to say, I am not an expert. I haven’t been to a fancy pastry school or had any sort of formal training, just a lot of trial, error, and experience.
LOTS and LOTS of experience.
Keep in mind, my way is not the only way, and maybe not even the best way, but it’s what I like and what works for me. The purpose of this article is not to tell you what you should do, but rather give you an idea of what happens in my kitchen as a foundation to build upon so you can come up with a method that works well for you.
I begin every single cookie project with my favorite cookie recipe. Not only is it quick and easy, it’s also a very forgiving recipe. You can find the original, printable version of my recipe in standard US measurements HERE.
Most people find this recipe easy and delicious. However, I have a handful of readers that don’t get the same results that I do, and a few others who are more comfortable weighing their ingredients. So, for these readers, I’m posting my recipe by weight. PLEASE go easy on me. I am not at all comfortable with this method, but I am trying!
Ingredients
- 227 grams unsalted butter
- 175 grams confectioner’s {icing} sugar
- 1 egg {room temperature}
- 1.5-3 teaspoons extract or emulsion {any flavor}
- 1 teaspoon salt
- 2 teaspoons baking powder
- 400-425 grams all-purpose flour
Instructions
- Cream together butter and sugar.
- Add eggs and extract and mix well.
- Sift together flour, baking powder, and salt, add to wet mixture little by little until well incorporated.
- Roll and cut cookies into desired shapes, dusting with flour as necessary.
- Bake cookies at 200 Celsius for 7-8 minutes until tops are appear dry rather than shiny. Do not brown.
I think I did okay on the conversions, but these numbers may as well be in Greek for what they mean to me, so if I goofed, shoot me an email, I’ll get it fixed. Please don’t call me stupid or leave me nasty comments. It kinda puts a damper on my day.
As for me, I still measure like my Nanny did. I call it the “old-lady method”. Nanny kept cups in her flour, sugar, salt and baking powder bins and she never ever moved them. Most of them weren’t even real measuring cups, she just knew what they were and what they did, and she got consistent results every time. If you need a little more information on measuring, I suggest this article on properly measuring dry ingredients from My Baking Addiction. It’s REALLY helpful and informative.
Of course, I use real measuring cups when I bake, but like Nanny, I never ever take them out of the bin that they belong in so my dough is pretty consistent.
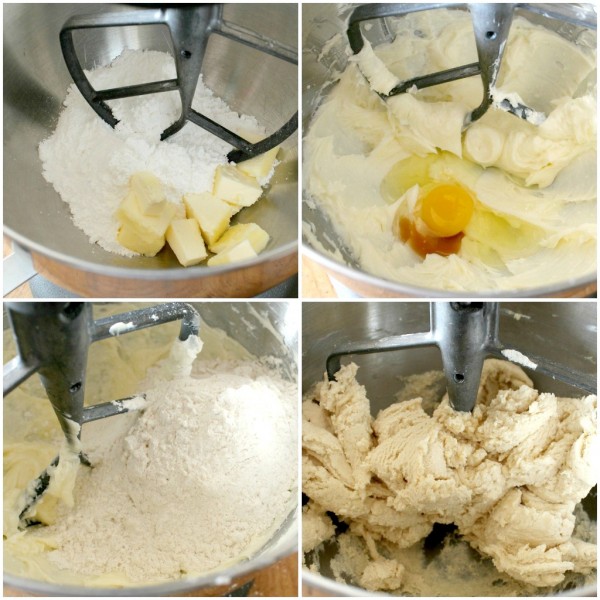
Mixing the dough is pretty simple. The most important thing is to mix ingredients in the proper order. Begin by creaming together the butter and sugar, then add the egg {room temperature} and vanilla, then, after sifting together the flour, baking powder and salt, add it to the mixture little by little until a dough is formed.
Be sure the egg is room temperature and the butter is not over or under softened. Usually I set it out two to three hours before baking and let it come to room temperature. If you forget, no worries. Chop the butter into small pieces and wait about 30 to 45 minutes. It will be perfectly softened when you’re ready to bake.
Try to resist the urge to microwave it. Nine times out of ten, you will end up with a butter puddle, and over-softened butter WILL affect your dough. Once again, I’d like to send you to My Baking Addiction if you’d like to know more about perfectly softened butter. I could write a novel, but there’s no need, because Jamie already has it well covered.
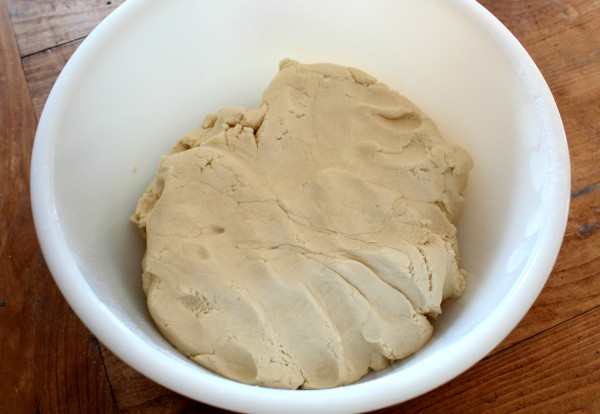
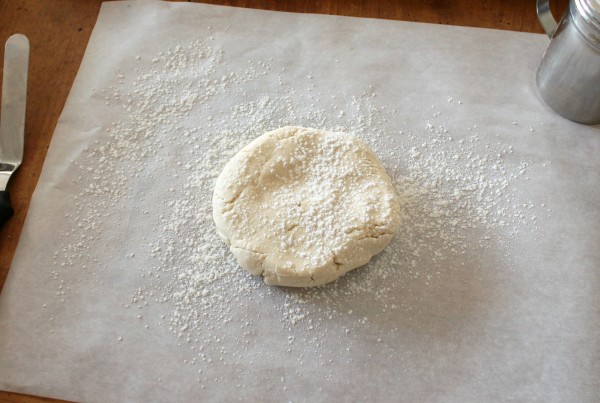
When the dough is mixed, it will be soft, but not sticky and will look like this. I find that it firms up as it rests, so I often give it five or ten minutes before working with it..
For those of you who like to work ahead, I do not recommend refrigerating or freezing this dough. I’ve tried it, and it completely changes the final product. Fresh dough creates a fluffy, light, non-greasy cookie with minimal spread. In my experience, when the dough is refrigerated for a long period of time, it is harder to work with and produces flatter, greasier cookies with significantly more spread than fresh dough. I’ve also noticed that when chilled, the dough darkens and becomes crumbly and the cookies have dry crackly tops when baked.
Rather than pre-making dough, I prefer to set aside a baking day, make two to four batches of dough and use it immediately. This doesn’t mean I will hunt you down and kill you if you decide refrigeration works best. Remember, your way is the best way for you!
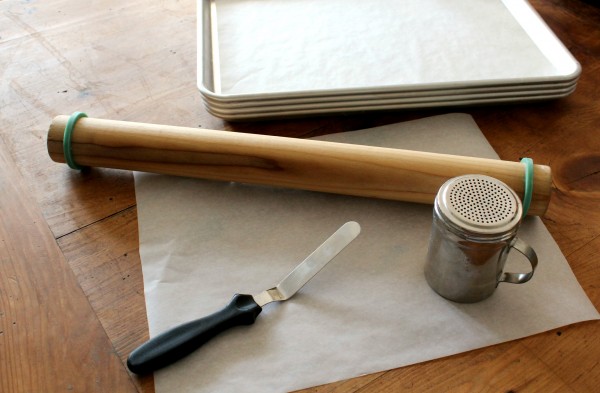
While the dough is resting, I set up what I call my rolling station. I gather all of the tools I need and set them up in the area where I will be working . These are parchment lined baking sheets, an offset spatula, cookie cutters, a rolling pin, and flour for dusting my workspace and dough. I prefer to roll my cookies on parchment paper, so I also have a sheet for rolling.
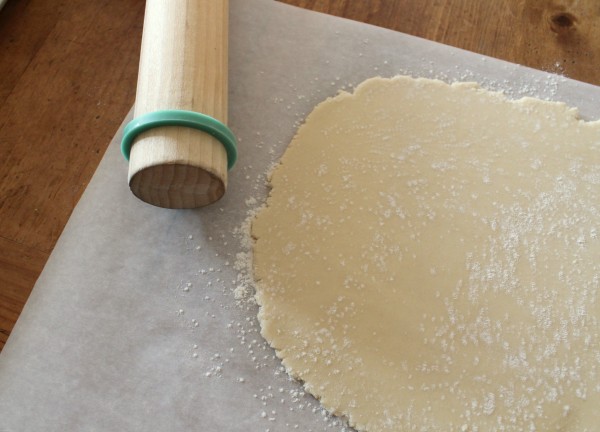
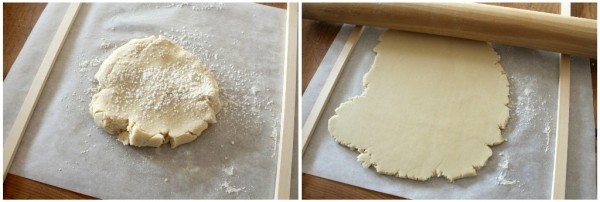
Beginning with a six to eight inch dough round, I lightly dust it with flour and begin rolling, turning the parchment 45 degrees at a time, until I have a 1/4 inch thick circle of dough. After baking, will expand to 1/2 of an inch thick.
Have you ever wondered how to roll perfectly even sheets of dough? It’s easier than you might think. I use rolling pin rings, which are basically big rubber bands that fit on my rolling pin to create a perfect space between the surface and rolling pin. I love them, but if these aren’t for you, there are many products on the market that will do the same thing, like Do’ Boards, the preferred tool of Cookie Crazie Pam.
If you don’t have the time or funds to pick up any of the tools above, don’t worry…you can also use square dowels. They can be found at almost any hardware and craft store. Just choose the thickness you prefer {I recommend 1/4 of an inch} place them on either side of the dough, and roll the pin over the dowels.
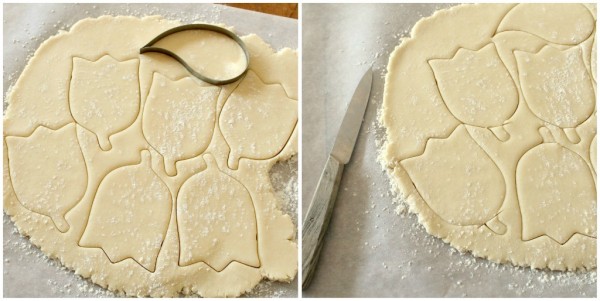
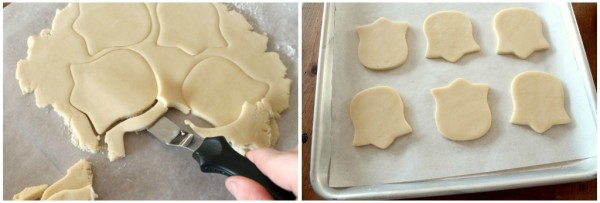
After the dough is rolled, cut out the desired shapes, as closely together as possible. You can use cookie cutters, or plastic and paper templates and a paring knife. Also, don’t be afraid to trim existing cutter shapes to make them work for the project at hand, or even piece together shapes from multiple cutters. Add the scraps back to the dough and continue doing this until all of the dough has been used.
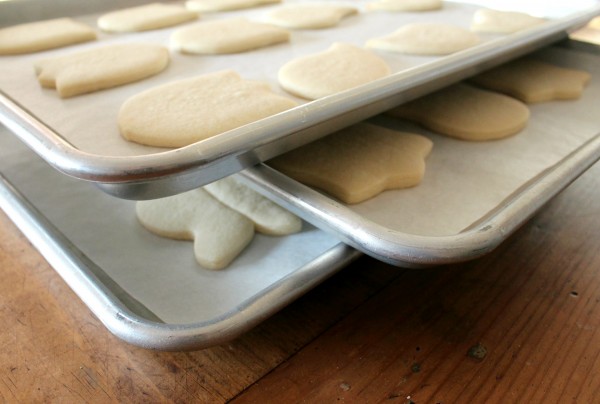
When the cookies are cut, use an offset spatula to transfer them to a parchment lined baking sheet. I am pretty good at this, but if you don’t feel comfortable moving cookies once they’re cut, I suggest rolling them on parchment and transferring the entire sheet to a pan after removing the scraps.
If I happen to have extra dough, I use it to make minis or circle and square cookies to freeze. They often come in handy later.
As the sheets are filled, bake the cookies. Seven minutes at 400 degrees works best for me BUT, my oven and I are old friends. Until you are comfortable with the recipe and your oven, I highly recommend buying an oven thermometer and sitting right by the door until you know what works best. It may be five minutes, it may be seven minutes, it may even be eight. The key to perfect cookies is to watch them until you know exactly what the end result is going to be.
Keep in mind to not open the oven a whole lot while baking them. It will affect how they turn out. Just peek in here in there to keep an eye on things. It may take a few batches to get it right, but once you figure things out, the results will be pretty consistent..
Be sure not to over bake the cookies. Some recipes are meant for a little color. My recipe is meant to create a lighter, softer cookie. If you’re looking for brown and crispy, this isn’t the recipe for you.
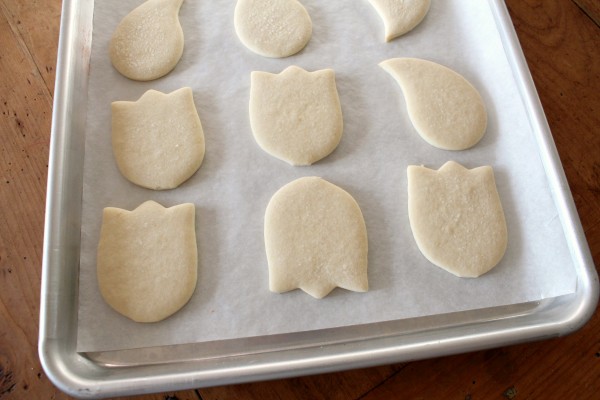
Most of the time, the end result is a smooth flat cookie that makes a wonderful base for decorating. Every once in a blue moon the cookies have crackly tops, but I think that is from adding a bit too much sugar or letting them sit too long before baking. I don’t spend a lot of time worrying about it though, because they are usually hidden by icing.
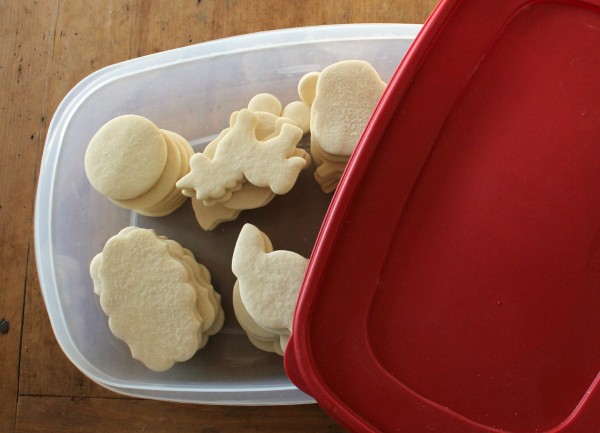
Freshly baked, the cookies will be a bit fragile. I always let them cool on the sheet for at least four hours, sometimes more before moving them into an airtight container.
I prefer waiting until they are a day or two old before decorating them to reduce the chance of oil from the cookie leaching into the icing and causing icing spots.
Once again, this is how I make perfect sugar cookies every time. It works well for me, but do encourage everyone to experiments and try what works for them.
Now, for some frequently asked questions about baking:
- How far in advance can you bake the cookies? I bake the cookies up to a week ahead of time and store them in an airtight container until ready for use.
- Can your cookies be frozen? Yes, they freeze well after baking. They don’t need any special treatment. I don’t even waste wax paper. I just stack them in an airtight {Tupperware} container and pop them into the freezer.
- How long should the cookies thaw before decorating? I have taken them out, put them on a cookie sheet and started decorating within fifteen minutes, but I am a procrastinator. It’s probably wiser to pull the container out about an hour ahead of time, give them a bit to thaw and then start. Either way, it’s not something to get too wound up about.
- Can you freeze decorated cookies? Hypothetically yes. Do I do it? Not so much. I’ve done it TWICE and then never again. It’s too nerve wracking for me. Bad things can happen. Long story short, if you do decide to freeze them, layer the cookies between sheets of waxed paper, and when you thawing DO NOT OPEN THE CONTAINER UNTIL THEY ARE COMPLETELY THAWED. I could go on, but that’s a whole other post.
- How far ahead of time can you bake the cookies? I would say a month or two, if you freeze them. If not, about a week, maybe a little more.
- How long are the cookies good for after they are decorated? Ideally, I’d serve them within three to four days of decorating. But this isn’t always possible. The thing about cookies is that they have an amazing shelf life in most cases. Think about the cookie aisle of your local grocery store. I’m betting that fresh Vanilla Wafers and Oreos are to die for, but even if they are days or maybe even months old, they are still edible, and pretty darn good. Same goes for decorated cookies. Keep them in an airtight container, and they will last a LONG LONG time.
- I’ve always been told leaveners are the ENEMY of cut out cookies. Your recipe has a LOT. Can I just leave it out? Yes. BUT, it will change the recipe. I’ve done just about everything that can be done to my recipe. The baking powder contributes more to how the cookie rises than how it spreads. If you leave it out, it will be a flatter, denser cookie. You’ll also have to roll it to exactly the thickness you’d like it to be, because it will not rise much at all.
- Do I have to use confectioner’s sugar? Won’t real sugar work? Again, you can do anything you like. It’s always good to experiment. But I’ve tried real sugar and it does not produce the same cookie. They are thinner, and greasier, and spread a lot.
- I don’t like almond extract. Do you have any other flavors of dough? Changing the dough is as easy as changing the flavor of the extract used. You can use any flavor that suits your taste, just make sure to use the same amounts called for in the recipe.
- Why do you prefer to decorate “old” cookies? Cookies that have had a day or two to sit are less likely to leach oil into royal icing.
- I followed your recipe and it didn’t work. What happened? This is one of those things I can’t help you with, unfortunately. If you measured the ingredients, weigh them. Otherwise, I’d have to be standing beside you to help. There are so many variables, oven, climate, quality of ingredients, etc. that can affect the final product. My best advice in this case is to try again, making sure that you added all of the ingredients and have not mis-measured.
This is how I make perfect sugar cookies time and time again. I hope this helps you to make beautiful cookies too. If you have any questions, feel free to leave a comment. I’ll do my best to answer them.
The most important thing of all is to keep baking and find what you like.Stay tuned for in-depth posts on decorating with royal icing, my favorite baking tools, storing and freezing cookies, and more. Have a wonderful weekend!
Happy baking!



hey there,
i just tried this recipe and i would like to say thank you ! my search is over !!! this is the perfect cookie dough that doesn’t need chilling , i can roll them up after 10 mins rest and oh my goodness ! the texture, the taste is just perfect . i added almond and vanilla flavour 🙂 thank you!!!
Can you tell me what brands of the ingredients you used? I’m trying to see why my cookies are spreading so much and at this point the only thing I can think of is my choice of brands. Thanks!
Hi! I was wondering if you have rolled out these cookies to 1/2″ thickness and if so, did you have any trouble with the centers still moist while the edges were darkening more than you’d like it to? Should I be decreasing or increasing the temperature to even out the baking?
what size egg did you use for the Sugar Cookie recipe?
Thanks!
I love this recipe, i use large eggs
Thank you, thank you, THANK YOU so much for this recipe! It is such a lovely easy recipe to make and to work with, and my cookies came out perfectly first time! The quantity of dough it makes is really great. From my first batch of dough I got 26 med/large apples out (I’m actually giving your “bitten apple” cookies a bash for a Snow White party this weekend and I did not even know that the pic I was given from the client was yours too!). My second batch (which I’ve just finished baking up now) made 15 large princess dresses and the extra I used up making 5 medium minions 😀
Thank you also for the grams conversion!
Kind regards from South Africa! And thank you again!!!
can you convert the recipe to US standards? grams to cups, etc
https://www.sweetsugarbelle.com/2011/06/basic-sugar-cookie-recipe-2/
Hi!!
Would love to know a substitute for the egg in this recipe..would really help.
I love yuo!!! you wrote all ingredients in grams!! thank you very much!!!
I was excited when I came across this recipe, because I wanted to show off my decorating skills with royal icing and showcase it on a delicious easy fast sugar cookie and all other recipes I saw required resting and refrigeration. I was however disappointed when I made them not only did they need to be refrigerated so that I could move the rolled cut cookies to the baking sheet, but they also were way too fragile after baking and were way too crumbly to enjoy. I followed the recipe with no changes, and just wanted to let others know my results. Lots of others seemed to have good results but I will not be using this recipe again. Sorry.
Your cookies are beautiful! Will I get the same results using a Silpat instead of parchment paper? Also, how far in advance can royal icing be made and how should it be stored? Thank you so much!
I nearly always use a Silpat, rarely use Parchment paper. Works great.
hi I was wondering if the cookies will taste as good if i’ll switch the butter with margarine.. it will be really helpful thank you so much.
Probably not, Margarine is powered egg whites, and well butter is butter
I’ve just baked mine with margarine and it works beautifully and they taste great. I was out if butter and it’s late at night. Margarine is vegetable fat not egg whites.
I don’t know if it’s a typo or not but you wrote to bake at 200 degrees. On the US standard recipe you wrote 400. Which is the correct temperature?
This is the grams conversion, and often countries that measure in grams use Celsius to measure temperature. If you’re in the States, your temperature is 400 farenheit.
After the cookies are iced and left to dry over night, do they need to be covered or can they be left uncovered for a couple of days? My frosting became too hard on the cookies ( hard to bite) and I’m wondering if it was because I left them out for 2 days after decorating. Any tips on that.
I want to make the Sunflower cookies to use as wedding favors for our son’s wedding. Will these hold up ok in the cellophane treat bags? Concerned about the petal icing being soft……
They are beautiful!
I love the dough. The shape was great. I only will use less salt next time. 1/8 theaspone. Thanx for sharing,
Willeke, The Netherlands
Hello.
Thank you so much for the recipe converted into grams. Helps a great deal!
I need an advice though- My last batch looks exactly like the biscuits on your picture, but all the others that preceded it aren´t as smooth and looking as good. Do you have any idea why that could have happened? Could it be because I put the batter into a fridge for few minutes and the chilled butter was to blame? I wanted to blame it on the fact, that our flour isn´t the same as yours, but that´s not right as one batch is great.
Sorry for such stupid question, the biscuits are great and tasty, I just wish they all looked as awesome as the last batch, lol.
Greetings from Czech Republic 🙂
Pingback: Sonnenblumen, Efeu und Schokolade ~ GinkgoWerkstatt
SS Belle you are a lifesaver! I made your cookies for my daughters’ tropical bridal shower and they were the hit of the party! My outlining and flooding technique needs work, but the cookies were delicious!
Any chance you can tell me the brand of sheet pans you use- and possibly provide a link to them?
Also, do you let the cookies completely cool on the baking pan before moving them?
I am currently using an air bake sheet that does not have the sides on it – like yours does. when they come out of the over I simply slide the parchment paper and cookies off the cookie sheet and let them cool a minute on the counter before I transfer to a cookie rack to cool completely.
I would be completely satisfied with this except it seems to take almost twice the amount for the cookies to bake on the air bake and with all the cookies I have begun making I don’t have time to bake for twice as long.
Hope this makes sense.
Love your work and your tutorials! THANK YOU!
I buy half sheet pans from Sams. It only costs about $10 for a set of two. Over time I built up quite a collection. I love them. Just make sure they fit your oven before you buy a ton =)
Thank you so much for sharing your info on baking beautiful sugar cookies! My daughter & I purchased the set of cutters recently at Joanne’s & took a chance. The cookies & icing turned out beautifully according to the directions! They taste wonderful, & have received so many compliments! I’m just now reading your baking post which will be helpful but I had no issues! I always wanted to bake beautiful sugar cookies & now I can thanks to you! Having SO much fun!! Now I’m on the hunt for as many of your cookie cutters as I can find! My only question is how to use the icing bag rings. I’m sure I will find it on a post!
SS Belle, I’m looking for advice. I seem to have a problem with keeping my cookies soft in the middle after decorating. I don’t know what’s changed, if it’s the temperature in my house or the humidity, but after I’ve decorated them, and left the icing to dry, my cookies are hard – or crunchy rather, and I’d like it to stop. Any ideas on what could be causing this and some tips to make change the outcome?
Hi how do you get the cookies to bake so evenly in the top side? Mine end up with bumps
Hi, What is your size of half baking sheet pans as photo shown? Thank you!
Hi! Would these work if I put in the rind from a lemon? I love the taste of my cookies but they spread horribly.
Just wondering if the messurements are in Australian metric?
I followed the recipe exactly, and my cookies spread!!! They tasted so good, and looked great, but I can’t have them spread! Do you have any tips? I live in Utah so I wonder if the elevation has anything to do with it.
Thank you so much for your help!
Why do you prefer to use unsalted butter and then add salt, rather than just use salted butter?
Thank you,
Cindy
I really don’t have a good reason, except that I was used to baking with unsalted butter, mostly because it gives you complete control over the amount of salt you add. But really, I think it’s quite alright to use salted butter if you like the flavor of the final cookies. Many people do it this way and are pleased with the results.
Where do you get your rolling pin? I bought one at BBB, but realized when I got home it’s taperedand the rubber bands don’t work.
Pingback: New York Cookies – A Sweet Moment
I have been searching for a recipe just like this! It is beyond perfection!! I can’t thank you enough. Both for the cookie recipe and the royal icing! You have made this momma very happy! God Bless you!
I just came across your website when searching for the perfect sugar cookie and I have to say, I’m so relieved I found it!! The cookies came out brilliant, so delicious and perfect for decorating. Thank you for sharing your recipe and for making the instructions so easy to use!! I’m from the UK so finding a recipe in grams was a blessing!! Thank you!!
Can you reroll the dough?
Yes, a few times. When it feels too dry or overworked, I put the scraps in a Ziplock in the fridge and throw it in the next batch.
I am just getting started and am in need of a new rolling pin. Suggestions???? Do you put your cookies on a cooling rack after baking? Thx! Love your webistie , tips and etc!!!!!
Shellie
I’m sorry but this recipe was the worst I’ve tried… horrible to work with and cookies don’t hold its shape… won’t try it again and I’ll follow my regular recipe
No apology necessary. The range of comments on this post prove that there is no such thing as a one size fits all recipe. Thank you for your feedback.