DIY Cake/Cookie Stands
This all began with a case of cake stand envy. My friend Glory has the most amazing collection of cake stands, and since I stalk her blog, they were always nearby, tempting me, calling my name…
The problem is, I have not ONCE in my life made a beautiful cake, which makes it hard to justify a collection of cake stands… ESPECIALLY when most of them cost the better part of a hundred dollars.
And even if I could find a way to justify buying one, I need them to display cookies and most cake stands are WAY too big for that.
Then one day, I stumbled upon this amazing idea from Centsational Girl, and my whole world changed. Suddenly it was possible for me to have cake stands in every color without breaking the bank. Even better, I could make them cookie-sized.
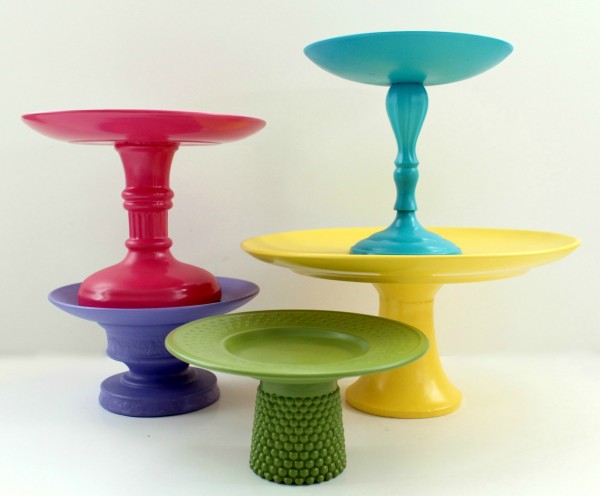
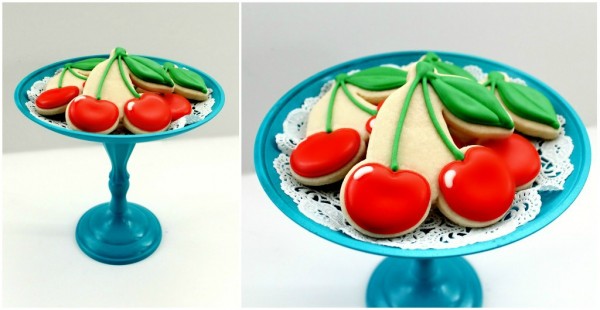
That very weekend I hit every thrift store I could find looking for candlesticks and saucers. I found an amazing selection and not one of them cost more than a dollar. All it took was a little E6000 and spray paint and I wound up with THESE!!!
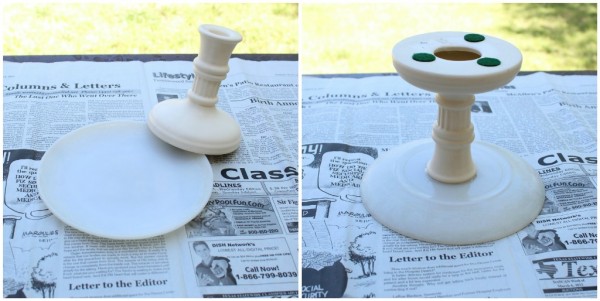
They were SUPER simple to make. First, I matched all the saucers to a base. Then I used E6000 to glue them together. At that point, they needed to dry overnight {It takes at least 24 hours to cure}.
The next day I sprayed the stands with frosted glass spray to prep them for painting. This helps the colored paint adhere to the surface.
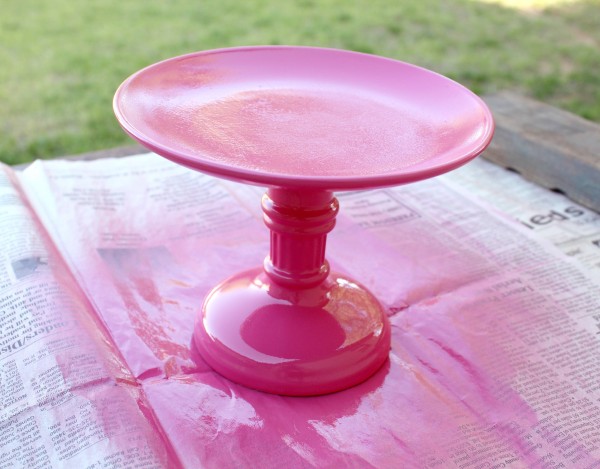
When the frosted layer dried I sprayed them with colored paint. I could tell immediately I was going to love the final product.
While making these I learned a couple of things I should share. First of all, it seemed like Rustoleum brand paint gave the heaviest and most uniform coverage. Also, I found it worked best to start with the stand upside down, spray the bottom, let it dry, turn it over and spray the top. After that dries, flip it again, and do any touch ups that are needed.
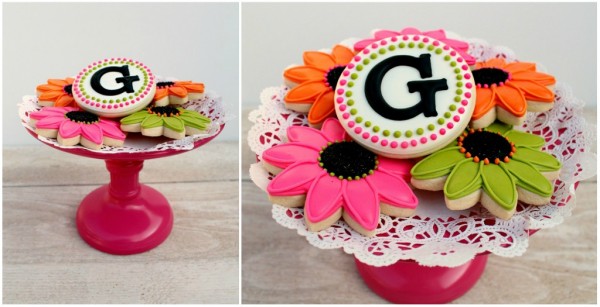
It’s a pretty simple and inexpensive project, and they really make beautiful display pieces. However, please note, these are not food safe. Be sure to place a barrier between the food and surface of the plates when using them to serve. I used paper doilies as the Centsational Girl suggests, but clear or decorative plates in a similar size work well too.
I LOVE my bargain-priced cookie stands, which is kind of obvious, because I made tons of them!
Every once in a while I would even find candle holders that worked without gluing.
But one day, on another thrift store run, I found something that took GREAT to OUT OF THIS WORLD.
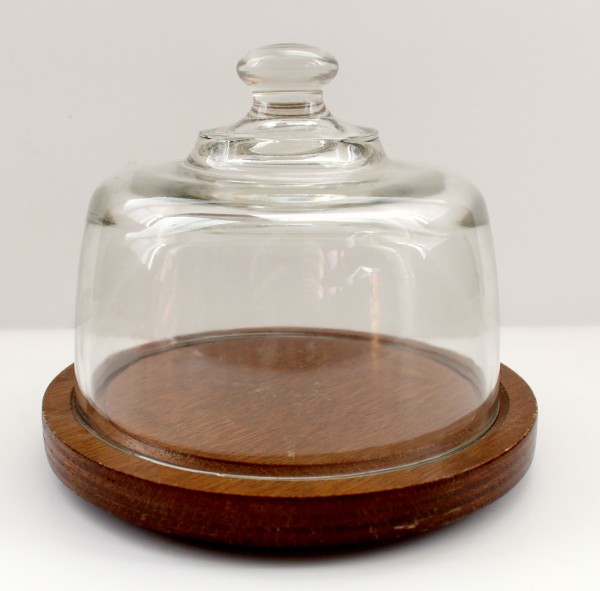
I bought this old cheese dome for three dollars.
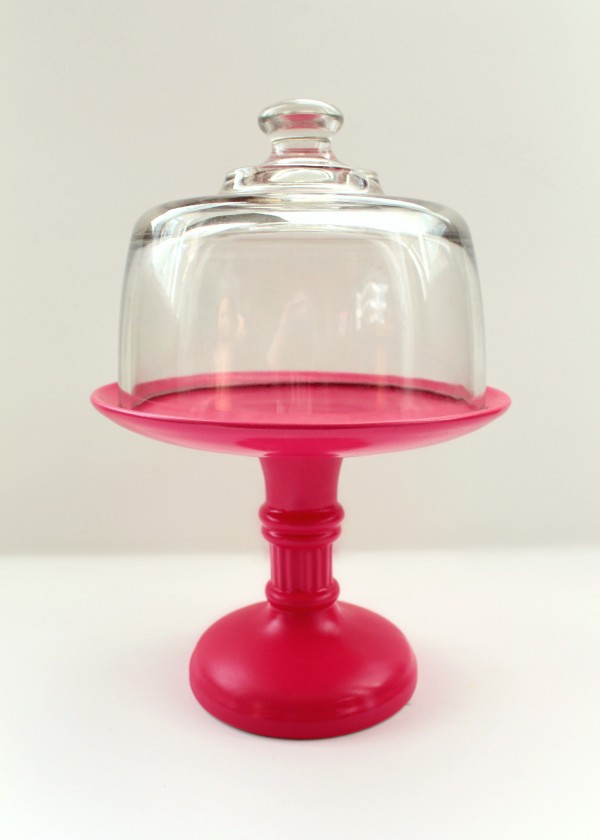
Turns out, they make perfect lids for cookie-sized cake plates! {I also noticed later that if you look closely, you can see me snapping the picture and Belle hanging out beside me =)}
As for the base, you can either keep it, or do what I did and use it to make this adorable button wall hanging from Cap Creations.
Two great uses for one bargain buy? That’s a win-win in my book.
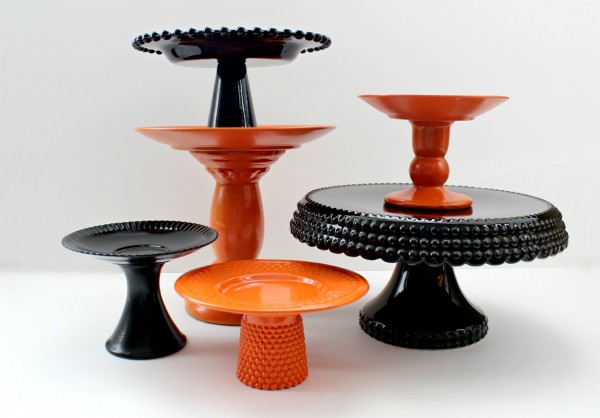
I started this obsession way back in June and it’s still going strong. Can you guess holiday what my latest “collection” is for?
{For the record, I didn’t make all of these. The large black stand, bottom right, and the black one up top are store bought}
I hope you can use this idea to pretty up your parties without breaking the bank. I also encourage you to scroll through the comments on Centsational Girl. Her readers had many more brilliant tips and ideas for these.
If you can, I highly recommend taking a day off from cookies to make these. They really are the icing on the cake cookie. With minimal effort and investment you can make your cookies even prettier than they already are!
I love linky parties! YOu find the best things there. I’m linking up with:
and


oh. my. gosh. i LOVE this! i’m totally making a bunch of these in all kinds of colors!
Pingback: Fab Friday – Eye Candy (and cakes and cookies) | Diva Entertains Blog
Pingback: Funky Historic House Wedding pt 1 | Off Piste
Hi I just wanted to share something i have used the cheese dome and bottom for. If you find something for the stand as you did with the other plates, you can glue it to the bottom of the entire cheese dome. I suggest something like a wider are bigger around candle holder. makes a great cloche for all seasons or your small pastries. have made several and friends love them.
forgot to mention to paint the wooden bottom any color you like. Can add a ribbon on top of glass or around stand.
I am a cake-stand addict, and I am absolutely head over heels in love with this idea. Thank you so much for sharing it and I am going to hit centsational right now!
Love this idea! You’re so right – there’s no end to candle sticks at thrift shops. Our little thrift shop down the street just closed…but I hear a new one is coming in behind it. Can’t wait!
What a clever idea – these are fantastic, and so much prettier and unique than the ones I’ve seen in the store.
Girl, you are AMAZING!! This is such an awesome prop idea. Must do this pronto….or maybe I can just borrow yours 😉
I all of a sudden have a massive urge to comb the thrift stores today. 🙂 Thanks for amazing inspiration!
If you wanted a cookie stand like the boughten one, couldn’t you use an upside down pie plate?
Oh yes! I just made SEVERAL with old tart pans. They looked beautiful with the fluted edges and were perfect for displaying cookies!
I LOVE this idea! I was agonizing over buying cake stands and your fantastic idea came along. I will be out shopping for these candle holders and saucers 😀
Pingback: Top Ten Posts of 2011
Continued to be amazed by the creativity on the site! I have officially made Sweet Sugar Belle by New Years resolution!
LOVE this idea!!! Thanks so much for sharing!! 🙂
where did you get the bases?
Ok, can I just say “I love you” without it being weird? I can’t remember how I found your blog yesterday, probably Centsational Girl, but I LOVE LOVE LURVE IT and when I saw these cookie stands I nearly fell out of my chair! I went to Goodwill and purchased the cheese tray you have above and it’s been sitting in my closet for nearly 6 months because I couldn’t figure out what to do with it….I mean $1? Really, it has to find a place in my home right? And now it has….OMG I’m just in lurve with the paint colors. Can’t wait to dolly it up today. Thanks so so so VERY much! I’ll tackle the cookie decorating on another day LOL…BTW, any cute car, drive in cookie ideas for my daughter’s 16th birthday? I’m doing a Cruise In Theme at our local Drive In Theatre and at some point I’m going to “Drive In” her new to-her-1st-ever car 🙂 Shhh…It’s a secret! These would be SO awesome…Can you tell I’m excited 🙂 Love & Happy Friday!!!
GaH! I am in LOVE! Thank you for sharing you crazy talented woman!!
That’s a crckrecjaak answer to an interesting question
So I have a potentially silly question. I have seen this done before and either had too many thoughts running through my head or never read well enough to see that these are not food safe. I just bought an adorable cupcake stand at Goodwill that is made of clear plastic. I was hoping to paint the underside of each of the 4 trays to give it some color. I understand not eating directly off of it, but in your opinion would it be bad to have cupcakes underneath?
Thanks,
Lynnae
wow – these look great. Very creative and not that difficult either!
Pingback: DIY Cake Stands « An Ordinary Life
This is such a great idea – I totally copied it, but my spray painting skilss are not exactly up to scratch. Thanks
http://pamiejane.wordpress.com/2012/02/22/diy-cake-stands/
Pingback: Do It Yourself Cake Stands « The Girlfriends Walk
Pingback: Bakery Review: Saint Cupcake, Portland Oregon | Delish
so i used the “frosted glass spray to prep them for painting” and then the next day when ready to paint the color the paint on the plate cracked and peeled off…what could i have done wrong?
Love all these colorful stands.I love making these, but I use clear plates and candlesticks-more elegant for fancy parties.I made one from the cheese stand, but I just glued a wooden candlestick to the bas-lucky I found one in same color wood-but I could have painted the whole thing.Also hear in the South we have tea cake stands-which are clear and very tall. I found a tall vase and a plate with the same design. I am going to have to make some colorful ones now-espescially those Halloween ones!
Hi-featured your cake stands on my blog today!!
AMAZING!!!!
Gorgeous! I went the dollar store candlestick & plastic tray route for DD’s 1st bday party, and I’m with you on the Rustoleum! Is the frosted glass spray you used called just that? I just used spray primer then covered with the color, but I did have a few bubbling incidents. :-\ I can’t believe I didn’t think to hit up thrift stores! Those have so much more character! 🙂
Pingback: Quick and Easy $2 DIY Cake Stand | A Heart Full of Love
Pingback: DIY: Jewelry Stand | ballinonabudgetblog
Pingback: Cake plates and other sweet treats | The Craft Hack
Pingback: Half Baked – The Cake Blog » Fabulous Cake Stands
Pingback: Day 22 – Shop for décor at the Dollar Store | The Frugal Homemaker
Fun, Fun, Fun!!! I am having a Tiered Display link party at my website Homa Style starting Wednesday, August 29, at 8 am {Arizona time}. I would love to see all your creations at the party. Here’s the link to the party
http://homastyle.com/wp/?p=3826
My friends and I actually purchased our wedding cake stands from a woman who makes beautiful cake stands with removable cake skirts. Seems that most bakers only provide those boring looking plain cake rounds to display your cake…why spend so much money on a gorgeous cake to just put it on a dull piece of cardboard? You can buy the stand kit I think it’s called and it comes with a stand, a cake skirt and matching flower and ribbon for only $65!!! She has a good selection of fabric skirts and crystal ones too. The best thing about this cake stand is you can change the skirt over and over to match every event! This is the stand I purchased. Check her out on cakedress.com!
cakedress.com
I featured this project on my blog.
http://www.decorellaknox.com/2012/09/easy-diy-glass-cake-stand.html
Pingback: Future Project: DIY cake stand and cookie stands « FlowBlueHunters.com
Pingback: DIY: Cake Stands | BitchyBride.com
Such a great idea. I’ve really been wanting pretty dessert displays like these, but find them to be really expensive. I can’t wait to try this.
Pingback: Craft | Pearltrees
Pingback: Halloween Style Cake Stands and Compotes DIY
Pingback: baking up a storm « the style of life
Pingback: Saving ~ Buying ~ Wanting ~ Making |
Pingback: DIY Cake Stand for Under $5 - The Bearfoot Baker
Wow – I love how yours cookie plates turned out and your color choices are amazing. Sadly, I can’t eat cookies anymore (no sugar or gluten) but I’m thinking this concept would work just as well for crackers and cheese, bite size appetizers or maybe olives (all with a plastic liner of course)
Well done and your spray paint technique is way better than mine – and one more question…where do you store this new obsession?
Christmas is the celebration of the birth of Jesus Christ.
I find it the easiest to sift the flour and
other dry ingredients before I start with the creaming
of the butter and sugar. This helps prevent crumbs from getting
in your frosting.
Pingback: Dr. Seuss "Oh The Places You'll Go" 1 Year Old Birthday Party Plus Super Healthy 1st Birthday Smash Cake - Sugar Free, Vegan, Gluten Free Option |
Pingback: DIY Tortenplatte mit Fuß & Cupcake-Ständer | Cupcake Liebe
Pingback: DIY???????? | Recipes From America
Pingback: Super Cheap DIY Sweets Buffet Stands - Savvy Nana
Pingback: Tipy | Pearltrees