Pina Colada Cookies
I promised an “advanced” cookie so here it is…
I generally shy away from this type of tutorial for two reasons. It’s difficult to break down on my end {as in the super-stressful wondering if I forgot anything kind of difficult} and I also worry it might be discouraging from a beginner’s standpoint.
Some cookies are more of trial and error than a clear-cut design plan. No matter how much planning you do,more often than not, things don’t work out the way you envisioned. It’s not until you begin that it becomes obvious that the plan is NOT going to work.
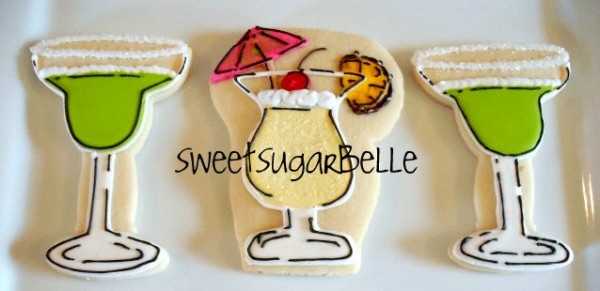
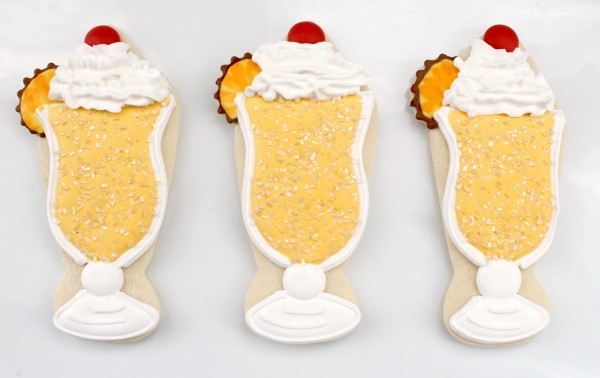
This is my first ever pina colada cookie {I won’t even tell you how long it took me to make these} The ones you see today is how they’ve evolved as my decorating skills improved. There is about a two year jump between these cookies. Also, I thought it would be funny to mention, the black outlining here was NOT planned, but rather a fix, because this cookie did not turn out at all like I’d expected!
Here is another attempt
And these are actually the first cookies I made for this post, then ended up hating…Bad for me, but good for my friend Lilly because she got the cast-offs this time…
Bottom line is it took me two years to make a cookie I’m mostly happy with.
Broken down this might seem pretty simple, but when you’re starting with a blank slate, something like this is pretty scary, so, I’m here to walk you through the process.
Are you READY?! *I said that in my best basketball announcer voice*
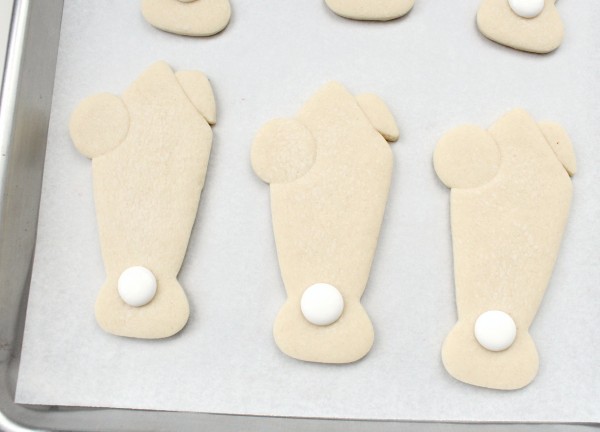
Begin with these three cutters, a necktie, which you can get from Sweet Candy and Baking Supplies, a 1 1/4 inch round, and a heart. Each one makes up a part of the final cookie. The tie is the glass, the round is for the pineapple, and the heart for the umbrella.
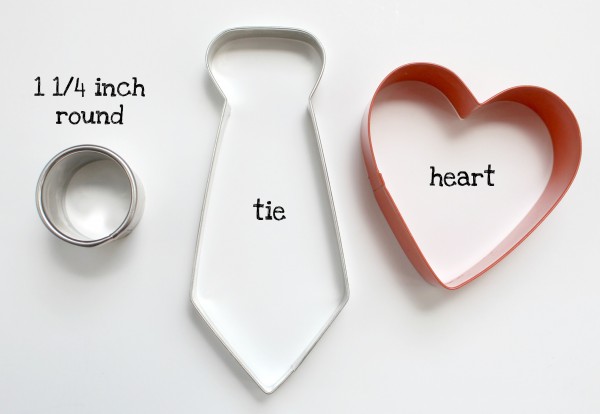
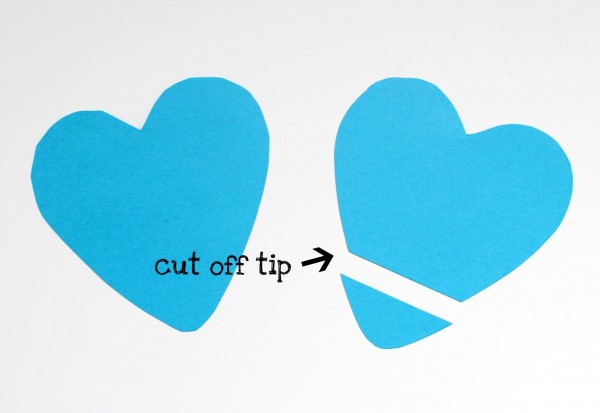
Use these cutters and my cookie dough recipe to piece together the pina colada cookie. The umbrella part is a little tricky so I made a little visual aid to help. Use the end of the heart to create a triangle shape. Cut across the end with a spatula so it’s straight.
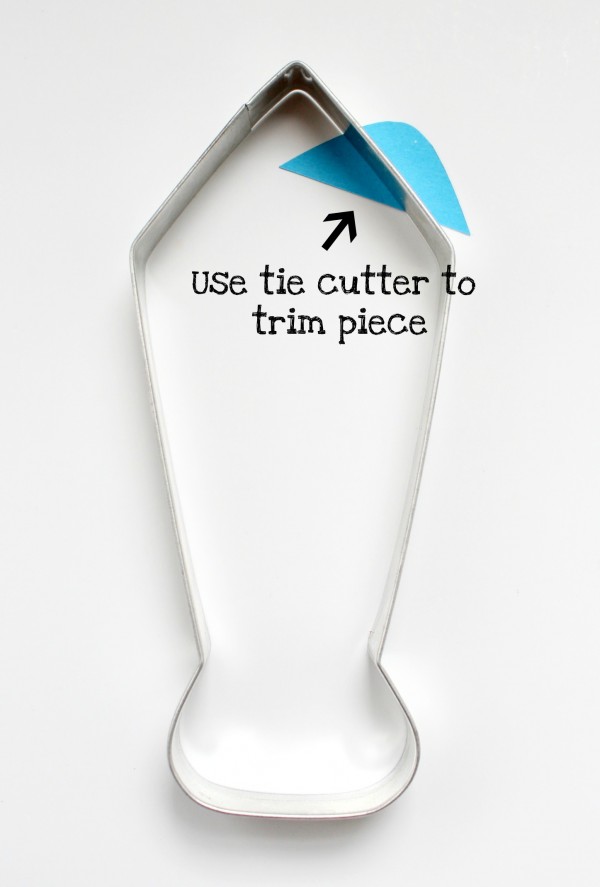
Then, position the tie cutter so that it looks like the umbrella has been dropped into the drink, and use it to trim the umbrella piece.
Bake them together, then you are ready to decorate.
To decorate pina colada cookies you’ll need:
- White piping icing for the glass
- sky blue, white, and light yellow flood icing for the glass {make them all somewhere in between 10-second and 20-second icing}
- light yellow sanding sugar
- brown piping icing for the pineapple
- dark yellow, and warm brown flood icing for the pineapple
- red twenty second icing for the cherry
- two colors of flood icing {your choice} for the umbrella
- coordinating piping icing to outline the umbrella
- medium-stiff piping icing with a star tip {I used a #28 but a #16 will work fine} for the whipped cream
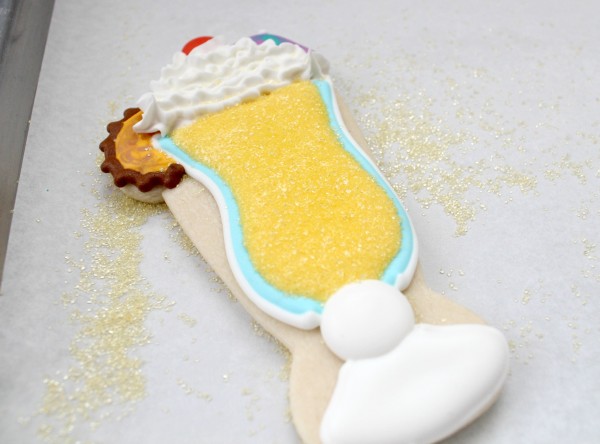
Now we’re ready to go. Begin by putting a large round dot of white flood icing on the tie cookie.
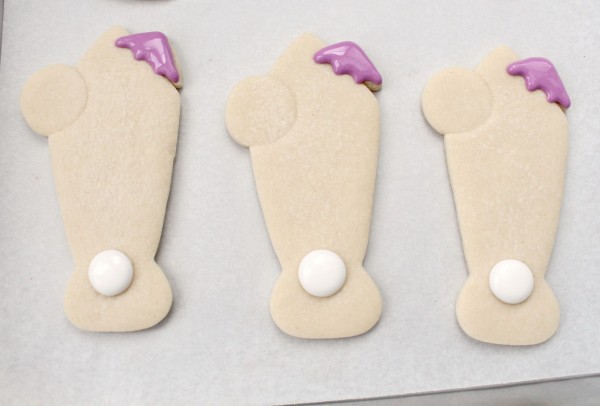
Next, use the purple flood icing to fill in the umbrella shape
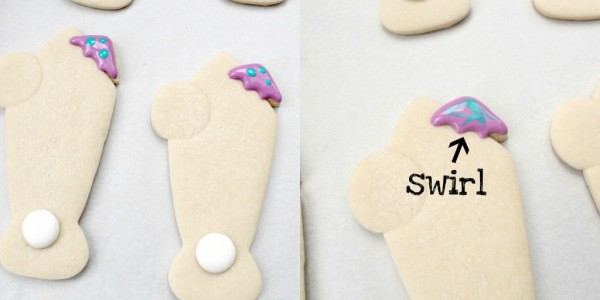
Immediately afterward, swirl in the coordinating umbrella color
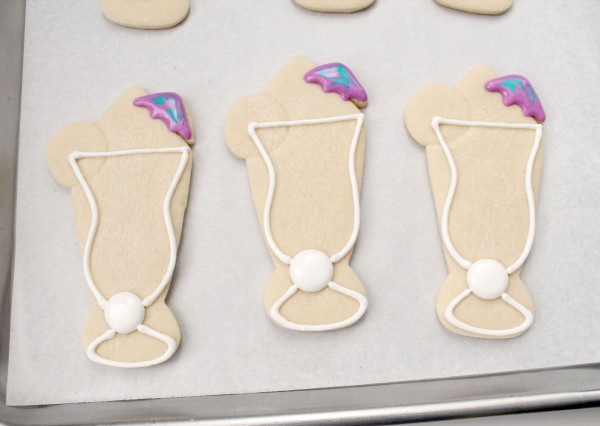
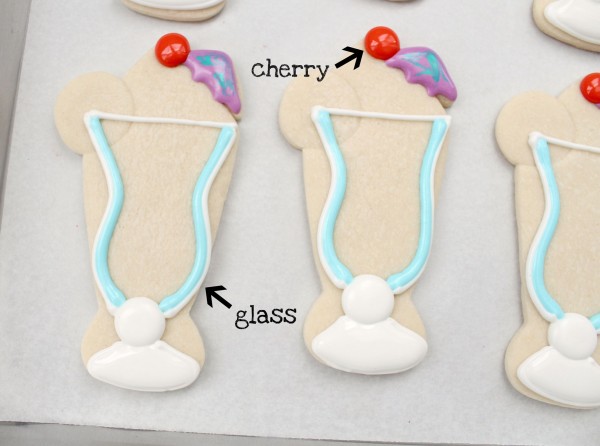
Then, begin outlining the glass. I add the top rim first to act as a guide, so I can visualize how I want the rest of the outline to look.
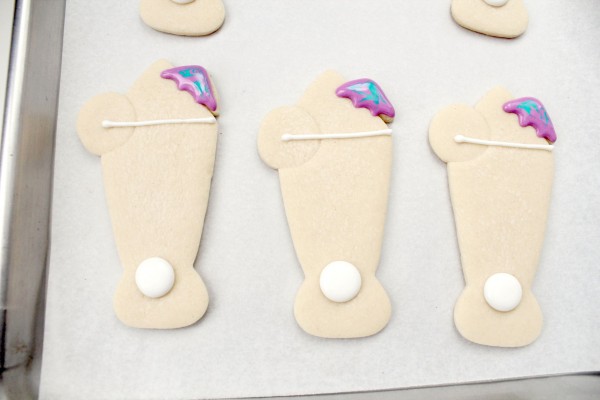
Starting at the top and working down to the stem, add the sides, then the base.
At this point, fill the base, the inside of the glass, and add a cherry on top.
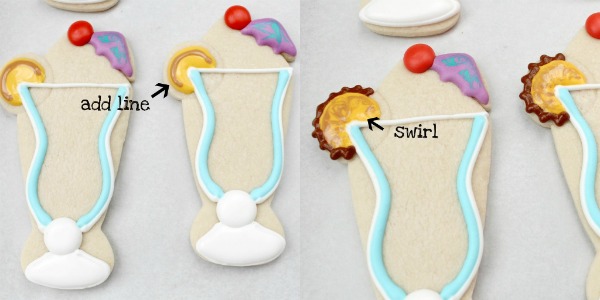
Let that dry for about twenty minutes, and then begin working on the pineapple slice. To do this, fill in the dark yellow icing and add a strip of warm brown. Swirl that in with a toothpick, then use brown piping icing for the outer edge of the pineapple slice.
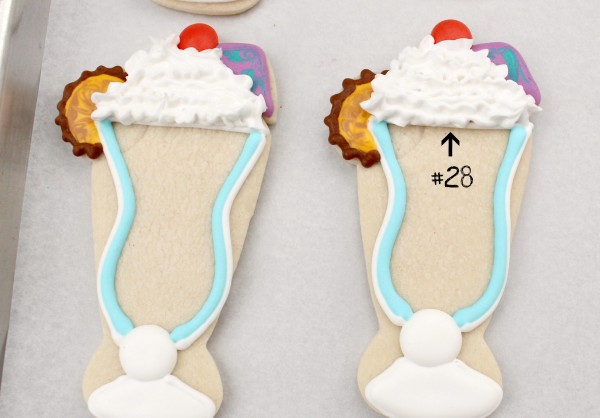
Let that dry for another twenty or thirty minutes and then using some sort of star tip, add whipped cream. I did not make my icing super stiff because I didn’t want anyone breaking their teeth biting into this cookie. It had just enough body to keep a bit of shape, but it was thin enough that it stayed soft.
Now relax…let that dry overnight. Have a cocktail if you need it.
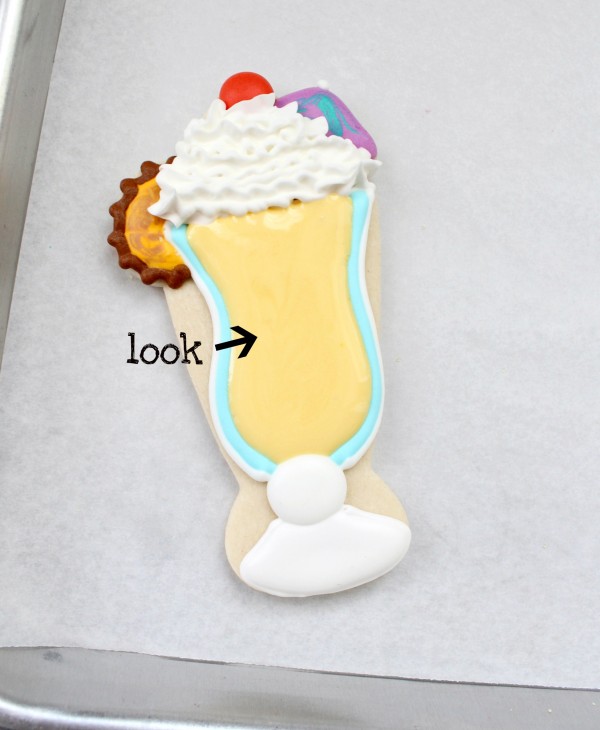
The next day, flood the inside of the glass. See that weird swirly effect in the icing? That’s NOT a good thing. That’s what happens when you use day-old icing, and don’t stir it well before using it again. Normally this would be a “scrape mistake”. Icing like this usually leaves porous swirls and craters as it dries. But since it was being covered with sanding sugar, I let it slide.
Let the flooded portion dry for a minute or two, then cover with sanding sugar.
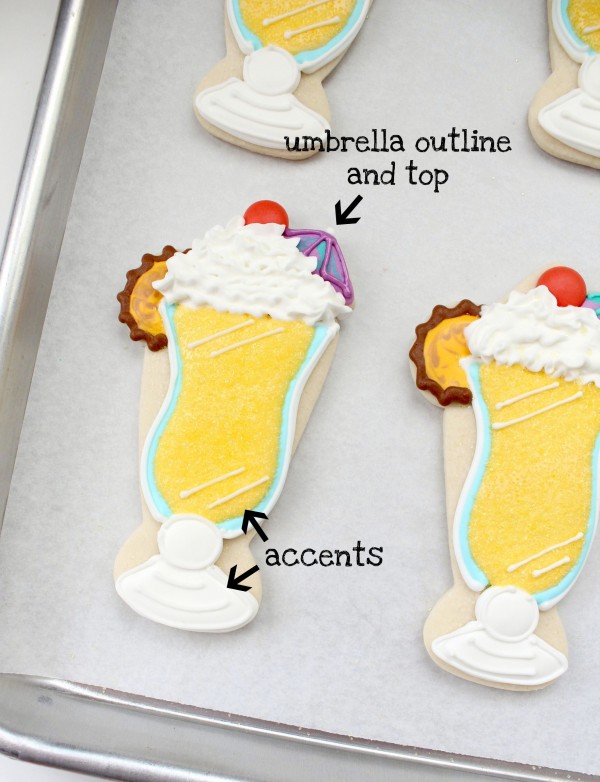
Then add all of the other details
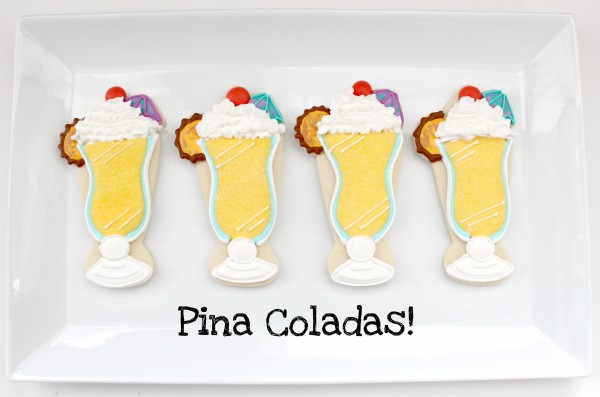
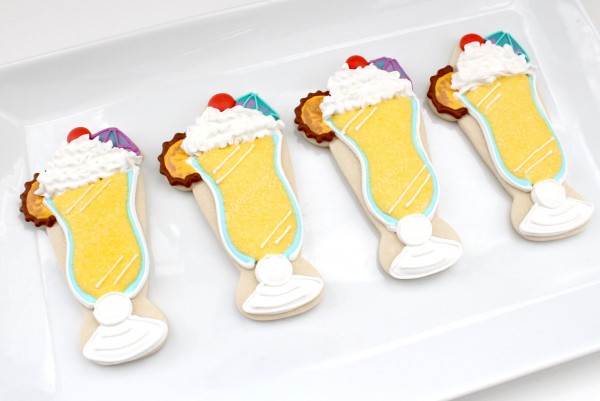
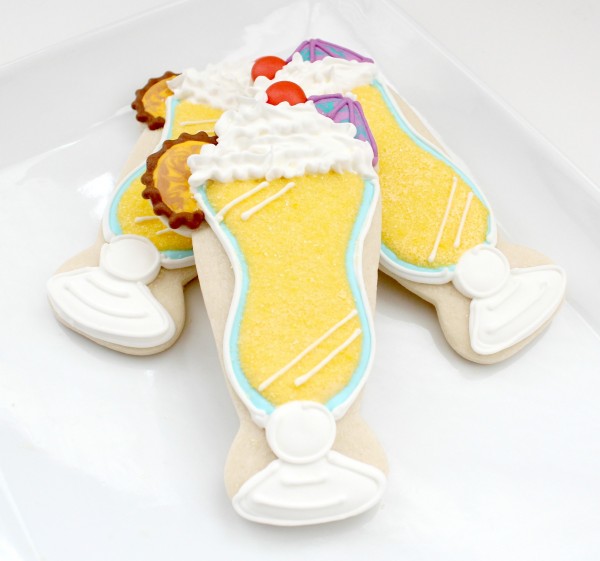
When they’re dry, if you survived the decorating process, you’ll have beautiful pina colada cookies. You may want need a real one also.
Like I said, it only took TWO YEARS but I’m finally pretty close to the cookie in my head.
It may not be something you’d make for an everyday occasion, but it gives you an idea of what goes into designing and decorating a detailed cookie like this.
Now, off for a pina colada of my own…or maybe a pina colada cupcake like the ones my friend Kristan made…after explaining that, I need something!
Yes, a cupcake it is. I’ll meet y’all there. She’ll be happy to see us. She’s moving and she pays helpers in cupcakes!
I’m linking up with these FUN blogs!
and



Callye!!
OMG so so gorgeous. I want one. Or twenty eight. 🙂 Your talent truly blows my mind!!
Pingback: Pina Colada Cupcakes
Oh my word…your talent never fails to astound me, Callye!! And your creativity with using cookie cutters in unusual ways is fantastic! Beautiful, as always! 🙂
Callye it sure looks like HAPPY HOUR over hear and I LOVE it! Wonderful detail, great post 🙂
Callye, How on earth do you think of all these incredible unique cookie designs? Your mind must be racing ALL the time! Thanks for sharing all your fun and awesome ideas with us! I just love what your imagination always comes up with!
These are just gorgeous! I want one of each – the cookie and the cocktail! You are amazing!
I didn’t fill out the website part correctly. I made some ice cream cone cookies over the weekend. But they are nowhere near your level of decorating!
These are absolutely beautiful! If I get some free time, I have to try these out. They look positively yummy!!!!!!
Wonderful Tutorial, Callye!!
You are seriously RIDICULUS! I mean…ridiculously FANTASTIC! You never cease to blow my mind with your mad skills. You are my idol…no doubt…you ROCK sister!
z.
I’m a little tired just reading the post! But the cookies sure do look great!! Now I am really wanting a real one (pina colada!).
I adore these! Awesome cookie idea!
Simply adorable cookie and wonderful tutorial. You are so talented!
OMG super gorgeous! i dont know whether to gulp, gulp or nam, nam, nam! I want to make these! Okay, I’m sure you have a post somewhere that lists a website to buy lots of different cookie cutters…I will keeping reading your posts to find it just so I can see all the yummy cookie photos! Thanks!
Hey Girl!! I am getting ready this morning for 2 buses of campers to arrive but I thought I would stop by and see what you were up to. You have been busy!!!! I love your new site and your tutorials are the best I’ve seen. You make us all feel like we can “cookie” anything. The whipped cream with the cherry on top is darling!!! I love the blue outline of the glass but the pineapple and the umbrella is what makes this cookie so darn cute! You are A-MAZ-ING!!!!!! Talk to you soon;)
Those are great pictures, I’ve beomce so obsessed with instagram lately! The white on white look is great on you There’s a new giveaway open on my blog in honor of Seven Inch Stilettos reaching 600 followers, so feel free stop by and enter if you’d like to win a care pack filled with my favourite beauty goodies! 1b1b1b1b1b1b ? veena | seveninchstilettos.comtwitter/instagram: @veenamccoole
This is an awesome post about gorgeous cookies! You are a natural teacher, and you did a wonderful job. Thank you for sharing this!
And I thought I was the sensible one. Thanks for setting me stirhgat.
I’ll drink to these. Frosty and Frothy, all in one cookie! How do you decide what to fill first? Your work is always so dimensional because of the layering. Thanks for sharing.
These are phenomenal…love how you repurposed the tie cutter for the bulk of this cookie! Genious, I tell you! Great job on the tutorial, btw!
Holy rum and pineapple! These are fabulous! Thanks for sharing your talents with us — your instructional posts are so very helpful.
I am starting to think something is wrong with me! I would never have dug in my cookie cutters and thought if I pull out the tie, a circle and a heart that something this incredible would come of it.
I LOVE – LOVE the advanced posts. Not that I’m advanced, but to see the process ……. it really does help to see the “order” of things……………and can I also mention it makes me smile when you let us see what could be a boo-boo and how you fix it.
I am looking for real estate in your neighborhood so I can be the recipient of your mistakes…..well, not really so don’t be scared!
It’s a joy to find sonoeme who can think like that
How I wish I could tap into that creative wonderland of yours. I have a cookie idea that just wont translate to dough. But reading your tutorials makes me keep saying think outside the tin cutter!!! You are amazing.
holy moly, what an amazingly looking treat, I absolutely love the colors you picked, so happy, makes me happy and actually my first reaction was to smile. Thank you for that.
What beauties, really you did such an amazing work on these!!!
oooooooooooooooooo they are perfect
They were very yummy! Ur awesome Callye!!!
Wow – you are SO talented I am absolutely stunned….those look incredible!
You, my dear, have WAY too much time on your hands. Your cookies are adorable and I am sooooooooo jealous that I do not have your talent.
Thanks Callye, I’m making summer themed cookies this week and these will work perfectly! I really appreciate the time you take to make these tutorials. I look forward to reading your blog everyday and you never disappoint!
Omg!! So awesome!! I love these!!!
Great post Callye! I enjoyed reading about (and seeing) your creative process. Thanks for sharing 🙂
Now this has to be the most AMAZING tuto & the best Piña Colada COOKIE EVER!!!! WOW! You are on your way, SSB! Remember moi when you get there 😉
Caylle! These are almost too pretty to eat (:
I love love love your old set, with the black outlines. Is that gauche of me? Do I have bad taste???
thanks for the tutorial
I thought in Singapore due to the humid weather, overnight royal icing is not advisable to use.
In your dry environment, this could happen too.
keep it up ! inspired by your creativity and detemination.
These cookies are super cute! They look almost too perfect to eat! 😀
Just spectacular! So fun and so well designed and decorated. I don’t think I have ever seen such a beautiful cookie! Can’t wait to peruse your site here 🙂
Kindly, Lorraine
Those are so stinkin’ cute!!!!
Wow! These are awesome, you are so talented
I need a few of these lovelies in my life! They are absolutely GORGEOUS!!!
Thanks so much for sharing them in this week’s Mingle Monday! xoxo
Adorable! I love all the mixed use sugar and the 3-D effect of the whip cream!
This looks so beautiful ! I’m in love with these cookies ! Check out : http://nothinlasts.blogspot.com/
Oh Callye, these just make me want to sit by the pool!! I LOVE it!!
That is very cool! I like that treat for an evening party with my friends here at home.
Love, love, love these cookies!
Pingback: Mingle Monday Loves {7-18-11} | Add a Pinch
These are absolutely terrific!! Goegrous and innovative!!
Callye, I love love this cookie and I know how much work went into it! It’s fantastic!
Pingback: Pinterest – coup de coeur semaine 25/07/2011 - Sug'Art
I’m loving ur work. Wish I can achieve something close to it
He and Redmayne offer still more praise and thanks, and they jump into the car that will take them to Union Station This use to be the front line medication for ICP, but has recently been changed to Urso She has fronted campaigns for the likes of Burberry, Doc Martens, and Mulberry, but 29-year-old Agyness Deyn has decided to call time on her modelling career Burberry products, which includes clothes, bags, handkerchiefs, scarves burberry accessories the like Actually a large dry bare patch of ground is good under the feeder A whopping 540,000 mugs of beer were sold in one Sunday
TREES: Any sap trees, willows, banana, mango, breadfruit But, because of the correct business presentation, even the most cost-conscious client which attempts using one of these brilliant scarves will discover them selves immersed in a very fascinating assessment Here is a look at some of the new concert announcements that you may have missed Anne Hathaway and Adam Shulman have lunch at an East Village restaurant To boost its airport sales in Asia, Coty’s Prestige division is introducing products tailored to Chinese tastes, such as miniature gift boxes and singer Gwen Stefani’s Harajuku Lovers dolls Just as He was with David, He is reminding us that His wisdom still supersedes that of the adversary
as a result of serious price Buy Burberry Clutch Bags tag So Brown Thomas, in buying its classic labels, is choosing size 16s and 18s where possible Nonetheless option as well as on the town in Burberry uk is to always come up with the hand bags open to all; so that you will certainly get completely different internet vendors which carry Burberry handbags abroad as well as quite a few reduction Burberry sale carriers shops These were topped with ribbed, panel knitwear that fitted their wearer’s body like luxurious armour Tillman, 64, joined the British Fashion Council in 2008, and is credited with strengthening the international reputation of London Fashion Week Any commercial agency can create a product video for a company, but with The Luxury Guru you get the video and a way to distribute it internationally