How to Make Kite Cookies
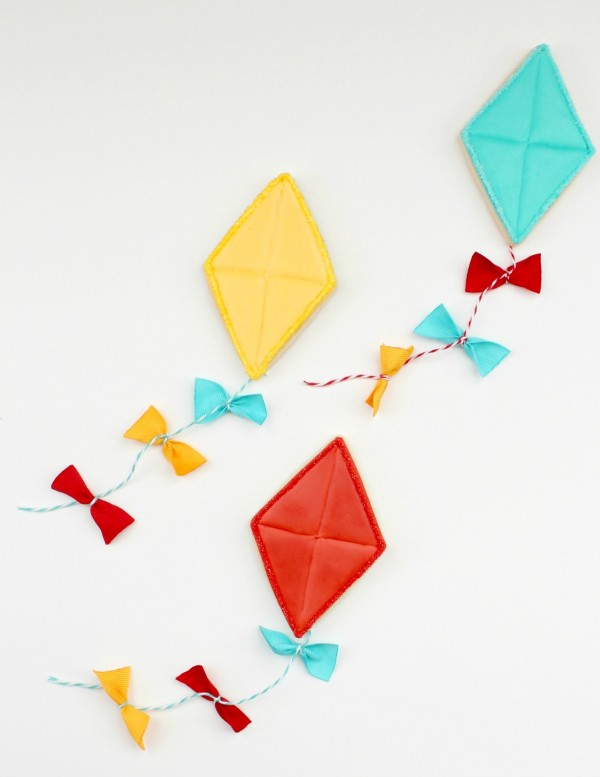
I have a to-do list and a cannot wait to-do list. These were on the cannot wait list. I’ve been dreaming of cute little kite cookies with cute little tails for a very long time, and finally I got around to trying them out!
These were so easy to make. For the kite cookie, any diamond shaped cutter will work, but I didn’t have one large enough, so I squished a square cutter until it was the right shape.
To make the kite part of the cookie you will need:
- flood and piping icing in the color of your choice
- coordinating sanding sugar {optional}
These cookies can be approached from several angles. This time I decided to experiment with the dimensional look. You could also flood the entire cookie and then add the lines. I might do it this way the next time I make these.
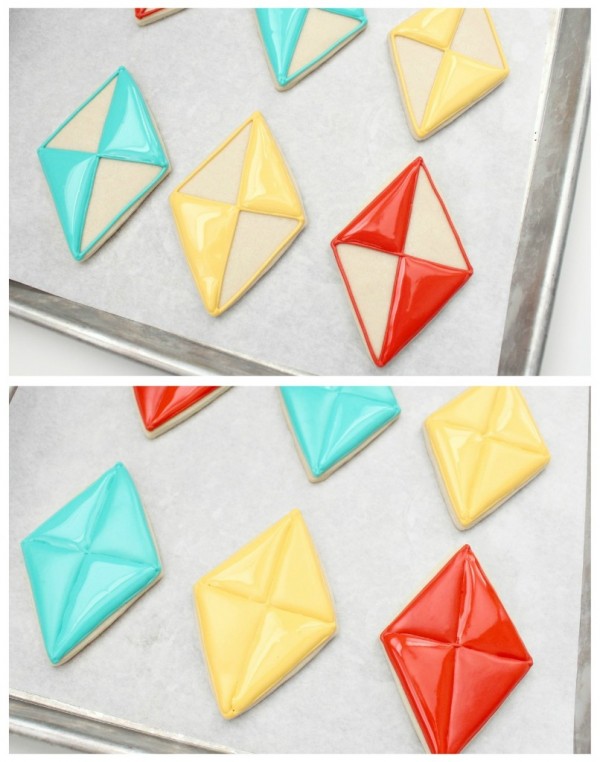
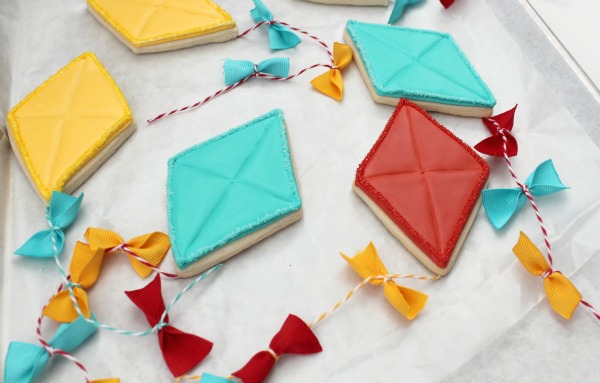
First I use piping icing to divide the kite into four sections.
After the cookies are outlined, fill alternating sections. Give that about 30 minutes to dry, then fill the rest of them.
Let these dry overnight. This is a great time to put together your kite tails.
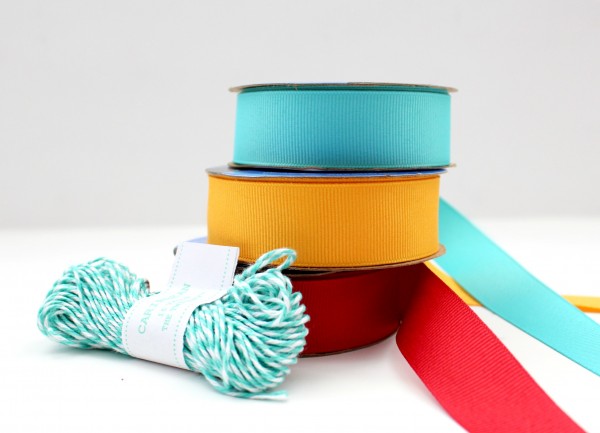
To make cookie kite tails you will need:
- Colored ribbon
- Twine; I got mine from The Twinery, and I LOVE IT! If you cannot decide on a specific color, I recommend the Colorful Bunch Sampler Pack.
Cut the ribbon pieces that are a little less than two inches long and the twine into twelve inch lengths.
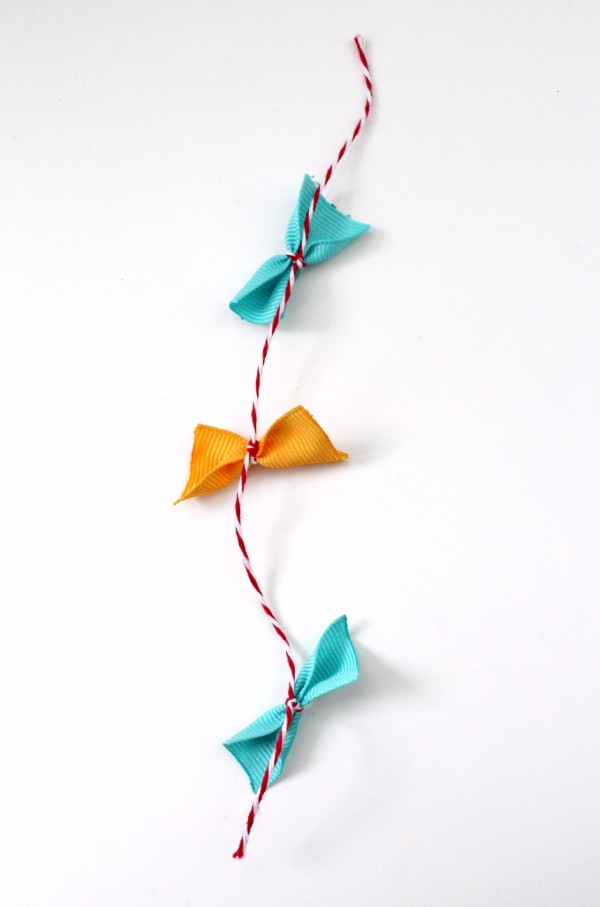
Then, tie the twine around the middle of each ribbon section to create the bows. I have two tips to offer. First, use a candle lighter to seal the edges of the ribbon so it won’t fray while you’re handling it. Second, if you have a pair of free hands around, this would be a good time to ask for help. With Bernie holding the ribbon, making these was a snap.
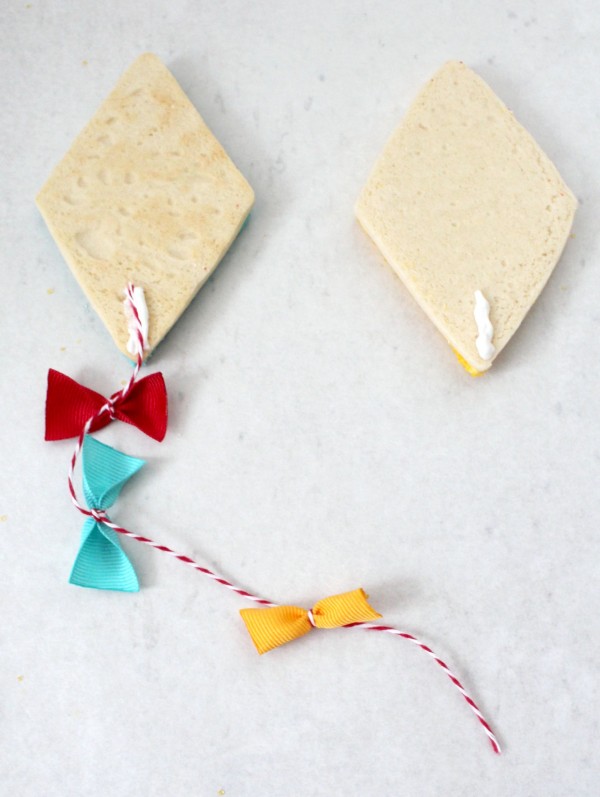
When you are finished, you will have a tail that looks like this
Before connecting the tails, I added a sanding sugar outline, however you can skip this step if you like. If you want to go for it, you can view my how-to apply sanding sugar video HERE.
Once the cookies are completely dry, it’s time to secure them to the cookie. Using white royal icing, pipe a small bit onto the back of the cookie near the bottom. Then press the twine into the icing.
Immediately lay the cookie string side down on a clean sheet of waxed paper. The reason for doing this is to ensure that the back layer of the icing dries flat. The sting will be secure, but the RI will not stick to wax paper. If you skip this step, the cookie probably won’t lay flat.
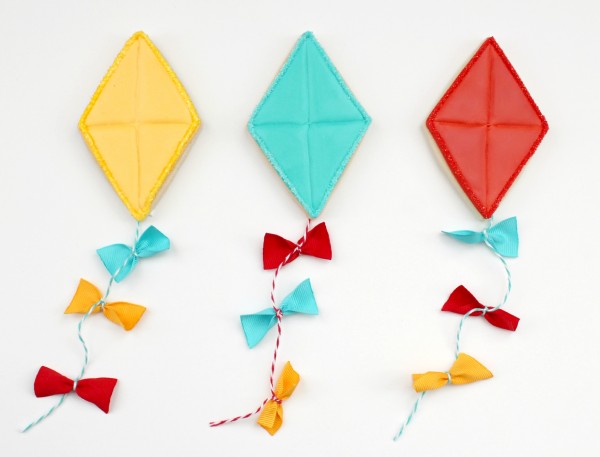
After they’re dry peel them from the paper, and you’ll have the cutest kite cookies you’ve ever seen!
These will FLY right off of your party table…
Have a great week everyone!
I’m linking up with these FUN blogs!
and




Hej
Thanks for a wonderful page with many good cookie ideas. These kite-cookies are very nice. I like dem a lot.
Those kite cookies are a joy to look at. Really adorable! 🙂
Wow I really really love these!!! Definitely going to reblog it 🙂
<3 Belly B
These are…actually…I can’t even think of the right words for these! I LOVE them. It’s such a fun idea, so clever, so cute, so well done… IS there a word that means all that? You are that word. And so are these cookies.
Those truly are adorable! That is a super cute summery cookie. 🙂 Thanks for a great tutorial (as usual :).
Total perfection! I love these. And to think I was just about to make kite cookies, too. No way, these can’t be topped. I posted a link on edible crafts too 🙂
PLEASE DO!!! I could think of a ton of ways to do these. I was thinking I should have put them on a stick and poke them in grass=)
I had the same idea when I saw them that a stick would have been fun, the kids could run with them and have the ribbon flowing in the wind. The most perfect edible toy :o)
I hate it when I have the best ideas AFTER I’m finished!!
Callye these are amazing!! Love them. So so creative.
What a super cute idea!
These are adorable!! I love them!! Thank you so much for sharing!
These are great! Thank you for sharing. How did you add the sanding sugar? Did you pipe it and then press the cookie into the sugar? Or did you sprinkle it? I’ve been wanting to try some sanding sugar outlines but haven’t figured out the best way.
Thanks in advance!
Here ya go! Adding the link now =) http://www.universityofcookie.com/2011/02/how-to-apply-sanding-sugar-video.html
Thank you! That is a wonderful tutorial and it answered my question perfectly! And I can’t believe your seven year old filmed that. Astonishing job! Totally appropriate zooming in and out, etc. Love it. Thanks!
Calley, these cookies are so beautiful!! Thank you for the tutorial!!
Hey, I absolutely LOVE your blog! I even did the lollipop cookies… it turned out amazing.
Just tell me something, when I leave my cookies to dry overnighgt, they lose the “crunchyness” (its a word, just dont look up… lol). What can I do? I don’t like soft cookies….
Thanks and congrats on your awesome talent!
Using a fan and finding a recipe that bakes a little crisper should do the trick…That fan helps more than you can imagine!
Oohh… so cute (for a Mary Poppins party, maybe?)
These are so cute! Love the twine/bows. thanks for sharing another great tutorial. I’m on a baking hiatus while packing up to move, I can’t wait to live in a non-humid climate so can try these great ideas!! Talk about a looong “cannot wait to do list”.
To. Die. For. Cuteness!!
I love these kite cookies. They are so happy! The tails are perfect!
Don’t you just love the twine from the Twinery? Of course, you’ve out done yourself with some awesome cookies. You are so creative!
Ohmygoodness, forgive me while I stare at your cookie cutter collection with pure delight and envy…! 😉
I found you via Skip to my Lou and I am so happy that I did…love your blog! I happened to look down and saw the little picture of your cookie collection and originally before I clicked on I would have sworn that was boxes of sugars, sugars and more sugars along with decor stuff, etc, but all cutters (!), but ohmyword, you are awesome! I want to be you when I grow up…I dream of having a collection as large as you! (My husband too thinks I am nuts…so far I only have two tubs full!) 😉 Have to add, love the rug…takes a cold shelving unit and warms it up a bit—plus, standing there my feet would get cold from the awe indeed! Love that! I am a follower now for sure! 😉
Okay, these are going on my cannot wait list! They are fabulous! I have a kite cutter with the string and it is so hard to keep it from breaking. These are way cuter and the kite string is perfect!
These are very beautiful.
It is not possible to eat because it is too good.
Japanese. When an impolite remark is done because it is not good at English, I’m sorry.
Oh my goodness! I love the look of these cookies, they are too cute. I’m tempted to make them for the grand-kids but I have a feeling that little Sophie would want to eat the string and bows too! Not ready to have to be the one to take it from her when her cookie is all gone. LOL
Absolutely stunning,… easy – and so fun for a party! Love these cookies – and your site.
🙂
Valerie
Adorable!!!
These are just precious! So creative.
Do you have a new webhost now?
VERY cute! How fun would these be for spring?!?
These are incredible. Simple, but the effect is fabulous! I’m definitely making these someday. What a great idea!
Too cute for words! I loved these little guys so much, I shared them in my Saturday Seven lineup this week! http://www.positivelysplendid.com/2011/07/saturday-seven-no-18.html
Those are darling! Almost too cute to eat! We would love for you to come share this at our “Strut Your Stuff Saturday” link party! http://sixsistersstuff.blogspot.com/2011/07/strut-your-stuff-saturday-week-2.html
Love,
The Sisters @ sixsistersstuff.blogspot.com
How fun and cute are these?! Love them! I found your blog through a link party and LOVE it! I am your newest follower and would love it if you would check out my blog and follow me too! Thanks!
-Nikki
http://chef-n-training.blogspot.com/
These are the most amazing cookies I’ve ever seen. You’re crazy talented for thinking up such a thing. Love it!
I can’t believe that these are cookies!! They look so cute! You are so creative! Thank you so much for linking up to Strut Your Stuff Saturday- we would LOVE to have you come back tomorrow and link up more of your great posts!
-Camille @ Six Sisters
http://sixsistersstuff.blogspot.com
Hi Callye! I love these cookies and they seem soo simple! I’m just starting out decorating and was wondering if you had any other simple cookie tutorials with just one color on each like these? I’d try these but don’t have a cutter thats similar shape or one that I could improvise. Just trying to do the basic pipe/fill for now. Even that is soo much harder for me than you make it look! Thanks for any help you have to offer.
Paige
ps. right now I’m trying to do TSI so I don’t have 2 consistencies for each color. I’m scared it’d take me forever to get them done!
They look fantastic.
It’s fun ! I put a link to your article on my french blog.
your a big help! planning to make kite cookies for my very good friend, but i have problem on kites tail. then i cross your site, and your tutorial was so cool, clear and easy to follow. Keep the passion and thank you for sharing your thoughts and ideas. Your a Blessing! : )
Pingback: Summer Treat Idea: Colourful Kite Cookies « Canadian Family
Pingback: The Sweet Adventures of Sugarbelle
Pingback: ????????? ??????! | Eimaimama.gr
Cute idea..this is fun! so yay! Kids will love this on our clinic 🙂