Ice Cream Cone Cookies
I’m doing a magic trick today. I’m going to be TWO places at once. If only, right?!
I’ll be here making Ice Cream Cone cookies, and also over at my friend Shelly’s blog, Cookies and Cups. She’s gone on vacation, so to keep things interesting while she’s gone I made a special cookie just for her. It will definitely be worth the click. After you see the desserts she makes, you won’t even be thinking about cookies anymore!
As for me, I’ve had ice cream on my mind. I don’t even LIKE ice cream, but since this heat wave began, I have been eating it constantly CHOKING IT DOWN every day or two, in the name of staying cool.
Truthfully, it’s SOOOOOOO hot I’ve had to re-arrange my schedule a bit and do my baking at night or early in the morning. Still, hot or not, the cuteness of these cookies is worth breaking a sweat.
So here we go. For these I used one of the cutters from my brand new Wilton Ice Cream set. Wilton’s really been on a roll lately. Hello Kitty, Sponge Bob, flip-flops and margaritas, and now these.
I already had the ice cream cutter, but not the other two, so of course I picked ‘em up. If you don’t have this particular cutter, any ice cream cone will work.
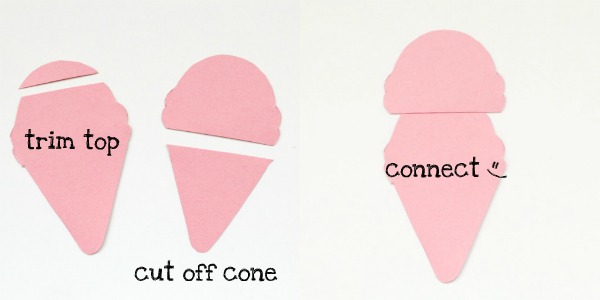
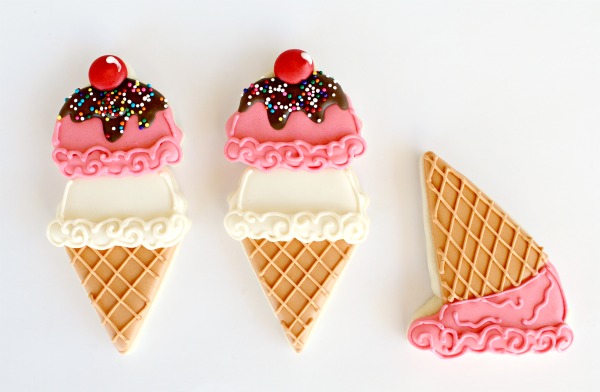
To make double scoop cones, I used this one to piece together another cookie.
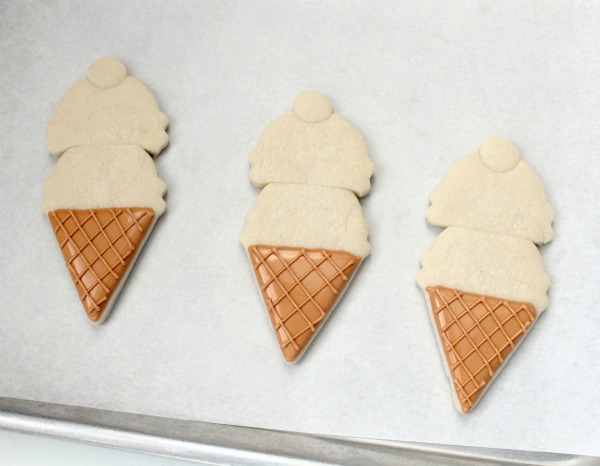
I also used a small round fondant cutter to add a cherry on top, but you can skip it if you want.
After they’ve baked, I suggest letting them rest a day so that they have a little time to firm up and won’t be as fragile along the seam.
To decorate these cookies you will need:
- Light brown piping and flood icing for the cone {I used a little warm brown and egg yolk yellow to make this color}
- Pink and ivory 20-second icing
- Pink and ivory piping icing with a #1.5 tip
- Red 20-second icing for the cherry
- Rainbow nonpareils, AKA sprinkles
- Chocolate brown 20-second icing for the fudge {I used chocolate brown with a touch of black to get the nice deep color}
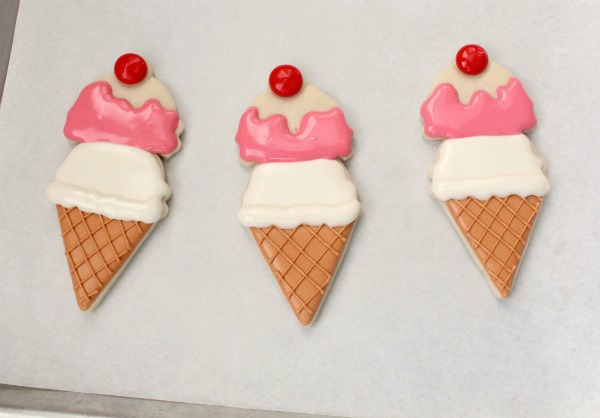
Now to decorate! First outline and fill the cone.
Let that dry for 15-20 minutes, and then use the piping icing to add the cone detail.
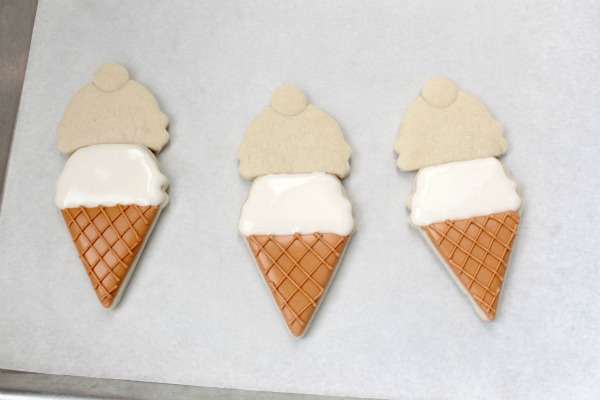
Let that set a bit, and use the ivory twenty second icing to add the vanilla layer.
Give that about thirty minutes to set and then add the strawberry layer, the cherry, and the little ridge to the edge of the vanilla. If you’d prefer, pre-outline the design and then fill. I chose this route to get the dimensional look I like.
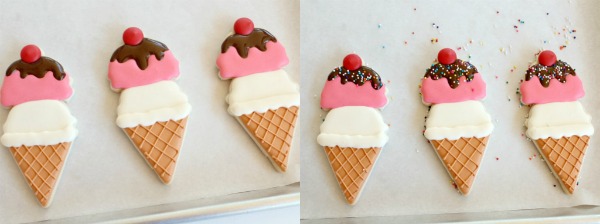
At this point the cookies will need to dry completely so that the sprinkles don’t stick to any other part of the design when you add them to the cookie.
The next day, add the chocolate sauce, then sprinkle with nonpariels.
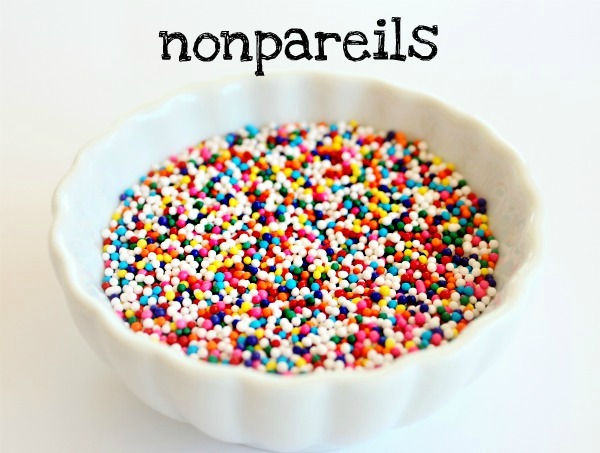
While we’re on the subject, I wanted to take a second to talk about nonpariles. Nonpareils is the fancy French word for sprinkles like these. It means “without equal”.
Lots of times people are scared of words like these, because they have no idea how to say them. The good news it, it’s actually VERY easy to say. It’s pronounced NON-PA-RAILS. So from now on, you’ll be able to say nonpareils to someone without mumbling and praying you said it right!
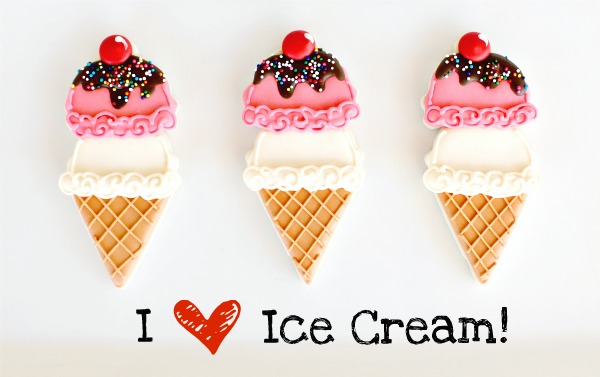
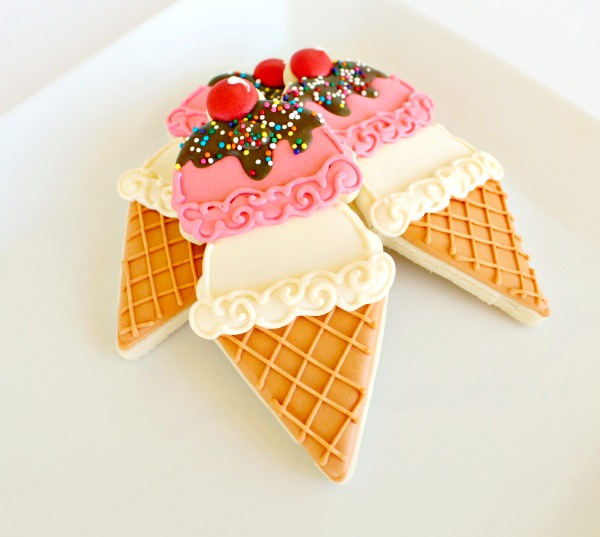
To finish up, I added the edge to the strawberry scoop and used matching icing and a #1.5 tip to embellish the bottom of each. I also added a white accent to the cherry {optional}.
Voila! The cutest little double scoops in town!
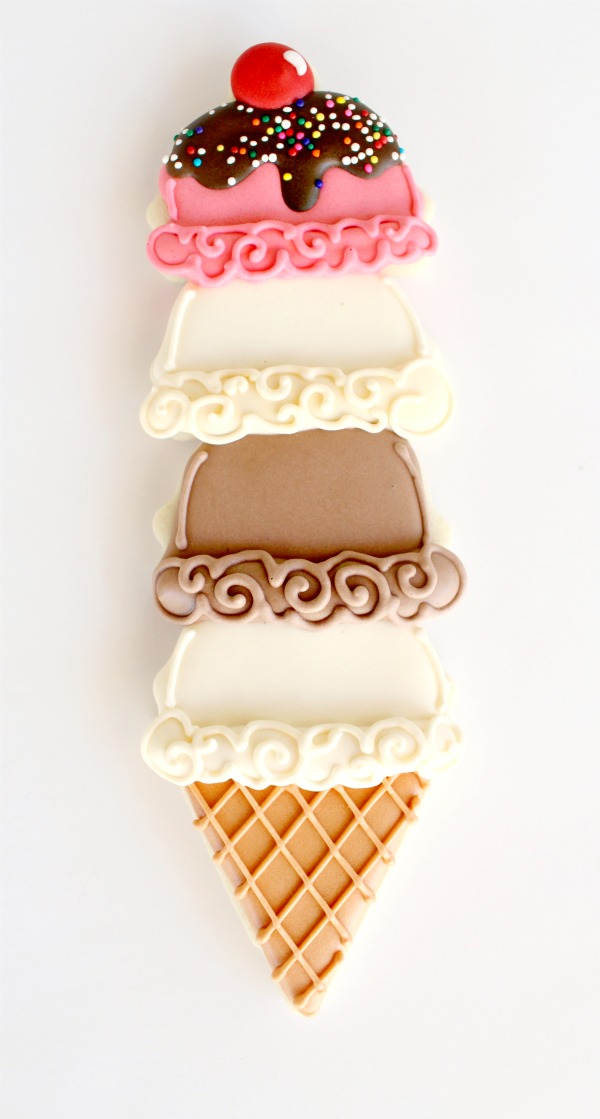
Those were for the kiddos. I made a daddy-sized cone for Bern-Dogg.
And in the spirit of ice cream, I made the inevitable “dropped cone”. As usual, it probably belonged to Belle!
I LOVE these cookies so much I’m thinking about doing this as Belle’s party theme this year. Speaking of themes, if you like them as much as I do, you have GOT to head over to Confessions of a Cookbook Queen and check out these cupcakes my friend Kristan, made! They match perfectly. I have big plans of talking her into driving all the way over here to make them for Belle’s party. I’ll let y’all know how that works out!
Keep cool everyone! HAPPY MONDAY!




I admire your work here so very very much. I just don’t have the dexterity or the patience, and that impresses me all the more. You and Kristan had a great idea here. I can’t wait to see more collaborations from you two.
I love your double scooped cones with the chocolate and cherry on top. I laughed out loud when I saw Bern-Doggs and your little dropped one is too cute!
I am a new follower, and I am SO GLAD I found you! You are amazing and inspiring, and I want to make amazing, beautiful cookies just like yours!
Where do you find your cookie cutters? I never see them sold as a set – only as individual cutters.
I just recently found your blog and I have to tell you I am so impressed… and now inspired. I am a complete amateur. Like really really a beginner, but I think this is something I could do with practice (and your awesome guidance). Here is a question I’ve come up with so far. I know what fill icing is (I’ve actually done that before), but what is 20 second icing? How do you make it vs the flood/piping icing?
Twenty second icing is just a different consistency of flood icing. I am working on organizing this week, so soon it will be very easy for you to fins posts on each subject! Thanks for being patient with me =)
Love what you did with these, Callye!! Your work always amazes me!! I’m so glad to be working with you and coming up with creative ideas!! xoxo
LOL, they’re all great but I love the dropped cone! Too funny. Another excellent post – thanks for all the photos to go with your great inspirations.
The cuteness is killing me – AGAIN!!! I love your work and love the “Cookies & Cups” you did over on Shelley’s blog. Keep ’em coming!
Ohh man I looove these! You have such talent! I could never go in such detail. 🙂 Thanks for sharing, they look delish!
these are way too cute! ( :
I LOVE IT! I was wanting to make a triple decker red, white and blue cone for the 4th of July but didn’t want to have to make a template to do it! You just provided the solution for me. As I always, I am grateful for your talent and generosity!
Oh my gosh! These are seriously too pretty to eat! I want to frame one! I love it! You are amazing! I am a follower and would love it if you stopped by my blog and became my newest follower!
Dropped cone for the win. You rock, as always!
Tweeted you earlier but in case you missed it, Capital Confectioners wants to talk to you about getting you down to do a cookie class in Austin in September, if you’re interested! Ping me at [email protected] if you want to chat about that.
So cute you have inspired me with all of your cookie talent. I have just started to decorate with royal icing because of you and totally LOVE it. Thanks
Lovely as always 😀 ohh so cutee i want a bite hehe
My Blog: http://amz88.blogspot.com/
These ARE the cutest little double scoops in town! I just love them! Thanks once again for all the tips! Try to stay cool!
Woaw woaw WOAW !!! Your an artist ! Please, keep us dreamming with your cookies !
I love your french lesson 🙂 Well, I’m french, in France ( and my english so bad, i know :-/ ) and I ‘ve never heard about “nonpareils”, even dont’ know this word ! Here, we just call them : “perles multicolores” http://www.vahine.fr/nos-produits/produit/perles-multicolores.html
But maybe it is like “nonpareilles”, which means little litle stuff ?
Well, whatever the word used in french or in english, your cookies are … SUBLIMES !
Thanks for sharing with the world,
Amicalement from France,
Maelwyne
🙁 Don’t not being sure, but I’m not for sure. I actually pulled the definition and origin from a decorating book glossary. Slang maybe? If says it is a combo of non pareils and translates to without equal. Looking at the link now…
We call them 100s and 1000s in Australia and by the way you are just so creative and clever – I love your decorated cookies and the videos I have watched are so helpful.
Love your work
xx
LOVE these ice cream cones! Definitely something that I need to try! You come up with the best designs!! How did you first get people to see your blog? I recently started one, but am unsure how to get people to see it. Any advice?!
These are sooooo stinkin’ cute!!!
I love ice cream and I love these!! So super cute!! I really love the giant one and the smashed one! =) Great post!
they look adorable ! very cute 😀
This just looks so delightful ! You always surprise me with your crazy looking cupcakes ! Check out : http://nothinlasts.blogspot.com/
You are so flippin’ talented!!! BEAUTIFUL!
So cute! I love your new header, looks so professional!!
xoxo
These are absolutely perfect!! My daughter’s birthday was in March and ice cream was her theme. You are wonderfully talented and inspiring to the novice that I am!!! The collaboration idea was also a fantastic idea! I can’t wait to attempt both desserts at the next appropriate event! THANK YOU for sharing your skill with us!!
so incredibly adorable!!!
Thanks for babysitting my site too!!
You and kristan together are sweetness perfection!
I have these cutters and while looking at them, I thought I wonder what Callye will do with these!! And you didn’t disappoint!
I love the authenticity that is brought to this set by the drop cone! Great idea!
Love! I posted these and the bandana cupcakes over at TomKat on edible crafts, naturally. 🙂 And love the site!!!!!
Absolutely adorable! You are so talented. Just looking at your cookies brightens my day! Thanks!
Wow! These are absoultely adorable! IYou have such an amazing talent! Can’t wait to give this a whirl:)
Sooooooo cute! love your work =)
Yay!! The cutters!!!!!!!!!!!!!!! 😉
These look amazing! I need to find those cookie cutters… They look like so much fun for the summer!
Love your blog!
Callye,
Another adorable creation. I love the “dropped cone” lol!
When I was at Michael’s yesterday I saw that they had a whole collection of serveware in ice cream party theme. You may be interested in it for Belle. 🙂
Oh my goodness gracious! I LOVE these! Your cookies look nothing short of amazing! They are almost too pretty to eat. Almost talked myself into attempting dump truck cookies for my son’s birthday, but then I came to my senses 🙂
These are super sweet!
Another awesome idea Callye, you always know how to out do yourself!!
thes are too stinkin’ cute!! And the best thing – I JUST GOT THESE CUTTERS!!!! I have so few, it makes me super excited to see some of your creations with something I have! (I don’t even have a scalloped circle or oval yet!) Thanks for sharing more of your fabulousness – LOVE the step by step tutorials. What seems so basic to so many is so helpful to the newbies.
These are adorable! If I had a girl, I’d totally make these for her party.
Hi I saw your gorgeous cookies on Cookies and Cups. These are great too! Looking forward to checking out more of your beautiful cookies:)
I’m doing an ice cream parlor bday party for my daughter. These would go perfectly 🙂
i LOVE these cookies! I want to make them so bad :). Your site makes me want to quit my job and just decorate cookies every day. I just found this website http://www.sweetbakingsupply.com and they have a ton of metal cookie cutters… they are priced at $1.25 each. not to shabby. They have a lot of shapes I’ve been wanting like a bee, bee hive, dragon fly. They even have a buffalo, fire fighter helmet etc etc. Check it out. I am sure you will find something you have been wanting. They even have mini cookie cutters. I think my bank account is in trouble 😉
Love the new blog page! These ice cream cookies are adorable! I am amazed at each of your new creations and always think….”it can’t get better than this one!”…and then you go ahead and post something amazing the next day!!!
Even though they are cookies, they make me want ice cream. lol
http://www.hello-fello.blogspot.com/
Love that dropped cone cookie! You are amazing! Seriously, I’m in awe.
How funny, I also bought this cutter set and just started decorating mine last night! Now I’m a little bummed because I know they won’t look as cute as yours but they are looking fun so far. I love the idea of building them to double scoop cones. Wish I had the patience for that!
These are great!! They look so realistic and I love the one that fell!! Always what happens to my children’s ice creams!! Your ideas are wonderful!
These are mega cute. I love the nonpareils on top and the amount of detail on these.
Wow, these are darling. I just want to eat them, save me the last one with the 4 scoops! LOL
Every time I think you can not beat your last design here you come again. Your talent is so amazing to me. You are right about everything being a “cookie” I enjoy your blog so much. thank you for sharing with us.
Brenda
I just bought that SAME set of cutters! 😉 i love that you are Kristan are working together! And these are just darling!
As usual, these look amazing! I’d just be honored any time you’d like to stop by and link up to my weekend sweet treats party 🙂
Ashton
somethingswanky.com
Hi.. ^o^
I’m from Indonesia, ‘n I love baking too…
You make a really helpful STEP-BY-STEP, ‘n I hope I can practice from that.
I’m surprised how’d you make it looks that easy, b’coz my cookies never turn out that smooth… (>o<);
This is my first time to visit your blog, 'n yeahh your cookies are absolutely A.M.A.Z.I.N.G!!!
Can you show me which one was your first ?
Awwwwww!!! Poor Fallen Icecream!!!!! 🙁
That’s the thnniikg of a creative mind
I’m impressed. You’ve really raised the bar with that.
Pingback: Ice Cream Cone Cookies | sweetfancydesigns
You are amazing!
So cute! I’m decorating similar ones now. I apologize if you’ve covered this in a previous post, but when piecing together shapes, how do you keep them from falling apart? I’ve done this twice and both times I’ve made extras in case they fall apart (which they did). Do you have a trick? Four of my double scoop comes broke at the point I pieced them together. Thanks!
Pingback: Ice Cream Cookies with a Cherry on Top - The Bearfoot Baker
Pingback: Pinning Friday - Favourtie discoveries of the week (2) | Sweet Cake O' Mine
Pingback: 7 Great Summertime Cookie Decorating Tutorials | CakeFu
It seems like an educational blog which always some new information to visitors and Enjoying every little bit of it and I have you bookmarked to check out new stuff you blog post.
youare amazing people
Nice one, there’s truly some sensible points on this website a number of my readers might realize this useful; i have to send a link, several thanks.
bryst tape