Rainbow Tie-dye Cookies
St. Patrick’s Day bit me with the rainbow bug! They are everywhere…pancakes, waffles, Rice Krispie treats, Jello…and STILL, I am not tired of seeing all of the pretty colors. So, I decided to make
more.
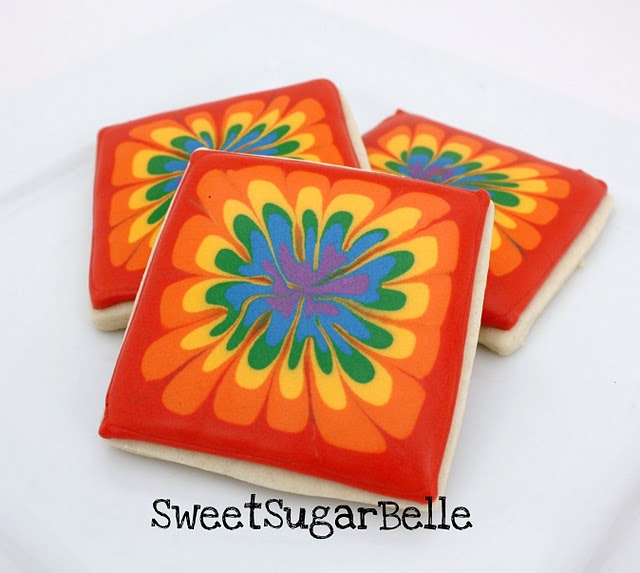
These simple cookies are very beautiful AND what’s even better is that they are easy to make!
The hardest part is gathering all of the supplies. Be prepared to spend an half an hour or so mixing icing.
This is what you will need…
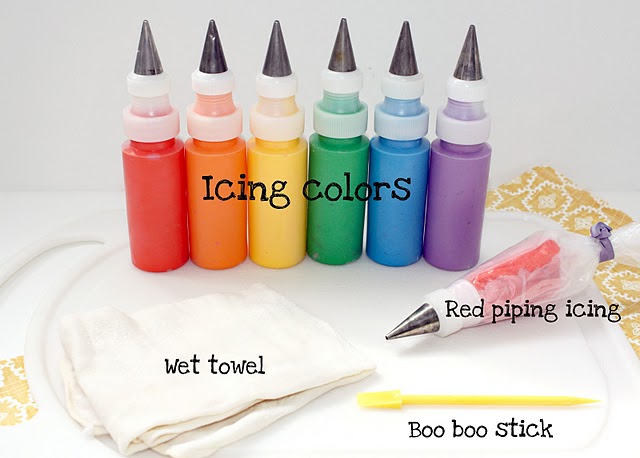
I always match the outline to the first color I plan on using in the sequence. In this case is was red.

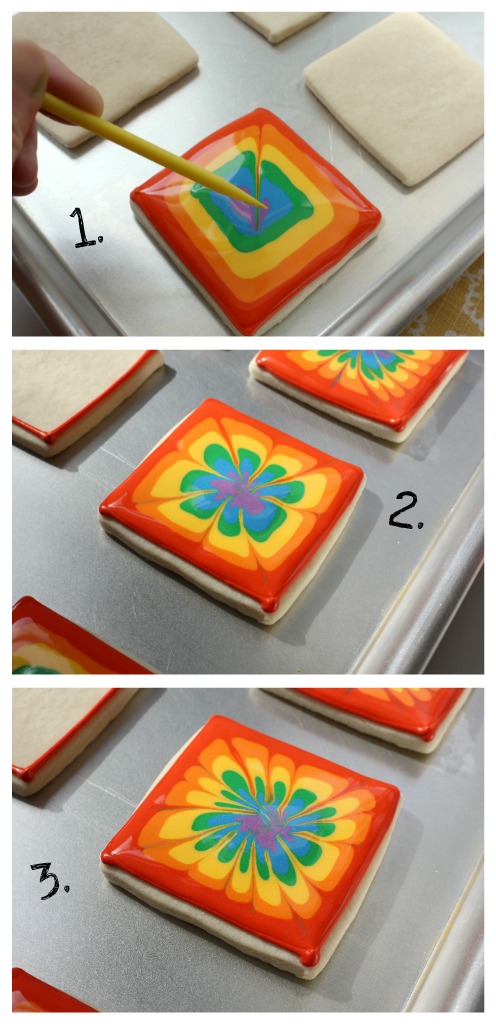
Once this part is complete, begin filling in your cookie with each color.


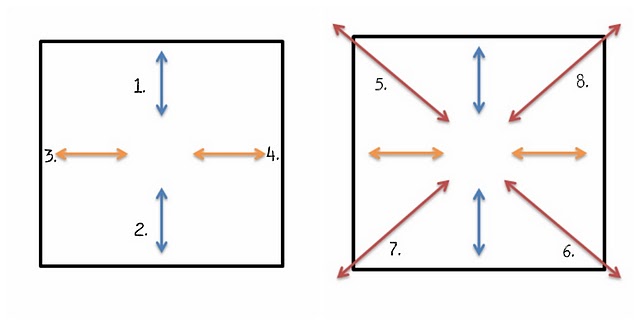
Then, drag the tip of your boo boo stick through the icing. Be sure to alternate sides as you drag to keep the design even.
Just in case that was a little hard to follow, I also drew a little diagram. Notice that you can drag the tip either way…I suppose if you want your tie-dye to be accurate, you should begin in the middle of the cookie and drag outwardly to the edge.
Truthfully, I’d never even thought about it until I wrote the paragraph above this one, and now that I realized I did it backward {maybe because I was taking pictures of myself doing this}, it’s going to bug the CRUDDY out of me, BUT, I AM NOT REDOING THIS TUTORIAL =) So, learn from my goof.
You might also be wonderin’ why you should wipe the stick after every swipe.

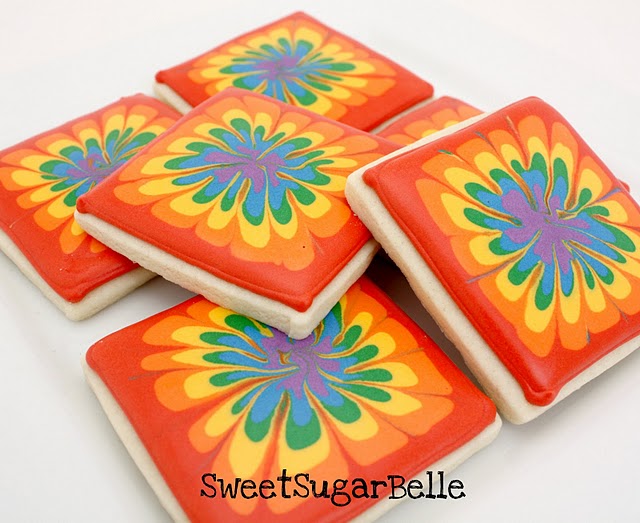
Another observation after the fact. Dragging in hides a lot of the purple. Dragging out would have created a pretty starburst shape and shown more of the color. And looked like real tye-dye. Arrrrrgh.
They are still pretty though, right? Even before they dry.

If this little how-to has caught you a little late for St. Patrick’s Day, there are plenty of other places tie-dyed cookies {or reverse tie-dye in this case} come in handy.
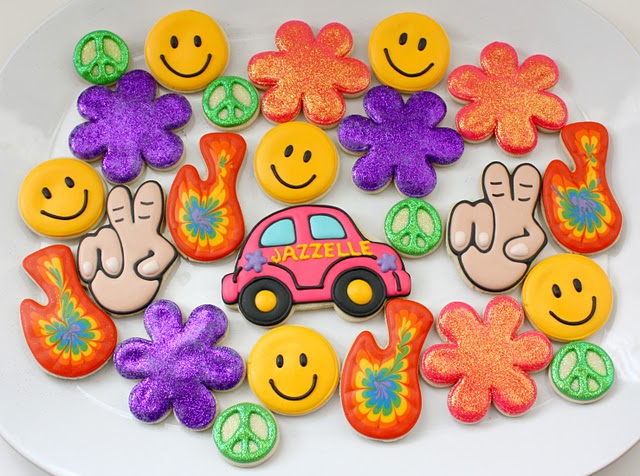
Have I ever mentioned I get hung up on the small details? I’m still grumbling about doing them backward, BUT STILL, aren’t they pretty?
If you need boo boo sticks, AKA cookie scrapers, or icing bottles, check out Karen’s Cookies. She has both, and she will get them to you very quickly!


Thank you so much for this tutorial! I'm pretty new to cookie-decorating and I wanted to make tie-dye cookies for my daughter's birthday. I had no idea how to even begin. A quick search on google brought me here and I'm so glad I found you! Beautiful cookies and great tutorial. You can see how mine turned out here:
http://artymcgoo.blogspot.com/2011/06/tie-dye-birthday-cookies
I linked to you. Thanks again! You are amazing!
Thank you so much for this tutorial! I am pretty new to cookie-making and wanted to make some tie dye cookies for my daughter's birthday. I didn't even know where to begin. A quick google search brought me here and I'm so glad I found you! What beautiful cookies and a really great tutorial. You can see how mine turned out here:
http://artymcgoo.blogspot.com/2011/06/tie-dye-birthday-cookies
I linked to your site. Thank you again! You're amazing!
WOW!!!!!!!!!!!
These are beyond cool! We’ll be trying them, for sure.
Hi! I love the idea of tie dye cookies!!!
I went ahead and made them using neonish colors and stroking the toothpick out instead of in. They turned out awesome and tasted great too!
Here is a link to my blog post about them (I used ALOT of links to various posts on your blog about cookies, colors, etc. in it)
http://irishmaiden91.blogspot.com/2011/07/tie-dye-cookies-crazy-swirly-fun.html
Very inspired,
Ashley
Hi! I love the idea of tie dye cookies!
I went ahead and gave them a try using neon colors and stroking the toothpick outward. They turned out sooo awesome and tasted great as well!
Here is my blog post about them (I used alot of links to your various posts about cookies, icing, colors,etc.)
http://irishmaiden91.blogspot.com/2011/07/tie-dye-cookies-crazy-swirly-fun.html
Very inspired by you blog,
Ashley
Pingback: Rainbow Cookies
Frontwards, backwards… When you decorate as beautifully as you, do… Who cares!
xxoo
These were so much fun! I made them with circles and did the 4 outside lines going out and the 4 inside going in and they created almost a pretty flower affect! 🙂
WOW, I am so curious to see! If you can, share them on my FB page!
Pingback: Glorious Treats » Tie Dye Shirt Cookies
These are so cute and sometimes mistakes make things better! I am making these this week with a peace sign over the top, and I am going to use your “mistake” of dragging in instead of out because to me, it looks more hippie-ish. Thanks for the tutorial!
How do you do ‘wet icing’?
I love that dragging them in make them look like flowers. I may use the “mistake” method in some upcoming cookies. Thanks for all these wonderful tutorials!
What icing and cookie recipes do you use? I love these cookies.
Both recipes are under the recipes tab above.
HI where do you buy this icing from?
You make it. The recipe is under the recipes tab.
Hi…I just saw this post linked from a Facebook page. My daughter’s birthday is in Oct so we usually do a Halloween theme. This year I would like to do something bright and pretty. In the picture with all of the various peace signs and smiley faces, how did you get the icing to look like glitter on the flowers? Can you make that or is that something you buy?
Pingback: Tie-Dye Sugar Cookie Party Favors Plus Tips on How to Write with Royal Icing - Oh My Creative
what did u need the towel for
I think these look great. Do you have a sugar cookie recipe that you like? I haven’t really made them much, but want to do a tie-dye hippy party coming up and love how these turned out.
Also do you think I could use this technique for the top of a cake? I love how bright the colors turned out and the flower shape of the icing. Any tips? Keep the icing pretty runny?