Christmas Bear in a Boot Cookies {Guest Post}
One of the most amazing things about this cookie adventure has been the opportunity to meet cookie artisans from around the globe. Today I would like everyone to welcome a special guest all the way from Brazil!
Paula, of Dear Sweet Cookies, specializes in simple but beautiful designs using common cookie cutters. These adorable Christmas bear cookies are no exception. I love this idea!
![]() Hi! My name is Paula of Dear Sweet Cookies , from Brazil! I would like to start by thanking Callye for this wonderful opportunity. I am deeply honored by the invitation to create a guest post.
Hi! My name is Paula of Dear Sweet Cookies , from Brazil! I would like to start by thanking Callye for this wonderful opportunity. I am deeply honored by the invitation to create a guest post.
I fell in love for this wonderfulworld of cookies and started decorating some years ago in my spare time. I haven’t had any experience with cookies, icing or cookie cutters before and it was a time of “cookie monsters” !
For a while it was a little bit lonely for me, because I haven’t many references and contacts to clear doubts or share experiences. Thank goodness for Sugarbelle and her cookie blog so I could learn and give life to this great cookie passion.
Life has brought many amazing experiences for me and some weeks ago I received an INCREDIBLE invitation from my Idol of Cookies! OOOOH my GOD! Can you imagine it? Unbelievable isn’t it?! I was really thrilled and I nearly died of joy!
I just held this special opportunity with much will and love! Now, enough about thrills, let’s talk about cookies!!
Christmas season remind me family, childhood, Santa Claus , toys…and bears! After much thought, I chose a simple cute project which combine Bear and Santa Claus boot!
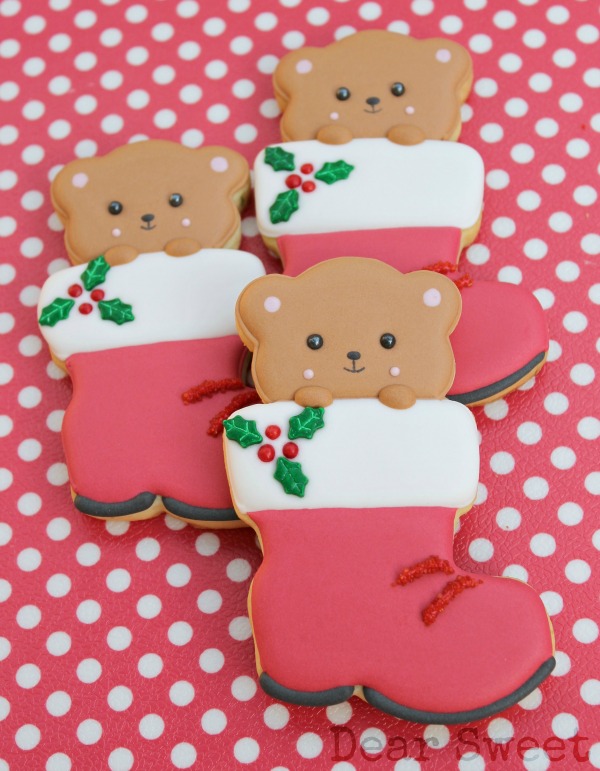 To make these cookies you will need:
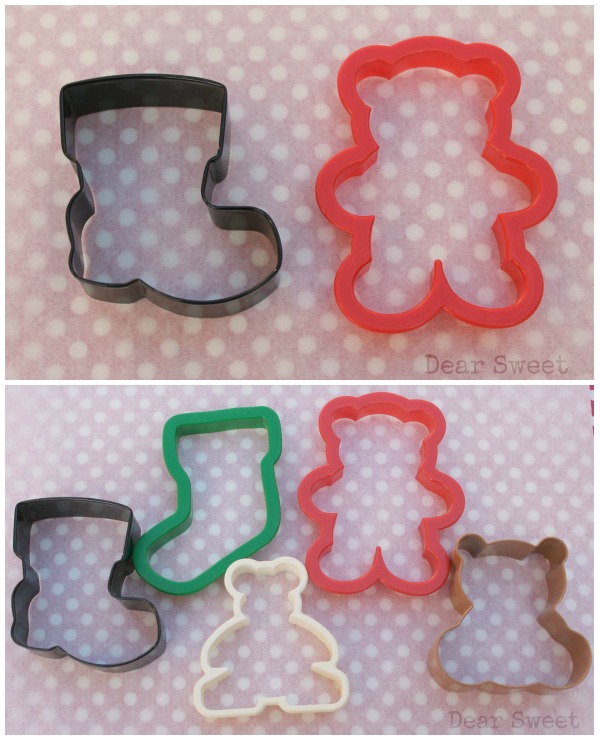
- Bear cookie cutter
- Santa boot cutter
*Both are simple Wilton cookie cutters. If you don’t have exactly these ones you can use similar cutters like the ones pictured below.
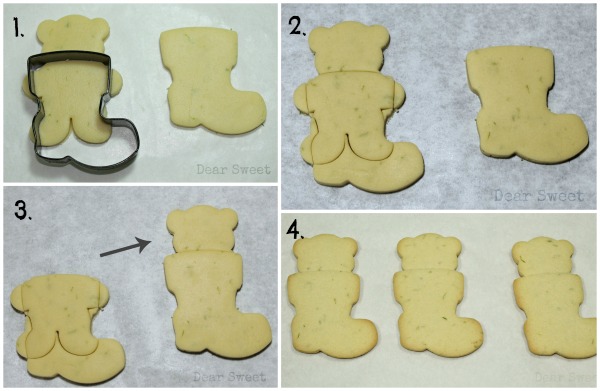
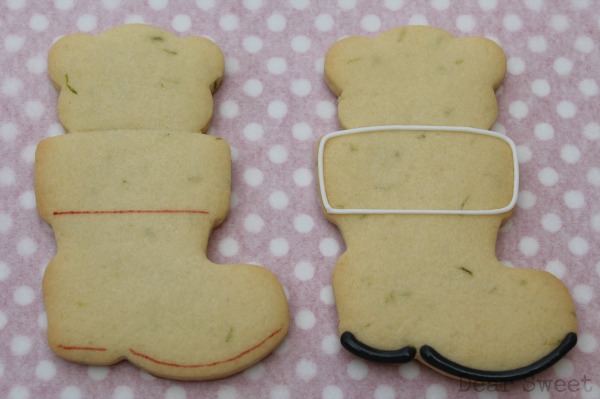
 Assemble the cookie following these steps:
- Cut out the boot
- Cut out the bear
- Use the boot cutter to cut the bear’s head
- Fit the head onto the boot and bake
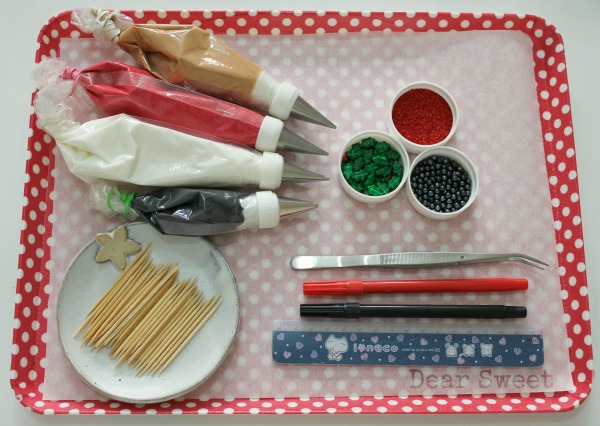
 To decorate these cookies you will need :
- Red piping and flood icing
- White piping and flood icing
- Brown piping and flood icing
- Small amount of black piping icing
- Small amount of light pink 20-second icing
- Tips #1 for details, #2 for outline, #3 for flood, and #5 for soles
- Black sugar pearls
- Wilton red holly leaves and berries sprinkles
- Red sanding sugar
- Ruler and edible marker {optional}
Outline and flood the white area of the boot.
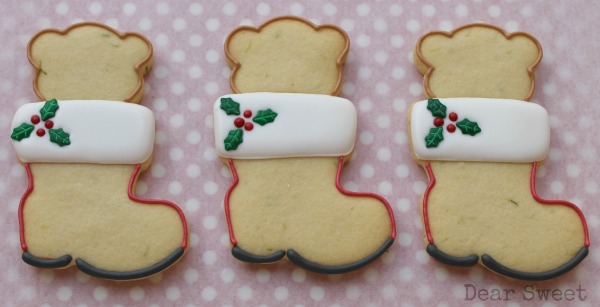
 Use tweezers to place 2-3 berries and leaves on the left of the boot. Pipe the sole of the boot with black outline icing (Wilton tip #5). Let it dry for 15-20 min. Next outline with red and brown icing.
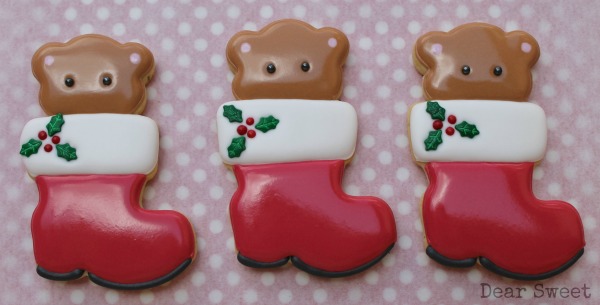
 Shortly after fill the Bear’s head drop 2 dots of light pink flood icing on the ears and using tweezers, place 2 black balls to the eyes.
 Leave them dry completely for several hours (overnight), then with brown icing add the Bear’s foot. While the foot is drying go to the last part of finishing.
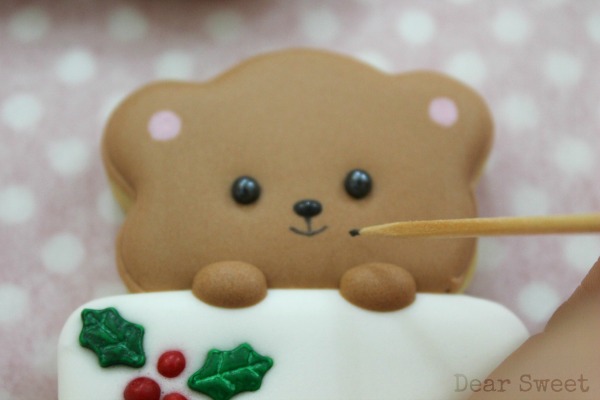
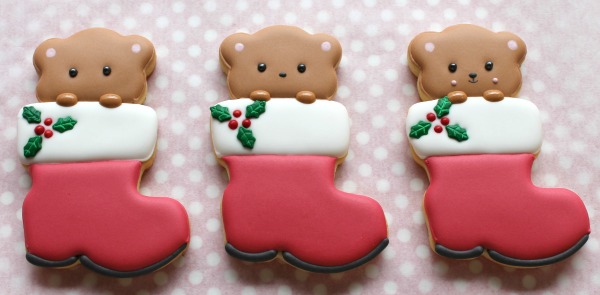 Add a small dot of black icing to the nose, dip the tip of a toothpick into the black icing and draw a mouth, or use a black edible marker if you prefer. Add two pink dots to the cheeks and let dry. Here’s a closer look at the mouth.
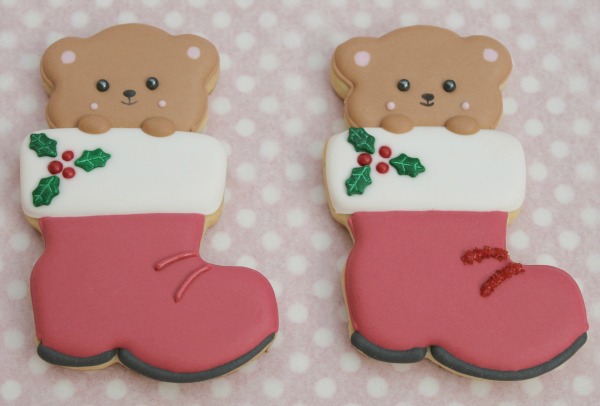
 Lastly, pipe 2 lines of red icing on the boot and immediately pour the red sand sugar onto the wet icing. Shake off and let them dry, and they are ready for Christmas!
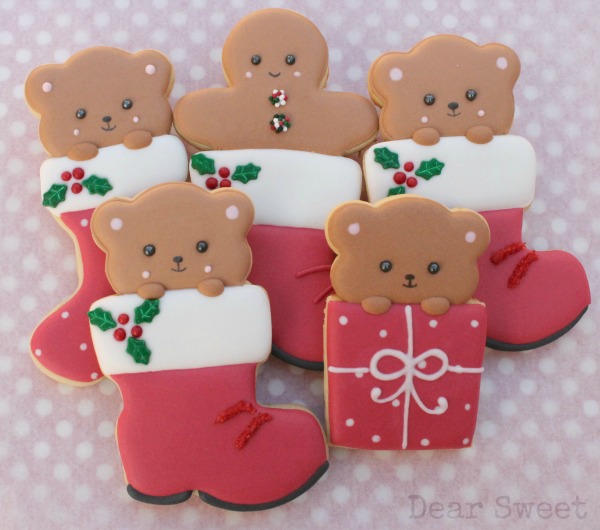
 Create your own designs by substituting gingerbread men, squares, or stockings.
 I hope this helped and inspired you to make cute and easy Christmas cookies! I wish you all a blessed Christmas season, full of love and joy!
![]() Be sure to keep up with Paula’s Facebook page, D. Sweet-Handmade Creative Cookies or her blog, Dear Sweet Decorated Cookies. For more adorable bear cookie ideas, check out these posts:
Be sure to keep up with Paula’s Facebook page, D. Sweet-Handmade Creative Cookies or her blog, Dear Sweet Decorated Cookies. For more adorable bear cookie ideas, check out these posts:


Oh Paula, this IS very special, your little bears in the boot are over the top adorable! And you really did awesome on your tutorial!
The Partiologist! Thank you so much!!
I’m very honored to be here on Sweetsugarbelle’s website am glad that you liked! <3
Oh, my! Those little faces! They are absolutely adorable!
Soooo cuute!! 🙂
Beautifull great
You are so generous to share these with us! They truly are over-the-top!! 🙂
Debbie Thank you very much! I hope this tutorial will inspire you to make beautiful cookies, such as Sugarbelle did for me!
I can never put 2 cutters together like that! Awesome idea!
Thanks
Thank you very much everyone! I really appreciate all the sweet comments! !
Oh for the love of cuteness! These teddies are so sweet! My 3 year old said, “Mama those are soooo cute!” 🙂 Thanks Callye for sharing Paula’s work! She’s fabulous!!
Oh and I just saw the shout-out for my polar teddies! Thanks gal! 🙂
Thank you so much Michelle! I ‘m flattered for you kind comment!
Paula these are just super adorable! Thanks for sharing!! Happy Holidays!
Oh Mike!! You are so sweet!! I’m a huge fan of yours and very honored for the beutiful words!
Paula is so talented! I’m in awe with this set: so cute and super sweet….absolutely ADORABLE!!!
As Callye said the cookie world is so Amazing that we can find Fantastic friends aroud the world!!!
I’m glad that I could meet you!
Thank you so much Evelin!!!
Hi Paula,
Thanks for this wonderful tutorial. I was just wondering when you combine cookies do you stick them together with some edible glue before baking? If not do they not fall off after baking ?
Thanks again
Hi Ann!!
Thank you for asking!
I think what is important is that the two pieces must fit perfectly together.
If you want you can press gently the edges with your fingers and let them closer , so they stick together better.
The cooking process and also the RI cover will let them intact and united.
I hope I could help !
PS: I don’t use any kind of “glue ” to stick them.
This is such a cute idea. I am going to give them a try. Thank you for sharing your great work.
Mary
Those are absolutely so sweet and adorable…
Thank you very much!!!
These are adorable!!! I too, am a fan of Paula’s work. Simple has never been so beautifully done.
Dear Heather
Ditto! I am a huge fan of yours! Thank you so much for the kindness!!
Pingback: Cookie van de Week | Cake Week
Hi Mary!
I am glad that you like it!!
Thank you very much!!
Thanks a million for this tutorial! I love the cookies and I’ll try them for my grandson’s school christmas party! Quick question: how do you get such a matte and smooth look on your icing? I’ve try many different recepies and for the life of me I can never (ever!) get that smooth…hmmm, yeah, I’m ‘royal-icing-challenged’ — no kidding! 🙁
Oops **smooth look*** 🙂
Hi Rosie
Lucky grandson!!
It will be great to see your Christmas Bears!
I recommend using a fan to help the drying and have a beautiful finish ok!
I hope could help you!
Thank you very much!
Paula, thank you, one more time, for being so kind and corteous with all my questions(here and in FB) about the cookies. YOU ROCK!! not yelling just excited 🙂 — anywho, I made the cookies for my grandson’s school xmas party and the kids love them. Many of them didn’t want to eat the top part because the didn’t want to ‘hurt’ the cute bear….awwwww Kids are adorable, I love them ALL!!!
Gracias Paula! 🙂
Pingback: Y LA NAVIDAD SE VOLVIÓ ROSA | Miss Galleta
Hi Paula!!!!! I can seriously ‘hear’ you speaking as I was reading that! Wonderful post. Your bears are so cute!!!! Miss you!