North Pole Cookie Pops
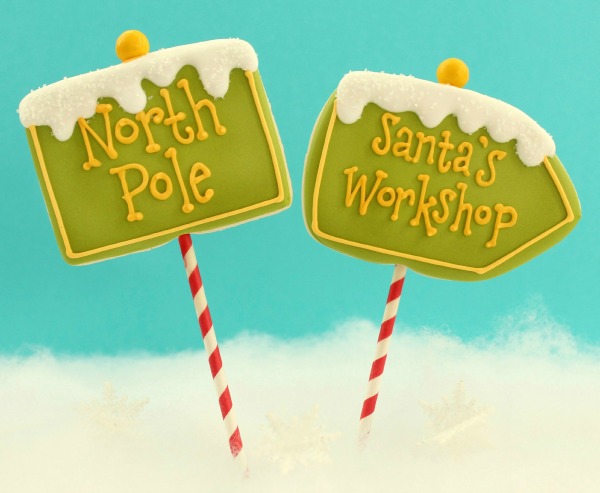
I used to be a little afraid cookie pops, but the moment I spotted peppermint striped sticks at World Market, I was inspired. I knew I’d have to face my fear and turn them into North Pole cookie pops.
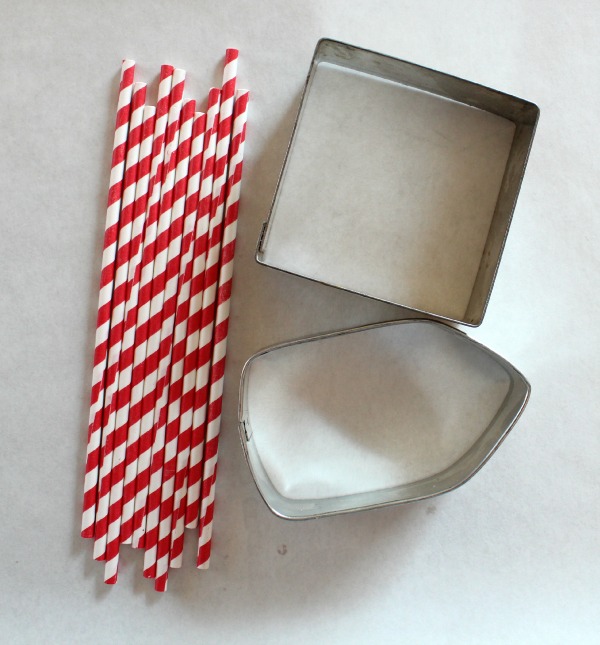
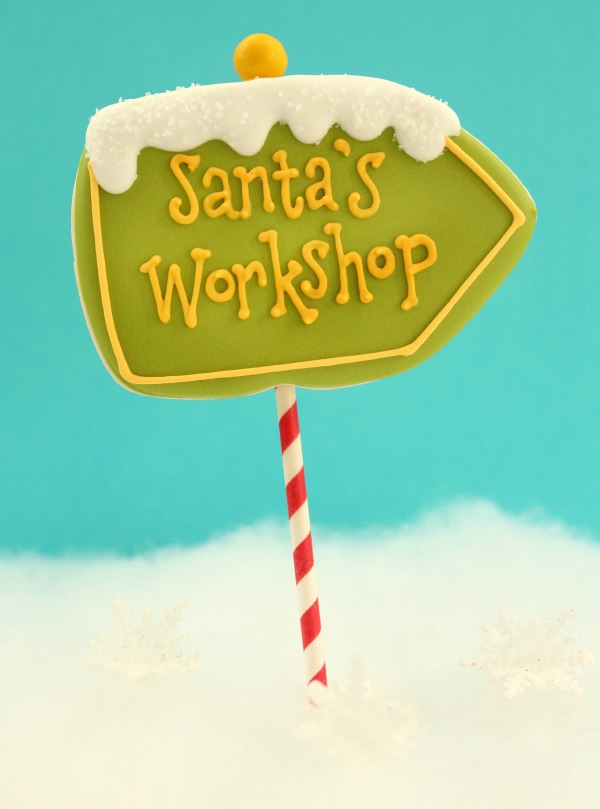 For this project I chose a simple square and my crayon cutter from Karen’s Cookies, but you can use whatever you like. Also, if you can’t find peppermint stripe sticks, plain ones will work too…we’ll talk about that more later.
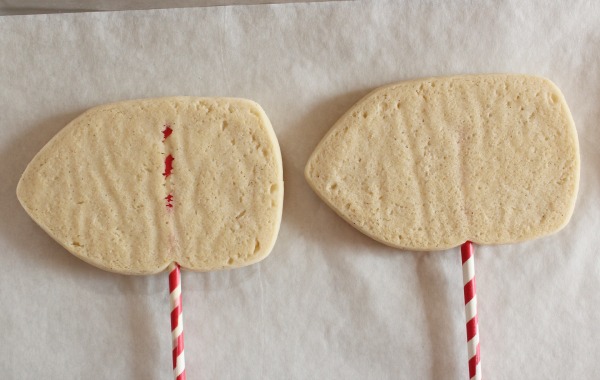
 Before baking, gently insert a stick into each cookie.
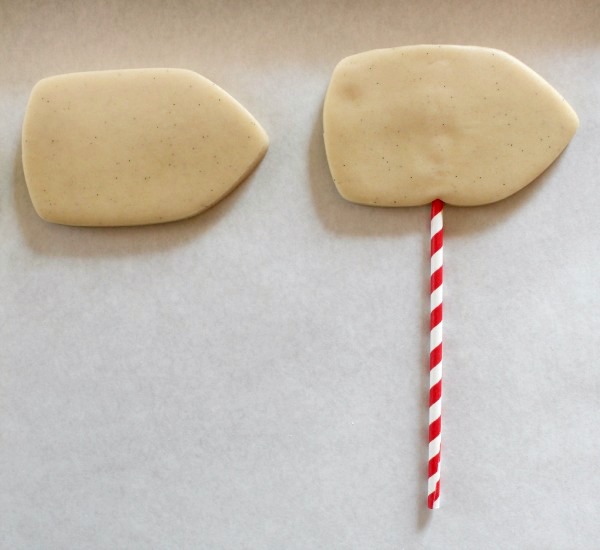 As I mentioned earlier, until recently I was afraid of cookie pops. No matter what I tried, they were always came out a little imperfect and ugly. Eventually I realized the problem is that my cookie dough is softer than most. So, now I don’t worry about an ugly surface, especially since they end up covered with icing.
If they are a little bumpy, take a page from the Bearfoot Baker’s playbook and flatten them with a fondant smoother. You can also roll them a bit thicker and bake a minute or two longer at a lower temperature…whatever works best for you.
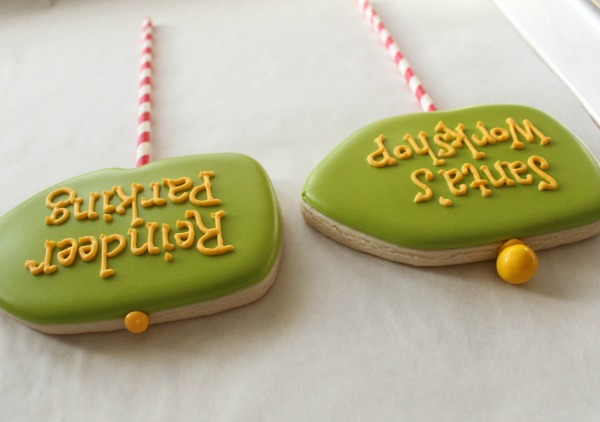
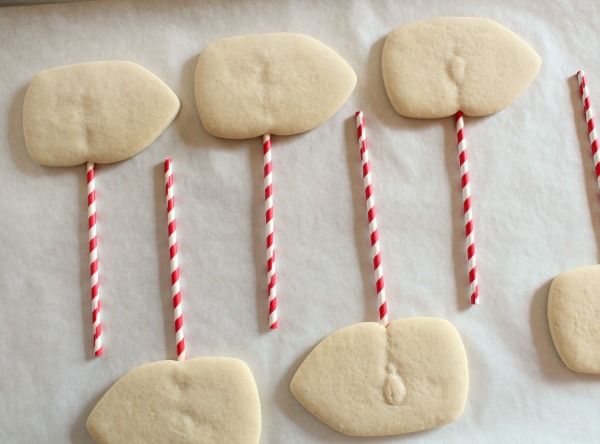 While we’re talking about ugly cookie pops I also wanted to show you the back of mine. Sometimes the sticks show through a little. In the beginning I worried that this might weaken the cookie, but it doesn’t seem to make a lot of difference. However, if this really concerns you, decorate the back side of the cookie for added strength.
 To make these cookies you will need:
- Bright green piping and flood icing
- Yellow piping icing
- White 20-second icing
- Clear or white sanding sugar or sprinkles
- Yellow Sixlets
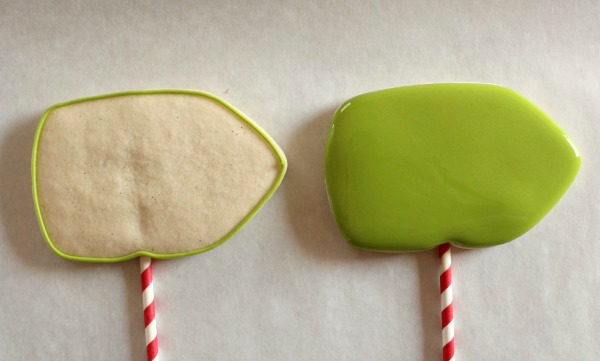
Begin by outlining and filling the cookies with green icing.
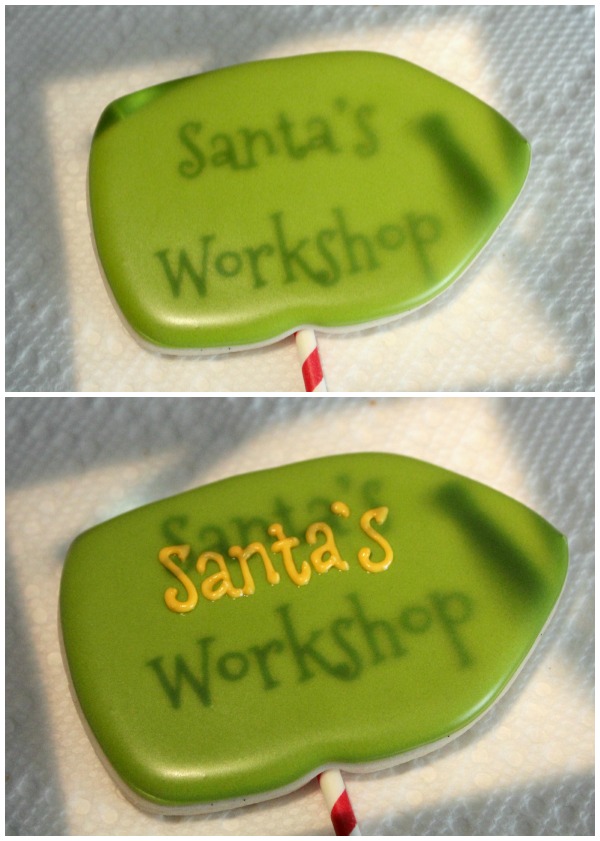
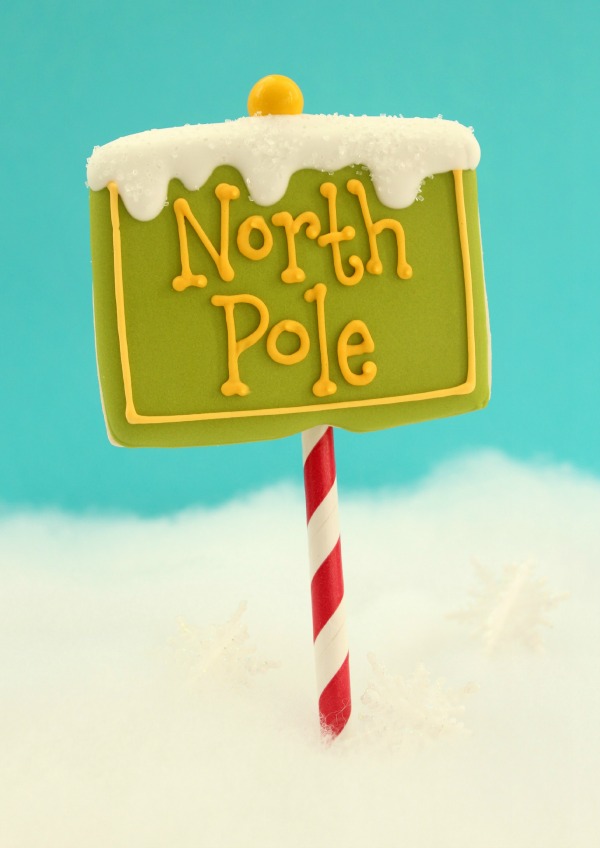
 Once the base is dry, use a small round tip {#1.5-#2} to pipe phrases like, “Santa’s Workshop”, “Reindeer Parking”, and North Pole onto each cookie. I used my Kopykake because I’m not comfortable writing on cookies. This font is called “Mountains of Christmas”
Using a Kopykake makes decorating a little easier, but it still takes a little practice. Notice I had to reposition the image during piping so that everything was properly centered. For more tips on using a projector for writing on cookies click here and here.
 Next use yellow piping icing to attach a Sixlet to the top pf each sign. Try to center it with the stick.
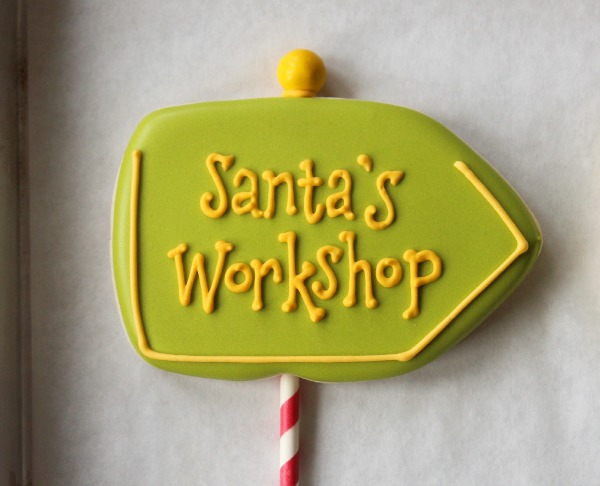 Then, quickly add snow as pictured below using 20-second icing.
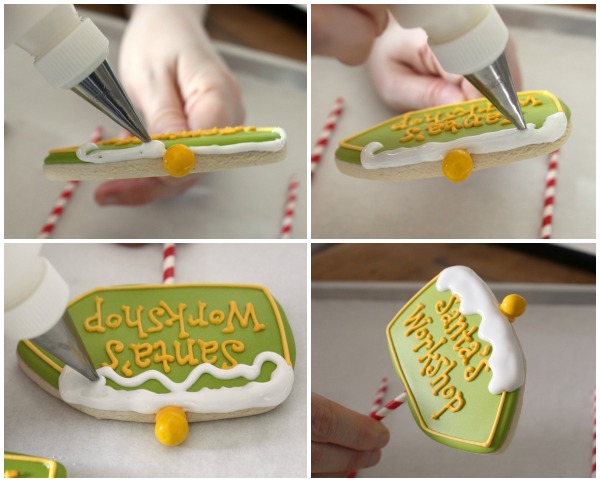 Immediately sprinkle with a bit of sanding sugar.
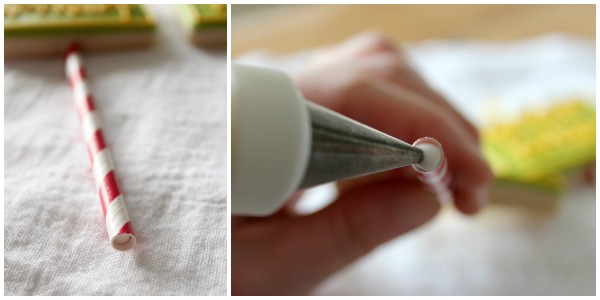
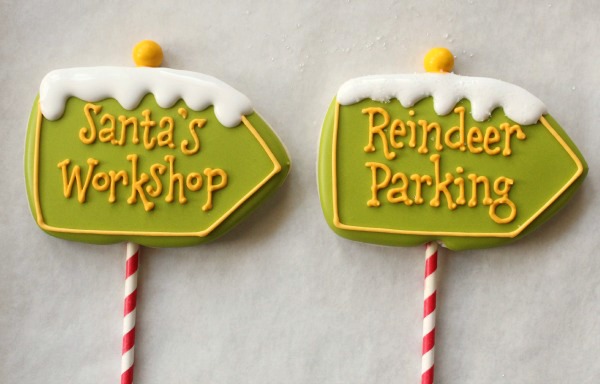 Remember I said that these can also be made with plain cookie sticks? Here’s how.
 After decorating simply cover the sticks with striped paper straws which widely available at craft and party stores and also online. Begin by measuring the straws and trimming to size {leave a tiny bit of space at the end} and slip them over the stick.
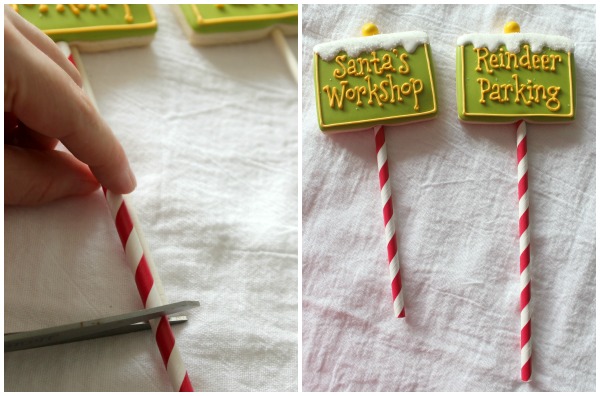 See the little space? Fill with a dot of royal icing, and let dry. This will help keep the straws in place. Easy peasy, right?
 This design is really simple, but you can use things like sprinkles and stencils to dress them up.
 For more tips and tricks related to this project, check out the following links:
- How to use a Kopykake Projector
- Piping on Cookies WITHOUT a projector via Sweet Ambs
- Flattening Cookies with a Fondant Smoother via the Bearfoot Baker
- Tips for Perfect Cookie Pops with the Bearfoot Baker
- Perfect Cookies Pops with Sweetapolita
- Free Christmas Fonts via Two-Twenty One {Thanks, Lisa!}
- How to Make Cookie Pops via Sweetopia
- Writing on Cookies {freehand} via Ali-Bee’s Bake Shop


I like these so much I just yelled at my husband for interrupting me while I was reading!
They are adorable! I love, love, love the sparkly ice crystals on the top of the sign and I love that you used the pencil for the pointed version!! So awesome!
Must make some…
Absolutely beautiful! When I first saw these, I thought wow..so cute, this would make an adorable cookie! Lol..than I saw that they are. Pure perfection! 🙂
Seriously my favorite cookie pops EVER!! I love everything about them. Pinning now!
Hi, is the recipie for the piping icing and writing icing the same as the 20 second icing? I want to try these, but want to make sure I have all my ducks in a row and all the instructiins I need! Thank you:)
Yes, they are all my basic royal icing. This post https://www.sweetsugarbelle.com/2012/03/consistency-is-key-twenty-second-icing-and-more/ and this post https://www.sweetsugarbelle.com/2011/03/coloring-and-preparing-royal-icing/ will help you a lot!
Beautiful!!!
Beautiful!!!
I also used your crayon cutter to do Mrs. Claus BakeShop, North Pole & Santa’s Workshop signs (no cookie pops just plain signs)… nothing like your’s though!
Since I still have a lot of christmas cookies I think I’ll have to give the pops a try! 😉
Love these! Thanks for linking to me! 🙂
These are very cute. I think the sixlet adds the perfect finishing touch.
These are magnificent! You’ve been posting so much now that Christmas is near and I love it! How you find the time with young children and all the busyness of Christmas I don’t know! I’m sure it’s an incredible amount of work for you but there are so many of us that love your work and appreciate your inspiring posts.
That means soooo much! I have been struggling a little, but I am doing my best to keep up 🙂
Ahhhhh these are just too cute! And the striped sticks just make them perfect!!!
Love, love, love!! Just ordered your cutters from Karen’s too! Can’t wait to make some signs!
Those are so sweet….Merry Christmas!
Pingback: Snowmen cookie pops - Roxana's Home Baking
So beautiful , I want to hug you!!
Gah, I can’t handle you sometimes Callye. Eeeeeeeeeeeee, these are adorable!!
OK, I’m done. Sorry for the outburst.
You always seem to find the cutest fonts for your projects. Your don’t collection must be huge. Adorable cookies.
I meant ‘font’ collection lol
Pingback: Food Links I Love | Foodversation
Love your cookie pops – cookie pops scare me too! And would you believe I made North Pole Cake pops – can’t wait for you to see! 🙂
I love everything you have made! You are amazing!
Thank you for the tutorial! I just want to make sure that it is ok to bake the straws?
Thank you
No, you add them after the fact. Check out the second and third photos from the end.
Thanks! I’m still confused because there is a picture that looks like the stitch is baked in ? (The one near the top where the cookie is flipped over).
I made two different versions. One with sticks from World Market that come with stripes one covered with straws, in case you can’t find them. Did you read the instructions?
I am so sorry ! I see it now.
That’s okay. better than ya smoking your house with burning straws, right?
Oh I love the mosaic. I love all the prttey white and cream with just a touch of color. I am so into white all of a sudden. Love it. I also wanted to let you know that the next “Cloche Party” is scheduled for Sept. 11th for the Fall season. Thank you so much for displaying the button about the last one. Let everyone know the new date. I look forward to seeing you there. Hugs, Marty
I LOVE THEM!!! I think they are one of the cutest cookies I have seen 😀 So adorable! 🙂
For some reason they look even cuter this year! I need to get my tush in gear and actually make them!
amazing idea! I sooo got to try it! Thanks for sharing
Pingback: 10 Christmas Cookie Recipes - Home. Made. Interest.