Vintage Duck Toy Cookies
The month of March brought not one, but THREE precious babies into my life. A tiny little nephew named George, a niece, Sara, and another one of my besties *finally* welcomed sweet John into the world.
Babies of course make me happy, and when I’m happy it puts me in the mood to make cookies.
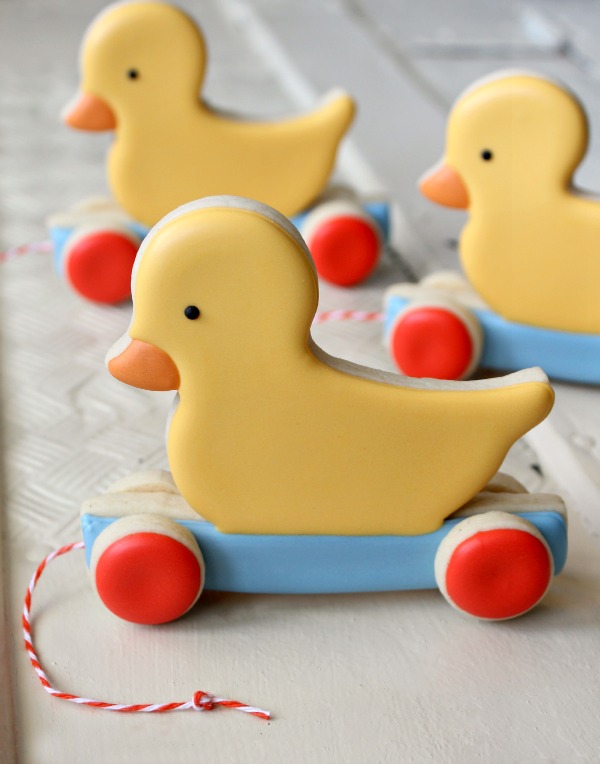
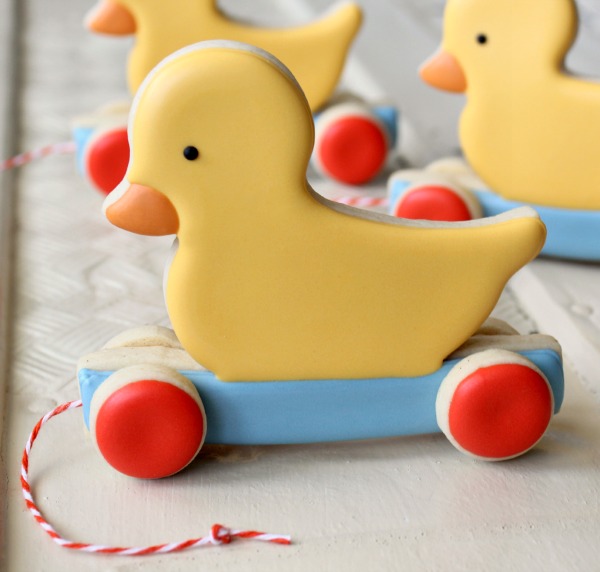
I wanted to do something a little different than the standard bibs and bottles so I came up with a simple duckie pull toy cookie. Yes, they’re three dimensional, but in the interest of simplicity I kept the colors and design elements to a minimum. If you’re new to three dimensional cookies this is a perfect project for getting your feet wet.
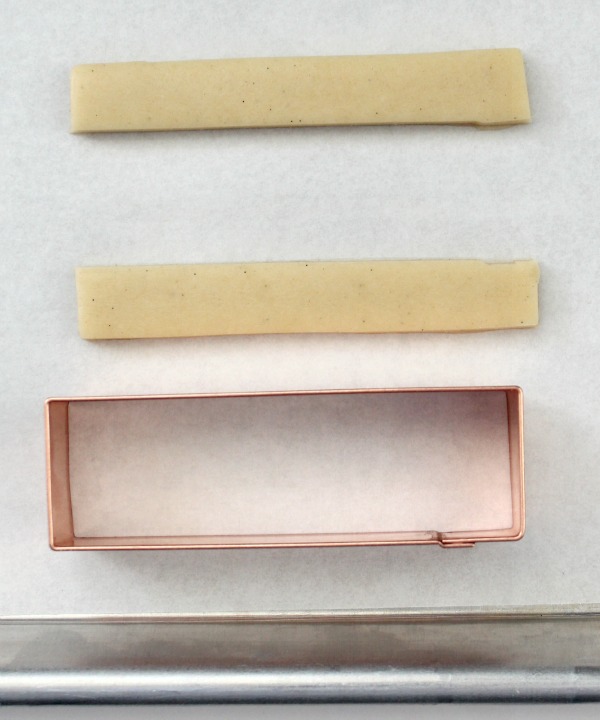
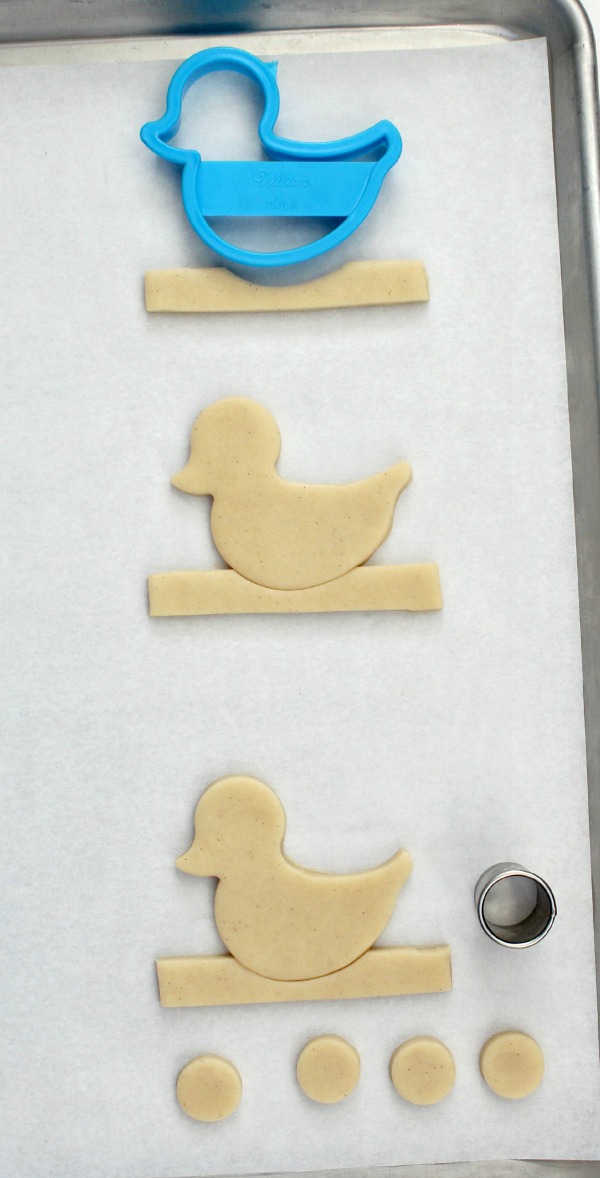
To make these cookies you will need a duck cutter {I used THIS ONE} and some sort of square/rectangle cutter, slightly wider than the duck. If you don’t have one use a template and a simple knife or pastry wheel.
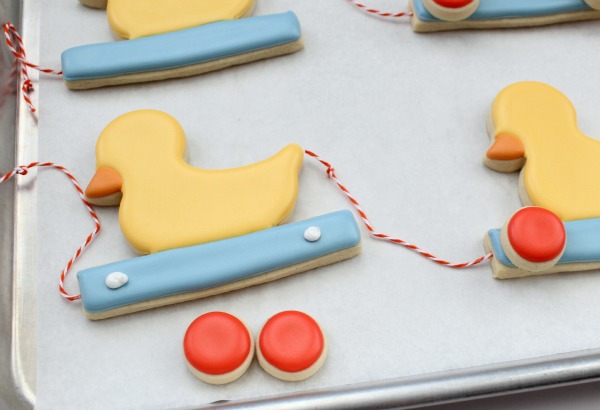
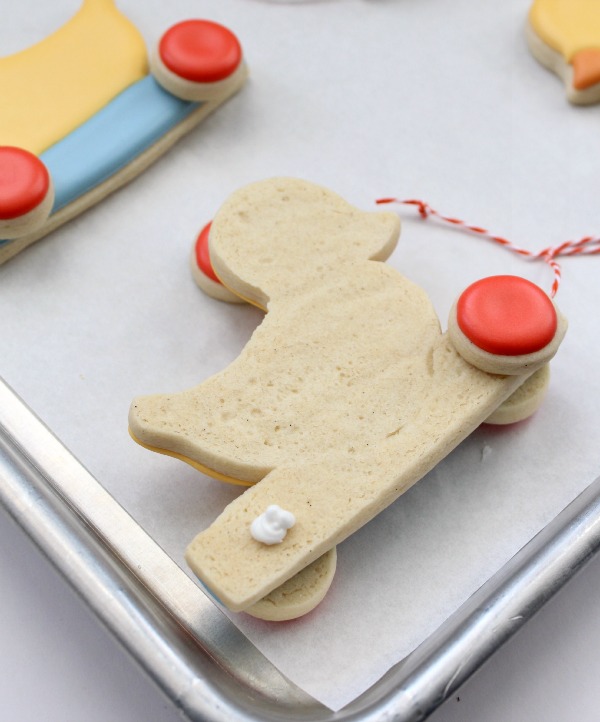
Piece together the duck and base to form a single cookie as pictured below. Then use a small round cutter to cut 4-5 wheels for each cookie.
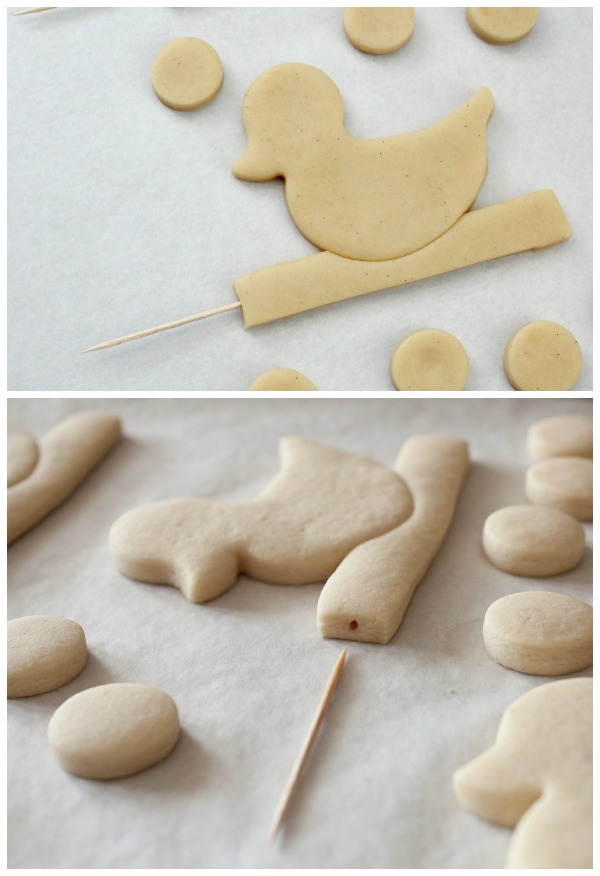
Before baking, insert a toothpick approximately 1/4 to 1/2 of an inch into the cookie to create a cavity. If you’re only planning on decorating one side of the cookie you could always skip this step and attach the string to the back but in my opinion, attaching it this way creates a more finished look.
After baking and cooling remove the toothpick and you’re ready to decorate.
To make these cookies you will need:
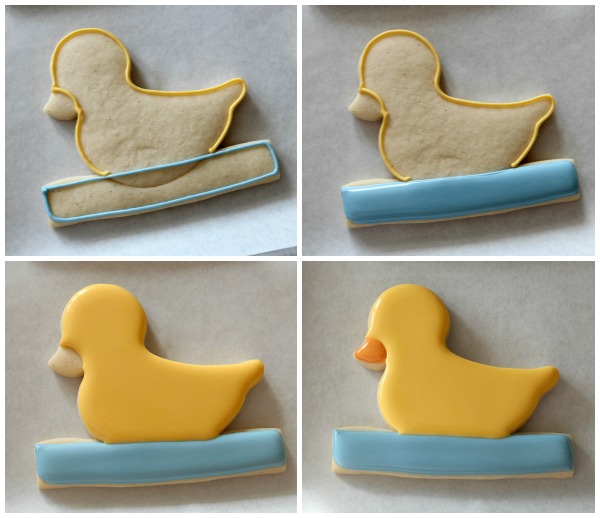
- Yellow Piping and flood icing
- Light blue piping and flood icing
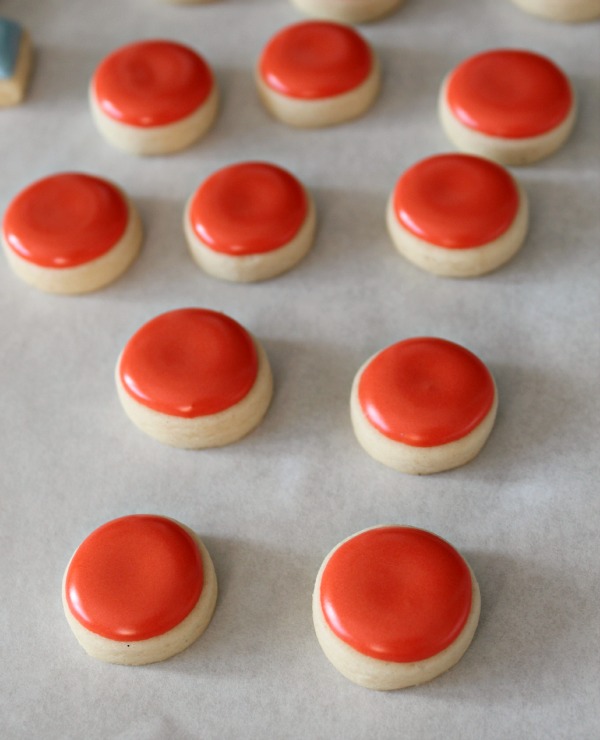
- Red 20-second icing
- Orange 20-second icing {only a bit}
- Black 20-second icing {or sugar pearls if you have them on hand}
- Stiff white piping icing
Begin by outlining and filling the duck cookie in sections. They will need to dry completely before working with them.
In the meantime use red 20-second icing to cover the wheels. These will also need to dry for a while.
While you’re waiting, you can put together the string pulls. Since my favorite red icing color, tulip red, falls a little on the orangey side, Mandarin twine from The Twinery is a perfect match. To make sure you always have the right color on hand I suggest picking up their 18-Color Sampler Pack. It’s always handy to have around.
To create pulls, cut a 4-5 inch piece of twine {depending on the size of your cookie} and double knot the end. Then dip a small section of the loose end into flood icing to stiffen it just enough to easily insert into the cookie.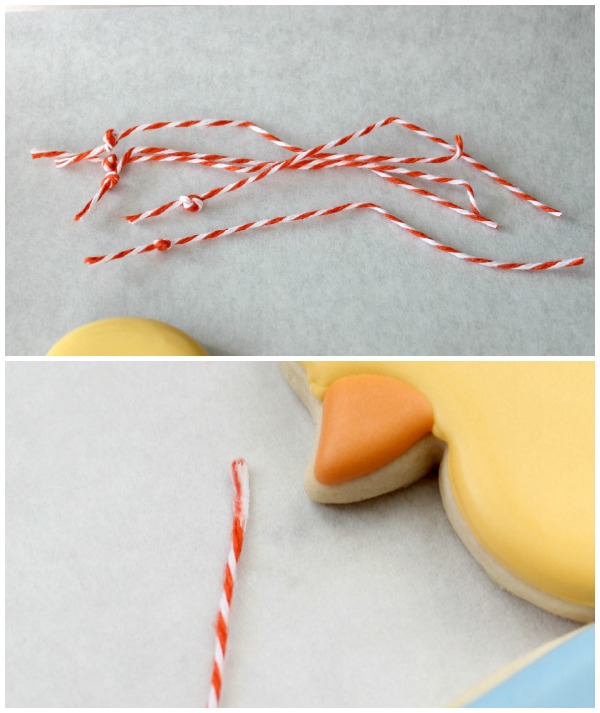
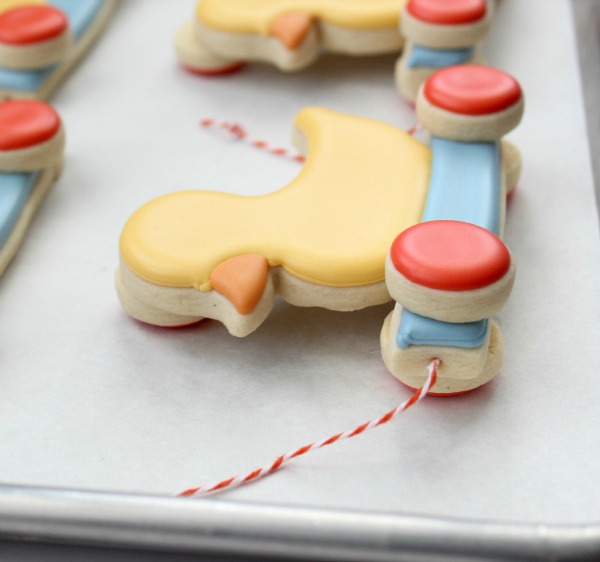
When everything is dry {this may take 8-10 hours} it’s time for the fun stuff. Begin by attaching the string pull. Squeeze a very small amount of piping icing into the opening and insert the string.
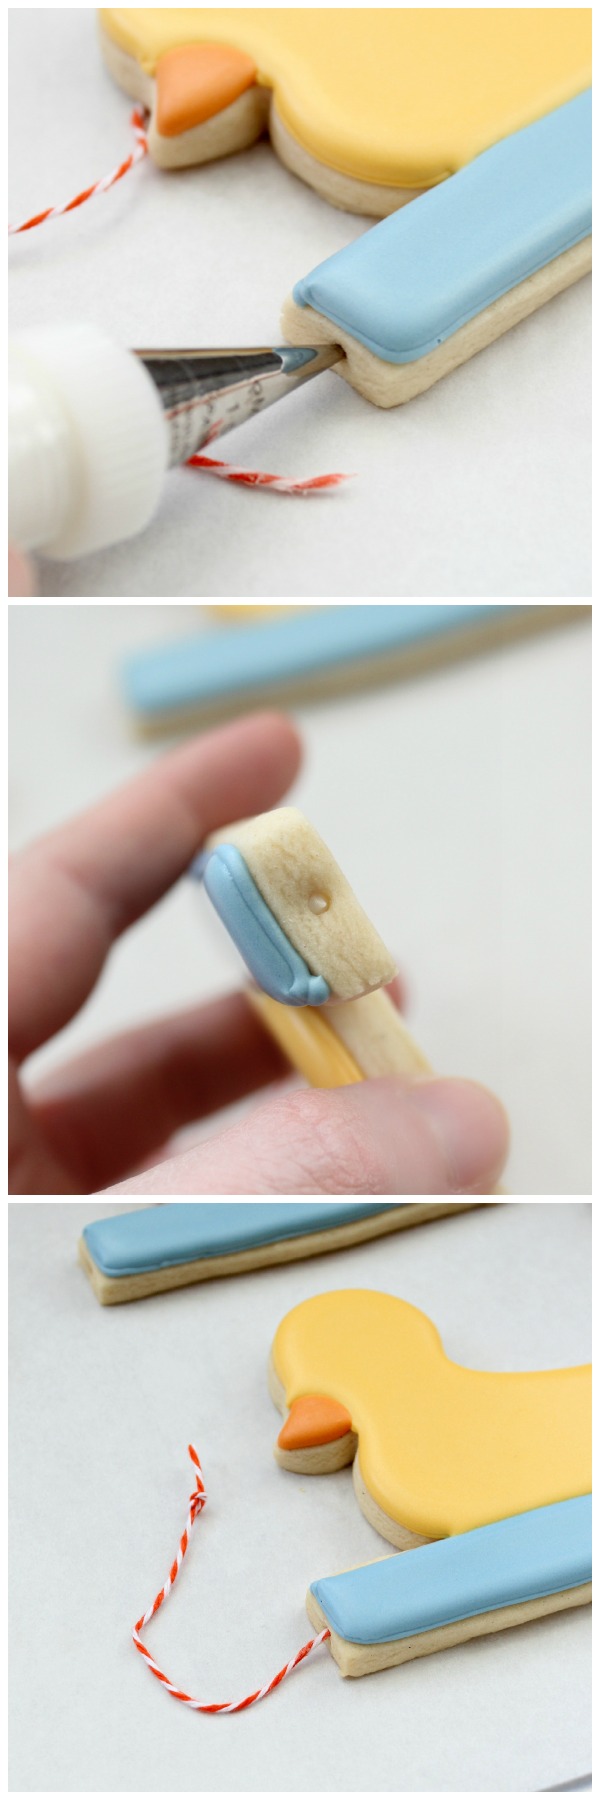 To finish up, use stiff piping icing to attach the wheels. For standing cookies this is a two-step process.
Flip the cookie over and use a spare tire {hardy har har har} or a coupler to keep things level while attaching the back wheels.
You might be wondering why I decorated the back wheels and not the other side of the cookie. The short answer is I’m crazy.
For those of you not afraid to take a trip into the dark recesses of my brain…during the planning stage of this project I MEANT to decorate both sides of this cookie but I developed a case of the lazies halfway in. But double-sided or not these cookies are cute, right?
Anywho, check the wheels to ensure that they’re even and leave the cookies in this position until they’re completely dry.
Also, you might notice that my duckies eventually grew eyes. I got so excited about the building part that I saved them for last. A wise, patient soul would probably add them before attaching all the other junk, but I’ve never been known for wisdom and patience.
This has been a great month for babies around here. George and John are perfectly healthy and our sweet Sara, although very sick, has the heart of a fighter. I cannot wait to see what’s in store for these tiny little babes and I hope you’ll keep all three in your prayers.
My sweet friend Giselle of Baking in Heels also made duckie pull toy cookies. You can check hers out HERE.
I’m excited about the month ahead. Spring is in the air and I’m ready to get busy in the kitchen. Here’s to a great April for everyone!


These little pull toy ducks are darling! Thank you for sharing!
I love these!! They are absolutely adorable!
Such a super cool design, Callye. I love their complexity and their simplicity. (Should those two words go together in the same sentence? Let’s just say I’m crazie too. ;)) Have a wonderful April! ?
Those are adorable…I would love to have an occasion to make those for!
Congrats for the new babies and for these awesome cookies!! They are so cute!
Wow! I love how the decorating part is really easy, but the completed design is so special! Beautiful work Callye!
These cookies are adorable. Very original and the perfect little duck toy treat.
Absolutely AMAZING!! I LOVE your tutorials! Great job!
The cookies are adorable. So sorry about your niece. I’ll be praying for her especially.
Oh man Callye!! I think these are my favorite cookies EVER! They are perfect for the 3 bundles of joy brought in March! I love everything about them but, that bakers twine for the rope… GENIUS!!
These are adorable. I love the idea.
If you make them again, you could just do mirror image cookies and glue them together. That way you wouldn’t have to decorate both sides.
You have done a lot of amazing cookie designs but I must say these are on the top of my list. Seriously….too cute for words. Love 3D cookies!!!
Thanks so much for sharing! What a cute idea…Love it! I might have to try this soon 🙂
**passes out** I am in love with these.
I think it’s OK that you had a lazy episode. Think about the icing to cookie ratio, too much icing for my taste. Such a cute idea, you always have the most inspiring cookies!
Thank you Callye! I’ve learned so much from you and almost have all the tools to make my first batch of royal icing cookies.
Super, duper adorable! Ducks are the sweetest little things, add wagons into the mix and make it 3d and you have pretty much the best thing on the planet!
So creative, Callye! I love the 3D effect that the wheels create and the added detail of the twine!
These are as sweet as can be!
I LOVE these so very much, Callye! I NEED to make them for SOMEONE, maybe for myself:)
Really good idea! I first saw it here, to be honest: http://www.baking-in-heels.com/2013/02/3d-ducky-pull-toy-cookie.html
but your version is a little bit more realistic, due to the blue part. Good job!
Poo! Just goes to show, when you think you have an original idea…I love the simplicity of Giselle’s. If only I had a knack for keeping things easy!
Okay… these are my new favorite cookie ever!!!! What is it about the adorable simplicity of the duck plus the genius of the 3D effect that made my heart skip a beat! You are pure talent miss Callye!
Congratulations on the new babies and this adorable idea..Fantastic!
A M A Z I N G !!!!
I’m so glad you did this post – these are darling! Sending prayers of thanksgiving for all those babies, especially for baby Sara and her parents.
Honestly, these could not be any cuter or more clever!! Instant share!! I will keep little Sara in my thoughts and prayers that she is strong and well soon.
Congratulations on all the new arrivals in your life! Prayers going out to all the new parent’s and their precious miracles, especially for little Miss Sarah and her family.
I am in love with these adorable duckie pull-toy cookies.
These are adorable! I found them at the Ducks ‘n a Row party – you were featured this week. Anyway. I’d love for you to share them at the Pinterest Power Party – it goes live Wednesday at 5:00 pm {PST}! The link is below but it won’t be accessible until then… Hope you have a terrific Tuesday!
Danielle
http://www.sewmuchcrafting.com/2013/04/pinterest-power-party.html
Seriously, these have got to be the cutest cookies on the face of this earth! I am planning to host a rubber ducky themed baby shower and these would knock their socks off. What a wonderful way to welcome all those sweet babies in your life! 🙂
Congrats on the new additions to your family! These pull-toy duckies represent the occasion so perfectly!
This is such a fun and sweet idea. We wouldn’t want to eat them at all though!
Gah, SO adorable!!
Oh my I love them!! What a super cute idea! I really want to make some 3D cookies now as well 😀
Pingback: bazar x – Galletaslombardero | cookies on time
Oh my gosh 3D cookies, I love these!
Pingback: Friday Favourites – 5 April 2013 – Life in Ryans'
WOW!!!!!!!!! AMAZING!!! THANK YOU!!
SOPHIE
I seriously LOVE these, Callye! Your step by step is so helpful, too. Definitely bookmarking for some day when I have a reason to make them, myself!
Happy April to you, too!! xoxo
LOVE
LOVE
LOVE
…Your work!
Everything is gorgeous!
Karen
bellabargains.etsy.com
These are so cute! I’m deciding if I’m feeling up to the challenge of trying to make these for my sister-in-law’s baby shower that I’m throwing! Out of curiousity, would you be able to tell me what cookie recipe you used? If I try to make these I’d like to use your exact recipe! Thanks!
Adorable duckies! I love them! I love this tutorial too – so well laid out and each step is easy to understand. I can’t wait to make a batch of these cute little guys! : )
These are so cute – I just try to make them. If you like to have a look – please just stop by :):
http://zuckerglueck.tumblr.com/post/58137510719/flitzerente-ich-weiss-ja-nicht-wie-es-euch-waehrend
This idea is simply the cutest thing I have ever seen!
Your photos are fantastic, too, by the way!
Thank you for such clear instructions!
Thanx,
Laura