Simple Royal Icing Holly Decorations
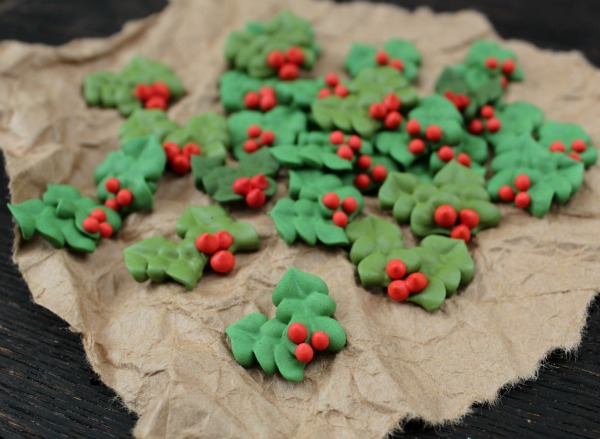
Okay. Back to the royal icing accents. Maybe I do have a problem but admitting it’s half the battle, right? Today it’s holly.
Royal icing holly accents are super simple to make. You will need:
- Medium stiff green piping icing
- Red piping icing
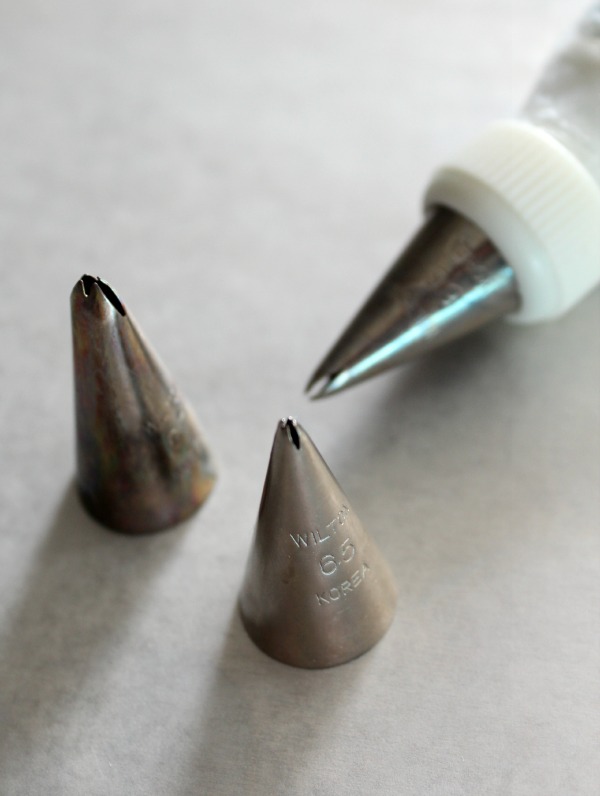
- Some sort of leaf tip
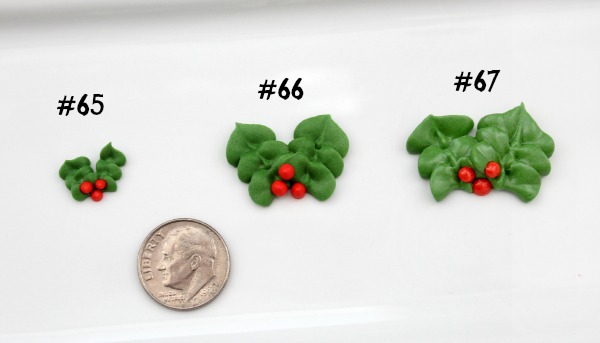
I used a #66 for this demo, but anything from a #65s to a #70 or a #349 and #352 {these produce more bubbly leaves} will work.
Here’s an idea of what size accent each tip will produce. There’s a few variables involved, of course {pressure, icing consistency, etc.} but this is pretty close.
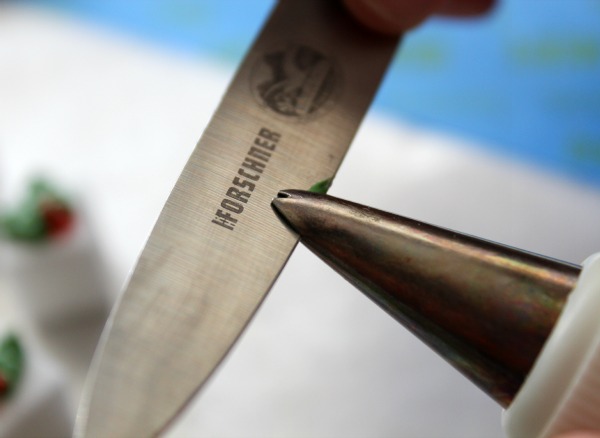
If your leaf tip isn’t cooperating with you, try opening it up a little with a thin bladed knife.
Now for the piping.
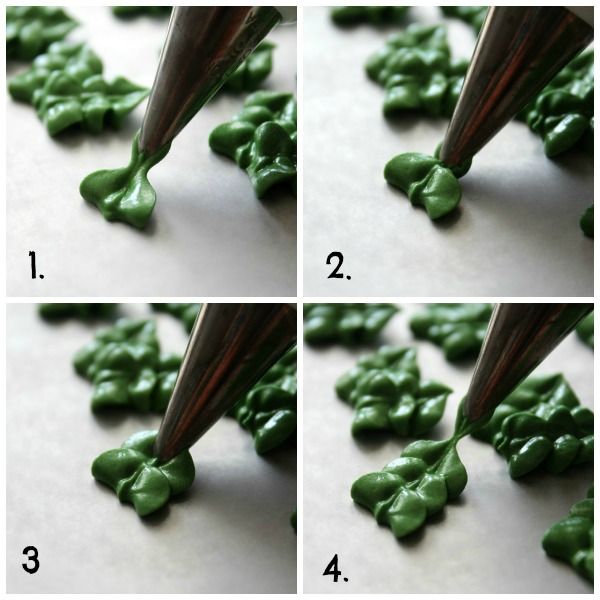
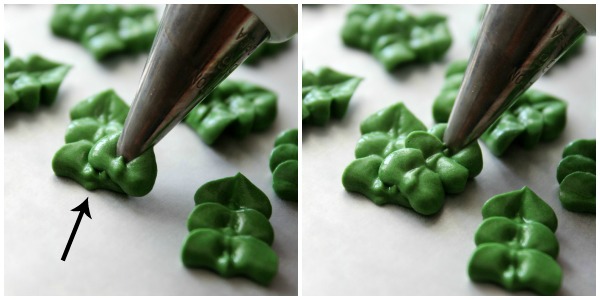
Piping holly is a pretty rhythmic thing. Almost like aerobics, but without the sweat and heavy breathing. It goes something like this…touch, squeeze, pull, release…back underneath, squeeze, pull, release. One more time squeeze, pull to a point, and RELEASE.
For those of you who are about as coordinated as well, me, I broke it down even further.
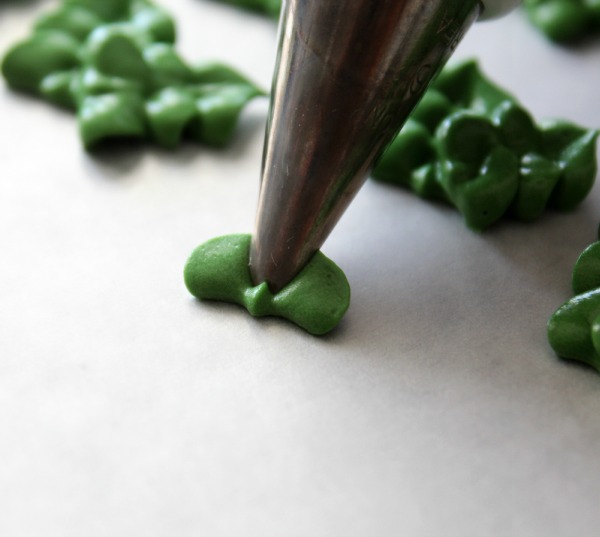
Begin piping like you would any leaf. Touch your tip to the parchment paper {or cookie} apply pressure to create a leaf, pull back ANNNNNNNNNND that’s where things change. Instead of pulling the leaf to a point until it breaks move the icing tip back underneath the first leaf and repeat two more times.
See?
Touch, squeeze, pull, and release…back underneath, squeeze, pull and release. One more time squeeze, pull to a point, and RELEASE.
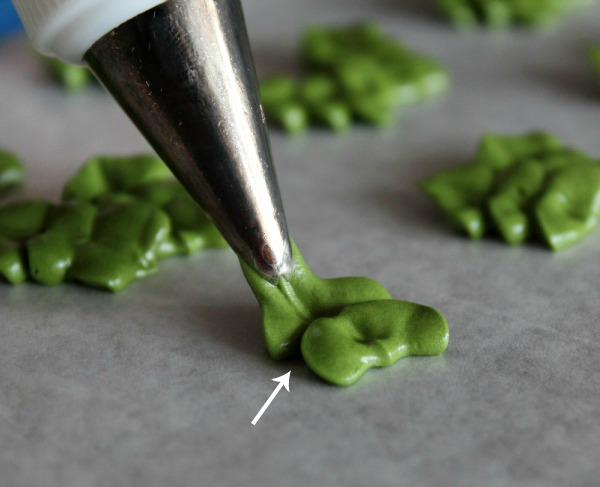
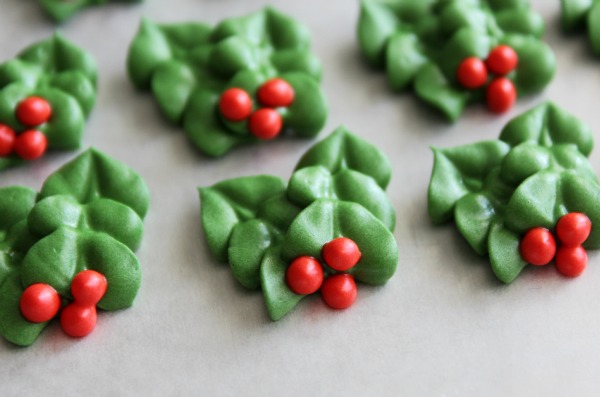
Here’s a side view, just in case I’ve really scared you.
After piping the bottom leaf, come back and add another {if you like double holly}. Same thing. Start by placing the tip near the center of the first leaf and repeat the steps above.
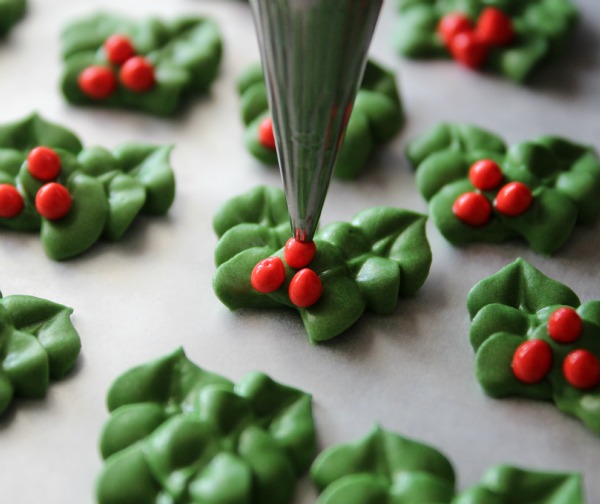
Finally, use a smallish {maybe #1.5 or #2} tip to add berries and let dry.
I like to have these on hand to add to snowmen and stockings but I’ve also been known to pipe them directly onto cookies and other things.
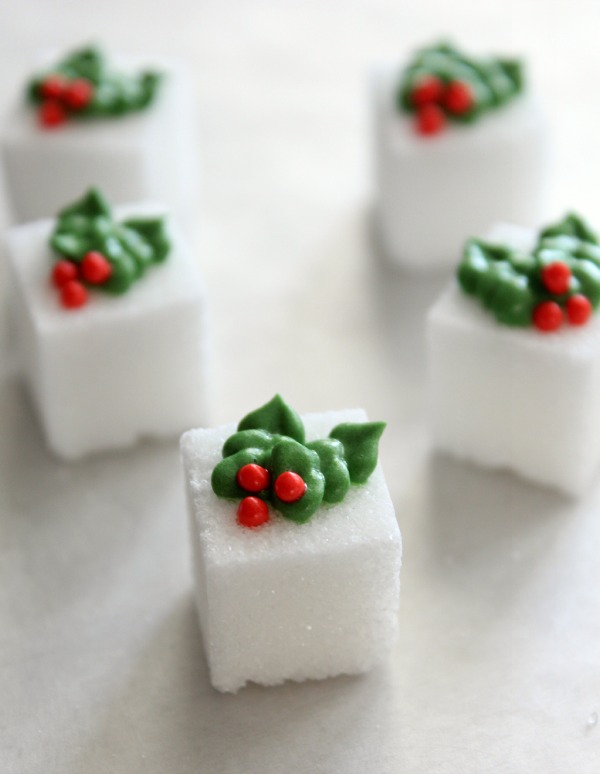
Like sugar cubes, for example. Same thing as above, except I used a #65 tip.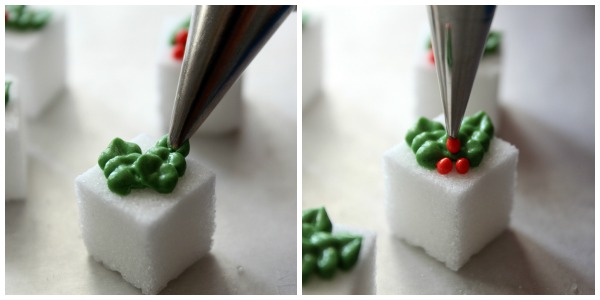
Super simple and super cute, my favorite!
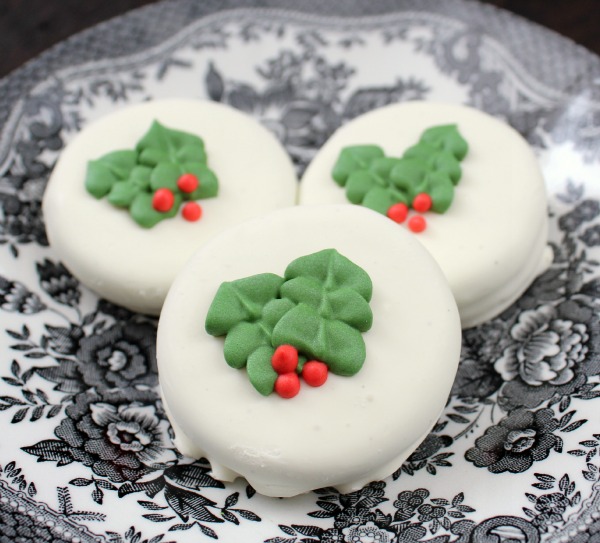
You can even used this technique to dress up store-bought cookies like white fudge dipped Oreos or homemade treats like Kevin and Amanda’s White Chocolate Dipped Ritz Sandwiches.
Oh yes, and for those of you that I’ve left completely confused with all my talk about aerobics, I made a {not so great I promise I will fix it soon} video. Not an aerobic video, lest I end up on America’s Funniest Home videos, but one about piping holly accents. Enjoy!


W O W. Thank you for your extremely thorough tutorials! I wish I lived near you so I could observe firsthand..not to sound stalker ish :). I just love what you do, and I think your skill is above and beyond!
Yay for more royal icing accents! We have two holly bushes in our yard and I super love them, especially this time of year! The sugar cube idea is fab – petit fours would be awesome too!
Super cute idea. Love the holly on the sugar cubes.
Thanks for such a great tutorial…..although somehow I am left feeling like I should go work out or something….
These are so great! Would be perfect to have on hand as a nice little accent on Christmas cookies! Love them on the little sugar cubes too!
okay…you know I’m totally making a ton of those sugar cubes and bagging them up with cute boxes of Christmas tea right? I think I need to do a post…how many little cutie pie christmas gifts can you make with Sugarbelle’s tutorials? so far I have hot chocolate mix with little snowman faces and christmas tea with holly jolly sugar cubes! Can’t wait to see what’s next! 😉
I’m a cupcake teacher and my favorite thing to make is roses, but then when it comes to leaves that Tip #67 my students are always having trouble with it. No two of them are made alike. I had to open mine… These lil holly leaves are beautiful! I’m making cake pops tomorrow in class and will definitely keep this in mind as inspiration! =)
Ergo-Blog
Thank you for the tutorial and the You Tube video. They were GREAT and came just in time, tomorrow morning I start decorating 75 christmas cookies and was wondering how to make Holly leaves and berries. I didn”t want to use fondant cut outs. All your tutorials are so helpful.
Thank you Callye for awesome tutorial, I have to try this out! Looks fabulous!!! 🙂
The sugar cubes are SO stinkin’ cute!!! I love it! And yes, seconding what other posters have said – thank you for such detailed tutorials 🙂
Hi!! Live your icing accents!! I’m having problems getting a pointed tip on my leaves, should i stop squezzing when I’m pulling to form a tip? Thanks
Yes. Stop squeezing and pull to a tip.
Thanks much for the holly tutorial. I’ve had lots of trouble with leaves and your tutorial was a great demonstration. Thanks too for the tip about opening the tip. Happy Holidays !
Great tutorial…as always!
You make it look so easy. Thank you for sharing your techniques and skills. I hope you are having a lovely holiday season so far.
They are perfect! One of these days I’ll get those darn leaves down! I hate them! I may need to “open” my tip, because it always gets wonky on me!
Just what I needed! Thanks 🙂
And, I always do better with a video – my brain just works that way ;-p
I can’t get enough of your icing accents! I’m pretty new to cookies and still developing a “style”, but it’s definitely looking like a simple flooded round or square cookie with a pretty outline and a fabulous little applique in the center is my favorite kind of design. I’m already excited about all the possibilities spring holds–from nests full of tiny eggs to cute little bunnies. 🙂
I love your videos and all the things you do.Your my favorite
Pingback: Mrs. Claus Cookies
Pingback: Decorated Holly Cookies
Excellent instructions, as I don’t do much decorating. Followed your totorial this year, froze them and added them after decorating my cookies, and they looked great. Thank you again.