Ralphie Cookies from “A Christmas Story”
“Oh, fudge!” There are only thirteen days until Christmas and so many cookies yet to be baked! That’s why I love ideas like this easy Ralphie cookie, made with a simple bunny face cutter.
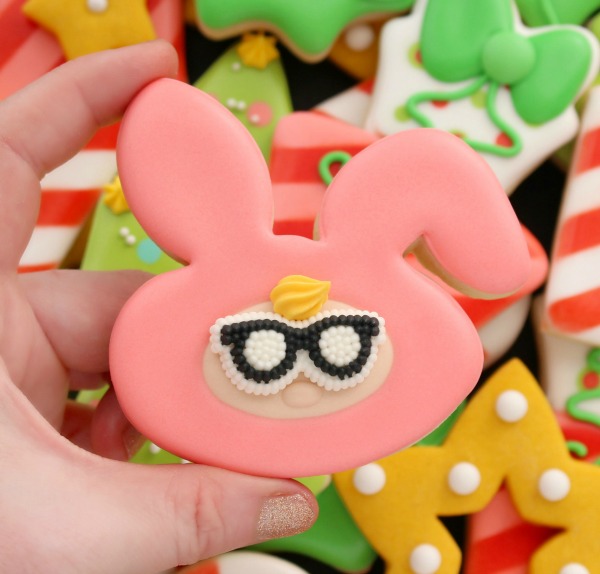
“A Christmas Story” isn’t my favorite Christmas movie, but it’s pretty close. I can’t help but identify with Ralphie, mostly because I was very much like him as a kid…and probably still am!
If you’re looking for a fun (and funny) Christmas cookie idea, this should definitely make the list.
To make these cookies you will need the following:
Supplies
- Bunny face cookie cutter (if you don’t own these specific cutters, any similar bunny face cutter will do)
- Free printable decorating template
- Food color marker
- Disposable decorating bags
- Couplers
- Icing bag ties
- Icing tips #2 and #18
- Icing bottles
- Wilton bow tie and nerdy glasses icing decorations (I’ve seen these in Hobby Lobby and Target)
Icing
- 20-second consistency light skin-tone royal icing (click here for color help)
- Pink piping and flood icing
- A small amount of stiff light yellow piping icing
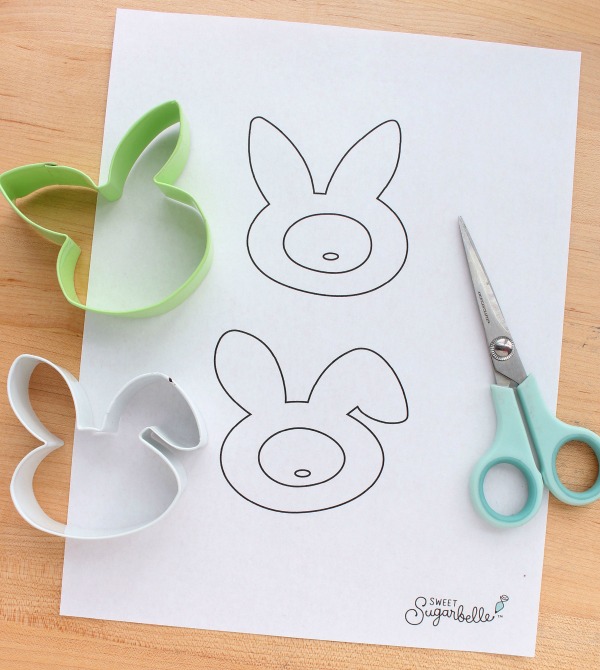
Step 1: Print out the provided template and cut out the face section. I used my two favorite Wilton bunnies, but any bunny face cutter will do.
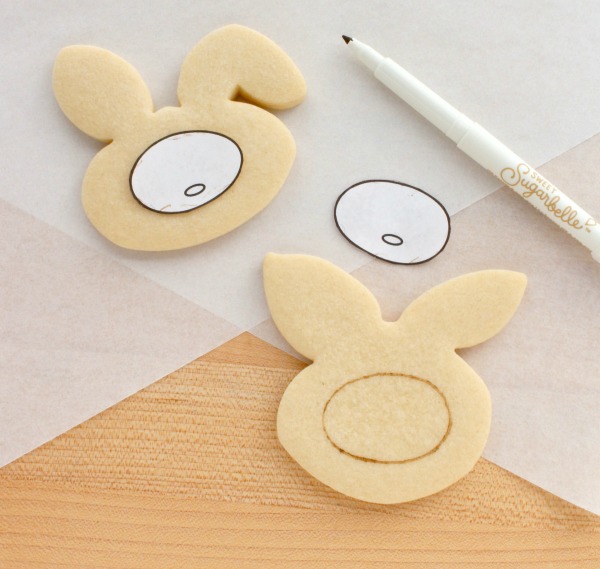
Step 2: Center the template on the cookie and use a food color marker to trace the outline on the cookie.
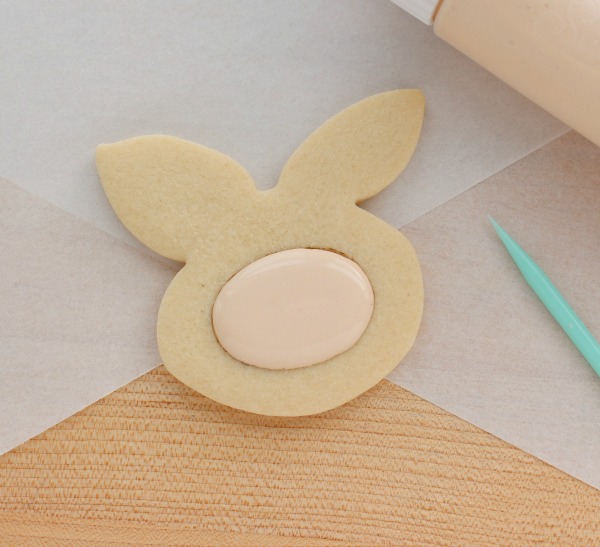
Step 3: Use skin-colored 20-second icing to fill the face. Let the cookie partially dry before moving on. This can take anywhere from thirty minutes to two hours, depending on the climate where you live.
Step 4: When the face is dry, add a tiny nose, then use a #2 tip to outline and then flood the remaining area of the bunny face pink. Let the cookie dry before moving on.
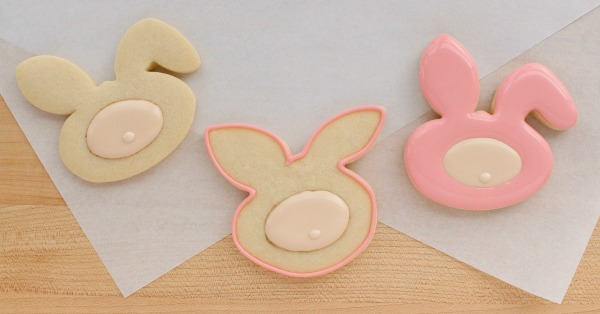
If you’re worried that the nose might crater, Jill FCS recently shared a tip on her Facebook page, and I have found it very helpful in preventing these dreaded dips. According to Jill, if you add a smaller detail on top of a crusted, but not completely dried, flooded layer, you are less likely to end up with a crater.
You can check out the full tip, with photos here.
Step 5: Use piping icing and tweezers (if necessary) to attach the icing decorations.
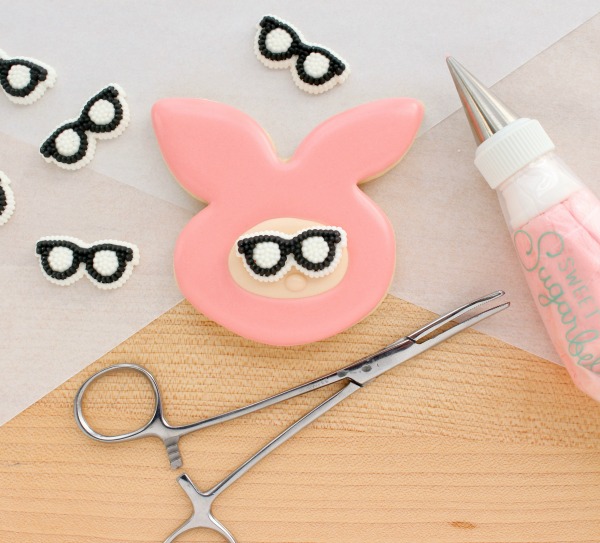
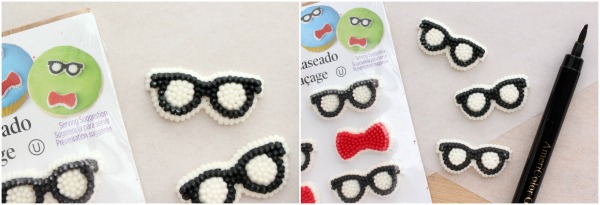
Tip: Sometimes the icing decorations can be damaged in shipping/transit. If possible, use a black food color marker to “color in” any obvious damage.
Step 6: Finish up by adding a tuft of blonde hair with a #18 tip, and that’s all there is to it! Simple, but adorable Ralphie cookies.
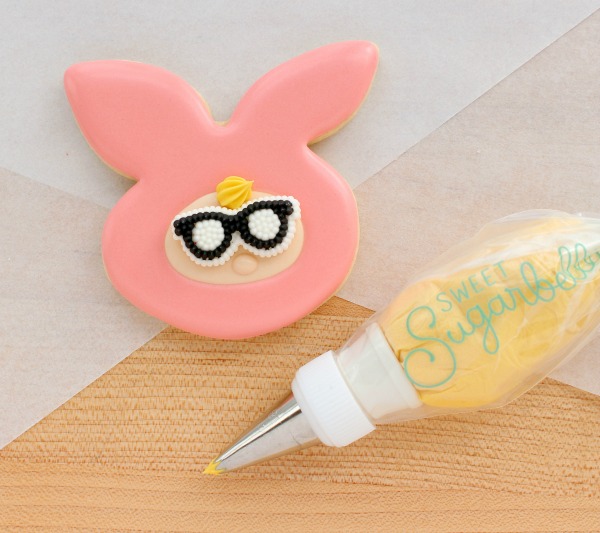
You can dress them up by adding sanding sugar or sprinkles during step four, but I kind of like the sweet simplicity of leaving them plain.
Oh, and if royal icing isn’t your jam, this design translates well to buttercream.
These look great on their own or mixed with other Christmas cookie designs.
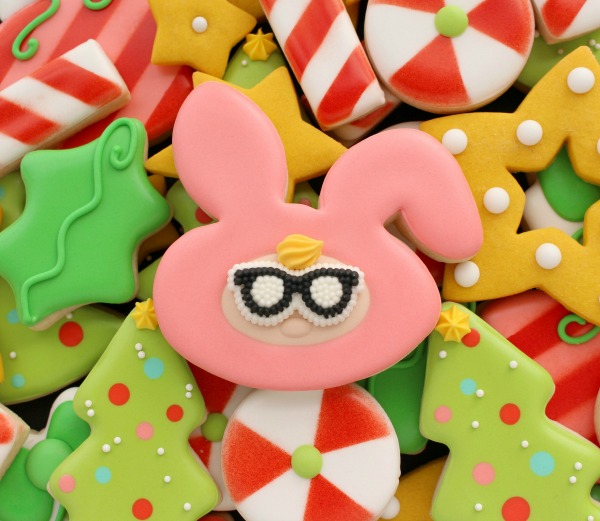
For more “A Christmas Story” cookie ideas, be sure to check out the following links!
- How to Make “A Christmas Story” Leg Lamp Cookies via Delish
- “A Christmas Story Cookies” via Oh, Sugar Events
- “You’ll shoot your eye out,” Cookies via Melissa Joy Fanciful Cookies and More
- “A Christmas Story Cookies” via Jacklyn’s Cookies
- “A Christmas Story Cookies” via Calley’s Cookie Jar on Flickr


These are so so cute!!!
Love the pink royal icing and the perfect finishing!!
I confess I Miss your cookie tutorials and it’s amazing to see the new one!
xo
Love these!!! So clever!!??
Great tutorial! Your Ralphie cookie is too cute! Thank you for the post. 🙂
Really adorable!
Love it! This might be a crazy question, but how do you get your cutter traces so clean? Do you use a program? Thank you!
love it
I’m with Paula. Every time there’s a new tutorial my heart skips a beat. Oh, the colours!
So stinking cute!!!
Thank you so much for the free template and tutorial. These bunnies are so darn cute!!
Now you just have to do the “leg lamp” cookie to go with it!
Amazing! Thank you for sharing this genius idea!!
Love these!
LOVE these! Can’t stop smiling when I look at them. These are so darn PERFECT. TFS!