Simple Decorated Yoda Cookies
Yoda. One of my favorite dudes in the entire universe. He’s actually my second favorite alien ever, but I have the sneaking suspicion that no one really cares as much as I do, so, back to the cookie thing.
I’ve been trying to perfect the Yoda cookie for about as long as I’ve been decorating cookies. I’ve done a super literal version that I loved at the time, but these days, I’m all about the simple life.
When I decorate cookies, I want to make things that are clean, fun, to the point, without a lot of stress. So, this is where I ended up. A new, slightly improved (depending on what you’re into) decorated Yoda cookie.
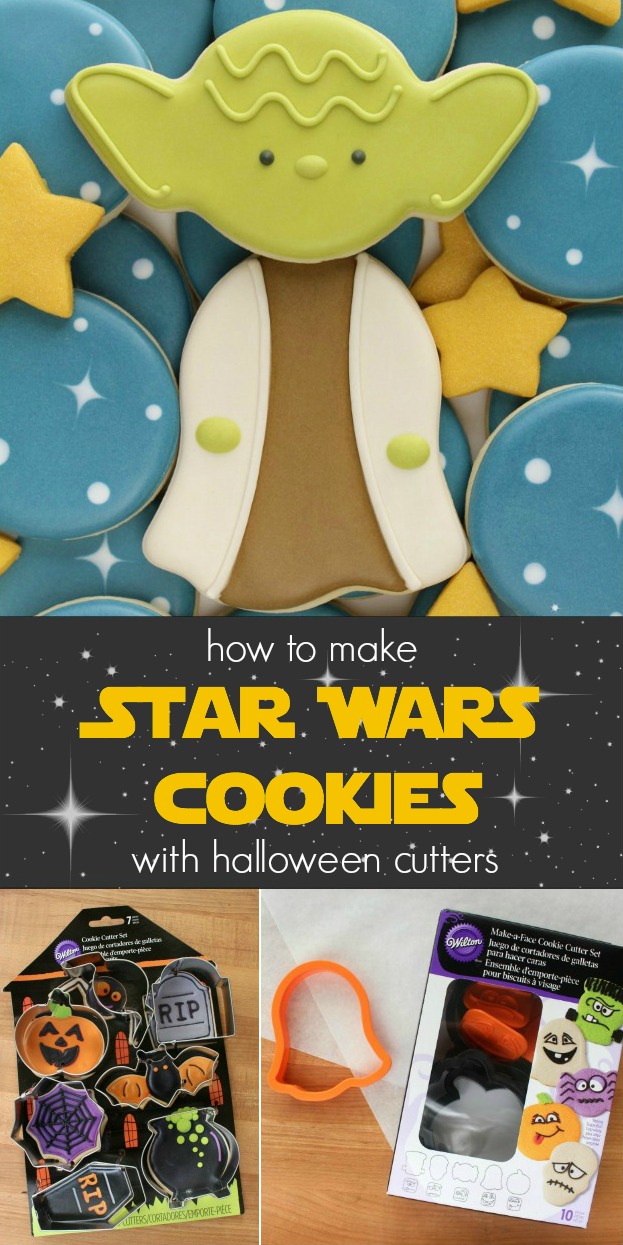
 I started exactly where I did with the original, with a fun, funky Wilton spider cutter that I picked up at Target, except this time, I used a ghost from another set to create a full body version. Pretty cool, right?
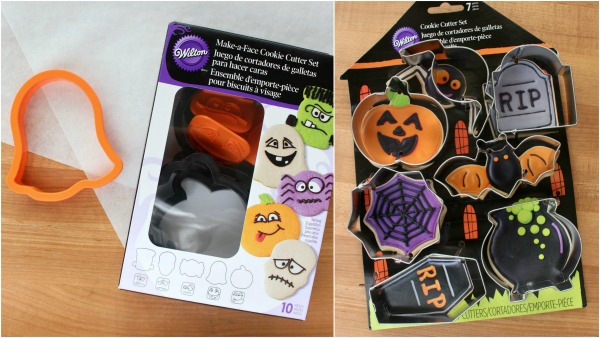
Before cutting out the cookies, you’ll need to give the spider a little pull to make it a little more Yoda-like, and then you’re good to go.
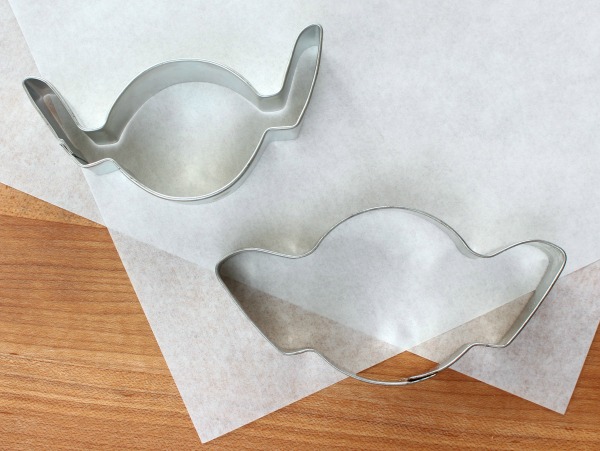
To make these cookies you will need the following supplies:
- Wilton spider cutter
- Wilton ghost cutter (use a bell if you don’t have the kit pictured above)
- Yoda green piping and flood icing (electric green +ivory)
- A small amount of black piping icing
- Dark brown 20-second icing (chocolate brown+electric green+a little bit of navy blue Progel)
- Ivory piping and flood icing
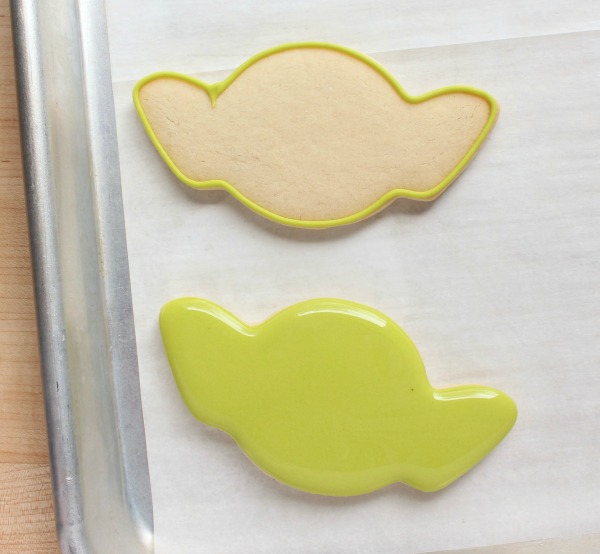
Step one: Outline the cookie with a #2 tip. When the outline has set, fill with flood icing. Let the base dry completely, which can be anywhere from 4-24 hours, depending on the climate where you live.
Step 2: When the base is dry, use a #2 tip to pipe two squiggle details on his forehead, and to define the ears. Use flood icing to make a small, oval-shaped nose.
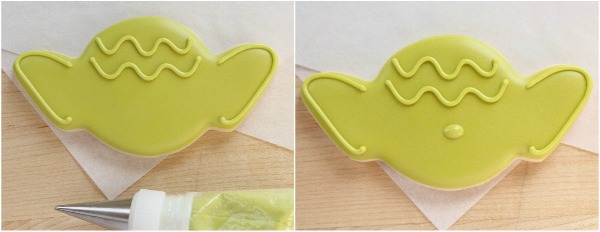
Step 3: Finish up by using black icing to pipe two eyes, almost even with the nose. I used a #2 tip.
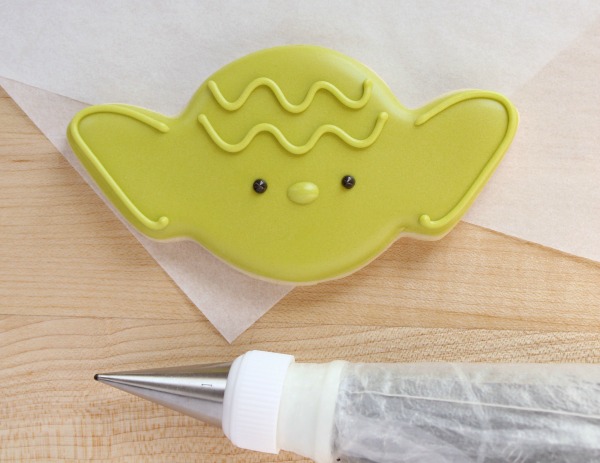
You can stop here and have a really awesome cookie, but if you’d like to take it a step further and make the full-body version, keep reading.
To make this step a little easier, I included a printable image to use as a template, or in your Kopykake or Pico projector. I went the template route. You can get yours by clicking here.
To make the Yoda’s robe, simply follow the steps below:
Step one: Cut out the template as pictured below and use a food safe marker to trace guidelines onto the cookie.
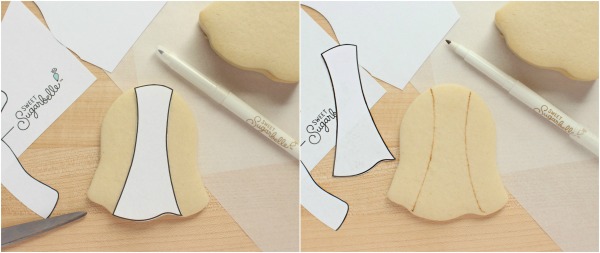
Step 2: Fill the center section with dark brown 20-second icing and let dry. This can take awhile if you live in a humid climate.
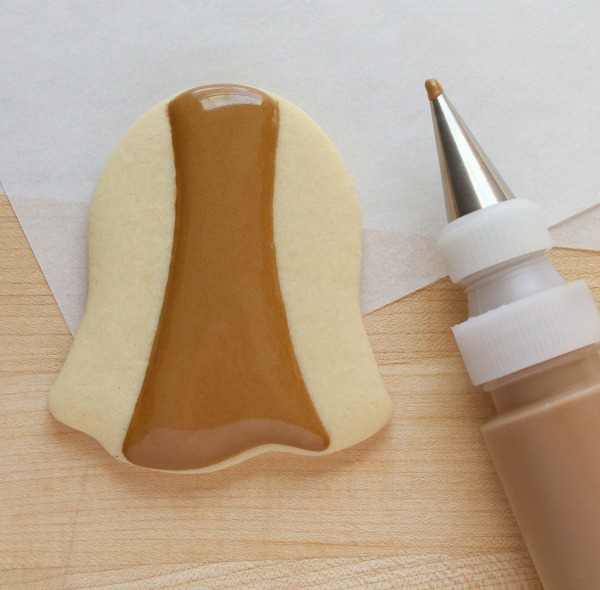
Step 3: When the brown is completely dry, outline the remaining two sections with ivory icing (I used a #2 tip) and once the outline is set, fill. Give this step a few hours to dry before moving on.
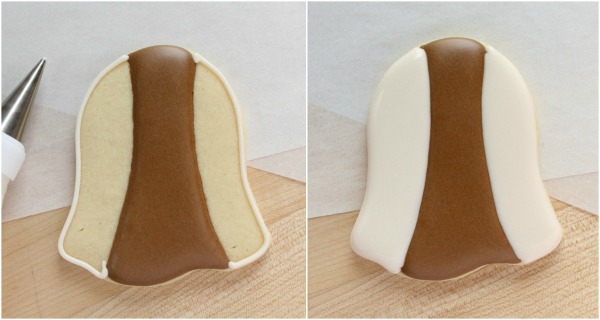
Step 4: When the base is dry, use a #301 tip, to pipe a clean line where the brown and ivory icing to connect. You can always skip this step, or use a #2 or #3 tip, but I really like the look that the #301 creates.
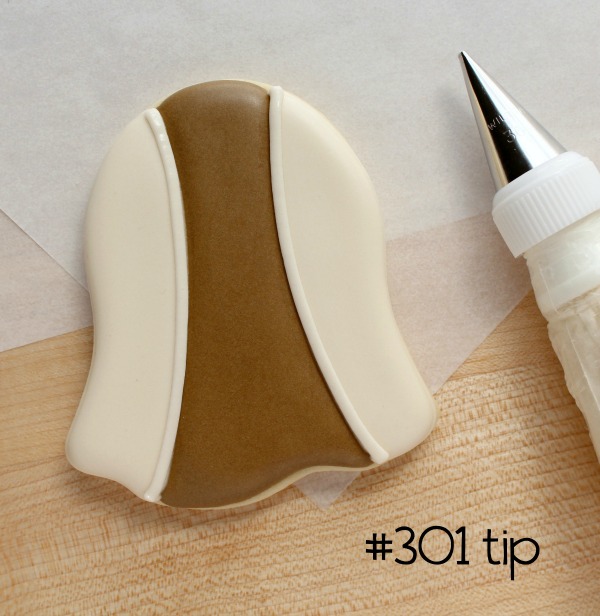
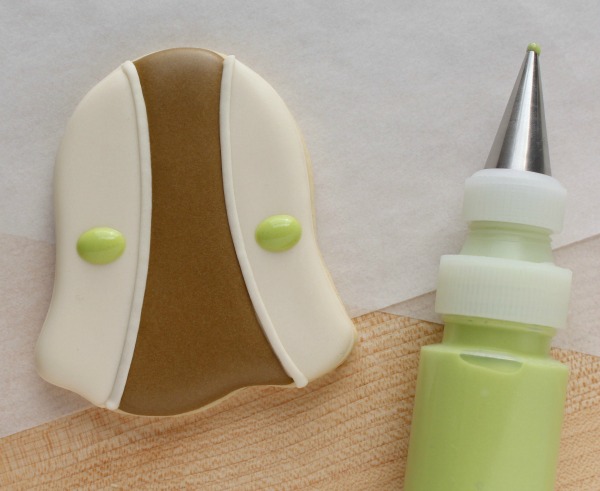
Step 5: Use the green flood icing from Yoda’s face to pipe two little dots for hands.
If you really want to get crazy, add a lightsaber or gimer stick (that’s the fancy name for Yoda’s cane for those of you who care) to round out the design.
 This cookie makes a great little two-piece boxed set, or you can mix in other simple designs to round things out if platters are more your jam.
 And if you’re short on time, or don’t like to spend hours decorating like I do, colored dough is okay too, and takes a fraction of the time. Totally up to you. The important thing is that you do what works best for you, because that’s really what art is all about.

For more fun Star Wars themed cookie ideas, check out the following posts:
 Yoda. One of my favorite dudes in the entire universe. He’s actually my second favorite alien ever, but I have the sneaking suspicion that no one really cares as much as I do, so, back to the cookie thing.


I might cry. I think I threw that away last year bc it looked totally useless!!!! Loved loved this post.
I love this! Absolutely adorable!
Excellent use of that dorky spider cutter!
Super Cute… I love him… My Granddarlings call me YODA… ( long story) pretty sure there is not to many Grandmas that collect have a Yoda collection like me… lol… My granddarlings would go crazy over these…
I want my grandarlings to call me Yoda! I love that!!!
So adorable . Thank you for this wonderful post.
I love love love this idea. I might even be able to do this..lol. Thank you for sharing!????
I’m so glad you are blogging again, but you’ve been so busy I don’t know how you find the time. Yoda is adorable and the color is perfect.
Love this! I’ve owned that spider cutter for years, and have never used it because of the wonky legs! I will now! Thank you
I think you may be the best PR person ever for Yoda. This is such a great tutorial and I love how you make everything precise, it is admirable and encouraging!
I have the spider and now I can use it, so thank you so much. My son is 24 and he loves Star Wars , has every movie and the Legos. I also bought the cutters from Williams and Sonoma , have not used them yet, but thought they might be good for fondant, have you tried them with fondant?
Omg, you’re awesome!! thank you…these are so cool. I know my grandkids will love them. Thanks a million!!!!!
I didn’t think I could love your posts more… and then you show your star wars loving colours. These make me so happy! Super cute.
So simple yet adorable! Howww do you get your icing so perfect every time?! I have read all the blogs, watched all the tutorials, and mixed hundreds of batches of icing and it still never comes out right. The worst part about cookie decorating for sure 🙁
Love this!!! I was hoping to see though if you may be planning to decorate some cookies that are Gilmore Girls themed?! 🙂
Sweet genius, these are fantastic! I’m really craving cookies now.
I like the simpler version better. It is more doable to me. I have a lot of problems with the icing and sometimes I just use fondant cut with the same cookie cutter and lay it on the hot cookie. I love your cookies. I have been watching you for years.
my two favorite aliens are Mork and Alf.
Hi, That Yoda is so cute! I bought your cookie cutter set with cute box on HSN. I’m getting ready to try and make some. But where can I find oil free vanilla. I’m not having any luck finding it. Thank you!
I love following your work! This is the best site yet!
They are so cute. I got a yoda head of soap at the school fête the other week. Love it.
can you tell me about the plastic with tip bottle that I see you have brown icing in? I think a bottle would be easier for me to control than a pastry bag.
I loved your tutorial. I made a few whole body toads and the rest faces. Everyone loved them but, while the icing was shiny going on and for a few hours overnight it turned a cloudy milky color. What am I doing wrong?
I use stick butter, 1/2 can 6 oz of condensed milk, 1 Tblspoon of Almond Extract (the real stuff) 16 ozs of powdered sugar with 1 tsp of merinque powder, Melt butter on low add other liquids, then add to powdered sugar as needed it won’t take all of the liquid, I save the rest to use as a thinner is my icing gets too thick, the trick is the constancy of the icing.
I LOVE this Yoda! I am with you- my preference as I continue designing cookies is to go for something less life like and more creative. Good job!