Decorated Hydrangea Cookies
I had never seen hydrangeas before moving to Virginia at age seventeen, but the instant I laid eyes on those beautiful, colorful blooms, I fell forever in love.
Now that I’m back home in Texas, “real” hydrangeas aren’t a possibility, but for years I have dreamed of enjoying them again. So, I made my own hydrangeas, cookie-style.
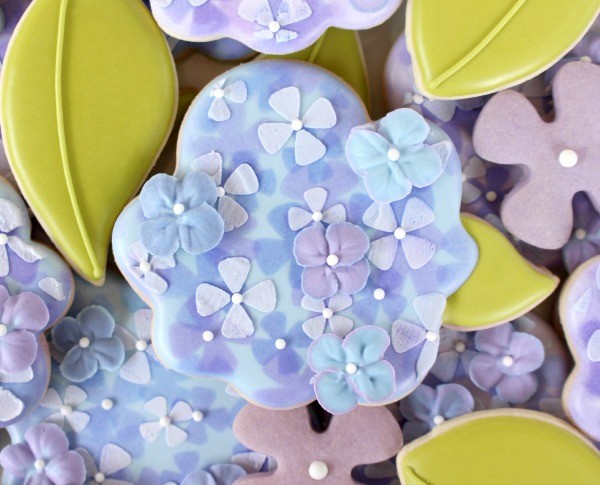 Many people believe that you need to own an airbrush system to create cookies like these, but that simply isn’t true. I was able to use Wilton Color Mist to “airbrush” cookies without the help of a machine.
To make these cookies you will need:
- Outline and flood icing in light smoky blue (mix Wilton delphinium and cornflower blue icing color)
- Wilton Color mist in violet and blue
- Stencil Genie
- Hydrangea stencils #1 and #2
- Light violet piping icing (a touch of Wilton violet icing color)
- Green 20-second icing (mix Wilton moss green and ivory)
- Royal icing hydrangea blossoms (video tutorial coming soon)
- White piping icing
I used the Whimsical Rose cutter from Whisked Aways Cutters for my interpretation, but if you prefer a more traditional hydrangea shape, this cutter would work well.
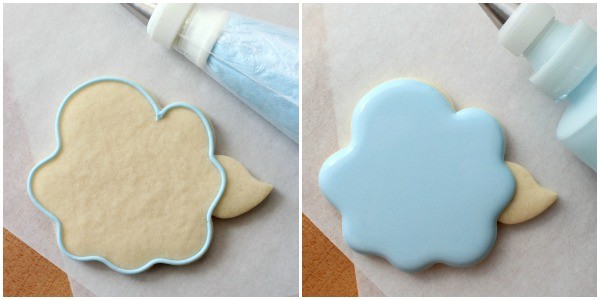
To begin, outline the flower with a #2 tip. One the outline is set, fill with smoky blue icing. After flooding, wait until the cookie is completely dry. This can take anywhere from four to twenty-four hours, depending where you live.
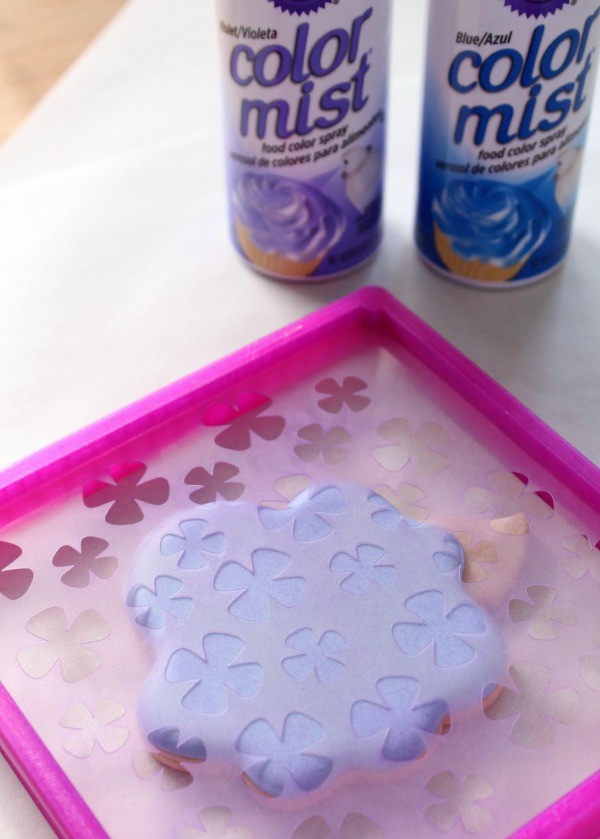
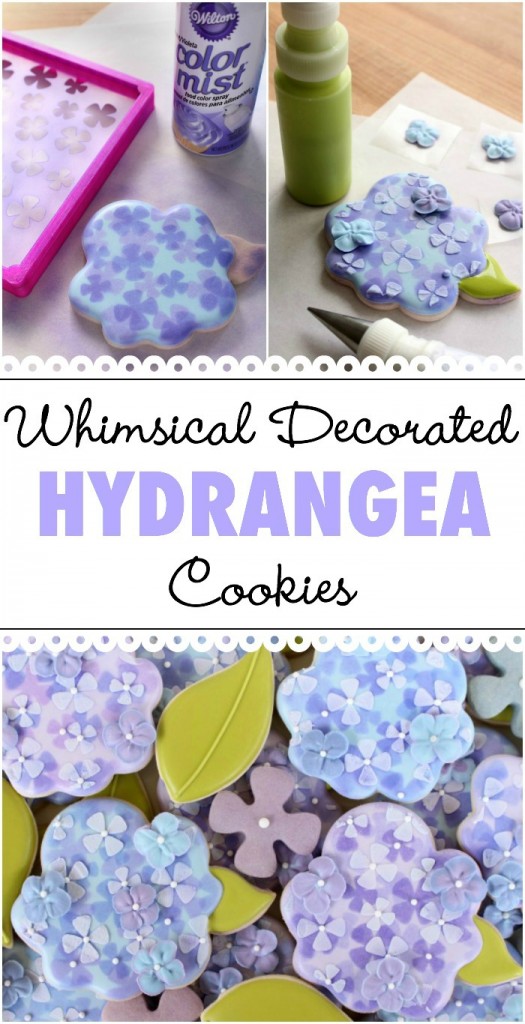
 Once the base is dry, place hydrangea stencil #1 in the Stencil Genie and give the cookie a light spray of both blue and purple Color Mist. For the best results, test the color on parchment before spraying the actual cookie and use light sweeping motions to ensure even coverage.
If you don’t have a Stencil Genie, you can also use magnets to secure the stencil as I did here, but I love how quick and easy it is to position the stencil with the Genie.
 After the first coat of Color Mist, reposition the stencil, making sure that mostly un-misted areas are visible through the openings.
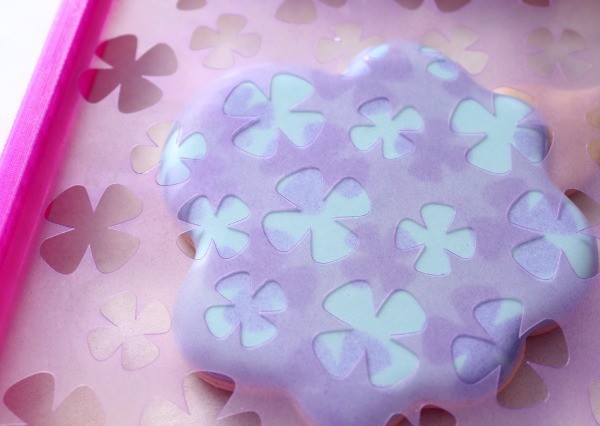 Next, add another layer of violet and blue Color Mist, a little darker this time. I showed photographs of each addition to illustrate how the layering of colors creates a completely unique shade. First the blue, then the purple, see? Pretty isn’t it.
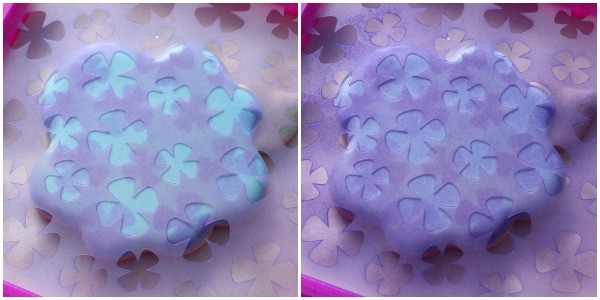 After applying the second layer, remove the Stencil Genie to reveal the color below. If it isn’t perfect the first time around, do not be discouraged. Any type of airbrushing takes practice. Make a few extra cookies just in case, and remember, nature is perfectly imperfect. Uneven coverage and overspray just make this cookie more interesting.
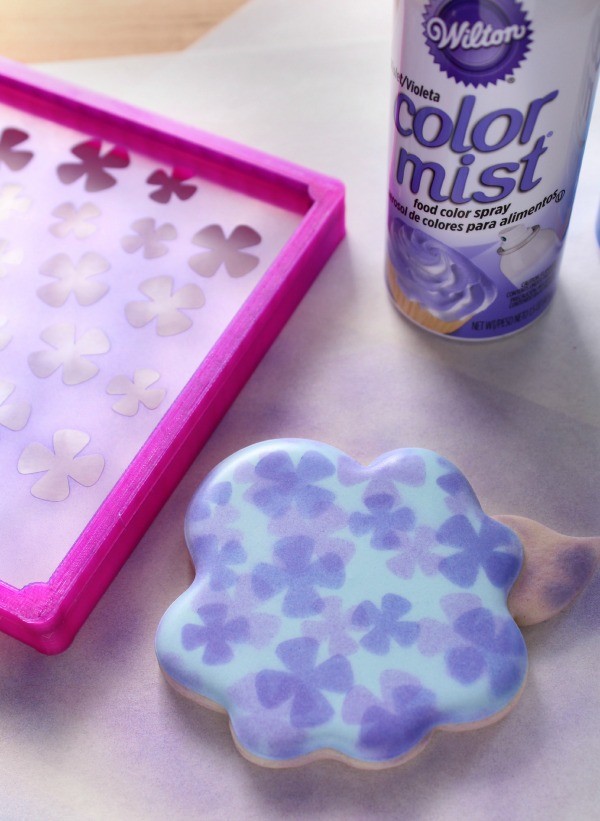 Give the airbrushed flowers a bit of time to dry (to prevent bleeding) then move onto the next step.
Secure hydrangea stencil #2 in the Stencil Genie, and use light violet piping icing to stencil the pattern over the previous layers.
For a more in depth look at stenciling with royal icing, see this post.
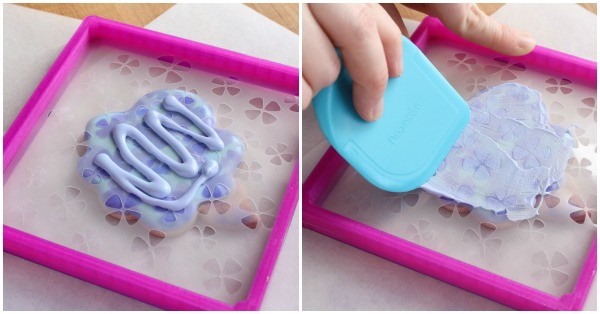 After adding the royal icing layer, remove the Stencil Genie and use a cookie scraper (aka boo boo stick) to gently remove any excess icing.
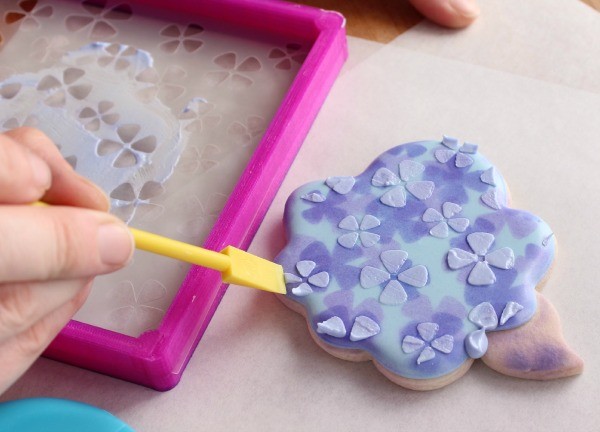 When the final layer of stenciled flowers is dry, use green 20-second icing to flood the leaf, then attach royal icing hydrangea blossoms with leftover light violet icing. Pay special attention to any bare spots or mistakes that might be visible, and use the flowers to disguise them.
In my experience, many people prefer cookies without royal icing accents, because they can be a little crunchy or hard. Ensure that the blossoms are easily removable by using only three or four flowers attached with just enough icing to secure them.
If you would rather not use royal icing flowers at all, you can definitely skip this step and still have a gorgeous cookie, but I think it adds a little something special to the final product.
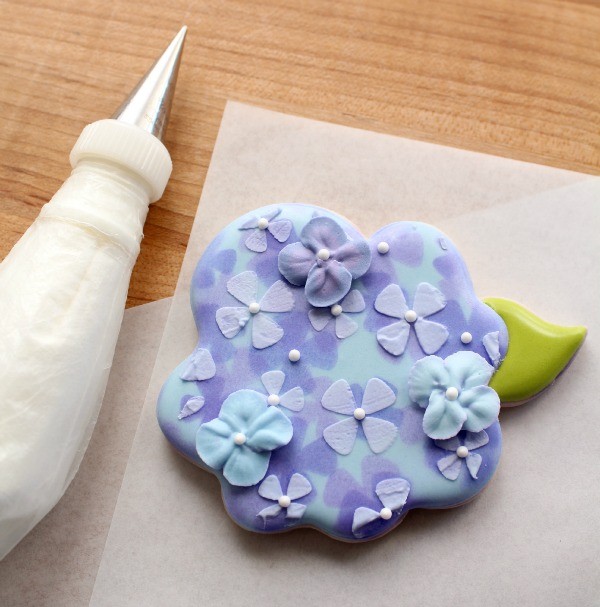
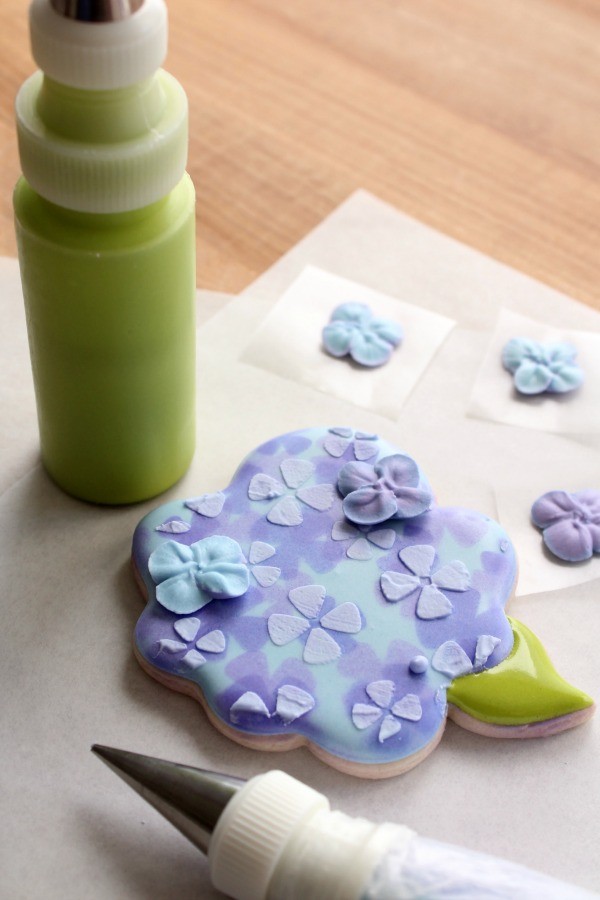 Finish up by piping white dots in the center of several of the flowers. I dotted all of the piped and stenciled royal icing flowers, and a few of the airbrushed ones.
If videos are more your thing, be sure to check out the live version of this post on my new and improved YouTube channel.
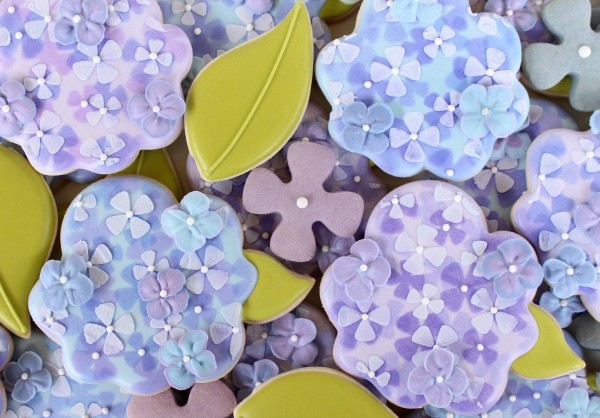
I mixed my hydrangeas with whimsical leaves, and simple cookie blossoms made out of colored dough. They aren’t an exact replica of the real thing, but they make my heart just as happy. I cannot wait to make them in other colors!
 Word of caution, Wilton Color Mist spray can be extremely messy. I have a blue baby to prove it. Be sure to cover all surrounding surfaces to protect them from airbrush color. Use butcher paper, old newspapers, science fair backboards, or disposable plastic tablecloths for easy clean up. You may even want to wear a mask, otherwise be prepared for a colorful surprise the next time you sneeze!
If you plan on airbrushing cookies often, I suggest investing in Wilton’s new airbrush system and colors, now available at Michaels. Be sure to use their weekly coupons for even more savings.
If you would like to see a video of the actual decorating process, leave a comment, and I will get one posted on my YouTube channel very soon.
If you like these cookies, be sure to check out the following posts:
- Brush Embroidery Hydrangea Cookies via Glorious Treats
- Molded Hydrangea Cookies via Montreal Confections (video)
- Adding Leaves to Flower Cookies
- Hydrangea Cookie Cutter via Copper Gifts
- How to Pipe Royal Icing Hydrangea Blossoms (video) -Coming Soon
- Hydrangea Cookies via The Pastry Princess
- Hydrangea Cake via I Am Baker (this is another great way to pipe hydrangea blooms but for cookies I recommend a #101 tip)


These are beautiful and I love how you used the stencil in layers. I agree with you about people not liking too many royal icing accents – at least I don’t. I often see cookies that have so much RI in the detail and accents, I’m afraid if I bit into one, I’d crack a few teeth! 😉
Perfection Callye! Love, love, love these! You are so creative! Thanks for sharing these with us! ????
So beautiful! The “blue baby” comment was too funny!
This cookie is beautiful! Can’t wait for the tutorial video on how to make them and the tutorial video on how you made the royal icing flowers!! Hope it didn’t take to long to turn your little smuf back into a baby. LOL.
I cannot get over how gorgeous these are! The layers add such depth and interest. I really love your artistic take on how you approach things. Thank you again for thinking of us for your wonderful cutter design!
Amazing! Loved seeing how you brought this design to life.
I would love a vdeo! Especially of the flowers Yay
So beautiful! I need that genie! Thanks for the tutorial, Callye!
WOW, Callye! These cookies are absolutely stunning!! I love that you used multiple techniques to layer upon each other for more detail. Can’t wait to see how you make the royal icing flowers!
Absolutely stunning Callye!! I love the depth and dimension and color!! I as so gonna miss the hydrangeas from my mother’s garden but I hear bluebonnets are beautiful too-though have yet to see any!! 🙂
beautiful…trop beaux…congratulation
Emma depuis la France.
These are my new favorite cookies. They are perfect! You are a genius!
My Mom loved hydrangeas so we grew up always having them. Mine are blooming now! Your are absolutely beautiful. 🙂
Beautiful!!!
Where do u get the stencils from? Are they just any stencils that are cut to fit the Genie? Thank you for your help.
I shop at The Cookie Countess and Artfully Designed most of the time (there are links to both shops in the sidebar and to the exact stencils I used in the post)…as for the Stencil Genie, it can be adapted to work with other stencils, but the shops mentioned above (and others) specialize in cookie stencils, so I would recommend them, because of the ease of use.
I like this tutorial!
lI hope you and the family are safe from the flooding in Texas.
wow.. thats awesome 🙂
vmenplus
Thanks so much for this tutorial! I made some of these two weeks ago as part of a large set I made for my son’s wedding, as his bride chose hydrangeas for wedding flowers. They turned out beautiful, and I will definitely make them again on their own. I’m just a hobby baker, but greatly appreciate your sharing detailed instructions & designs like this! Thanks again!!!
These are georgeous! I have seen that spray before but never thought to use it on sugar cookies. Thanks for the tutorial!
I love the multi use of one stencil for this flower. Truly love all ur cookie designs.
Hello! Ma name is Mariya. I’m from Russia. I like your cookies! I’m not well in English, but try hard. I want to be your friend. And l want you be my teacher in cookies.
Beautiful cookies!
I don’t see a video on how to make the flowers – has it been posted yet?
These are so beautiful! I notice the cookie cutter comes in various sizes. What size cookie cutter did you use?
You are always so sweet to share “how” to achieve-the-look! You have inspired me from the beginning of my cookie journey a couple of years back. I poured over you’re website to get information & found your’s the most helpful of all. Thank you for always encouraging the rest of us!