Decorated Golf Cookies
Father’s Day is coming soon, and in my world that means lots of cookies in the traditional themes. At the top of the list, golf cookies.
To be honest, I don’t know much about golf. I went to the driving range (I think that’s what it’s called) with a couple of friends in high school and after about three swings, one of them forbade me to touch her clubs. What a grouch, right?
Most recently, my husband forced me to watch the Masters. After three days I learned two things. It’s a pretty big deal to win that not-so-stylish green jacket, and if I ever can’t sleep, golf is the answer.
Seriously though, I may not cut it out on the course, but golf cookies? Those I can do.
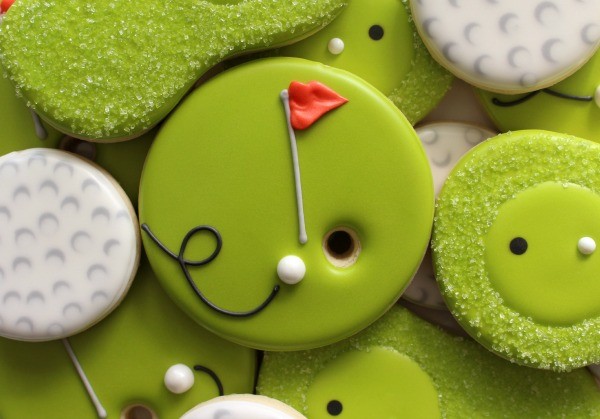 These simple cookies were inspired by Cookie Craft, a cookie decorating classic. Chances are, if you’re into decorated cookies, you own, or at least know of this book.
This timeless classic features over one-hundred and fifty cookie designs, along with recipes and practical tips for anyone interested in the art of cookie decorating.
If you’re familiar with Cookie Craft you might have noticed that it looks a little different. Not to worry, it’s the same book you know and love with a fresh new cover. Isn’t it pretty?
Better yet, it’s now in paperback.
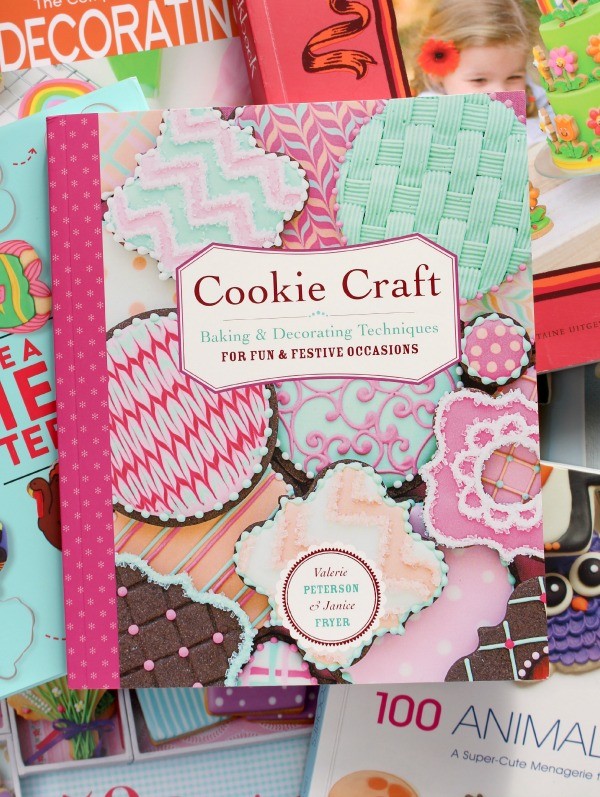 Reading through my new copy of Cookie Craft inspired me to put my own spin on their classic putting green design. So, I made golf cookies, Sugarbelle-style.
Start with your favorite cookie recipe and cut into rounds. If you don’t have a favorite, you can find mine here.
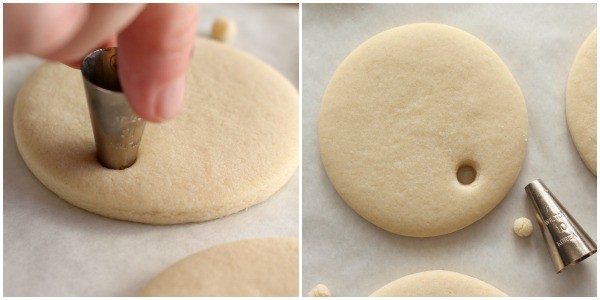
Immediately after baking use a large round tip (I went with a #10) to quickly cut a small hole near the bottom edge of the cookie.
Word to the wise — by “immediately” I mean cut the cookies as soon as they come out of the oven! This is important for a nice clean cut. Also, be very careful not to burn yourself (not that I’ve ever done that).
If you’re cutting a lot of cookies, I also recommend using two tips. That way you can switch them out and continue to cut while the other one cools.
 To make these cookies you will need:
- Green piping and flood icing (make the flood icing a little on the thicker side)
- Large white sugar pearls
- Gray piping icing
- Red piping icing
- Black piping icing
Outline the cookie with a #2 tip.
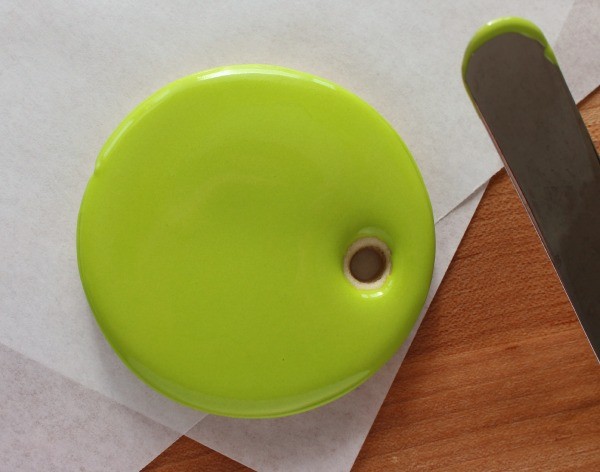
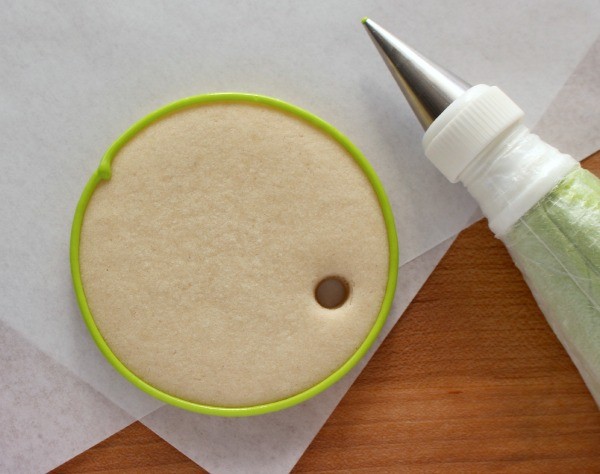 Quickly flood the cookie, leaving the cut out space open. Immediately drop a sugar pearl into the wet icing and let dry.
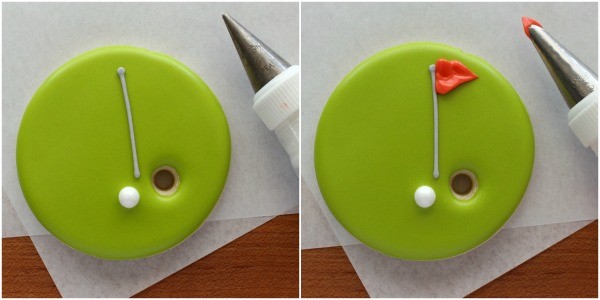
 When the base is completely dry, pipe the details. Use gray icing and a #2 tip to pipe a flagpole. Let the pole dry, then use a #66 leaf tip to add a flag. I made my flag a little wavy so it looks like it’s fluttering in the wind, but if you like straight flags you can do that too.
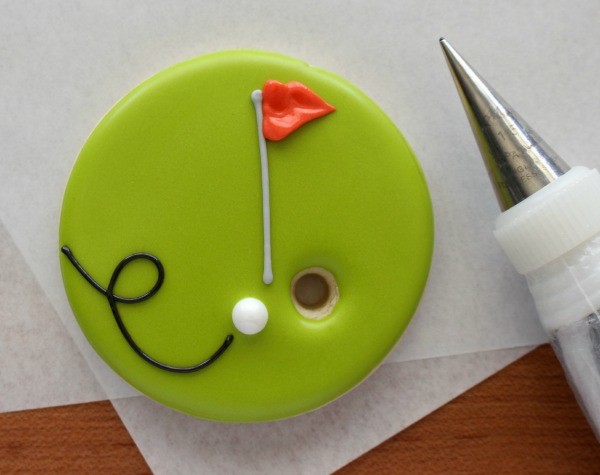
 Finish up by using black icing and a #1.5 tip to pipe a loopy ball trail. To avoid wonky lines, I suggest starting at the ball and piping back toward the edge. You may also notice that I used a solid line instead of dashes like the original. With four kids, I just don’t have time for all that. If you like dashes better, then by all means, do dashes.
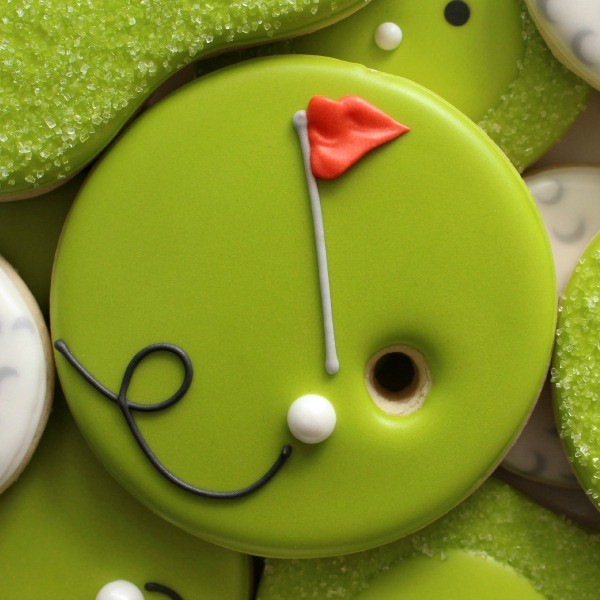
 Now before anyone gets huffy, let me just say, I’m fully aware that women also play golf. So, if you want to make these for a girl, say for Mother’s day, then go for it. Girls like golf too.
If you don’t already have a copy of Cookie Craft, you need one. You can pick it up here. For more fun golf cookie inspiration, be sure to check out the following links:
- Decorated Golf Ball Cookies
- Simple Golf Cookies via The Bearfoot Baker
- How to Make Decorated Golf Cookies for Father’s Day via Lila Loa
- Golf Cookie for Father’s Day via Sweet Ambs
- Golf Bag Cookies (and another poor soul who cannot golf) via Royal Icing Diaries
- Go Bo! Golf Cookies (my all-time favorite golf cookies) via Jill FCS



I love your golf cookies! The wavy flag is so darn cute that is almost makes me want to learn how to play golf. Notice I said, “Almost!”
These are super cool and what a brilliant idea Callye!!! 🙂
These are so awesome!!!! I can’t wait to see the full set. LOVE that golf tee and the one with the sanding sugar!
Oh, and you changed your banner!! I like it! 🙂
Red golf flags. My nemesis. In golf (seriously a par three course shouldn’t be so darn hard!) and in cookies. My red always bleeds into the background. Always. No matter the shade of red. No matter the colour of the background. No matter the humidity, or how long I wait before layering the red on the top of the background. Always. They look great that night – I’m always decorating at night it seems – but when I get up in the morning, there’s a little bled halo around any red elements. (brown and orange give me similar results, but red is the worst!!) Help help help!!
These are adorable! I hope you are going to show us the rest! How did you get your shade of green? Love it! And is that green sanding sugar or just white? I would love to try these for my dad.
That’s the worst! I used to fight that problem all the time. There are a couple things I did to prevent it. The biggest one was to make dark colors 2-3 days before. You would be amazed how little color you need when you let it set and deepen. I only do black to about a charcoal grey, and my reds only to the point where you can tell I put in red food coloring instead of pink. If they aren’t quite dark enough when I’m ready I’ll add more. The other thing I’ve done and was super scary was to put them back into the oven on the lowest setting for about 10 minutes. It dried the icing without bleeding but on a white background I sometimes have grease leak into the icing.
Adorable! I wish my husband liked cookies (he doesn’t care for sweets, crazy person) because I would make these for his birthday or Father’s Day, he is an avid golfer. Surely I could find someone to give them to. Just too cute!
These are just wonderful. I try to duplicate many of of your designs, and I just don’t have your talent. I enjoy my own efforts nonetheless. I do have a question for which I think I already know your response to. How in the world do you keep the icing from falling into the hole. I suspect you will say piping around it and having the correct icing consistency. The icing consistency is always my biggest challenge. Thanks for your great designs.
These are so clever! I love the cutout! And I love that shade of green, it’s perfect for the green 😉
Love it.
Just adore the leaf tip for the flag, it really does look like its flapping in the wind. Love these!
You make it look so smooth and effortless! Love them. 🙂 Time to subscribe to your you tube channel! Your new header is SWEET!
excelente
So cute!!! You scored a “hole in one” with this design!
Pingback: friday faves: june 12
Pingback: 20 Fun and Simple Decorated Cookies for Father's Day
Pingback: Edible Gifts for Father's Day | Style Sprinter
Pingback: How to Make Easy Hole in One Golf Cookies
I love this creative design. Flag looking so good.
Thanks for great recipe
Love these and I’m actually making them now. 1 problem and maybe you have an easy fix…some of my golf “balls” are staying stuck to the cookie. Any suggestions? I love using the pearls instead of a dot of icing, but not if they keep coming off. Thanks!!!
Shoot sorry — auto correct issues! Some balls AREN’T staying on the cookie. I dropped them on while the icing was wet and they are completely dry now. Thanks again!
Such an adorable Father’s Day gift! I’ve included it in my roundup of best Father’s Day crafts for the Dad who’s a sports fanatic 🙂
http://grumpymommy.com/fathers-day-crafts-for-dad-sports-fan
When you say, “flood the cookie” with icing, are you using the decorating bag or a decorating/icing spatula?
I also would like to know how to flood the cookie. JUst make it super thin and put it in a decorator bag?