Colorful Airbrushed Autumn Leaf Cookies {Guest Post}
Want to make beautiful, colorful cookies without mixing a single icing color? Today The Cookie Countess shows us how!
![]() I love decorating cookies. I really, really do. But I’m going to let you in on a little secret…I loathe coloring icing and dealing with bags. Mixing colors, dodging of that splat of gel when you first open a new food color bottle, loading and cleaning bags, drying and sorting tips…drives me bonkers.
I love decorating cookies. I really, really do. But I’m going to let you in on a little secret…I loathe coloring icing and dealing with bags. Mixing colors, dodging of that splat of gel when you first open a new food color bottle, loading and cleaning bags, drying and sorting tips…drives me bonkers.
This is one of the main reasons I originally became interested in airbrushing and stenciling. It was nothing short of amazing. It gave me endless color and design options without making multiple bags of colored icing.
Fast forward almost two years and I have been happily stenciling and creating colorful cookies in much less time and without the hassle. Woo hoo! More time for Facebook! (Wait, was that out loud?) I mean-more time for family! (Yes, that sounds better.) It has led me to experiment with some different ways to achieve dimension and color through stenciling and airbrushing.
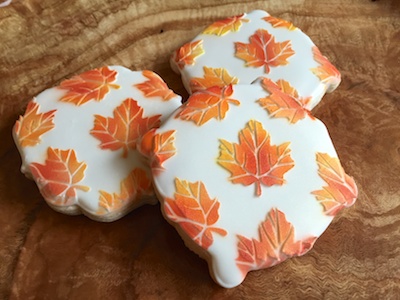
Today I am going to show you how to make these vibrant and beautiful fall leaf cookies, all without mixing up a single icing color.
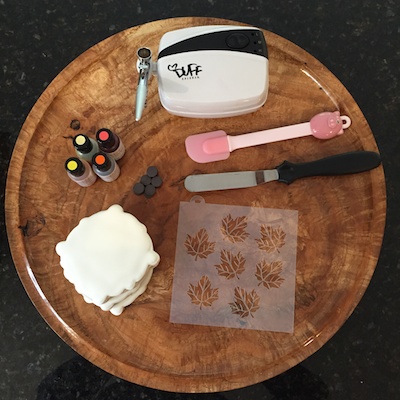
 For this project you will need:
- White iced cookies that have been allowed to fully dry
- White stiff consistency royal icing
- Leaf stencil, available here in my online store
- Airbrush
- Yellow, orange, red, and gold airbrush color
- Rubber or metal spatula
- Magnets (0ptional)
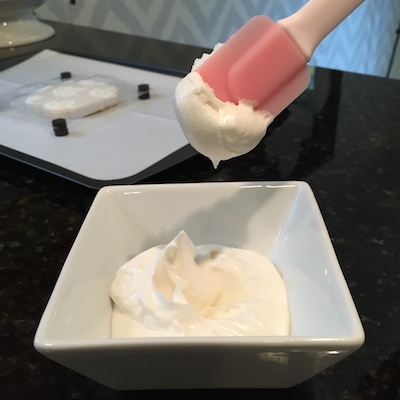
 Begin with stiff consistency icing and a small spatula. For the icing to hold its shape after you lift off the stencil, it must be thick and not spread at all, thicker than piping consistency.
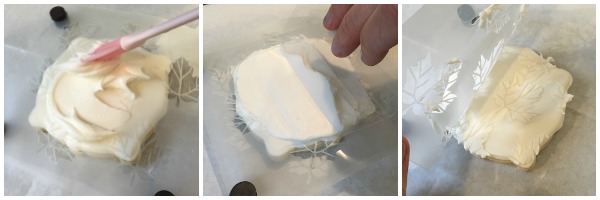
 The first step is to stencil the dry flooded cookies with white royal icing. If using magnets, position the stencil on top of the cookie and anchor with magnets. Be sure to work on a magnetic cookie sheet to ensure that everything stays in place.
Spread the icing over the stencil and cookie with a spatula. It should be a somewhat even layer, but don’t worry about perfection just yet. Try to stay within the border of the cookie.
Next, remove the excess icing. For this project, I’m using a piece of plastic I cut from the lid of a yogurt container. I like the shape, size, and small amount of flexibility it provides. An offset metal spatula, a large rubber spatula or a bench scraper work well also.
Just do your best to leave an even and smooth layer. Then carefully remove the stencil to reveal the beautiful leaf pattern underneath.
 If you have any bit of icing that hang off the edge of the stencil, simply remove them with a scribe tool, or toothpick. Even with just the white design you have a beautiful cookie!
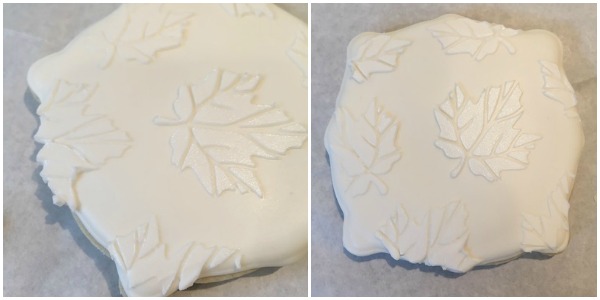 Once the icing has dried (twenty minutes or so) you can begin airbrushing. Place the cookie back under the stencil and line it up with the previously stenciled design. Press down lightly on the stencil so it “clicks” into place.
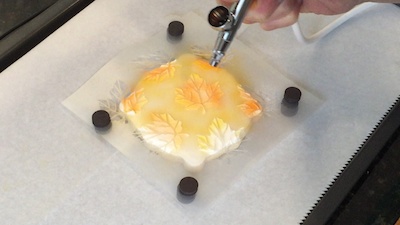 To achieve the look of fall leaves, use red yellow and orange airbrush colors, in that order, spraying in random patters over the leaves. As in nature, no two leaves will be exactly alike. If making multiple cookies, spray one color on all the cookies and repeat for each subsequent color.
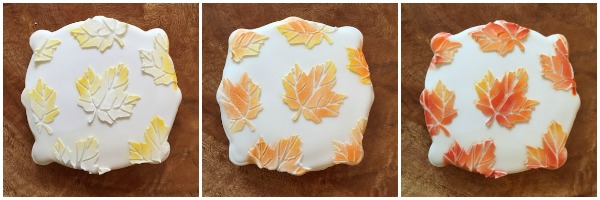 To finish up, mist with a light layer of gold sheen for a little sparkle and depth.
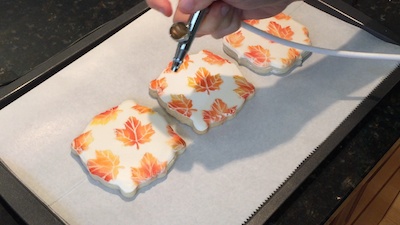 Those of you who prefer videos, you can watch me in action here.
There you have it! Beautiful, colorful cookies with no color mixing involved. Doesn’t that make you happy? Here are a few more examples of cookies made using this technique.
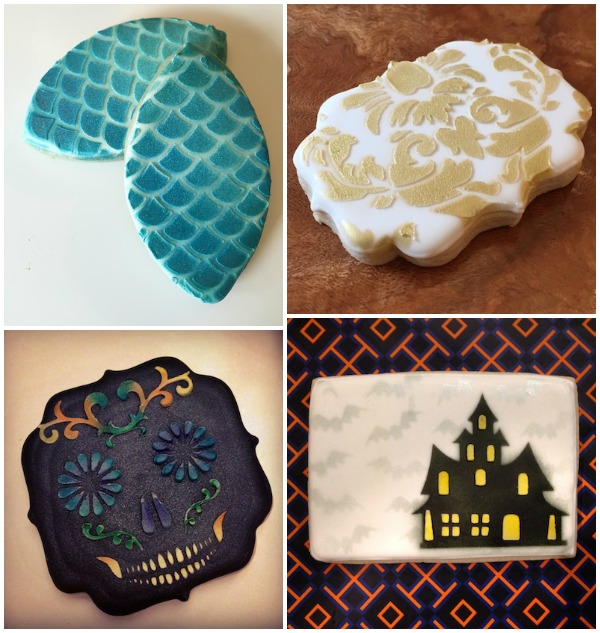 I hope you have fun trying out stenciling with royal icing and an airbrush. Please stop by my Facebook page and share your pics! I would love to see them!
![]() Be sure to check out Hillary’s website, The Cookie Countess, for all your cookie stencil needs. For more inspiration, check out the following posts:
Be sure to check out Hillary’s website, The Cookie Countess, for all your cookie stencil needs. For more inspiration, check out the following posts:
- Pretty Damask Stenciled Cookies
- Easy Bandana Print Cookies
- Masking Cookie Stencils with Press and Seal Wrap
- How to Accent Decorated Cookies with Stencils
- Stenciling Cookies with Magnets


They are beyond gorgeous and stunning and everything in between, I’ve got my airbrush out and have been having so much fun!
Your airbrushing skills and design ideas are beyond! Beautiful collection of cookies.
Beautiful fall leaves and the haunted house is so cute. When using several different colors, I presume you have to clean out the airbrush every time? I know what you mean about mixing colors, I always have too much icing left over, I do try to use it for run outs etc but still throw icing away. Thanks in advance 🙂
Hi Claire! I sometimes clean my airbrush out between colors and sometimes not. If I have a dark color like black – yes, I will rinse it out, dry it and move on to the next color. If I’m moving from a light color to a dark I don’t always clean it. In this case – spray out any remaining color of the first color, load the second color, and then spray that color on to a paper towel until you see that color spray true. Just takes a second or so. Hope that helps! 🙂 -Hillary
Wow! Just amazing! You just might inspire me to delve into the world of air-brushing!
Great video! I am going to look at others. Thank you Callye and Countess!
Your work is out of this world. I am always amazed of your creations and how you transform cookie cutters to design beautiful things!
Exclusive blog. I love to visit your blog.. Thanks for sharing.
I really have never thought about the airbrush meaning that I wouldn’t have to mix so many colors and bags! Genius! 😀
Your content is really great and effective to learning about autumn leaf. It is really super. Thanks for sharing great content here.