Whimsical Reindeer Cookies with Cookies with Character {Guest Post}
What happens when a former Disney animator becomes a cookie artisan? Amazing things, is all.
I fell in love with Krista, of Cookies with Character a few years ago. Besides being amazingly perfect, her cookies have so much…CHARACTER!
When this amazing cookie landed in my inbox, I was completely inspired. I’ve seen gingerbread reindeer, but never like this!
![]() Hey there fellow cookie lovers! I’m Krista from Cookies with Character.
Hey there fellow cookie lovers! I’m Krista from Cookies with Character.
When Callye asked me to do a guest post, first I picked myself up off the floor, then I started racking my brain for just the right thing to do. These fun whimsical reindeer were something that I have always wanted to do, so what a better time than now? Thanks for having me!
 I’d like to say that this is not my original idea. The idea of reindeer made on an upside down gingerbread cookie has been around for a long while. This is my take on it.
Supplies:
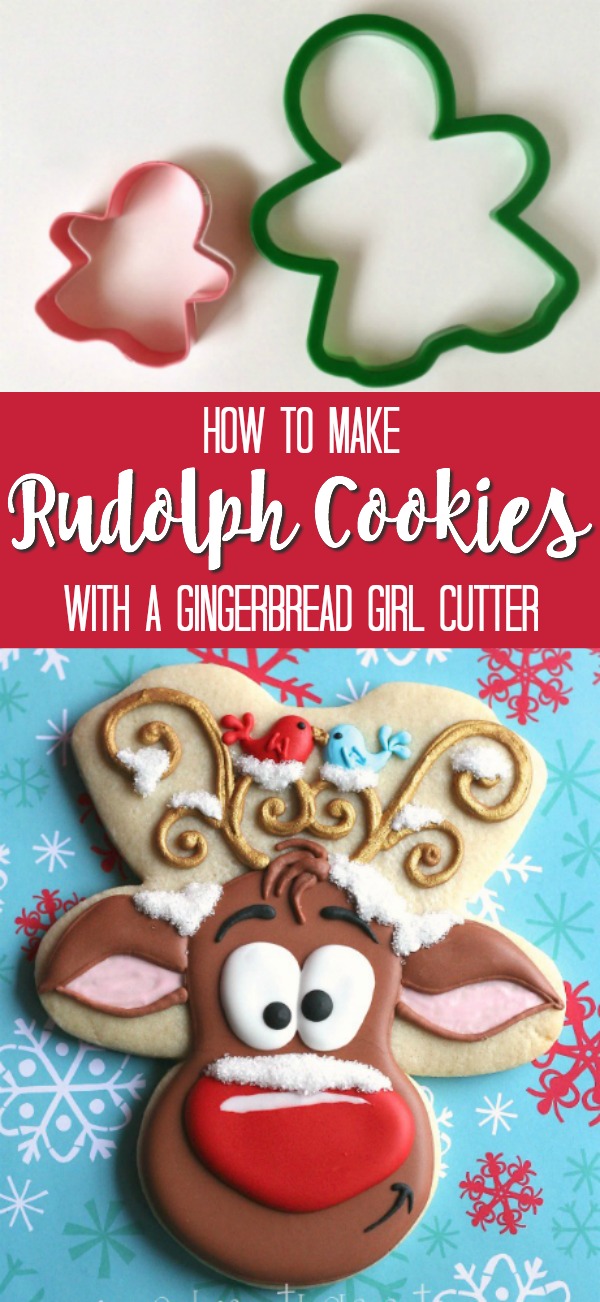
- Baked “Female” Gingerbread cookies in any size {I used a cutter like this}
- Brown piping and flood icing
- Pink flood icing
- Red 20-second icing
- Blue 20-second icing
- White 20-second icing
- Black piping icing
- White sugar sprinkles
- Gold petal dust and some form of alcohol to mix with it {I use vodka but any extract with a percentage of alcohol will do}
First off, choose a cutter. I went with a large gingerbread cookie cutter, six inches to be exact, because I knew my kids would love them. You can pick any size you want.
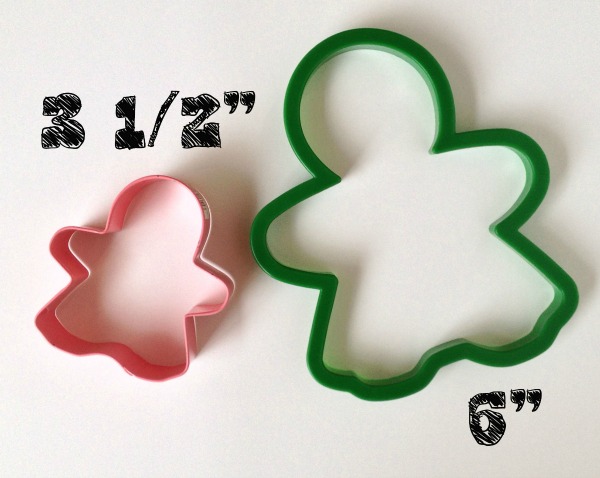 Flip the cutter upside down. I chose the female gingerbread because of the skirt allows more room for the lovebirds and whimsical antlers.
Begin by outlining the head of the reindeer with edible markers. Sketching a design on a cookie before hand is a great way to keep things straight, especially if you don’t have a Kopykake.
Just make a big heavy bottomed pear shape, then add some big ‘ol floppy ears.
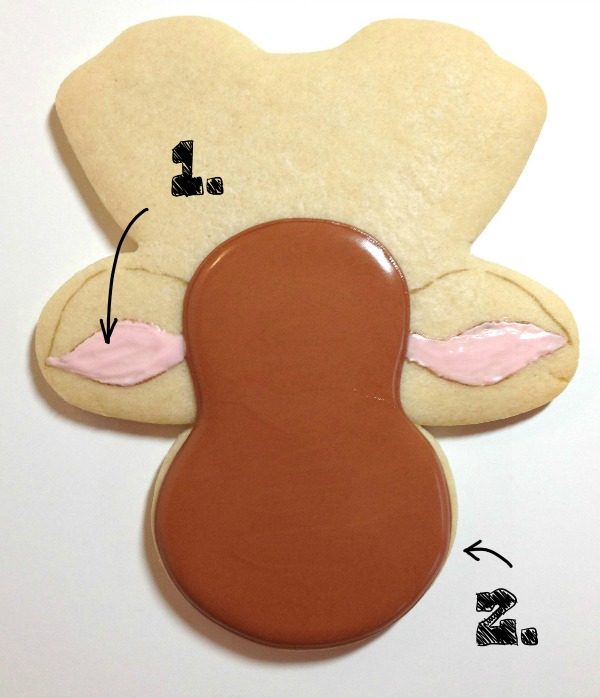
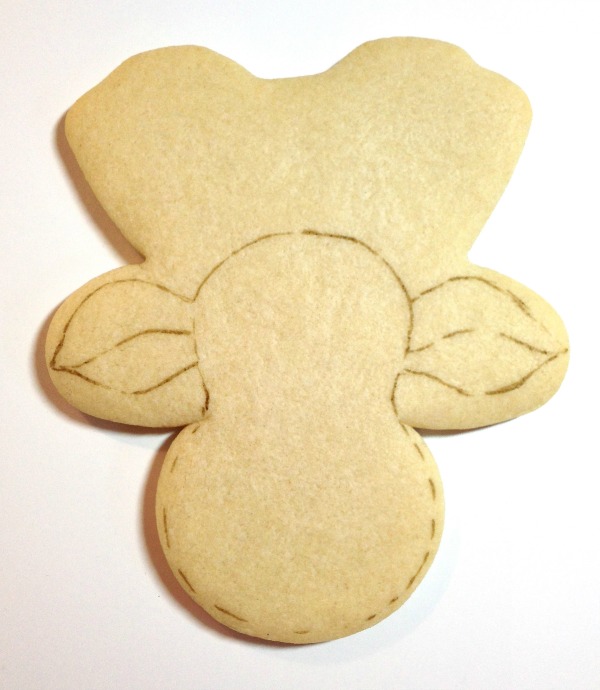 Brush a very light coat of flood consistency pink icing on what will be the inside of the ears. This will dry fast due to how thin it is.
 - Outline and flood head and snout with brown.
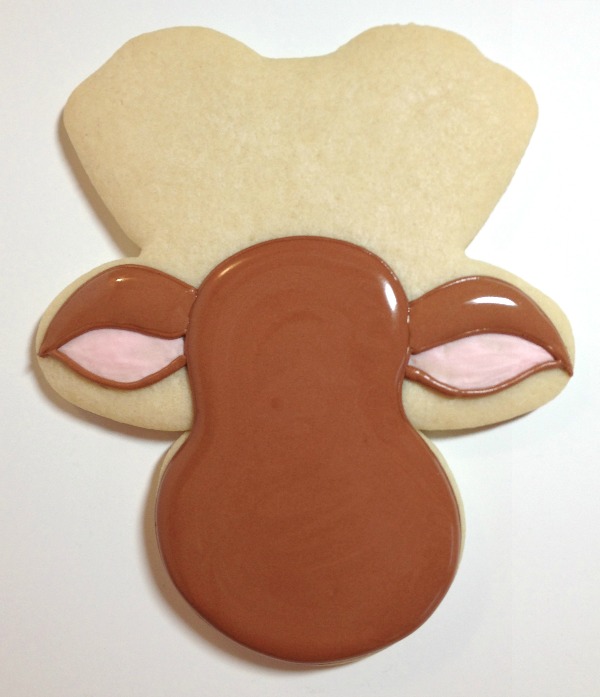
 Next, outline and flood ears, squeezing a little heavy on the lower line on the ears.
 Grab your edible marker again and draw on the antlers.
- Pipe the antlers on to the desired thickness.
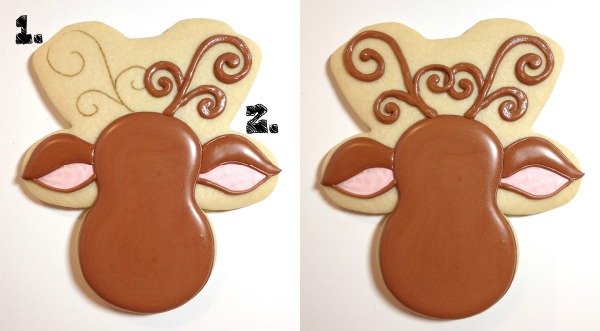 Let the antlers dry completely! Its very important that you let the antlers dry for at least twelve hours before the gold painting. Otherwise the icing will pit.
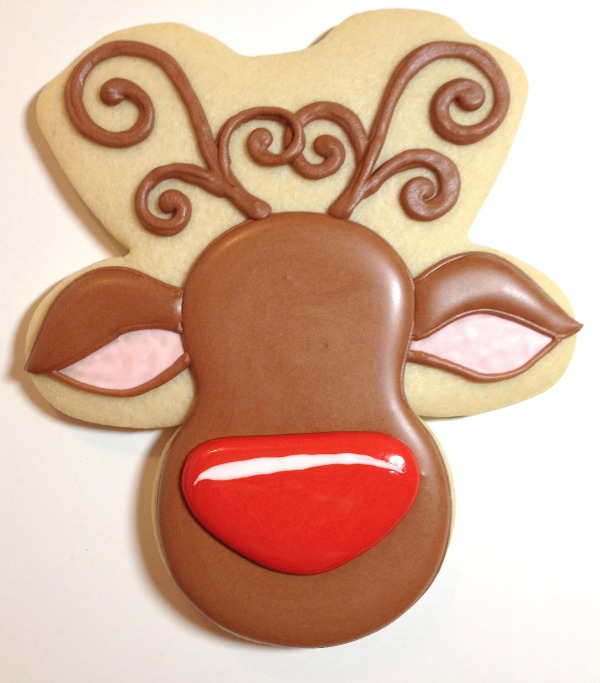
Using the red icing pipe on a large cute nose. While it is wet, use the white icing and a #2 tip to pipe one reflection line across the top of the nose. Tap the cookie lightly to make the white icing settle into the red.
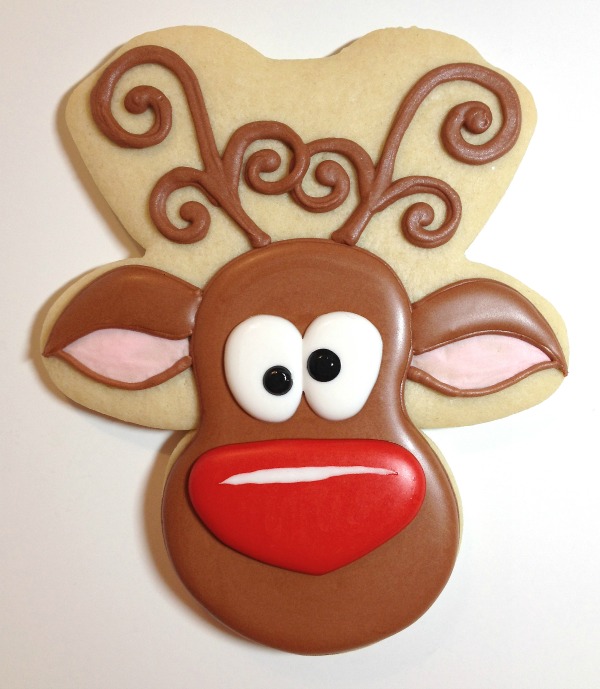
 Pipe one large oval with the white icing and immediately add a pupil. Allow the first eye to dry for about ten minutes before doing the other one so they don’t become one large lump.
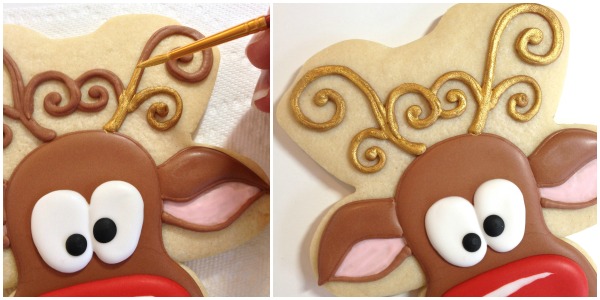
 Once the antlers have had time to dry, paint them gold using a paint brush. They should be dry after at least 30 minutes and ready for the next step.
 Using the red and blue icing pipe little birdies on the antlers. You really could do them anywhere and in any position you like. Use a toothpick, boo-boo stick or scribe to drag up the tail, into a nice point.
Add details, such as feather tails, wings and little beaks in the brown piping icing.
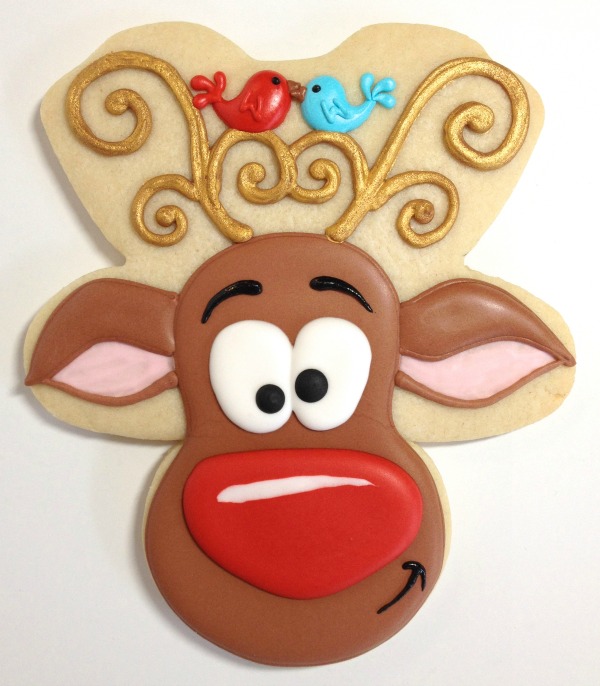
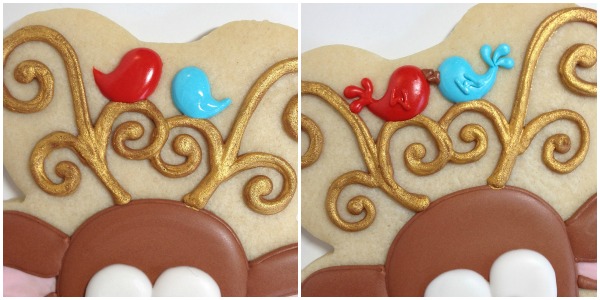 Next, add the black elements: eyebrows, small crooked smile, and the dot eyes on the birds
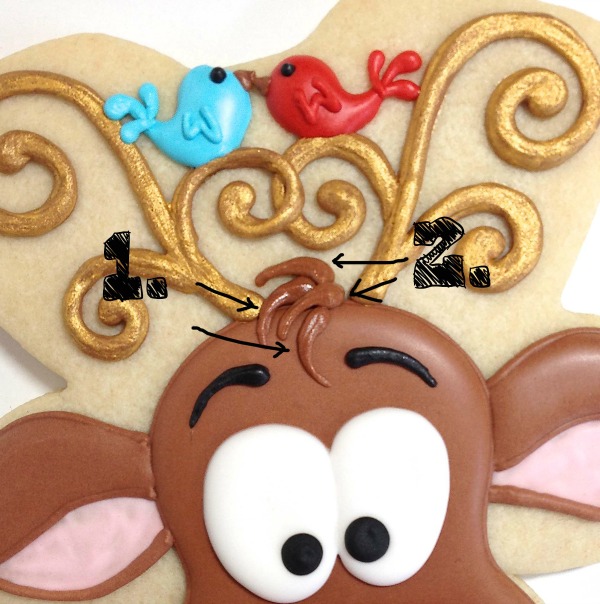
 To create the small hairs, pipe them in opposite order.
- Pipe the second and fourth one
- Then pipe the first and third
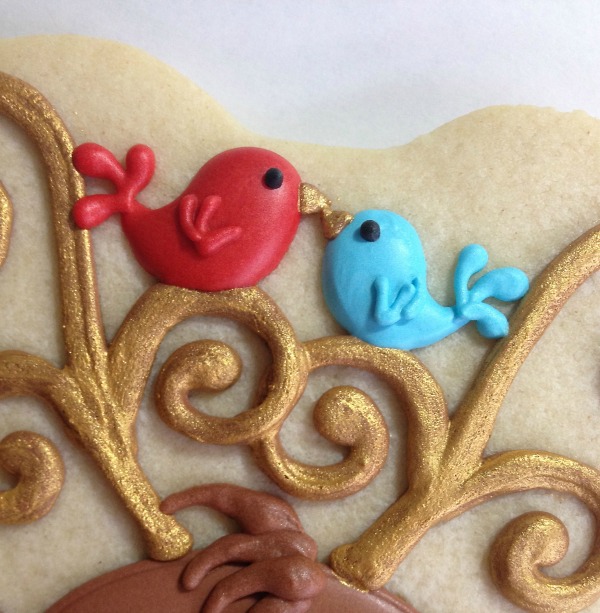
 Also, don’t forget to paint the little beaks gold. It’s the little things.
 Looking at the cookie I felt it needed a little more detail, so, I added some white piping icing as snow.
While the snow was still wet, I sprinkled with white sanding sugar. Make sure the rest of the reindeer is dry before you dump the sprinkles on it, of course!
Feel free to add any other snowy elements. I tossed in just a few snowflake shaped sprinkles.
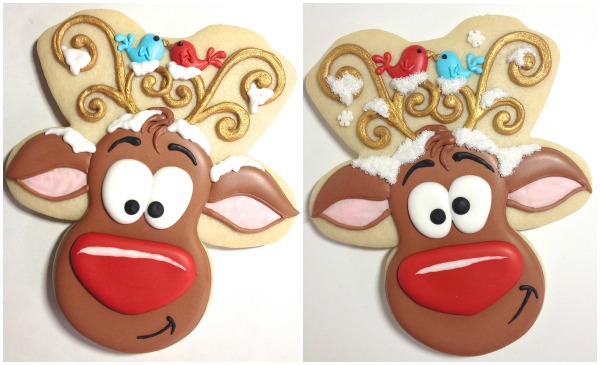 And just for fun, a little snow on his nose!
 Anyway you do it, these little-big guys are so much fun to make.
Happy Holidays everyone!
![]() Be sure to “like” Krista’s Facebook page, Cookies with Character and follow her blog, here!
Be sure to “like” Krista’s Facebook page, Cookies with Character and follow her blog, here!
For more Christmas characters, check out these posts:
 What happens when a former Disney animator becomes a cookie artisan? Amazing things, is all.


This is super amazing and very creative! Highest level of creativity.
these are just incredible!! I don’t have nearly the talent or patience, but I am incredibly impressed with the creativity and technical ability. Thanks for sharing!!
These are unbelievably awesome. I don’t comment often, but WOW. You make them look so doable, too. I would never know where to start just looking at the picture, but you break it down so well.
Amazing !
These are wonderful!!!!!
Love you!!!!!!
ADORABLE!!!!! Great job Krista!! Love this guy!
I am so in LOVE with these reindeer!!!! Oh my goodenss they have so much personality!! PINNING NOW!!
These cookies are amazing! I just love how much detail you put into them and I really appreciate the step by step instructions. 🙂
Love these cookies. Your cookies always have so much “character”!
Absolutely one of my favourite.
It’s amazing, it’s so cute… I love it!
You creativity has no limit. Well done and thank you for sharing such a great tutorial.
Sending you the best season’s greetings
Ckay
These are ADORABLE! I so wish I had the creativity to design stuff so cute myself! Thank you so much for the tutorial and for sharing your wonderful design!
These are so cute and came just in time. I was wondering how to improve my Rudolph this year (only been decorating a little over a year) and these are perfect. I did not like the way my ears came out last year. Thanks again
http://www.pinterest.com/pin/478859372850613888/
this is how they came out last year
FABULOUS!!!!!!!!!!!
These are amazing!!! I want to make them over Christmas.
I just wanted to say thank you for the great recipes, I made my first decorated cookies from scratch. I love tje cookie and royal icing recipes. I usually make cakes so cookies are my new obsession. Thanks again.
Adorable! Did you wait the 12 hours before adding the eyes as well? Did your black pupil bleed? I am considering making these for an order but need to start it tomorrow. I’d hate to have shadowy pupils LOL.
Wow, they are awesome, thank you for sharing the tutorial, I really like how clearly you set out the steps.
Haha! this is so much fun and so beautiful! You’re very talented!
Krista sure does live up to her moniker. So full of character! These reindeer are like right off the movie Frozen!
I don’t think it’s possible create a cuter reindeer cookie! As I scrolled down, he got cuter and cuter with each detail!
Pingback: Rudolph The Red Nosed Reindeer Cookies
Adorable!!! Thanks for posting the tutorial! My daughter spotted them while I was reading and requested I try them for her preschool Christmas party. Can wait to see their faces 🙂
Eek these are just tooo too adorable! Thanks for sharing Krista! I think I’ll have to give these a try with the kids! Cristin
where do u get the gold ” paint”???
Pingback: Christmas Reindeer Cookies | Learn, Live, and Explore!
Pingback: Christmas Cookies and a Cutter Giveaway - The Baked Equation
Wow!!!! I have been pouring over your website the past few days as I try to learn all about cookie decorating. I am getting so excited to get my creative on. Thank you SO much for all you share and for including guest posts like this. I think I love you, SugarBelle!!!
Krista: Thank you for sharing such a detailed (and absolutely adorable) post, too. I really look forward to checking out your blog, too.
Thanks again!!!
Pingback: Lovebird Cookies For Valentine's Day
Pingback: Decorated Moose Cookies
Pingback: 12 Must-Make Christmas Treats | GleamItUp
Pingback: 19 Amazing Christmas Treats I'll NEVER Have the Time to Make | You Pinspire Me
I luv your cookies, You are an awesome artist . . . Thank You
HELLO by Spain! I love this page and take many ideas for my own cookies! Thanks for all! ???And Marry Christmas!
i like it
Pingback: Merry Christmas! | MAKE.cookie
Pingback: Awesome Upside Down Gingerbread Men Reindeer CookiesStylish Board
Pingback: 10 Christmas Cookie Recipes - Home. Made. Interest.
Hello , could u tell me where you could get the 6 inch cookie cutter because I love these deigns and I want to try them out myself xxxxx
It’s included in Wilton’s 101 Cookie Cutter Set http://www.amazon.com/Wilton-2304-1050-101-Piece-Cookie-Cutter/dp/B001D1FJ2E/ref=sr_1_1?ie=UTF8&qid=1448595549&sr=8-1&keywords=wilton+101+cookie+cutter+set
or
http://www.target.com/p/wilton-101pc-cookie-cutter-set/-/A-17194668?ci_src=17588969&ci_sku=17194668&ref=tgt_adv_XS000000&AFID=google_pla_df&CPNG=PLA_Kitchen%2BShopping&adgroup=SC_Kitchen&LID=700000001170770pgs&network=g&device=c&location=9004471&gclid=Cj0KEQiA-NqyBRC905irsrLr-LUBEiQAWJFYTpVJJ7Mk7ANsztz-Se7_EeTbFQyCYTBIhMXoFk__AZsaAqxc8P8HAQ&gclsrc=aw.ds
Inspired by yours, but different! Take a look!
https://www.facebook.com/photo.php?fbid=10212050012585253&set=pb.1222295486.-2207520000.1484250634.&type=3&theater
Pingback: 25 Delicious Christmas Cookies to Try This Year - Adanna Daily