Mrs. Claus Cookies with Make Me, Cake Me {Guest Post]
One of my favorite things about the holidays is sharing them with family and friends. This year I broght the tradition to my little corner of the world wide web and invited some of my favorite decorators to stop by and share a little Christmas cookie cheer!
First up is the amazing Michelle, of Make Me, Cake Me. Michelle specializes in practical but stunning cookie designs for every occasion. Enjoy!
![]() Hey cookie friends! My name is Michelle and I’m over the moon to be here at Sugarbelle’s! Since I first started cookie-ing and writing my own blog, Make Me Cake Me, I’ve been an avid follower of Callye’s work. My own cookie designs are filled with elements of Sugarbelle (this cookie is a perfect example of that!) and I can’t believe she thought me worthy to share a cookie with all of you! Picture me bowing down in cookie deference. I’m not worthy!
Hey cookie friends! My name is Michelle and I’m over the moon to be here at Sugarbelle’s! Since I first started cookie-ing and writing my own blog, Make Me Cake Me, I’ve been an avid follower of Callye’s work. My own cookie designs are filled with elements of Sugarbelle (this cookie is a perfect example of that!) and I can’t believe she thought me worthy to share a cookie with all of you! Picture me bowing down in cookie deference. I’m not worthy!
Anywho, I’ve been thinking about Christmas and if my life experience has taught me anything, Santa isn’t the one making a list and checking it twice…
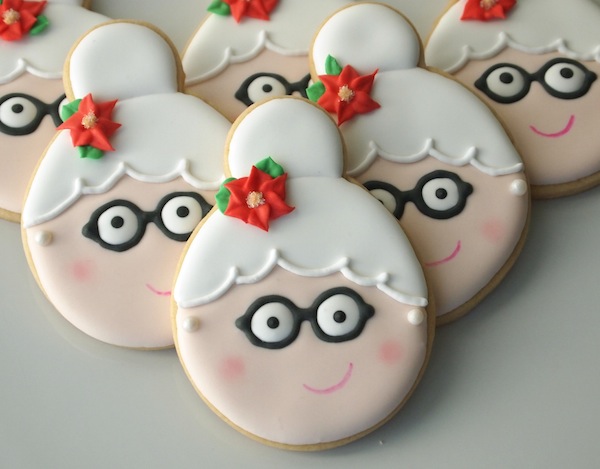
It’s this gal…
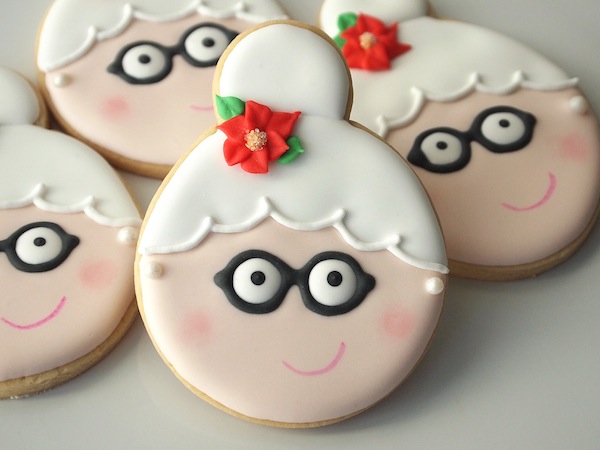 That’s right! It’s the one and only first lady of the North Pole, Mrs. Claus!
Mrs. Claus is dramatically underrepresented in cookie form. A few weeks ago, I searched “Mrs. Claus Cookies” on Google’s image search and no decorated cookies popped up. Totally unacceptable!
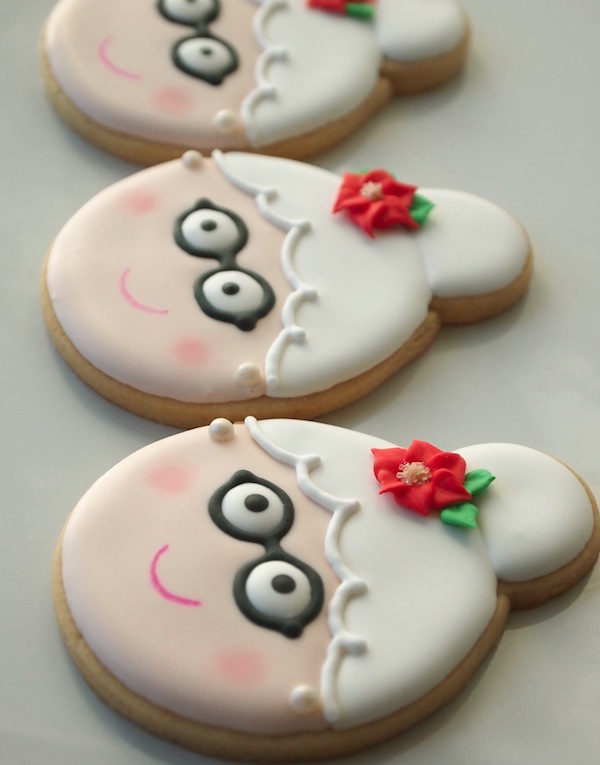 When dreaming up cookies, I always seek to keep my cutter stash in check and use what I’ve got. I took a page out of Callye’s book, sketched a general shape, and looked to see what I have that might work. Callye’s ballerina cookies are quite similar and use a ring or an ornament cutter. Alas, I have no ring or ornament cutter (criminal, I know!).
Option 1: hacking together a balloon cutter and a mini tulip cutter! I love how the tulip makes Mrs. Claus’s bun super big.
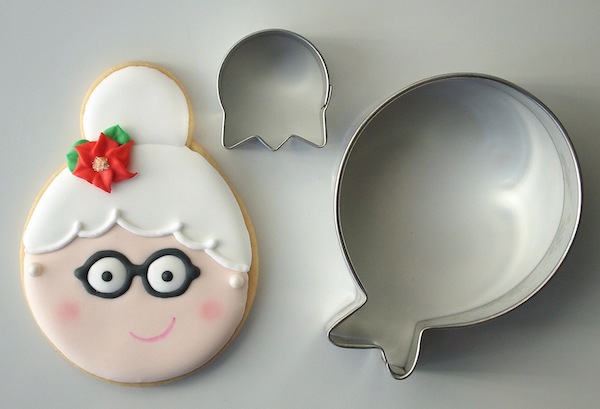 If you don’t have a mini tulip cutter yet, I highly recommend picking one up.
Option 2: hacking together an egg cutter and a mini tulip cutter. With an egghead, Mrs. C reminds me of a 1950s waitress, but that’s cool. She’s retro.
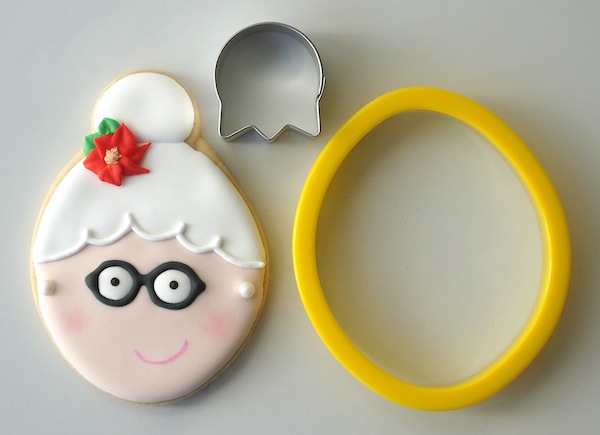 Here’s how the cookie cutter mash-up happens. I like to work right on the baking sheet, so I’m less likely to smoosh the dough as I position the pieces.
Okey-dokey, flip the tulip cutter and use it to cut the balloon’s bottom off.
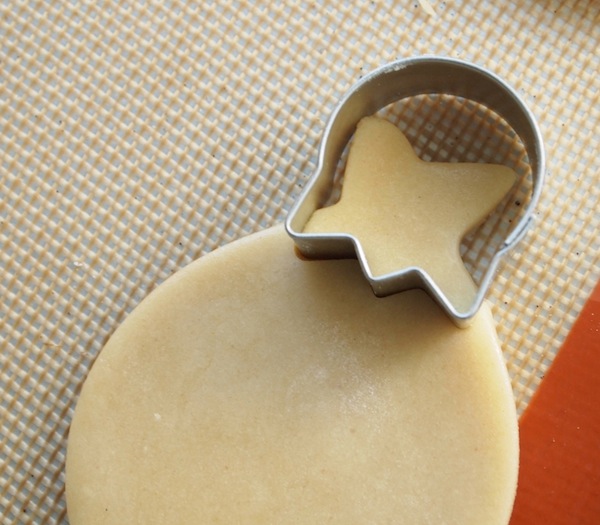 Slide the flipped tulip dough right in and voila!
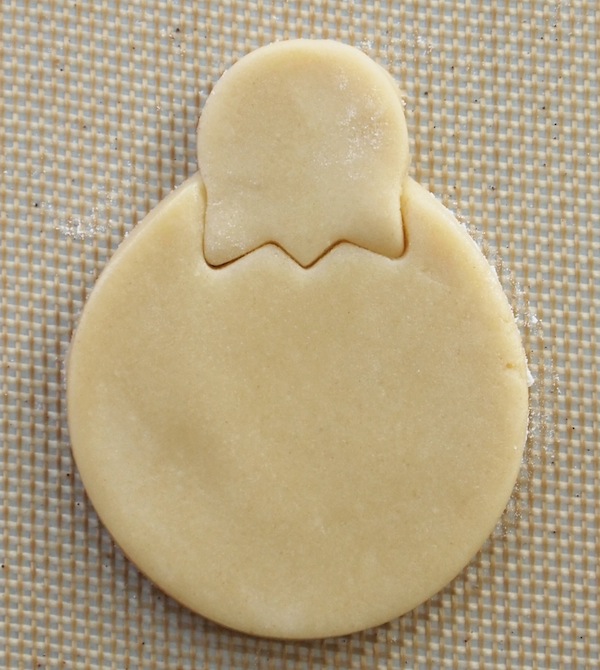 Let’s get decorating! Grab the following supplies:
- 20 second icing, Americolor Bright White
- Piping icing, Americolor Bright White
- 20 second icing, Flesh tone
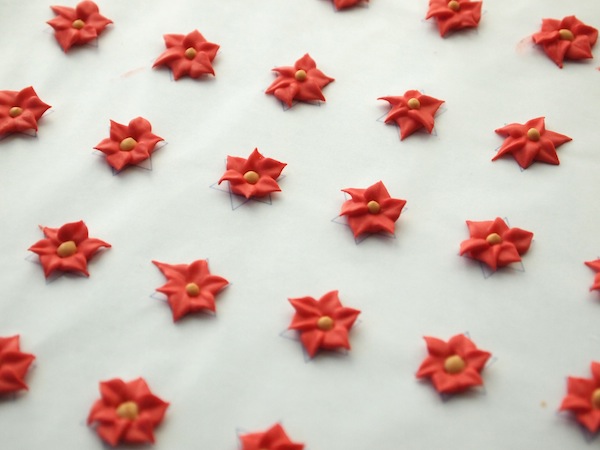
- Poinsettia royal icing transfers (I used a 65 tip)
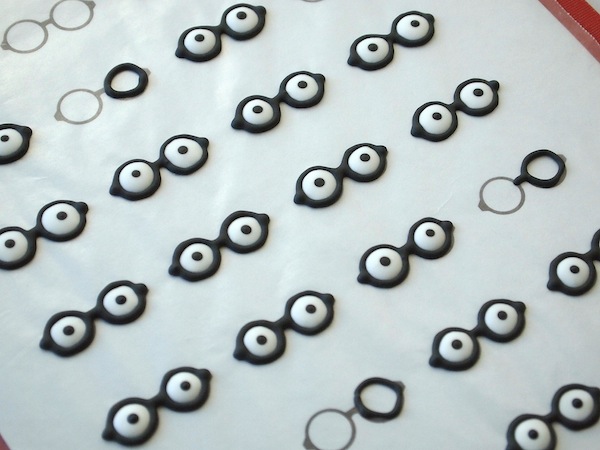
- Eyeglass royal icing transfers (Scaled to fit your cookie)
- Pink petal dust
- White sugar pearls
- Pink edible marker or pink piping icing
While these cookies have a lot of elements, most are made in advance, which if you’re a planner like me is fantastic!
I made a ton of poinsettia royal icing transfers a couple weeks back and have been finding lots of great uses for them.
 Also made in advance are eyeglass royal icing transfers. I scaled down Callye’s fabulous template to about 70 percent of the original size. Do make a good number of extras as they are fragile.
Of course, if you have a cookie projector like my friend Keely of Sugared Hearts Bakery, you could just pipe right on your cookie and end up with these adorable and sparkly spectacles! We both made our Mrs. Claus cookies on the same day without each other’s knowledge. Like Sugarbelle and Lila Loa, we had a cookie mind-meld!
 Now that the royal icing transfers are at the ready, we can get to the fun part. The cookie!
I’m not entirely confident in freehand piping, so I drew a guide on my cookie with an edible marker. From there, I filled Mrs. Claus’s hair with white 20-second icing.
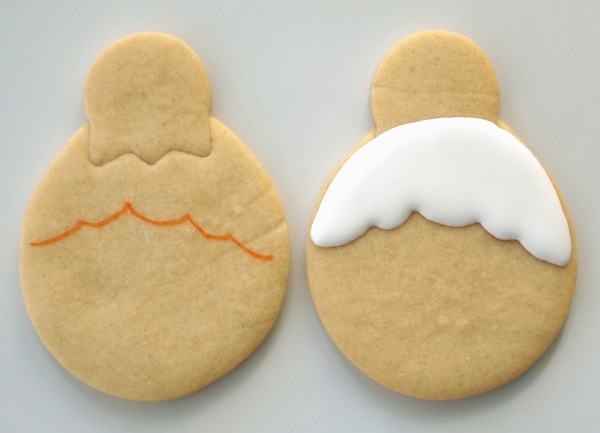 After the icing’s top surface is dry-ish, about 20 minutes, fill her bun with more white icing.
For the next step, flood her face with flesh tone icing and while still wet, drop in the eyeglasses. I find it helpful to position them with a scribe tool or toothpick. Quickly, while the icing is still wet, drop in white sugar pearls for her earrings.
Mrs. Claus keeps it classy with pearls. Me, I’m a hoops kind of girl.
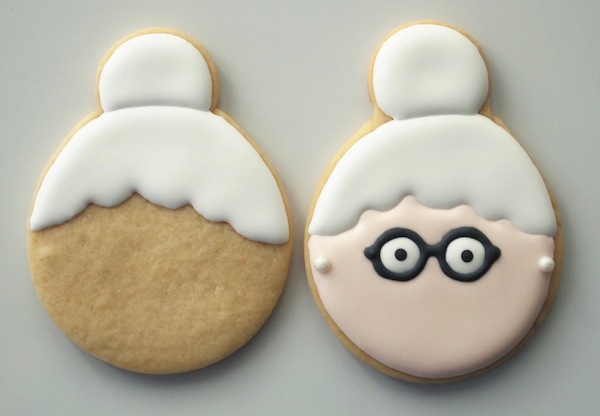 Let the icing fully dry a good 8 to 12 hours. The last steps are quick and easy, and where the magic happens.
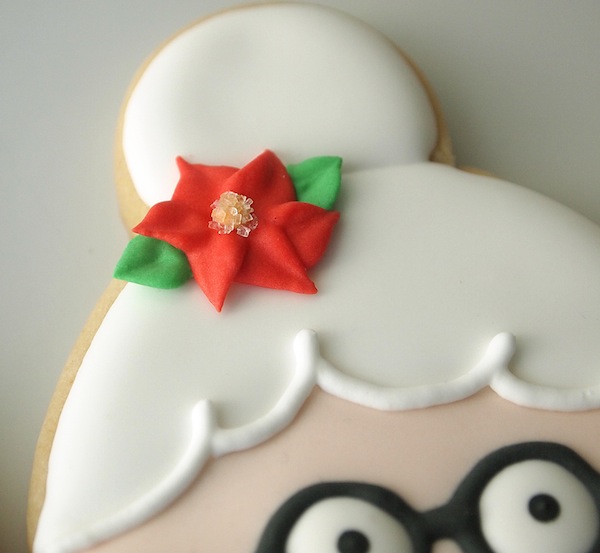
Use a dot of white icing to “glue” the poinsettia to Mrs. Claus’s hair and pipe a few white lines to accentuate her curly hair.
Add a little rouge with pink petal dust and a Q-tip (more on that technique here). For Mrs. Claus’s mouth, I used a pink edible marker from Americolor. While you could pipe a pink mouth, sometimes the easy route gets the job done just fine.
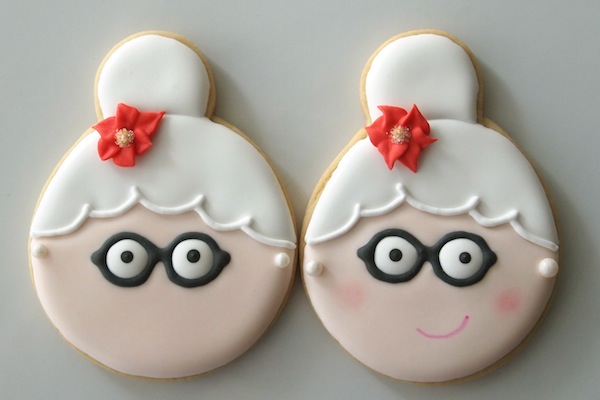 For Mrs. Claus’s bun, I ultimately decided they looked best with green leaves and piped them in at the last minute. You can most certainly add the leaves when you first make the transfers as this will save you time later on. Either way. No big deal.
 In case you’re curious, I used a balloon cutter purchased from my local bake shop, but also available at Karen’s Cookies. The mini tulip cutter is a Wilton model and the egg cutter is from Wilton’s 101 Cookie Cutter Set.
 Thanks so much for letting me drop by and share a cookie, Callye! I’m still pinching myself! Wishing you and all of your incredible cookie fans a cheerful and sweet holiday season!
For Santa and the rest of the crew, check out the following posts:


These are great Michelle! Thanks for sharing your creative ideas!
Thanks Yam! 🙂
So cute. Thanks for Mrs. Claus tutorial. Can’t wait to make this one.
Oh, I hope you do make her Kathy! Thanks!!
So awesome to see two of my favorite bloggers collaborating on this post. Thanks to both of you for your wonderful step-by-step tutorials.I made Mrs. Santa as part of my holiday collection last year, but I don’t think I have enough viewers on my blog for the picture to show up in a Google search. Just for fun, I thought you might like to see my version. Definitely, like the bun better than just the round cutter that I used.
http://mycookiefriend.blogspot.com/search/label/Christmas
She’s great, Diane! I love your Mrs. C!
Hi,
my name is Nens from Holland, i am a strarter in cookie decoration, here in Holland cookie decorating is nog so well known. Because there is no good explanation in duthc i try to get all the information online. I see that you make ge ‘glasses’ from misses Santa on paper? Is that special paper, can you work ‘of’ a cookie? won’t it stick on the paper? is it special paper?
“Glasses” are “eyeglasses” or “spectacles” and in this tutorial, you make the eyeglasses on wax paper (a special type of paper for baking and other uses). The eyeglasses won’t stick to the wax paper. Hope that helps!
Oh I love this cookie Michelle!!! It seems like poor little Mrs. Clause always gets forgotten in Santa shadow 🙂 She is fabulous and super adorable!!1 Great job!!
Santa casts a big shadow too! lol. Thanks Morgan!! 🙂
Yep, behind every great man…:). I ADORE your Mrs. Claus, Michelle!!! So darn cute! Congrats on being invited to Sugarbelle’s house:) You make an awesome duo! xoxo
Ain’t that the truth re: every great man 😉 Love it! Thanks so much, Sue! 🙂
Great guest blog post, Michelle! Move over, Santa! Mrs. Claus cookies are definitely going to make an impact this year. 🙂
Totally agree, Mike! The Year of Mrs. Claus, indeed! 🙂 Thanks friend!
*Squealing!* These are so cute Michelle!
Thank you so much, Nikki! 🙂
So good to see Mrs. Claus get her due! Love these cookies Michelle… she is adorable. A great addition to the holiday cookie tradition!
Thanks so much, Patty! So happy to hear of many Mrs. C supporters 😉
These are adorable. I love her bun and the poinsettia in her hair is the perfect finishing touch. Fabulous guest post Michelle!
Thank you so much, Paula! 🙂
Mrs. Claus is soooo….adorable. thanks for the tutorial.
Check out my blog: https://comfortandblissfullife.wordpress.com/
Fun blog and thanks for your comment! 🙂
Like all your cookies, Michelle, these are super cute too!! 🙂 Thanks for sharing.
You’re so sweet! Thank you!! 🙂
I just love your blog and your willingness to teach us novices! I have always wanted to decorate cookies but was intimidated. Your site, with its pictorial instructions, is just what I needed! Thank you so much!
Adorable!
Adorable! I love the pic of all the glasses!
LOVE! Mrs. Claus never looked so good! 🙂
I love MRS. CLAUSE!!!! Michelle did such a good job. I am off to pin and share on my FB. Thanks for the awesome tutorial ladies!
I really love the glasses…. they are making me want to make Harry Potter cookies!!
Ha! I totally see Harry Potter potential in the glasses! 🙂
You totally rocked these Michelle!
Thanks so much, Melissa! 🙂
Pingback: Mrs. Claus Cookies
I must get busy and make little Mrs. Claus cookies – they are too cute!!
Pingback: Reindeer Cookies with a Gingerbread Cutter
Pingback: Mrs. Claus Cookies with Make Me, Cake Me - fancy-edibles.com
Pingback: Christmas Party Girl Cupcake Cookies | Make Me Cake Me
Pingback: St. Patrick's Day Leprechaun Girl Cookies | Make Me Cake Me
Pingback: 16 Wintertime Christmas Cookies to Celebrate the Season | Chill for Real
Pingback: Here Comes Santa Claus… | American Cake Decorating
I love the cookies and plan on making some but I’m actually leaving this comment because one of your links is messed up I believe and I thought you might not know but want to. The link directly underneath the 3rd picture (where you show the cutters you used) in the sentence about the mini tulip cutter “these spooky cuties” is linking to a cooking site it looks like (“Make Me Cake Me”). Even if it is the right site it definitely isn’t linking to any cookies, spooky or otherwise, LOL. Anyway, sorry if I went about this the wrong way but I notice bad links a lot when I blog hop and if it were me and my blog I would want to know. LOL. Love the new cutters and everything you’re doing! 🙂