Cookie Sled Place Cards with Yankee Girl Yummies {Guest Post}
Want to learn how to build a cookie sleigh? Well, you’ve come to the right place. Kari, the super talented decorator behind Yankee Girl Yummies is here today to show us how!
![]() Coming to you from my favorite place in the world – my kitchen! Yankee Girl Yummies here and today I’m going to show you how to build a cookie sled!!
Coming to you from my favorite place in the world – my kitchen! Yankee Girl Yummies here and today I’m going to show you how to build a cookie sled!!
How?
What??
Did she say ‘cookie sled’???
Yes, a cookie sled. That is, a sled made out of cookies. Or cookies in the shape of a sled… You’d better just read on.
- candy cane cookie cutter
- drinking straw
- twine/ribbon, approximately 10 inches
- knife
- piping consistency royal icing for decorating and ‘gluing’
First off, I decided that I wanted to have a red sled. Keep in mind that your sled can be any color! Just add a few drops of food coloring to your dough after you’ve mixed it up. Another important point is this: your dough must be cold for this to work. If your cookie dough does not stick to the cookie cutter, it’s too warm. The consequence of warm dough is that your pieces will not line up properly after they are baked. Trust me on this one.
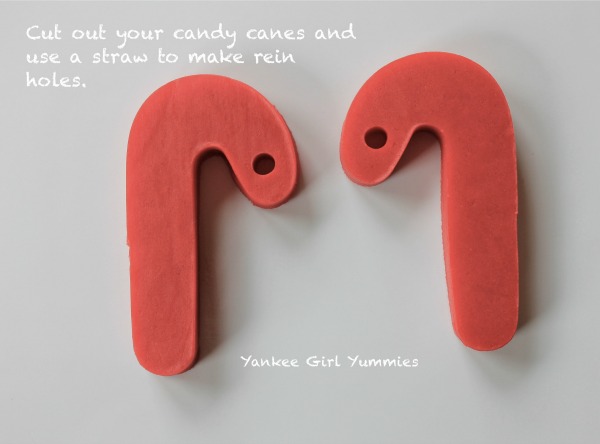 Start by cutting out a candy cane. Then flip your cookie cutter upside down – so that you have to press down on the sharper part. I know…it hurts a bit…but no pain, no gain. Or sled in this case. Then take a straw and make your rein holes. These will be the sides of your sled.
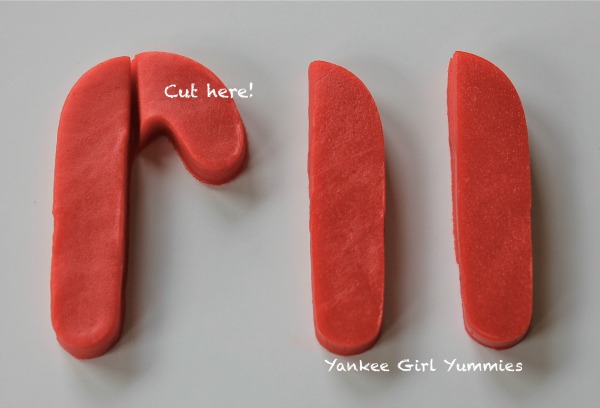 For the middle section, you need 3 cookies. Cut out 3 candy canes –1 regular candy cane and you’ll have to flip that cutter over again for the other two. Once they are on your baking sheet, take a knife and cut away the curved part of the candy cane. Bake em’ up!
After they are cool, take a larger zester and file away any imperfections. Just makes for a neater edge. But be careful, they are delicate. At this point, you can decorate your sides. The sleds are cute plain but a little decorating can make them super cute! Get creative!
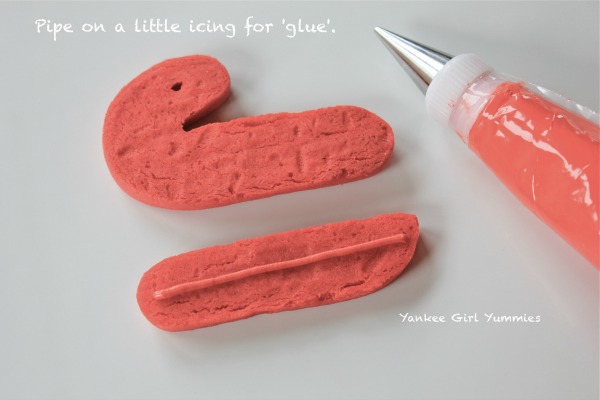
Once your piping décor is dry, you’re ready to put it all together. Start by ‘gluing’ one of your middle boards to a candy cane. Pipe on a straight line of icing, right down the middle of the board. I used icing the same color as the dough so that you would not see it. Then put the pieces together.
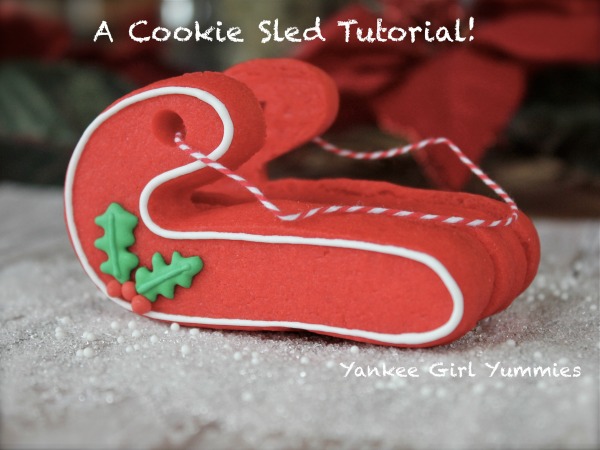
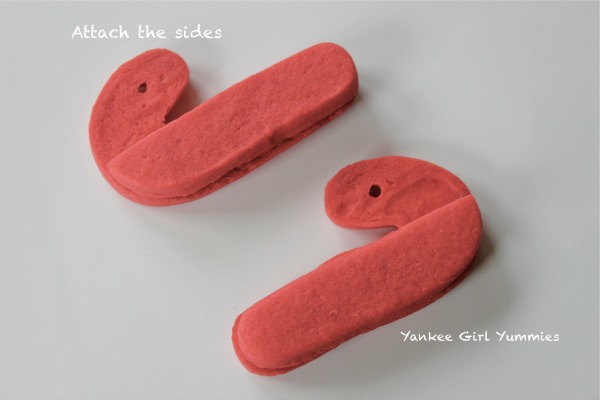 After you’ve added a line of royal icing down both sides of your 3rd and middle piece, you should be able to put it all together! It’s so cute, right?!?
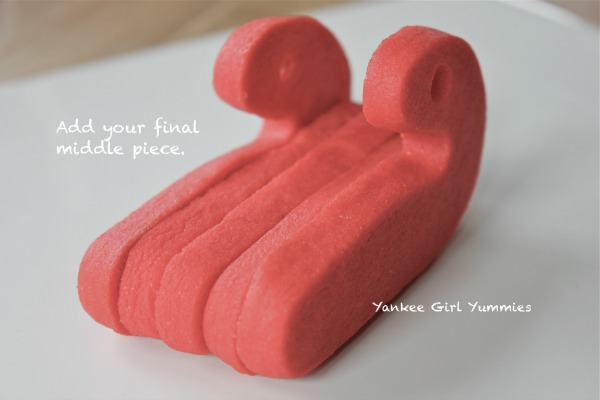 Once it’s dry, you can add your twine or ribbon. I, strategically, hid my knot in the hole that was punched out of the candy cane cookie.
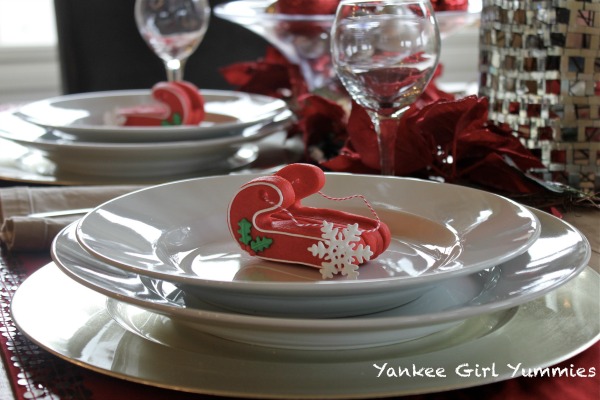
Whether you decide to use these as party favors or place card holders at your holiday table, I’d love to see your sleds!
 Stop by my blog at Yankee Girl Yummies or visit my Facebook page. Huge shout out to Rebecca at The Cookie Architect for her assistance and feedback with this project. You can find her and her cookie creations here.


Well, you know I love it! Such a cute idea! And the decoration options are endless!
🙂
How’d you get to be such a cookie genius, Kari?! Awesome!! 🙂
Michelle – I learned from the best! 🙂
3D-cookies are some of my favorite cookies to make. I’m nuts about these red sleds, Kari! They are the perfect touch at the table on Christmas Day. 🙂
Thanks Mike!!
Knocked my socks off with knleewdgo!
Oh this is just too darn cute…….. Might have to try these out!!
SO cute! I’m picturing some reindeer pulling the sleigh and Santa at the helm. Good idea in theory but who’s got time?
Thanks for sharing this Kari!
So darn cute! I would love to come to the table and see one of these on my plate:)
I’m floored! How adorable. I love edible place holders but these are way beyond anything I would have dreamed up. Love, love these and will be making them for sure. Thank you so very much for sharing!
Pingback: But wait! There’s more!! – yankeegirlyummies