Princess Face Cookies
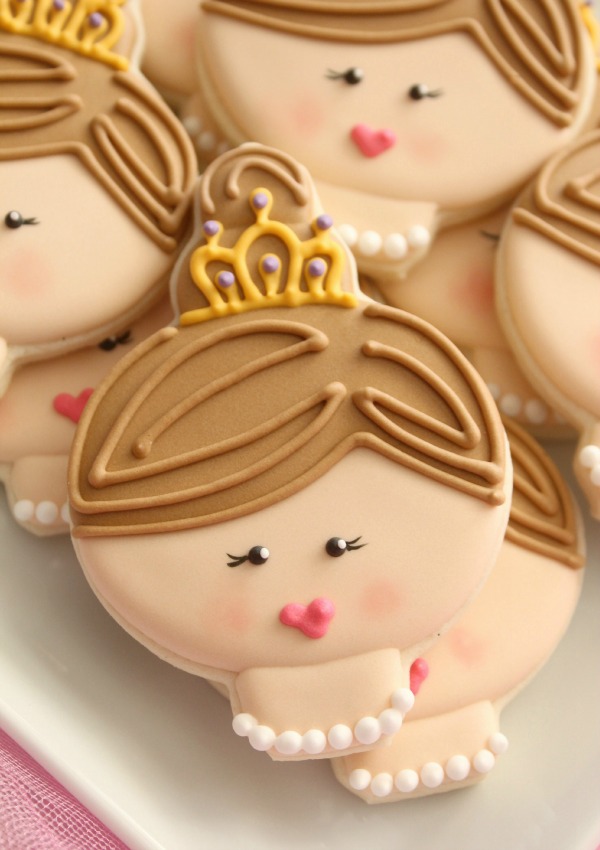
Do you have a sweet little princess in your life? If so, I highly recommend adding these to your baking list. As long as there are little girls in the world, princess cookies will always be a hit.
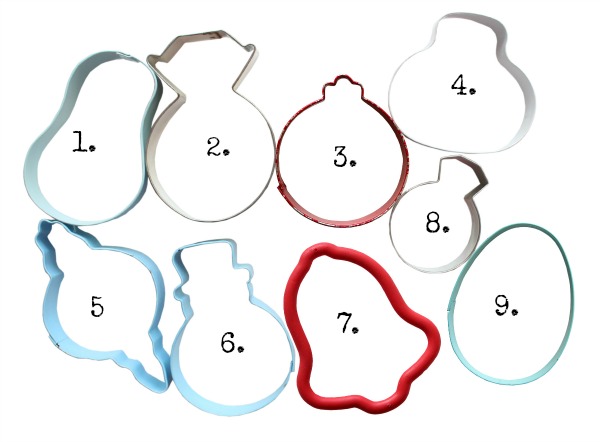
 The great thing about princess face cookies is that there are many cutters that will work perfectly. Here are some of my favorites. 1.) flip flop, 2.) large ring, 3.) ornament, 4.) skull, 5.) fancy ornament, 6.) snowman, 7.) bell 8.) small ring, 9.) egg {I’ve even done it with a tulip}
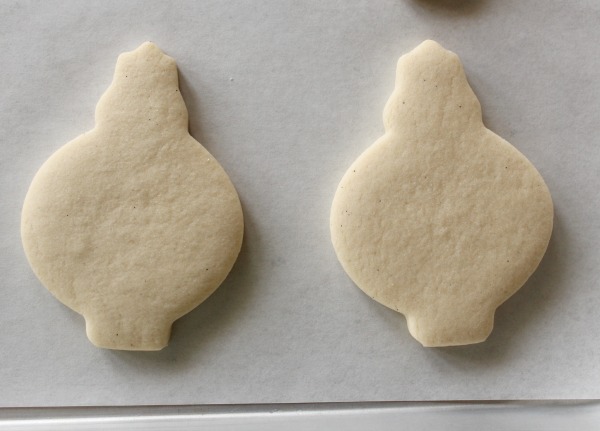
 This time around I chose the fancy ornament. I trimmed the bottom just a little but you can skip this step if you like.
 To make these cookies you will need:
- Fleshtone 20-second icing
- Piping and 20-second icing in the color of your choice for hair
- A small amount of black, pink, yellow, purple and white piping icing for details
Optional:
- Pink petal dust
- Black gel color
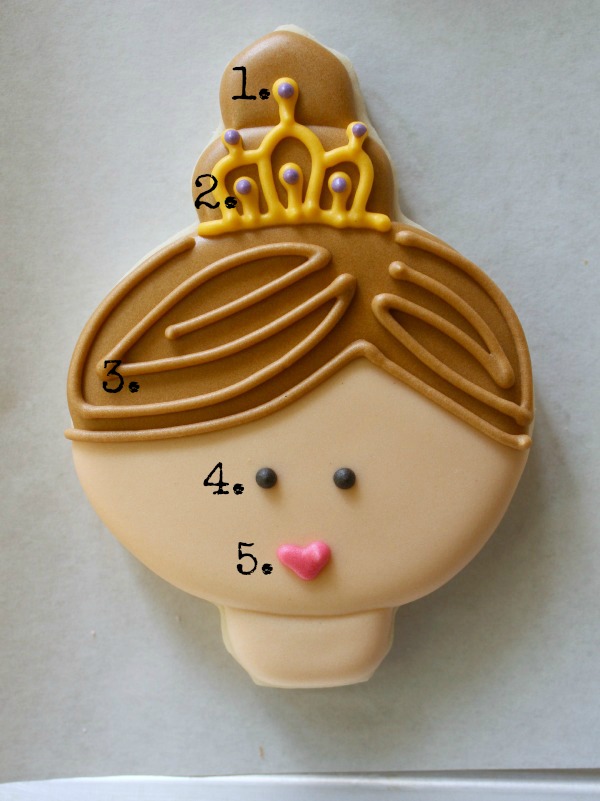
Begin by using flesh colored 20-second icing to create a face, leaving room for hair.
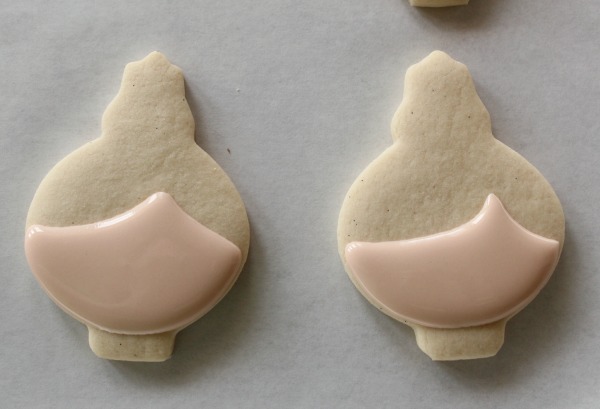 Let the face dry for a bit, then add bangs. Give each application a bit to dry add the hair in sections for a dimensional look, or save time by adding it all at once. I went with a side-swept part. Remember, you can personalize these cookies by changing the haircolor and style.
 Let the base dry, and finish up with a few details.
- Use yellow icing and a #1.5 tip to pipe a crown
- Add simple purple jewels {if you like}
- Outline the hair
- Add eyes
- Add lips
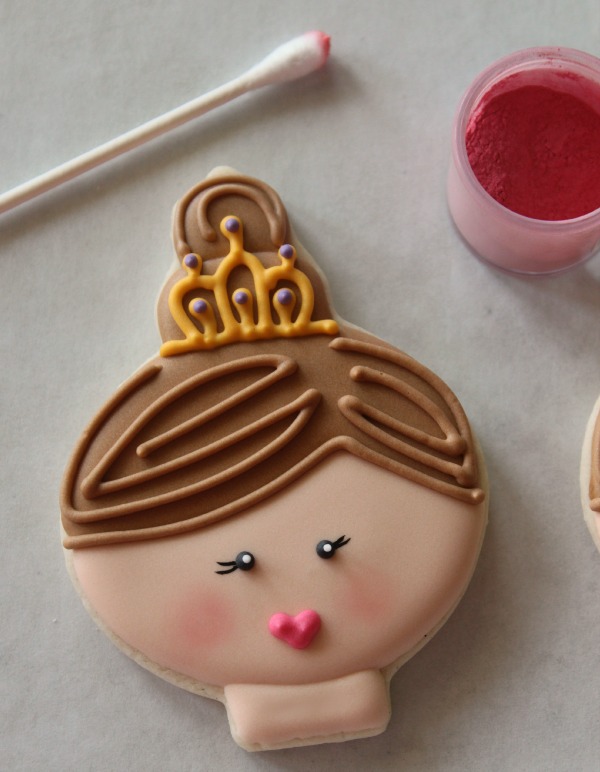
 If you really want to go all out, use petal dust to blush her cheeks and a teeny tiny little brush for lashes. I must’ve been in a really good mood, because my princess even ended up with a necklace!
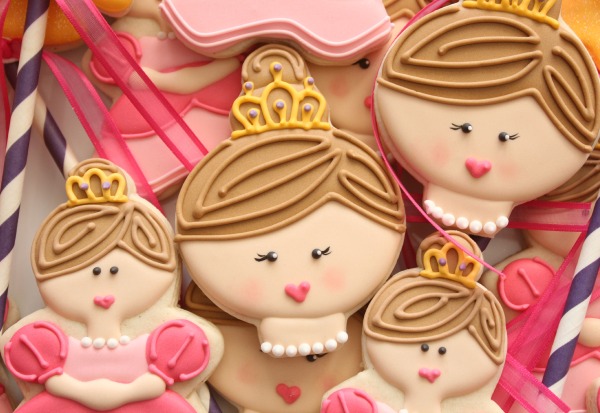


These are darling (of course)! I can’t wait to add these to my ballerina sets!
OH MY WORD!!! These are AMAZING! Soooooo cute <3
The sweetest ever! Too bad I have boys. 😉
Wow! I am always amazed at how well you create simplistic designs. It’s definitely not easy to do, you are truly talented! Love all of your work!!
Boy, that last pic sure shows how some blush, eyelashes & “white eye dots” really add that extra umphf to a cookie!
YOU are the girl version of Mike’s “badass dude” Callye!
Perfectly adorable! Thanks to your wonderful tutorial, I may be able to make these:) I have three little princess munchkins…so far:)
Those little lips and eyes and that little crown!!! Oh, how I’d love to live in your brain sometimes!!
Love them!!! You even gave their eyes the little ‘love sparkle’!!!!
Oh I love these. So thankful I have a little girl I can make them for. I have been missing you so much since you didnt post as much in September as usual but all is forgiven, these cookies made up for September… and all of October!. 🙂 You are my cookie life line!
Beautiful, love the eyelashes. Little detail matters. I am still confused about the cheeks, do you use dry laster dust on dry cookie or wet dust with vodka on dry cookie?
I prefer dry, so it’s not so intense 🙂
These are amazing! I love all your cookies and your use of cutters. You are SO TALENTED!
I wish I could pop in your brain Callye! I am so bad at this game……she is adorable! Those lips!!!!
Callye, these little girlies are just precious! Love their cuteness, their simplicity, and yet elegance!
Thanks for your great ideas! Now go squeeze your own little princess!
Incredible Callye! So pretty, and pretty awesome!
Callye, Your are a true artist!
Hi Callye,
Love these. I have nomination your blog for the Best Tutorials category in Craftsy’s Best Blog Awards. You really deserve it! Hope you win!
These are so sweet!! I love their little heart shaped lips! <3
So precious… love those little heart lips!
No one should be authorized to eat those wonders ! 😀
Maybe because I had sons and there was nothing pink and girlie unless I brought it into the house but I cannot get enough of your sweet, girlie cookies. They are so precious. Hope you are feeling better, my friend. xoxo
Genius! Love everything you make! “I’m not worthy!” lol
Pure genius, lady! The lashes. The pearls. The little heart mouth! Gotta love a princess as sweet as this!
Pingback: Princess Cookies