Perfectly Stenciled Cookies Every Single Time
Do you have cookie friends? If not, you should.
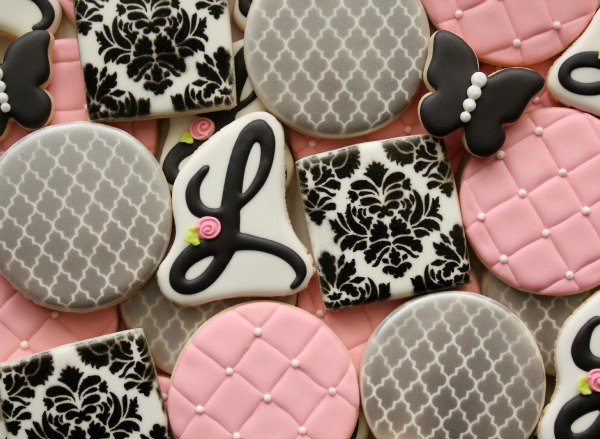
I have a cookie friend who’s kind of a genius. You’ve heard the old saying two heads are better than one? Well Kim is kind of like two heads. Add mine to the mix and we come up with things like this.
One night while our husbands were doing the things they do {football and X-box} we were having one of our cookie “text talks”. The topic? Stenciling.
Kim had an idea that magnets might be the perfect way to hold wiggly stencils in place. The thought had crossed my mind before too so I’d picked up a package then never tried.
That’s the good thing about cookie friends. They’re about all the encouragement you need to bust out the airbrush at ten o’ clock at night. I don’t know why either of us were surprised that it worked.
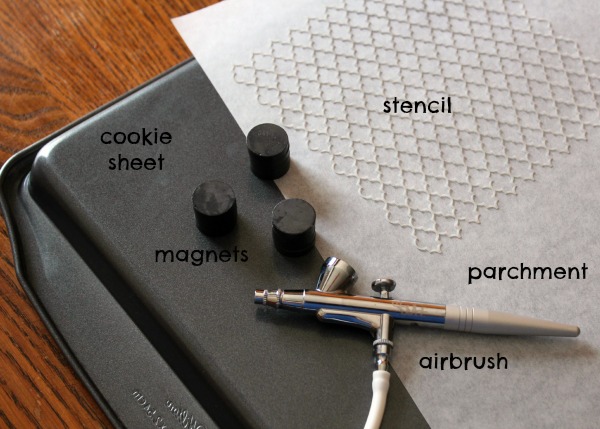
 For perfectly stenciled cookies you will need:
- A non-aluminum cookie sheet {make sure it’s magnetic}
- Simple magnets from the craft store
- Stencil
- Parchment Paper {for easy cleanup}
- Airbrush or food color spray
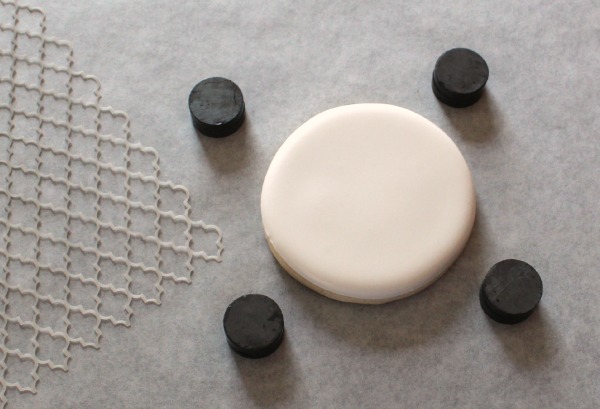
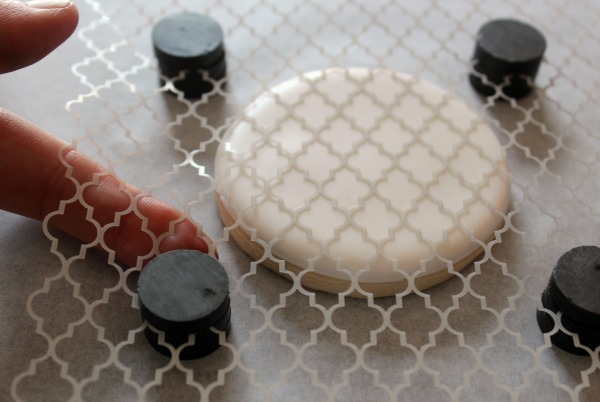
 Cover the cookie sheet with parchment paper and place eight magnets {two in each corner} in a square around the cookie. Two magnets are almost exactly the height of one of my iced cookies. If yours are a little taller or shorter it’s okay…the magnets will close the gap.
 Position the stencil over the cookie and use four more magnets to hold the stencil in place.
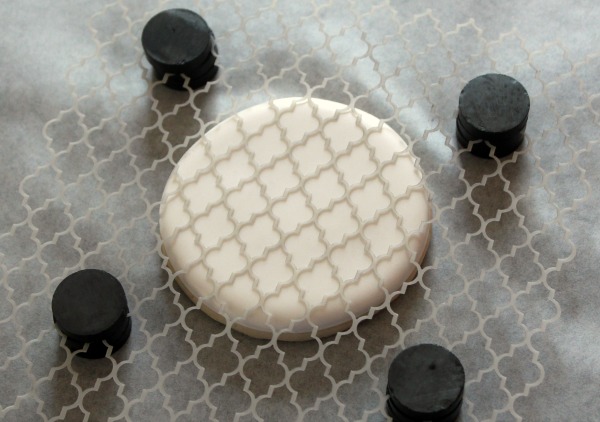 You can use your fingers or a chopstick to move the magnets so the stencil is taut. If you need to add a couple more magnets you can {see photo 2 below}.
 Lightly mist the cookie with an airbrush or spray food color. For this particular cookie I used moonstone lustre dust mixed with vodka. If you have concerns about lustre dust and food safety, see the note at the end of this post.
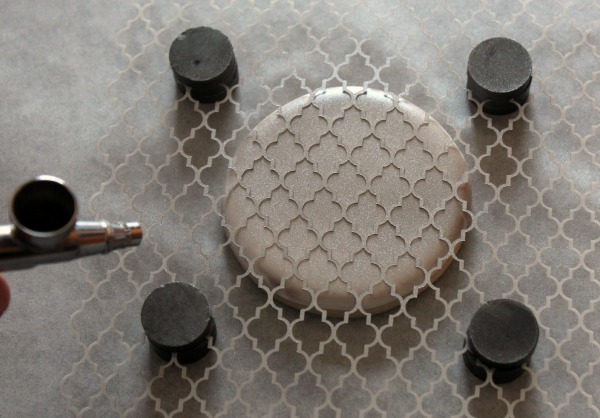 The key to a perfect finish is a using a light hand. Think nail polish. A few thinner coats are better than a globby, thick one. A light spray reduces the chance of liquid seeping under the stencil and muddling the design.
Remove the magnets from two adjacent corners, carefully pull back the stencil, and move the cookie to another sheet.
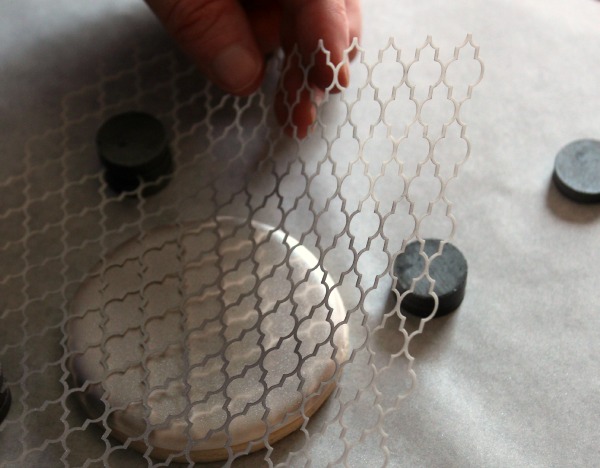 The coolest thing about this technique is that positioning the next cookie is as easy as dropping it onto the clean spot on the parchment paper.
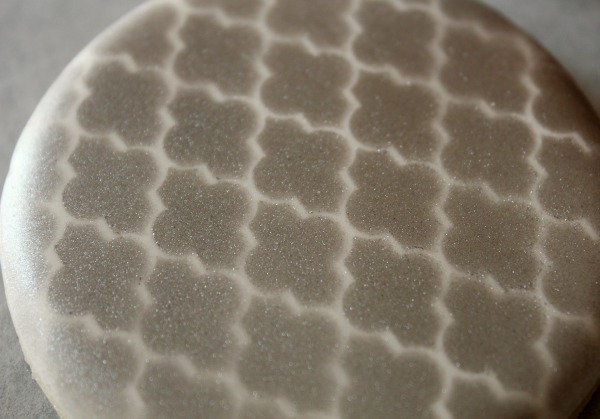
See? Stenciled cookie perfection.
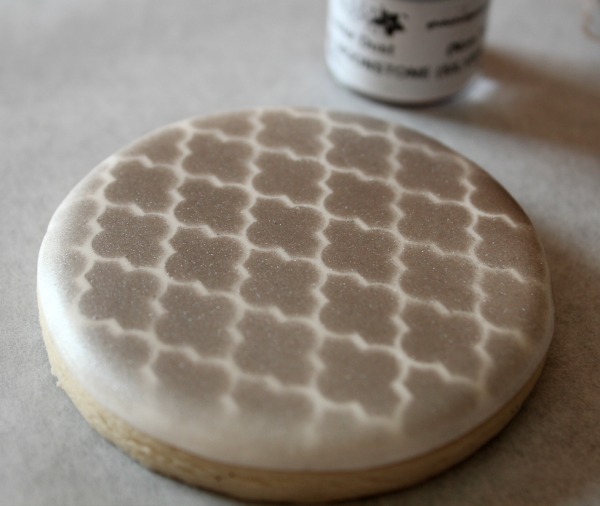 Here’s the closest shot I could manage. Clear, crisp, and beautiful.
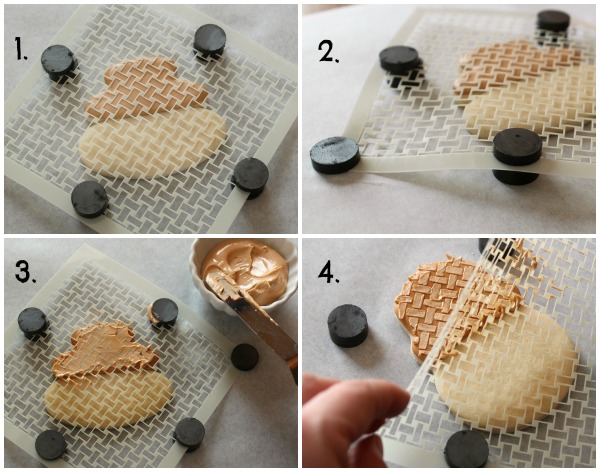
 This technique also works with royal icing. It’s like having a third hand. Same story…position, pull taut {use extra magnets if you have to}, spread, and lift. For a more in-depth look at stenciling with royal icing, click HERE.
One little side note, my metal offset spatula is magnetic. Be sure you’re keep it on a tight leash or you might get a little surprise.
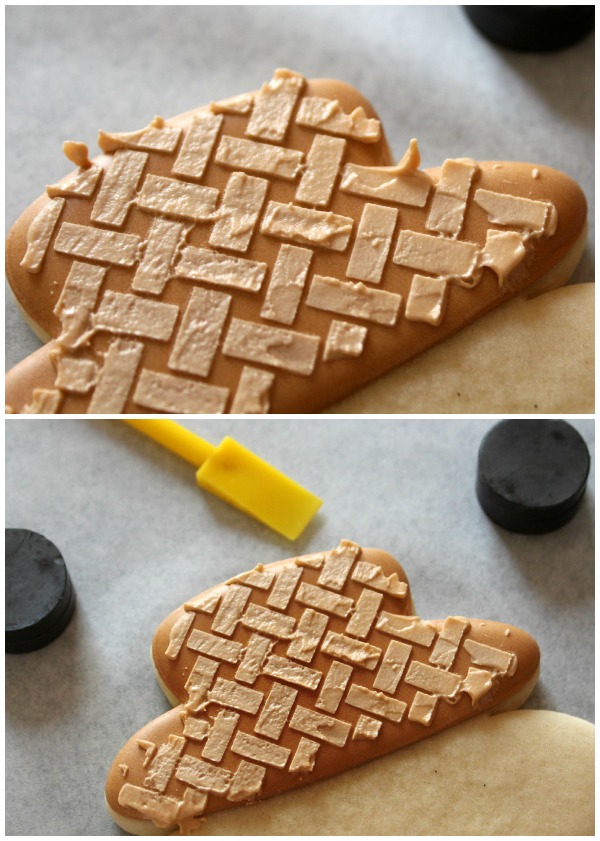
 Pardon the sloppy stenciling, I took advantage of my more rustic design. In any case, you can clean up messy edges with a boo boo stick.
 Here are a few tips, products, and blog posts to help you on your way:
- Moonstone lustre dust {like many decorating items} are non-toxic but not edible. The decision to use these products is a personal one. If you’re worried about food safety, Country Kitchen has a great selection of edible lustre dusts HERE.
- These days I buy most of my stencils from Stencil Land on Etsy. You can check out the quatrefoil stencil I use HERE.
- How to Stencil on Cookies with Royal Icing
- Video: How to Stencil With Royal Icing via The Cookie Countess
- To stalk my genius friend Kim, check out this post {another one of her genius ideas} or check out her Facebook page.
- Since we’re on the subject of cookie sheets and magnets, I’ve always liked this idea. Just thought I would throw that in!


