Accenting Cookies with Airbrushing {Guest Post}
I love the look of airbrushed cookies, unfortunately I don’t quite have the knack. Lucky for all of us there are sweet decorators like Laurie and Jeanette of SugarBliss Cookies that are willing to share their expertise. Today they’ll show us how to create beautiful cookies with simple airbrushed accents.![]() Hello! We are so excited about this opportunity to create a little guest post for Sugarbelle! Our names are Laurie & Jeanette. We are sisters and about 3 years ago we turned our hobby into a little business called SugarBliss Cookies. Can you all remember the very first cookies you ever made? We will never forget ours! Things started out pretty rough in our kitchen. After hours of work and anticipation, ours flopped. BIG TIME! Our recipes were NOT cooperating and we had so many questions! Thank goodness for Sugarbelle and her cookie blog! We adore this cookie community and feel like you have all helped and inspired us along the way. We are so excited to finally be able to share a little something with all of you! We’ve made a tutorial on how we like to use our airbrush to add some fun color and dimension to our cookies.
Hello! We are so excited about this opportunity to create a little guest post for Sugarbelle! Our names are Laurie & Jeanette. We are sisters and about 3 years ago we turned our hobby into a little business called SugarBliss Cookies. Can you all remember the very first cookies you ever made? We will never forget ours! Things started out pretty rough in our kitchen. After hours of work and anticipation, ours flopped. BIG TIME! Our recipes were NOT cooperating and we had so many questions! Thank goodness for Sugarbelle and her cookie blog! We adore this cookie community and feel like you have all helped and inspired us along the way. We are so excited to finally be able to share a little something with all of you! We’ve made a tutorial on how we like to use our airbrush to add some fun color and dimension to our cookies.
- Piping & Flood prepared in egg yolk yellow, sky blue and white (make these colors fairly light so you will be able to see all of your fabulous airbrushing!)
- Very small amount of black flood (optional)
- Tips – 1.5, Wilton 101 and Wilton 101s
- Airbrush
- Airbrush color (we like Americolor) in deep pink, copper/fleshtone, black, sky blue, copper sheen, pearl sheen (if you don’t have an airbrush, you could just use the canned stuff in pink, orange, blue, pearl and gold)
- Fine tip paint brush
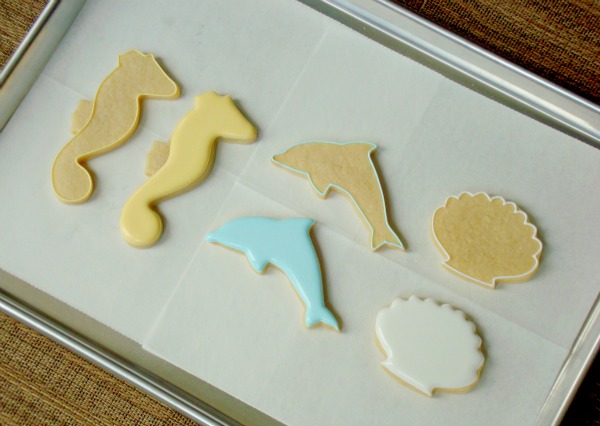
Outline and flood your cookies. Allow to dry (we dry ours under a fan for about 30 min).
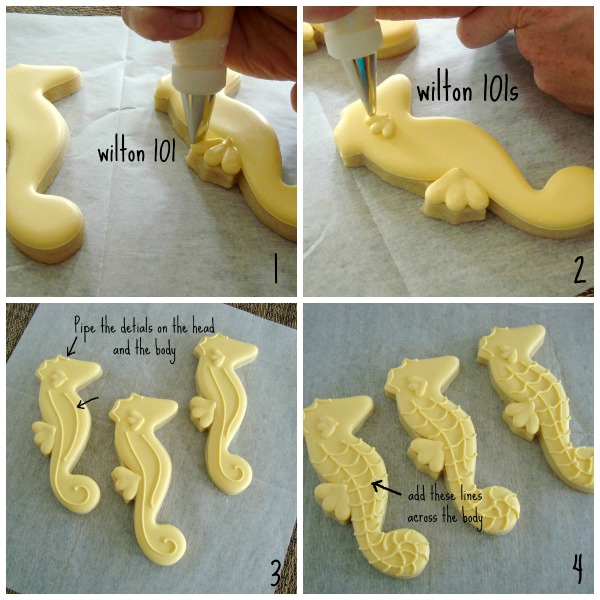
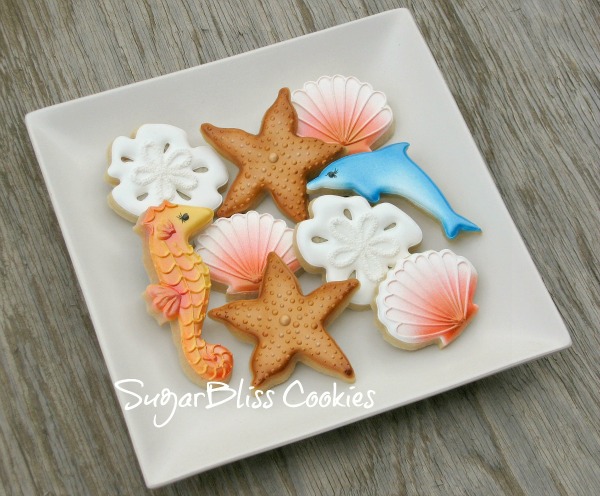
 Add all of the piped details to your cookies. We used a 1.5 tip for all of the piped lines and the 101 and 101S tips for piping the seahorse’s little fins.
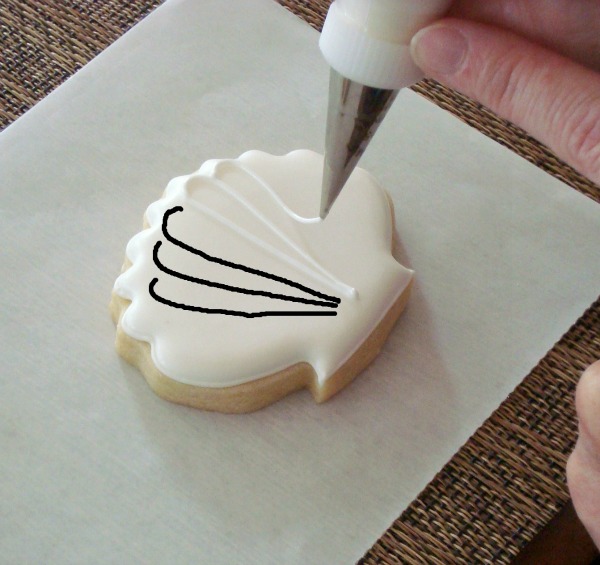
 We used a #1.5 for the seashell detail.
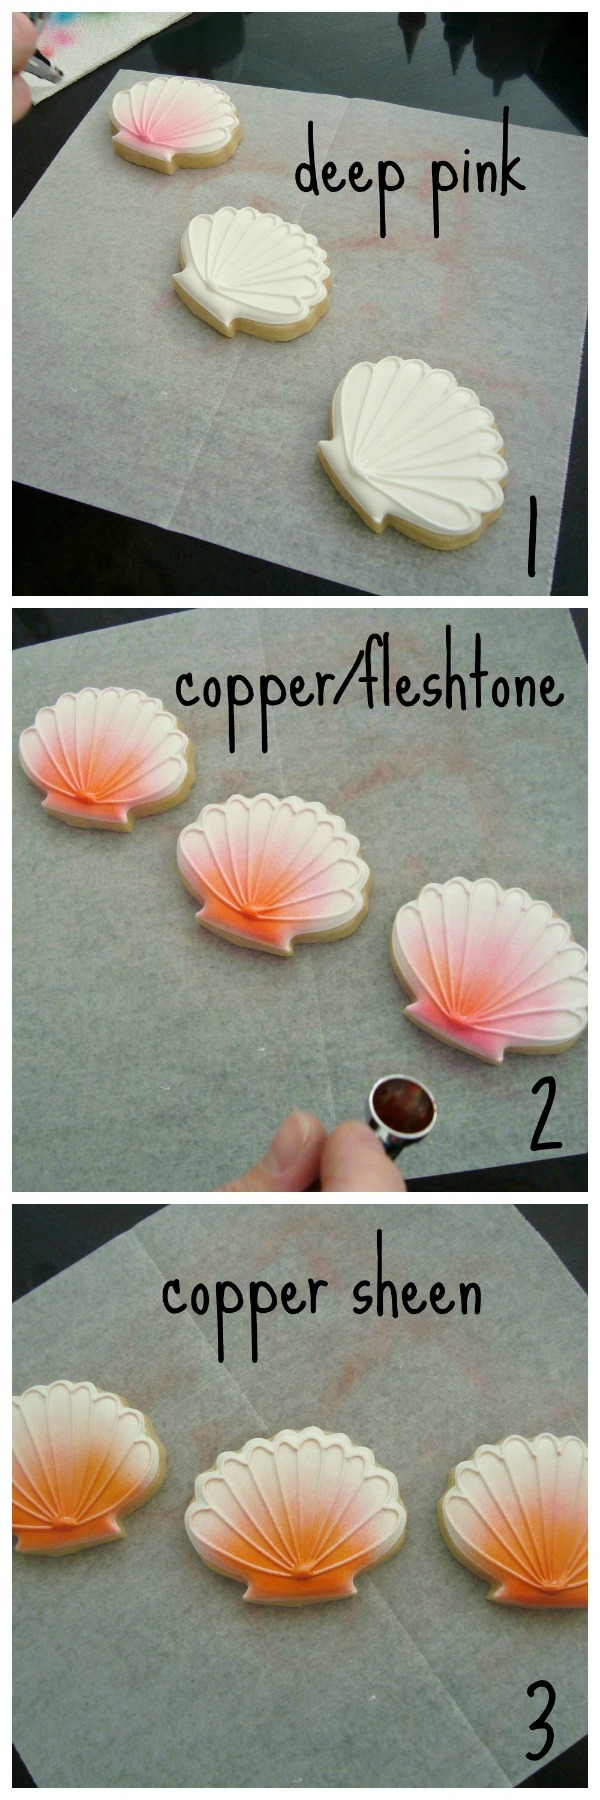
 Using the copper/fleshtone color for your air brush begin to add some shading to your seahorses and shells focusing in on the areas highlighted in the pictures. Move right on to the pink. We don’t even wash our airbrush out between colors.
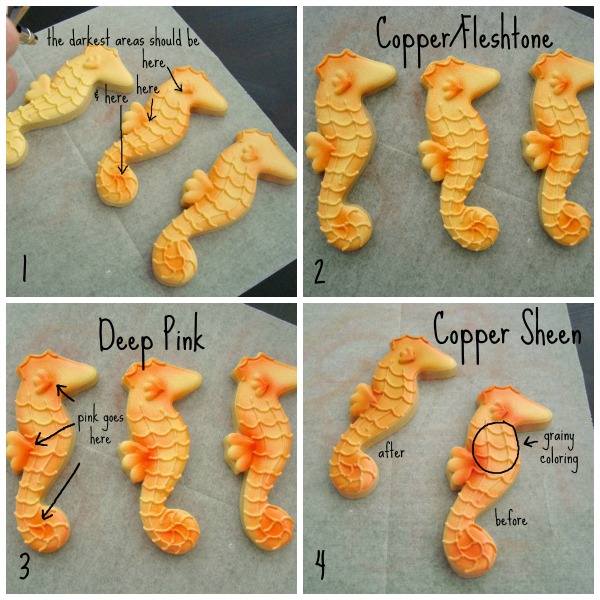 The two colors mixed together make a really pretty coral color on the shells. When you are done with this part, the colors are pretty and vibrant but they are kind of grainy. We add one more step because we like the colors to blend together even more so you almost can’t tell where they stop and start. We lightly sprayed the whole seahorse and the base of the shell with copper sheen. It also adds a little sparkle!
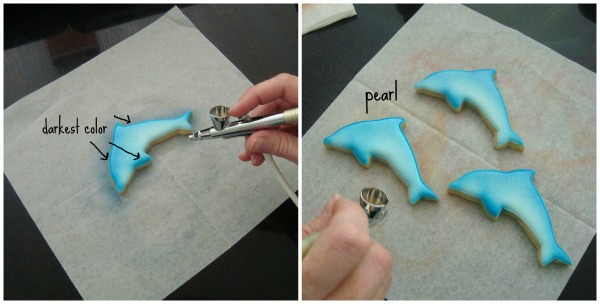
 We sprayed the dolphin with sky blue creating the darkest color in areas highlighted in the picture. Finish him off with a little pearl sheen to soften the color and take that grainy look away.
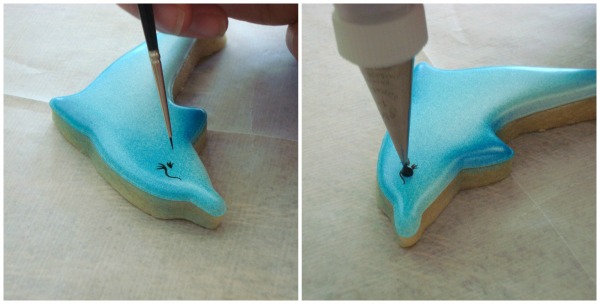
 We painted the eyelashes on with a very fine tip paintbrush and a bit of black airbrush color. A little goes a long way! Once the lashes were dry we added a small drop of black flood on top for the eye. If you don’t have black flood on hand, you could easily just paint the rest of the eye on.
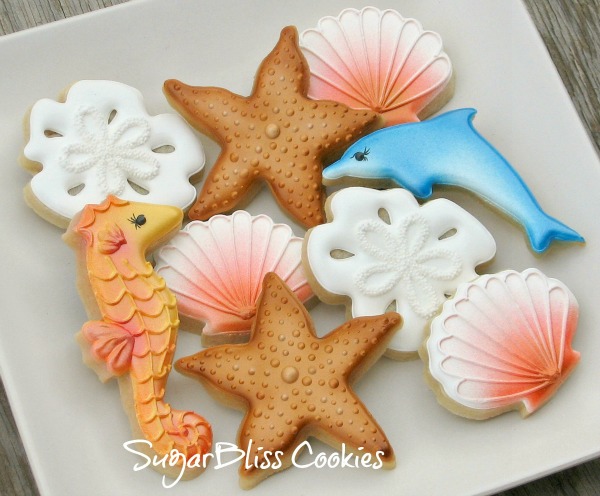
 We hope this helped and inspired some of you to go wild with your airbrush! We love using ours! Once you start using your airbrush, you’ll find it saves you a lot of time and it adds shading and detail to your cookies you can’t achieve with other techniques.
![]() I am always amazed at how these ladies add such depth to their designs with a few simple touches. Thank you so much for taking the time to share your wisdom. I am a huge fan of Laurie and Jeanette’s work and you should be too. Be sure to “like” their Facebook page to so you don’t miss a single creation.
I am always amazed at how these ladies add such depth to their designs with a few simple touches. Thank you so much for taking the time to share your wisdom. I am a huge fan of Laurie and Jeanette’s work and you should be too. Be sure to “like” their Facebook page to so you don’t miss a single creation.
For more nautical-themed cookie ideas, check out these posts:
- Seahorse Cookies
- Simple Starfish Cookies
- Simple Sand Dollar Cookies
- Shark Mouth Cookies
- Crab Cookies
- Cute Whale Cookies
- Cute Clam Shell Cookies via the Bearfoot Baker
Happy airbrushing, cookie friends!


This was awesome. I always wondered how she did that.
So pretty. I’m still learning to use the airbrush, thanks for these tips! I especially like the shading on the sea shells.
As usual, just magical.
I am also a huge fan of Sugarbliss. You are amazing! Your designs are fun and the way you add the airbrush outlines make your cookies one of a kind. Thanks for sharing your tutorial and airbrush skills with us.
Awesome airbrushing skills!! These cookies are gorgeous. Thanks for the tutorial!
Great guest post! Thank you for the great tips. I often get the grainy look and end up not liking it on my cookie. I love the extra step you took with the copper sheen to tie it all together! Im going to attempt to go wild with my airbrush…
First I need an airbrush and then I’ll definitely need some lessons should I hope to make cookies as pretty as these. This tutorial is great for all airbrush newbies and us wannabes.
Love these girl!
Can someone explain what “grainy coloring” means. The picture doesn’t enlarge to see what they’re referring to.
Hi Jo, the grainy coloring refers to the little flecks of color you get from airbrushing your cookie. Instead of seeing a smooth transition/color change you can see where the airbrush spit little polka dots of color. It comes out of the airbrush almost like a mist but it isn’t fine enough to just show up as a shadow or smooth shading. Using the copper sheen over the top hides these little dots and creates that smooth color. Hope this helped 🙂
Thank you so much…now I get it!
(Your cookies are outrageously cool….here and at FB…I LOVE your designs!)
The airbrush sure adds dimension! Another thing to add to my wish list…an air brush!
Que artistas felicidades es precioso el mejor blog existira uno igual en español???????
Oh yeah I have been criticised duinrg the any questions’ time after a talk at a conference because I used the wrong’ font on my powerpoint slides!!!!!!Apparently people have different preferences’ depending on their age .So I’m told.d.
Pingback: Deli Meat Tray Decorated Cookie Platter
I am looking to order a seahorse & seashell cookie cutter and LOVE yours pictured above. Can you share with me where you purchased these? I’d greatly appreciate it! Thanks!
Pingback: Decorated Mermaid Cookies
What brand airbrush do you recommend? Thank you!
What brand airbrush do you recommend?