Making Icing Color Match
Do you struggle with mixing perfectly coordinated icing palettes? Then I have a tip for you and it’s simpler than you may think.
A few years ago my friend Jen taught me this trick and I’ve been doing it {or mostly trying to} as often as possible since then. Not only does this ensure perfectly matched colors, it also cuts down on dirty dishes.
I’ve nicknamed this the “one bowl method”. It’s so simple I’m embarrassed to admit I didn’t think of it on my own. Beginning with the lightest color {often white}, mix each color in the same dirty bowl until you come to the darkest. Long story short, if you add a little bit of each color to the next one you’ll end up with a perfectly complimentary color palette every single time.
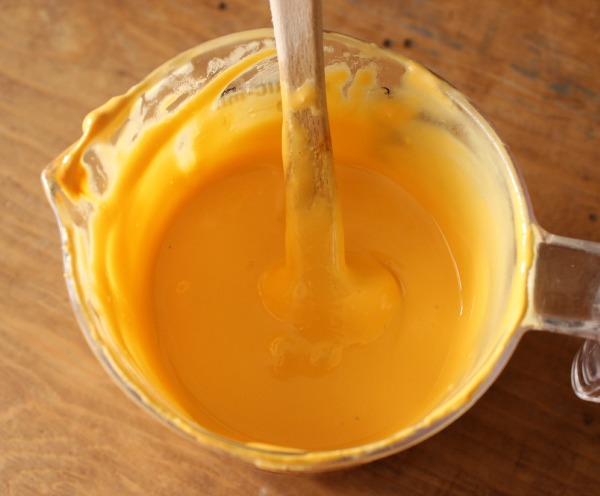
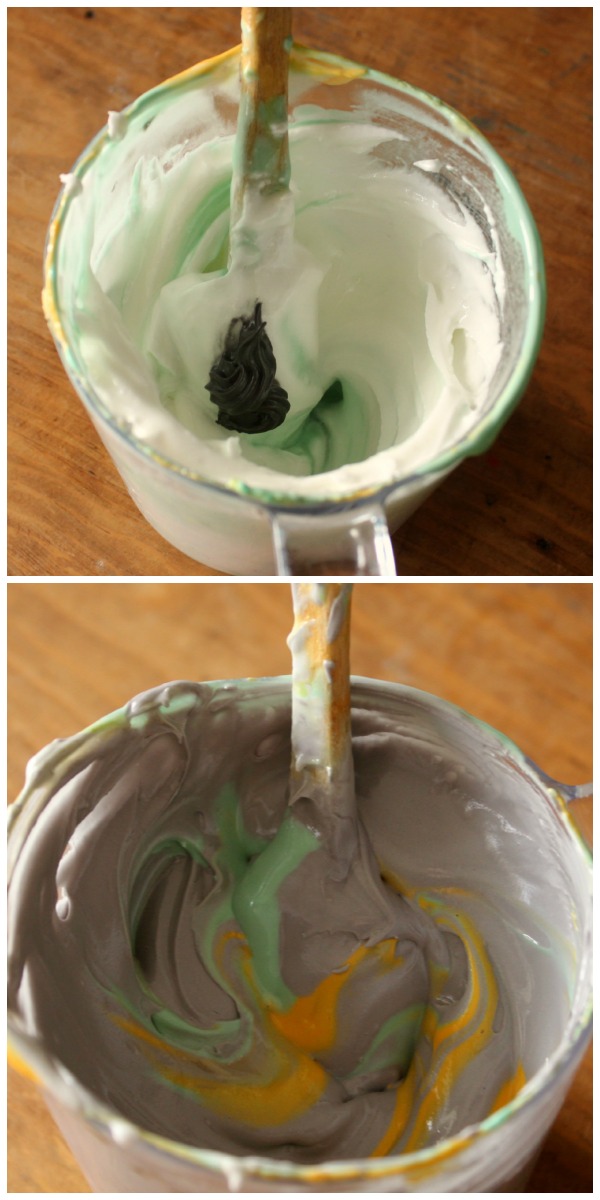
Before I really confuse you here’s a few pics. I started with white, of course, then I combined egg yolk yellow and ivory to create a pretty mustard color.
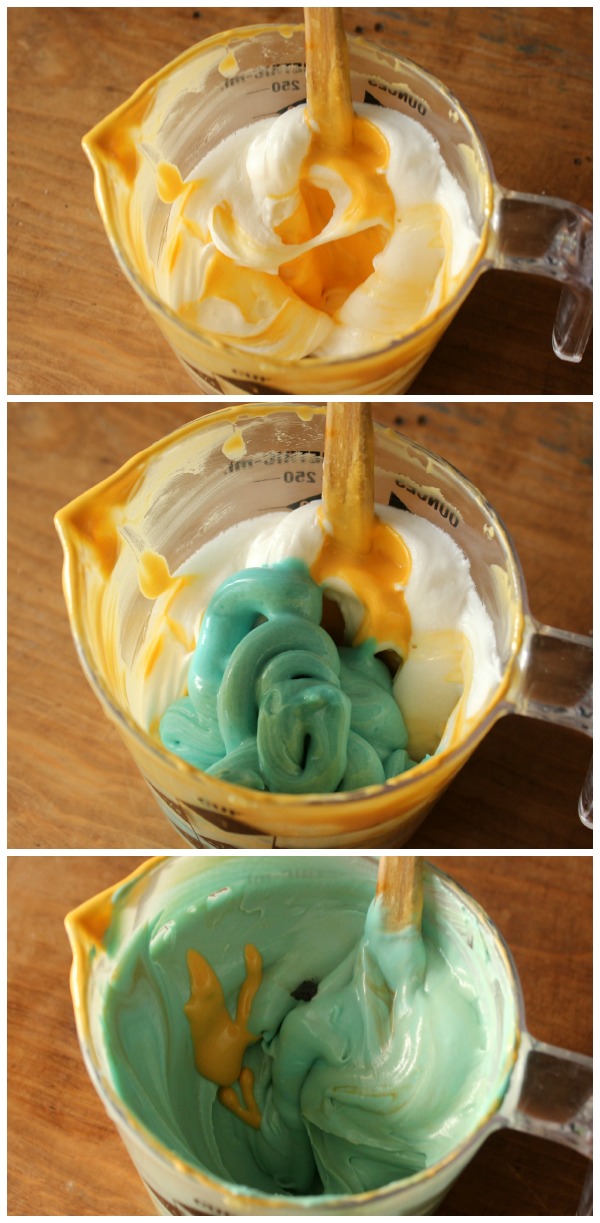
Once I’d finished with the yellow, I added more white to the dirty mixing cup along with some leftover turquoise icing I had on hand. After a bit of mixing it wasn’t quite right so I added a teensie bit more of the mustard color {above} along with a dot of dark gray piping icing, which also leftover from a previous project.
Finally, to make the light gray color I added more white icing to the dirty bowl and mixed with leftover dark gray plus a bit of mustard and turquoise.
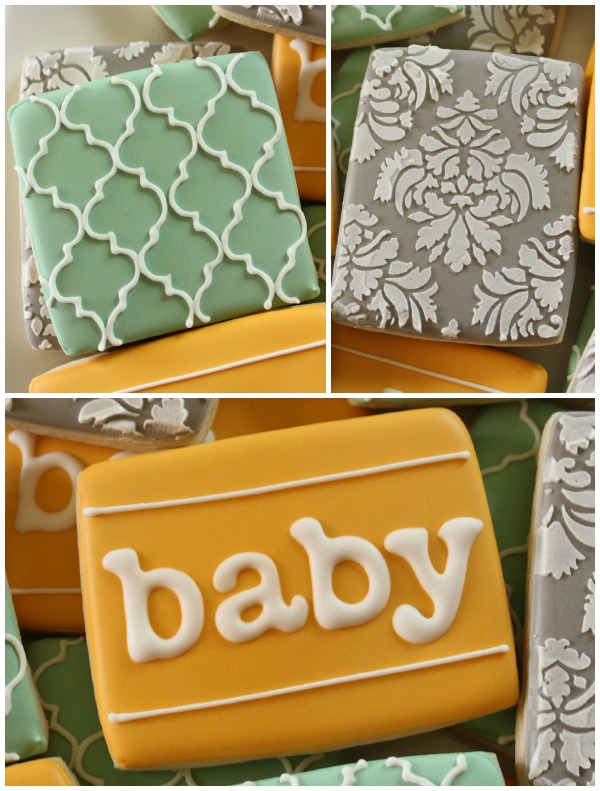
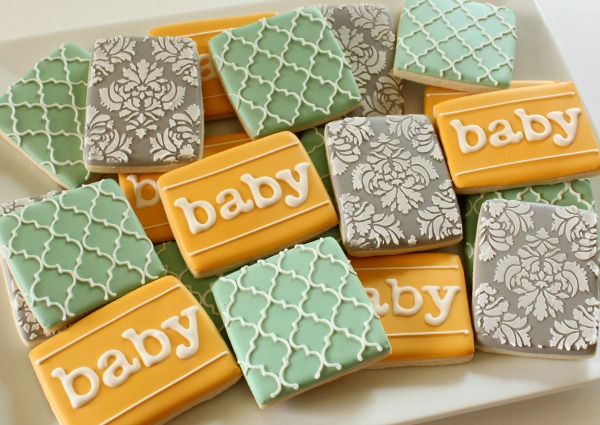
The end result? Three completely different perfectly coordinated colors. Think of it like a family. Two parents come together to create a kid. Although the kid “matches” the parents they’re still a individual person with their own unique physical attributes…unless you’re like me and have kids that look nothing like you. In that case, completely ignore this analogy.
 You can accomplish the same thing using multiple bowls by mixing a tiny bit of each color into the other shades {see the Lila Loa post below} if that’s your preference. All roads lead to Rome, right?
Anywho, to learn more about icing color, check out these helpful links:
- Make Your Colors Match via Lila Loa {Georgeanne said pretty much exactly what I did here, but in case I confused you or you have an aversion to using just one bowl, her explanation is very helpful}
- Karen’s “One Bowl Method” Video
- Changing Icing Colors with Black and Ivory
- Printable Color Chart
- Coloring and Preparing Royal Icing
- Tips for Coloring Royal Icing {Check out the links at the bottom of the post}
Here are a few more links for your reading pleasure:


Wow!!! Gorgeous cookies and great palette! I need to try this method, it would save me a lot of clean up and wasted icing when I mix way too much!
This is going to sound funny but I had to MAKE myself learn this! I used to mix the colors and HAVE to have them sitting there so I could see I had my entire list covered. Now I make a list from light to dark and get moving. I wasn’t easy but I’m getting it. I’m so weird, lol!
Typo city! Phone comment lol!
Seriously… this is EXACTLY why I can’t use the one bowl method! Because I HAVE to see all of my colors together before I can put them in my piping bags! Maybe someday…
In that case, I’m normal, LOL! You always know how to make me feel better GA! PS-I think I talked to you more when you were in Korea! I need to fix that, STAT! I miss you!
I use the one-bowl method, but I also use the plastic-wrap for clean bags method, so I mix a color, portion it into plastic wrap, then make the next color. Then I can see all my colors and coordinate them too. It makes everything cleaner.
The pods are what FINALLY made me okay with this too, lol! I like my neat little stack of pods 🙂
I definitely want to see the colors all together, and I want to be able to tinker with them at the end!- I actually used the one bowl method a few sets ago to good results, I just didn’t bottle up the colors until the end. I have a bunch of tupperwares I use and just put icing in them and tuck them under a wet cloth as I go- That way I can use the icings at hand to monkey with colors and make them match even more!
I’ve got a good pic of that that I should post soon…that’s exactly how I did it until Jen taught me this. I am learning slowly! It was hard for me to change it up!
Totally makes sense! Except I do stuff like reach for Super Red, accidentally grab Super Black (the little lids were open) and turn my beautiful red to brown with the black. Oopsies!
If I could stop those mistakes I’d be more successful at cohesive color palettes. It’s my “Kitchen ADD”.
These cookies are simple, beautiful and awesome!
That’s brilliant! And so simple… I never would have thought of it. Love it! (And such a pretty set!)
What a fantastic idea!! I love it! Plus, easier clean up is always appreciated 🙂
what about the egg in cookies do you cook it first in pan?
I am absolutely in love with these colors!! You always have the best techniques.
genius!
Pingback: Frosting Cookies and Cakes |
Oh I so wish I could do this, Callye! I haven’t made the switch to one consistency yet and always need to let my bowls sit to get rid of the bubbles. It’s such a great idea, though. Maybe I’ll try it when I only have a few colors to do. Thanks for the tip!
Now you have me thinking…I wonder if there is a marriage of the two? One bowl, rapid air bubble removal. I have heard tales of dental vibrators and placing the icing on airbrush compressors to gently shake them out, but I wonder if there is a quicker way that also involves minimal dish washing?
Hmmm – I have a dental vibrator but haven’t been overwhelmed with the results. Maybe I’ll try again in the name of not having so many darn dishes to wash! Will let you know how it works out!
Such a good idea!!
This is brilliant!! I will have to give it a try–I feel like I am getting better with matching colors but this way it’s a sure bet. And it seems like it would eliminate a lot of the wasted icing that I always seem to end up with.
I have been a fan of your site and your talent, since I was fortunate enough to stumble upon it one afternoon.
You would think I would stop being amazed, but I am constantly impressed with each new cookie. Your color sense is fantastic! I took an entire college course in color and could not come close to some of your wonderful color palettes.
The fact that you run your blog business as a busy Mom, makes me even more impressed with your talent and multi-tasking.
Thanks for all the great ideas you bring us.
seriously, gail…you just took the words right out of my mouth. a-may-zing!
I appreciate this tip in particular, because I really struggle with getting the right color these days …. but I certainly had to laugh at the fact that your kids look nothing like you 🙂 Mine look nothing like me, either! All that work, and they both look like Daddy … grrrrrrrrrrrr
At least he knows it wasn’t the milkman 😉
Great idea – always impress with your “ideas”. thanks I love your site.
Such smarties you gals are. 🙂
Totally awesome! Trying this on my next set. Thanks for the great tip!
Awesome tip, Callye! Love the colors you used for these cookies!
OK, now I am sitting here with my mouth open because my jaw dropped. That is just beyond clever! Thank you so much for sharing that.
You give the most amazing tips. I would never have thought of this myself!
Pingback: Cookie Crumbs | Jamie L. Watts
I absolutely have to try this method on a set of cookies. I did read Lila Loa’s tutorial a while back, but since I’m actually decorating cookies (not just obsessively reading about it), your post is a fantastic refresher. Tinting frosting and color theory is just like any other part of cookie decorating, I hope the more I do it, the better at it I become! Thanks for another great tutorial.
I’d never heard this before — what an amazing tip for coloring! Can’t wait to try it out… thanks so much!
Callye, you are so special. I didn’t have your mailing address to send you a big thank-you! I was so surprised to see the very cookies you made for us is featured on you site. Ashley loved them and we were all properly impressed with you talent and generosity. You are indeed a precious lady and your work is outstanding. The cookies you made for me with the heart shaped paint palette and paint brushes were adorable and they are so tasty. Thank you sweetheart, I love you. Moma Joyce
I love you too Momma Joyce! I really wish I could have come. I really want to see you soon. =) Miss you!
HOLY CRAPOLY! You just made this beginner ridiculously happy!
Thank you so much for sharing!
Pingback: Simplifying Multi-Colored Cookie Designs
Pingback: Toning Down Pink Icing
I have to tell you, you are amazing, i love to read your website…I think i’ts wonderful how much information you offer here for all of us! This is by far one of my favorite sites! Thanks so much for shairing all you know! All of your posts are so much fun to read, very easy to understand, and you have taught me so much! I’m not big with royal icing, but you have inspired me to try and use it more..also, i’m totally investing in a Kopykake projector..i cant believe how easy that looks..the struggles of making characters perfect may finally be made easier!!! Thank you thank you thank you!! I”m a huge fan!
Pingback: Simplifying Complicated Cookie Designs with Jill FCS
Pingback: Tan Royal Icing
Pingback: Simple Christmas Tree Cookies
Pingback: How to Make Deep Pink, Magenta, and Fuchsia Icing
Pingback: How to Make Tiffany Blue Icing
Pingback: How to Make Navy Blue Icing
Pingback: How to Make Burnt Orange Royal Icing
Pingback: Rose Shares... - Rose Bakes
Wilton taught us at an instructor meeting years ago to add a bit of the flower color to the leaf color, that way the flowers blended together perfectly, so this is a great idea. Hopefully after seeing the pics & explanation, I’ll remember to do it all the time.
Pingback: You’re Grate! Punny Cheese Grater Cookie Icing Color Palette – The Sweet Adventures of Sugar Belle