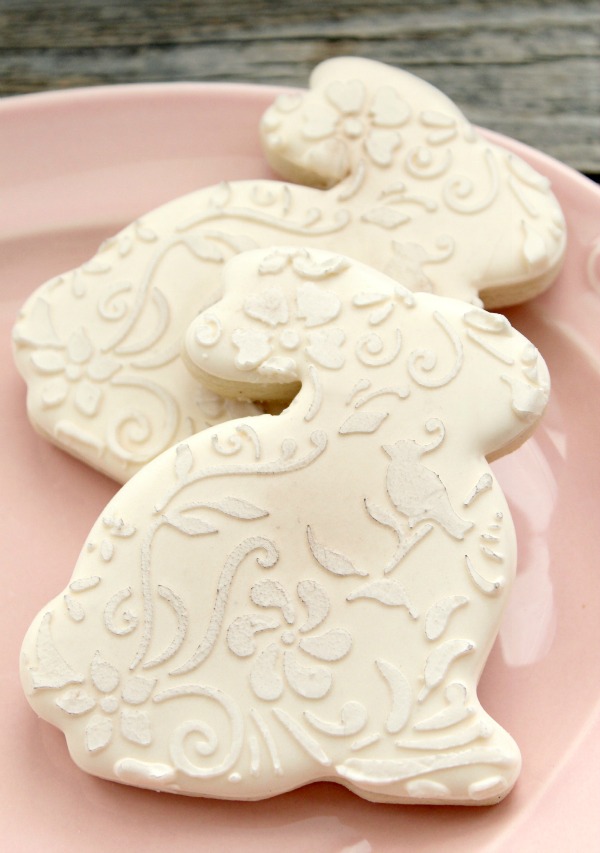
Vintage Floral Bunny Cookies and a Free Printable Kopykake Template
Spring has finally made it to my corner of the world, and lately I’ve been finding it harder and harder to sit inside decorating with warm breezes and sunshine calling my name. This time of year I find myself turning more and more to projects that require minimal decorating and color mixing. This technique doesn’t require a lot of work or prep time, but they’re sure to impress.
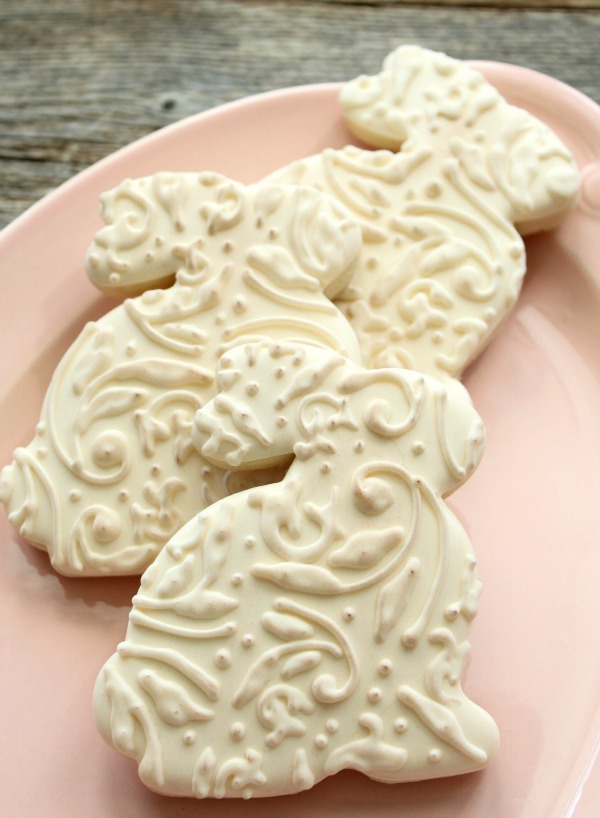
To make these cookies I used the Nature’s Vignette pattern from Designer Stencils. It’s one of the best stencil purchases I’ve ever made. When buying stencils, I often choose cake sides and tops so I can use one stencil for a variety of shapes and sizes. It’s possible to use them “as is” but can get a bit messy. In order to work more quickly I often make a stencil mask to cover the open space and create a more customized shape.
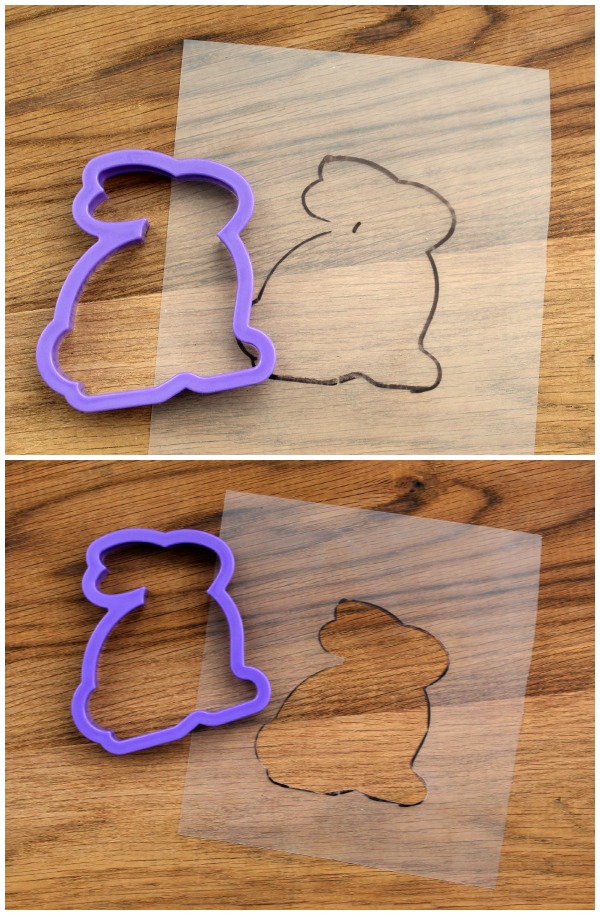
To do this trace the shape of your cutter onto stencil paper {available at craft stores} and carefully cut out with an Exacto knife.
Tape the shield over the larger stencil with painter’s tape to avoid damaging the stencil when the mask is removed.
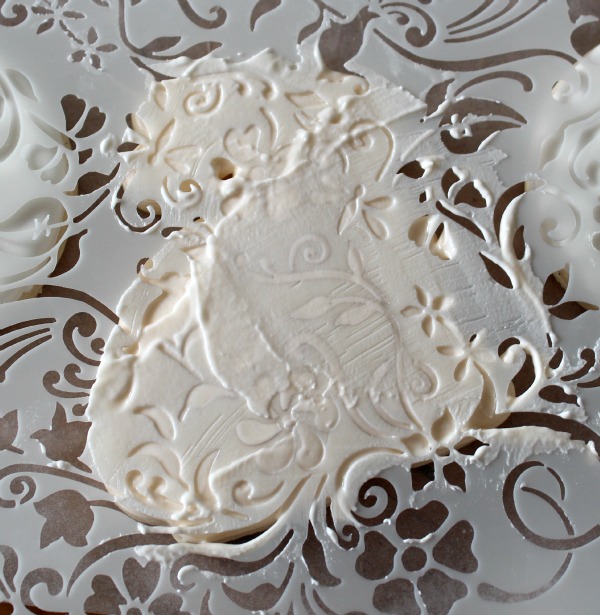
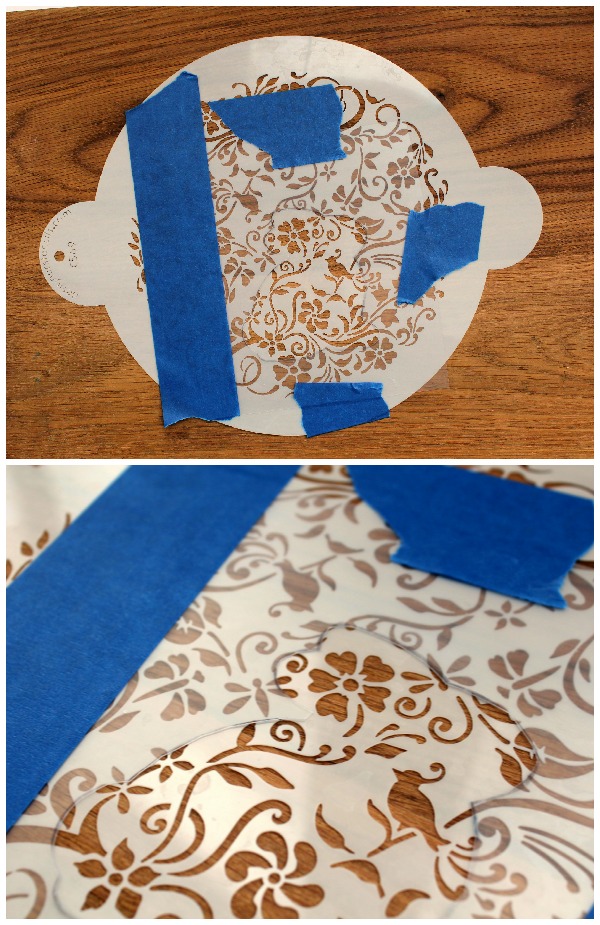 Place the stencil over the cookie lining it up as closely as possible. Use an offset spatula carefully spread icing over the design. I didn’t go into detail this time around but for more information on stenciling, click HERE.
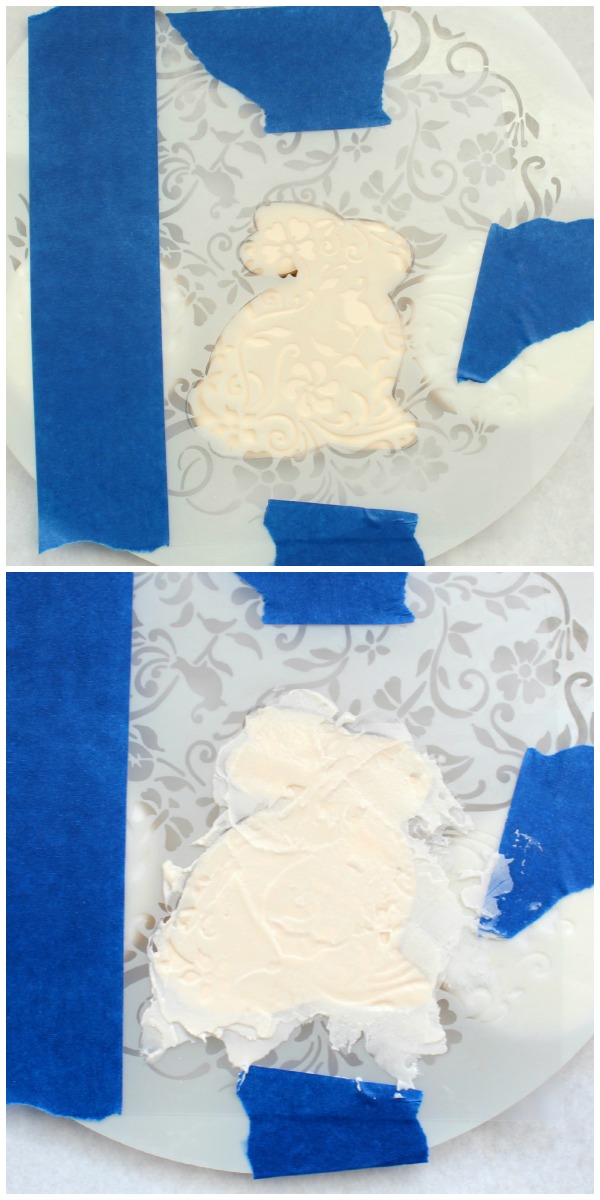 You may have a few messy edges, even with the mask. This is no cause for alarm. Use a toothpick or boo-boo stick to gently clean up any excess icing.
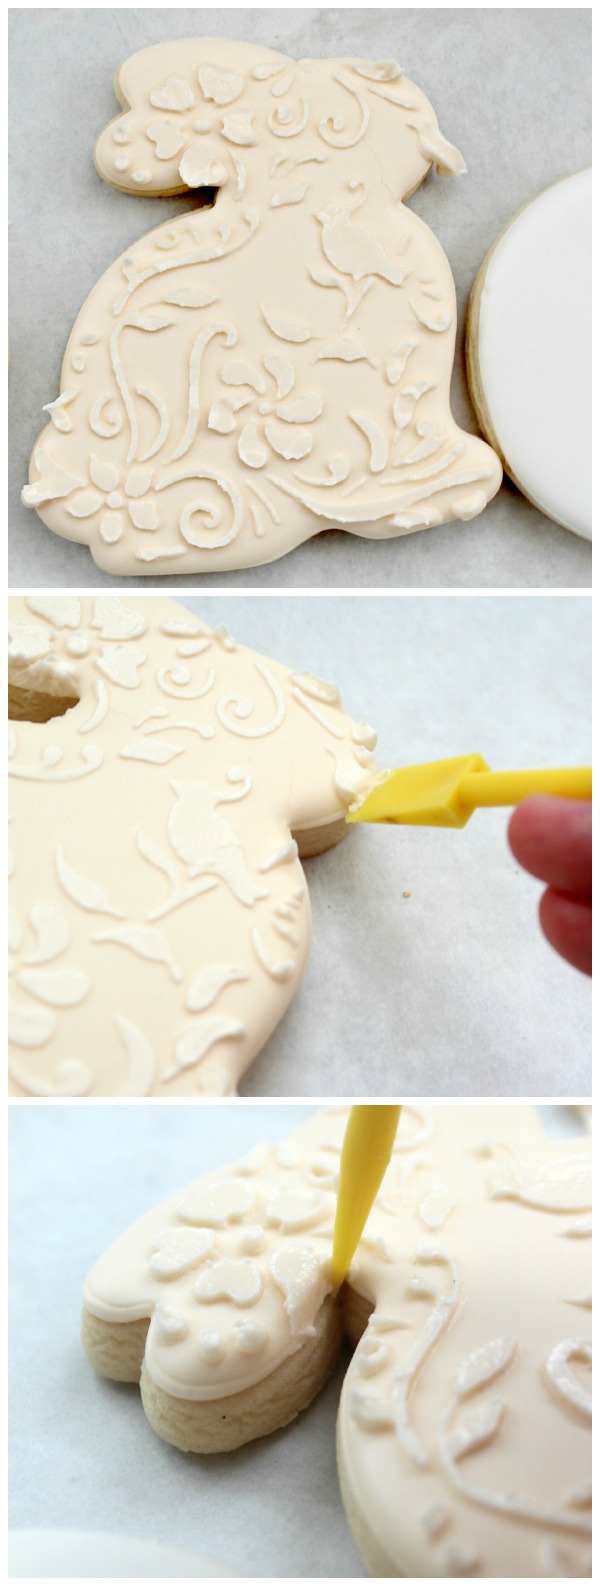 Remember, it’s possible to use a larger stencil without making a mask. The trick is to use thicker icing and to work slowly.
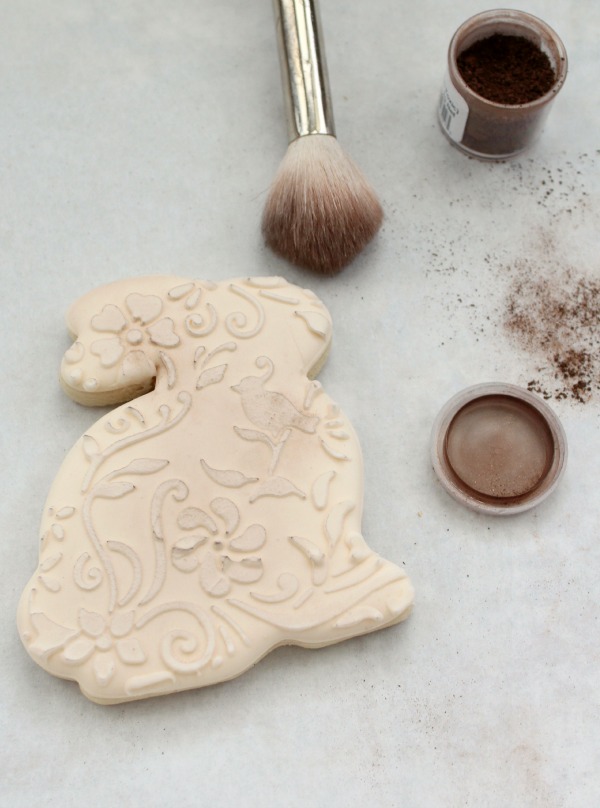
After stenciling let the design dry. To create an antiqued look lightly brush over it with petal or luster dust. Alternatively, you can use this “glazing” technique from The Barefoot Baker or cocoa powder.
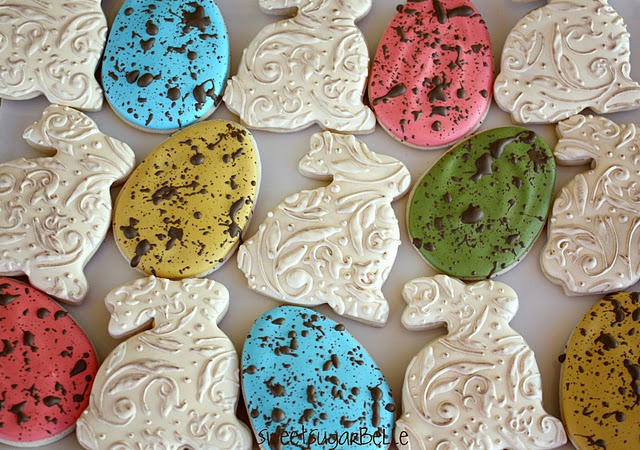
If you own a Kopykake {and perhaps not a stencil} I have another method for you. I made this set of cookies a few Easters back.
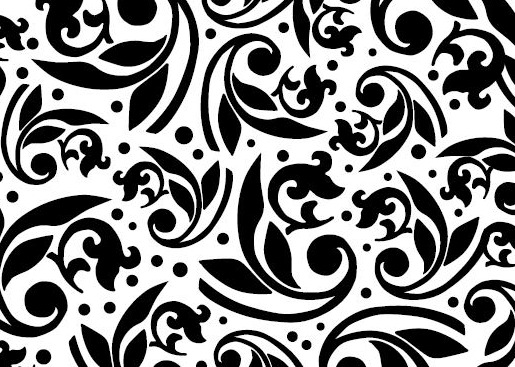
The pattern came from a card that I found in Target’s dollar bin *I think*. Since it’s a classic pattern I figured I should share it with all my cookie friends. It will work well for many different designs. To print your copy, click HERE.
Print, trim, pop into your Kopykake and pipe away. I like 20-second icing best.
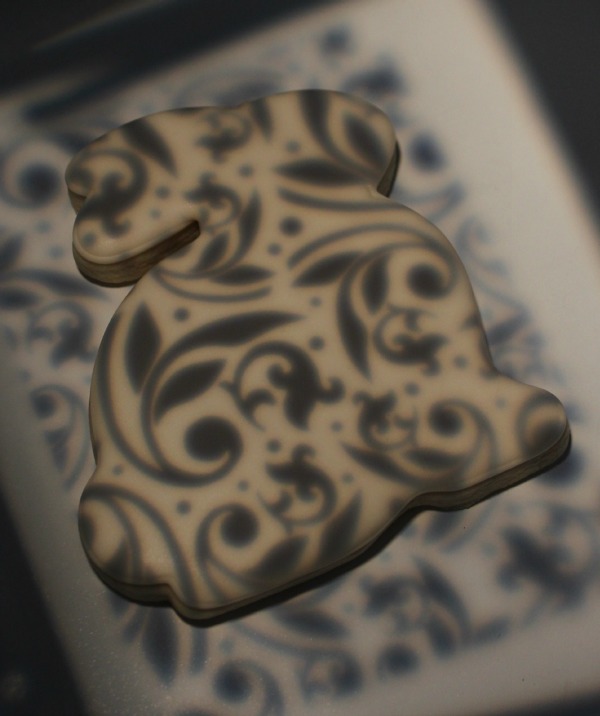
Whatever option you choose these cookies are the perfect way to celebrate Easter without a lot of fuss.
If you like these cookies, you may also find these posts helpful:


Love these! I just made some baptism cross cookies today with a very similar white-on-white stencil! Next time I will try antiquing . . . takes it to the next level!! http://www.bakedbyrachel.blogspot.com/2013/03/baptism-cookies.html
I am so glad you did a tutorial on this! Your bunnies have always been one of my favorite cookie designs EVER! Adding the luster dust is brilliant! Thanks for sharing!
So, so beautiful and elegant! Such an awesome tutorial too, I love all the detailed pics.
You are the SMARTEST! What a fabulous way to decorate a cookie!!!!
I’m on board with anything that reduces the amount of time I have to spend mixing colors! This technique creates a stunning effect. Beautiful bunnies, Callye!
I love love love those cookies – and I am going to make them…soon. Real Soon. I don’t have a KK so this is great! The vintage look are some of my favorite of all your cookies! Hope you’re having a great weekend my friend! 🙂
Te quedaron unas galletitas preciosas. Soy totalmente fan tuya. Creo que tus galletas son maravillosas y disfruto muchísimo viéndolas. Gracias por todos los consejos que nos regalas!!! Enhorabuena por tu trabajo!!!
Callye, I look at your blog everyday. I should have made many comments regarding your jaw-dropping talents with cookies. I loved making cupcakes until I saw a youtube video of SweetAmbs cookies, then I converted to being an aspiring cookier! From SweetAmbs site is where I discovered you…and I cannot wait for the next thing you post. I’m like the lady at Christmas time outside of Target, tapping on the window, chanting “open, open, open”. LOL!
BTW….I love the vintage bunnies! Can you show more vintage ideas in the future? I just recent.y made a cookies using a cameo mold. They turned out ok, but I need ideas on how to incorporate the fondant into the cookie.
Thanks again for all you fantastic work and wonderful tutuorials. I truly learn alot from you.
Love your stenciled cookies. May be a bit more time and patience involved but the finished effect is worth it!
These are gorgeous! I love the look of stencils but they seem so time consuming…
Beautiful and simple, two of my favorite things! Perfect for a busy time of year. But we’re supposed to get five inches of snow to to tonight, so I’m not feeling spring yet. I’m jealous, really.
Such a cool way to add some vintage to your cookies. Love the ivory on ivory.
so perfect. I am so going to use this template! It’s a perfect idea. I usually freehand my swirly things, and every once in awhile they go wonky! Happy Easter friend!
Pingback: Glorious Treats » Colorful 3D Easter Bunny Cookies
SO gorgeous!
These cookies are simply elegant. Adorable as bunnies but can you imagine them for weddings? Maybe wedding bells or flowers? Wow! You are a true artiste!
They seem to get prettier every year! They are so elegant and chic. Lovely!
I love this vintage/antique look so much! It’s classic and gorgeous! Thakns for the tutorial, Callye!
I love the look, I was able to try tonight. I don’t know how to send you a picture, but mine turned out very close. thanks,
Gorgeous cookies!!!
What a beautiful idea. It kind of reminds me of flock wallpaper. Gorgeous!
Wonderful idea to stencil with icing, thanks for sharing.
Pingback: Celebration Cookies | Style My Party
Pingback: Our favourite Easter baking ideas | Food Heaven
Pingback: Rabbit Cookies with Chevron Ears and Video - The Bearfoot Baker
Pingback: Airbrush with Stencils - The Bearfoot Baker
Pingback: Easy Decorated Burlap Cookies
I am looking for a bunny cutter just like that. Where can I purchase one?