Easy Lego Ninjago Cookies
It’s no secret of how I feel about character cookies so, when my son requested Ninjago: Masters of Spinjitzu cookies I instantly envisioned some sort of ninja dog hybrid character that would leave me curled in the fetal position in the far corner of my cookie room. To my surprise, unlike Bakugan Battle Brawlers and Ben Ten, Ninjago cookies were actually easy. Very easy!
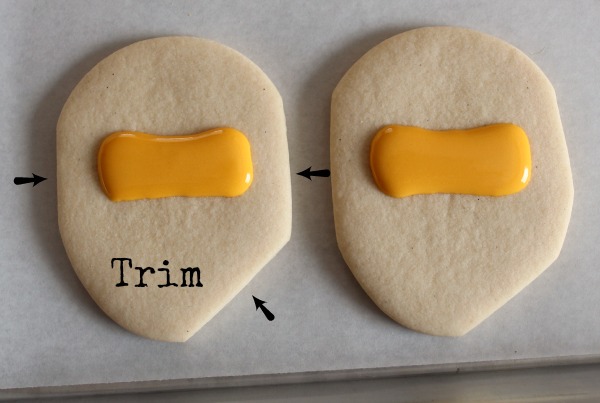
I used a trimmed egg cookie for my ninjas but if you want to go even simpler a round or square cookie will work just fine.
To make these cookies you will need:
- Yellow and your choice of red, blue, black, white, and green 20-second icing
- Black piping icing
Begin by using yellow icing to create the eye area as shown on the cookie below.
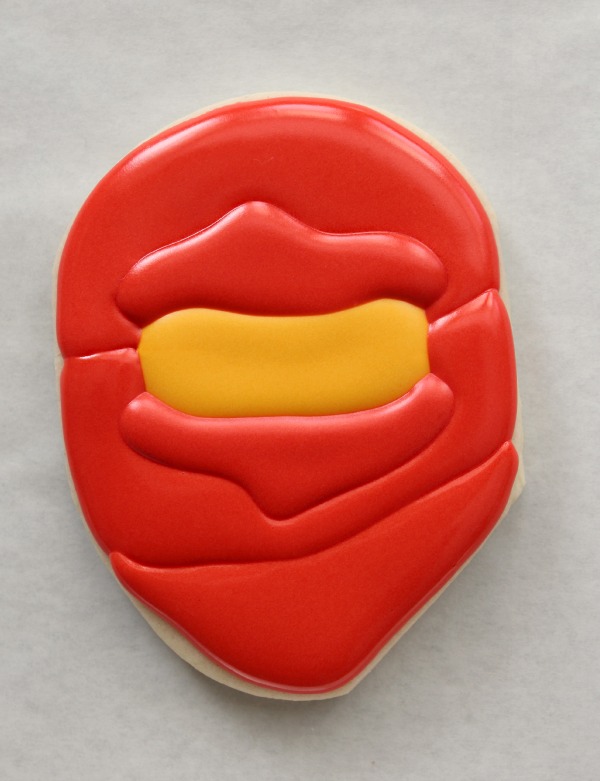
After the yellow has set for a bit, begin adding a mask. Let each area set for a bit and build each layer until the entire cookie is covered.
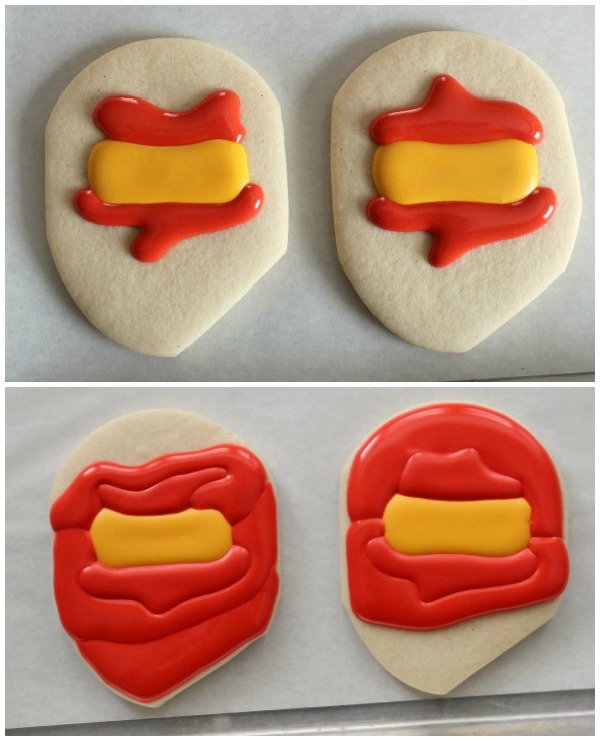 Alternatively, you can outline and flood the cookie then pipe “wrinkles” but I like the texture and convenience of 20-second icing.
At this point let the cookie dry overnight. While you’re waiting, I’d like to show all of you non-Kopykakers a quick little trick for perfectly positioned details.
Begin by Googling the image you need. In this case I was looking for a Ninjago face. With a bit of searching I found this guy. I like him for two reasons. First of all, he’s very simple and second, if you do decide to print, you’re not wasting colored ink.
The next step is basically the “push-pin trick” with a twist. All you do is copy and paste the picture into some sort of image editing program and resize.
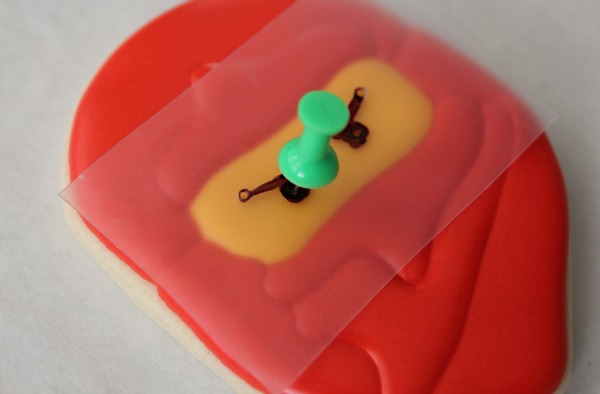
At this point you can print the image and use as-is, but for even more accuracy use a small piece of stencil paper {or transparency paper} and mark the image with a permanent marker. Pre-make pinholes and you’re ready to go.
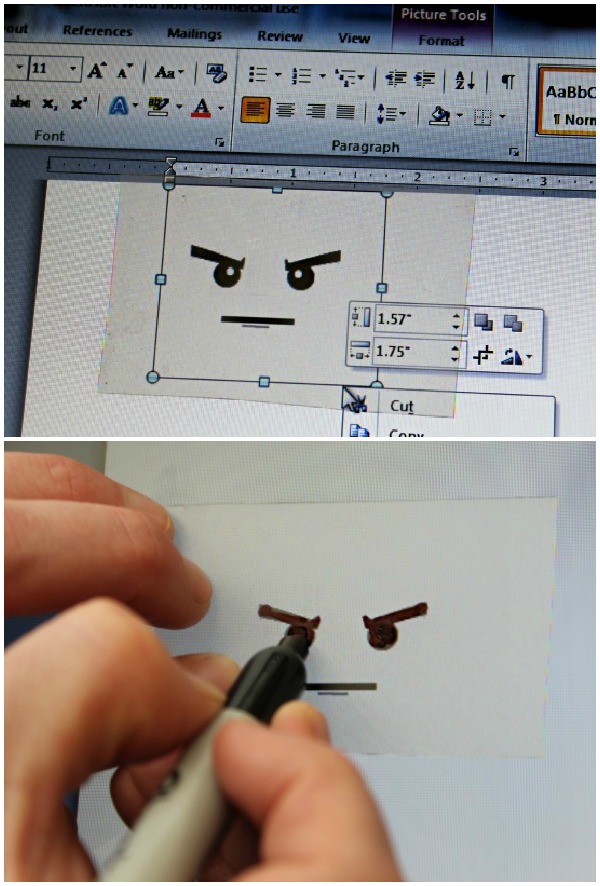 The transparent paper allows you to precisely position your image on the cookie. It takes a little work but it’s an easy alternative to dragging out the projector…plus I think the whole “stick a needle in your eye” thing is hilarious in a creepy sort of way.
To finish up, pipe the final details and let dry. If you’d like, add a little white highlight to the eye. It really does make a difference.
If you have boys, cross your fingers they ask for a Lego Ninjago birthday party. They’re some of the simplest cookies you’ll ever make.
Have a great week everyone!





These are spot-on PERFECT! Love the new “trick,” too – thank you! ♥
Fabulous cookies, Callye! I’ve used your push pin trick many times, even with a Kopy Kake. It is just so quick and easy! 🙂
It really does beat getting it out, huh!
I’m sad that my son is 12 and I have no idea who or what Ninjagos are! lol But they look pretty cool! Awesome job!
Boys love these. Now I know I can do them easily. Thanks !
I have complete faith that you can do these AND all the ones I’m scared of! You rock cookies like this!
my son freaked out when I showed him these on face book, Lord help me I can see some cookies in my future.
These do look pretty simple! I wish I had a kopy kat! SIGH!
My son would be totally in love with these…if I showed them to him. I’m still debating. My daughter loves Ninjago, too. Because Kai (the black ninja) has a sister. And she is super cool.
AWEEEEEEEEEEEE! My Belle found out Snoopy has a sister and is in love. Sounds like our gals would make great friends!
OMG my grandson would love these!! he is such a fan. I know you shy away from Character cookies but these are very appreciated and besides… they are NINJA’s right? so we can’t really see them lol.
Wow! I made some back in August for my son’s birthday. I made then on circles and they were fairly simple. I love your cookies though. The added texture makes the cookies! Wonderful job. (And I was so thankful not to have to make Star Wars characters, I’ll take Lego faces any day.)
I love these! I also love how you simplify something that I would try to over-complicate 🙂 My son would flip out if I made him these!
(I have a question totally un-related to this post, but I don’t know if you go back and read older posts so I thought I’d ask here if it’s ok…..do you know where you got the baby rattle cutter that you used for the stethoscopes in the nurse cookie set? Not the one with the “knob” thingies on the sides, but the shorter one? I have been looking everywhere for that one for a long time and I can’t find it!) Thanks 🙂
Here ya go =) I happened to find that first, but I think Amazon and other places have them http://www.coppergifts.com/cookie-cutters/pc/Baby-5pc-Cookie-Cutter-Set-Tin-p5398.htm
Thank you!!!! 🙂
My youngest son just picked having a Lego Ninjago party for his birthday in March. This couldn’t be more timely. I have never made decorated cookies like this before, but with your simple tutorial, I just might be able to pull it off! Thanks so much for sharing!
My daughter saw these, and she went nuts! She loves Ninjago because she’s obsessed with Legos and her older cousin (who by the way is named Zane just like the white Ninjago!)is a huge Ninjago fan. I’m going to make these for him for his birthday. He’ll be so happy! Thanks for another fantastic tutorial!
Great work as always Calleye. I have a question I can’t seem to get an answer to…I have had some black bleed start happening out of no where. I outlined the design first in black and then did the fill in design. I guess the real question here is how long do you fan dry first before air dring over night? Thanks for any tips
Carrie S.F.P
Wow, so easy! I really do hate dragging out a KopyKake for those small projects. It means clearing off my dining table for it, too. Push pins to the rescue! Thanks for sharing.
I had a phone call today from a friend asking me for cookies of this character. I asked her what language she was speaking as I had never heard of such a thing. I ended up not making them for her since it is birthday weekend here, but I know how to now!!!! I’m sending her over!
More great tips! Sometimes, when it’s late at night and I’ve finally made it to the “add eyes” stage of the cookie project, the last thing I want to do is drag out the projector (which has to be kept in the basement, due to limited space). I love using a pin hole as a guide because I think freehand is always better for cookie “flow” (things look less forced when I just go for it).
” I think the whole “stick a needle in your eye” thing is hilarious in a creepy sort of way. ” —- THIS is why I love you.
LOL! Whew! I was afraid you were aboutta say I cannot come over anymore!
Thank you for sharing your wisdom! I’m not an experienced cookie maker but following your instructions was able to pull off these Ninjagos cookies for my son’s birthday!
How did you make the layers/lines so distinct?
A boy? I have a daughter who is turning 7 next week and of all the Lego cookies she saw, these are the ones she wants for her class party! Thanks for the tutorial!
I don’t see the KK image to print? The link no longer works…can you redirect me to it? Thank you!