Baking the Perfect Sugar Cookie
*This is my basic sugar cookie recipe converted to grams. For the original, standard American measurements, click here.
A good cookie base is an essential component of perfectly decorated sugar cookies. It takes a little practice, but with the right recipe and a few tips it’s very easy to bake perfect sugar cookies very time.
First of all, I would like to say, I am not an expert. I haven’t been to a fancy pastry school or had any sort of formal training, just a lot of trial, error, and experience.
LOTS and LOTS of experience.
Keep in mind, my way is not the only way, and maybe not even the best way, but it’s what I like and what works for me. The purpose of this article is not to tell you what you should do, but rather give you an idea of what happens in my kitchen as a foundation to build upon so you can come up with a method that works well for you.
I begin every single cookie project with my favorite cookie recipe. Not only is it quick and easy, it’s also a very forgiving recipe. You can find the original, printable version of my recipe in standard US measurements HERE.
Most people find this recipe easy and delicious. However, I have a handful of readers that don’t get the same results that I do, and a few others who are more comfortable weighing their ingredients. So, for these readers, I’m posting my recipe by weight. PLEASE go easy on me. I am not at all comfortable with this method, but I am trying!
Ingredients
- 227 grams unsalted butter
- 175 grams confectioner’s {icing} sugar
- 1 egg {room temperature}
- 1.5-3 teaspoons extract or emulsion {any flavor}
- 1 teaspoon salt
- 2 teaspoons baking powder
- 400-425 grams all-purpose flour
Instructions
- Cream together butter and sugar.
- Add eggs and extract and mix well.
- Sift together flour, baking powder, and salt, add to wet mixture little by little until well incorporated.
- Roll and cut cookies into desired shapes, dusting with flour as necessary.
- Bake cookies at 200 Celsius for 7-8 minutes until tops are appear dry rather than shiny. Do not brown.
I think I did okay on the conversions, but these numbers may as well be in Greek for what they mean to me, so if I goofed, shoot me an email, I’ll get it fixed. Please don’t call me stupid or leave me nasty comments. It kinda puts a damper on my day.
As for me, I still measure like my Nanny did. I call it the “old-lady method”. Nanny kept cups in her flour, sugar, salt and baking powder bins and she never ever moved them. Most of them weren’t even real measuring cups, she just knew what they were and what they did, and she got consistent results every time. If you need a little more information on measuring, I suggest this article on properly measuring dry ingredients from My Baking Addiction. It’s REALLY helpful and informative.
Of course, I use real measuring cups when I bake, but like Nanny, I never ever take them out of the bin that they belong in so my dough is pretty consistent.
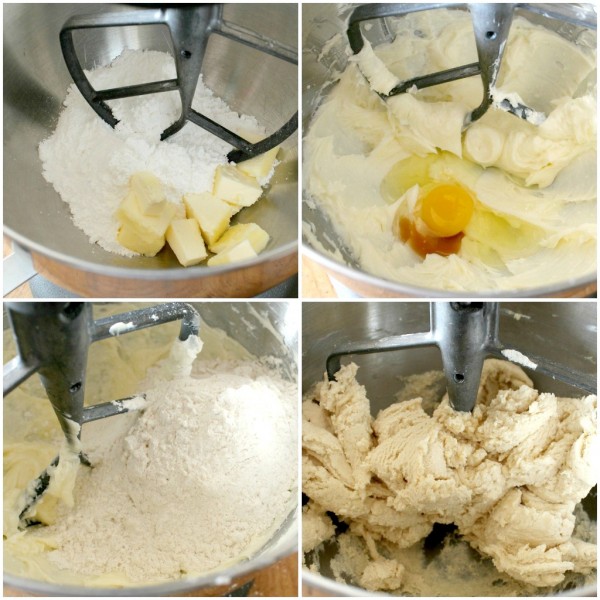
Mixing the dough is pretty simple. The most important thing is to mix ingredients in the proper order. Begin by creaming together the butter and sugar, then add the egg {room temperature} and vanilla, then, after sifting together the flour, baking powder and salt, add it to the mixture little by little until a dough is formed.
Be sure the egg is room temperature and the butter is not over or under softened. Usually I set it out two to three hours before baking and let it come to room temperature. If you forget, no worries. Chop the butter into small pieces and wait about 30 to 45 minutes. It will be perfectly softened when you’re ready to bake.
Try to resist the urge to microwave it. Nine times out of ten, you will end up with a butter puddle, and over-softened butter WILL affect your dough. Once again, I’d like to send you to My Baking Addiction if you’d like to know more about perfectly softened butter. I could write a novel, but there’s no need, because Jamie already has it well covered.
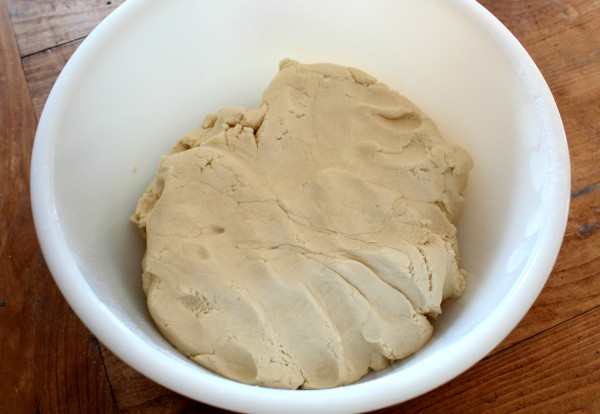
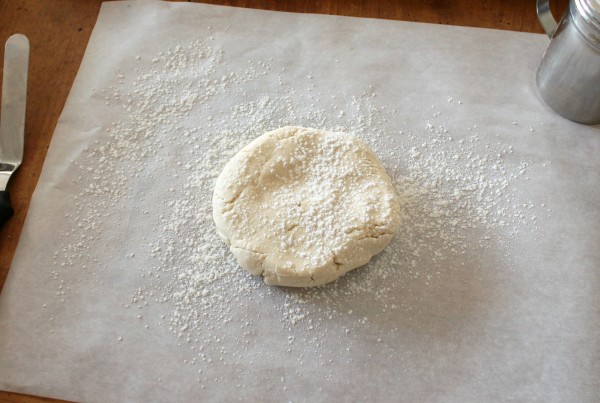
When the dough is mixed, it will be soft, but not sticky and will look like this. I find that it firms up as it rests, so I often give it five or ten minutes before working with it..
For those of you who like to work ahead, I do not recommend refrigerating or freezing this dough. I’ve tried it, and it completely changes the final product. Fresh dough creates a fluffy, light, non-greasy cookie with minimal spread. In my experience, when the dough is refrigerated for a long period of time, it is harder to work with and produces flatter, greasier cookies with significantly more spread than fresh dough. I’ve also noticed that when chilled, the dough darkens and becomes crumbly and the cookies have dry crackly tops when baked.
Rather than pre-making dough, I prefer to set aside a baking day, make two to four batches of dough and use it immediately. This doesn’t mean I will hunt you down and kill you if you decide refrigeration works best. Remember, your way is the best way for you!
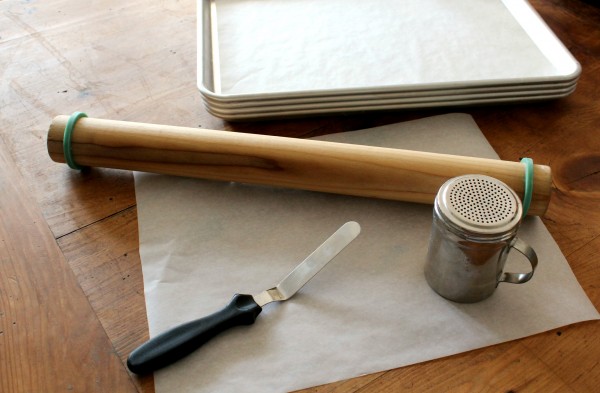
While the dough is resting, I set up what I call my rolling station. I gather all of the tools I need and set them up in the area where I will be working . These are parchment lined baking sheets, an offset spatula, cookie cutters, a rolling pin, and flour for dusting my workspace and dough. I prefer to roll my cookies on parchment paper, so I also have a sheet for rolling.
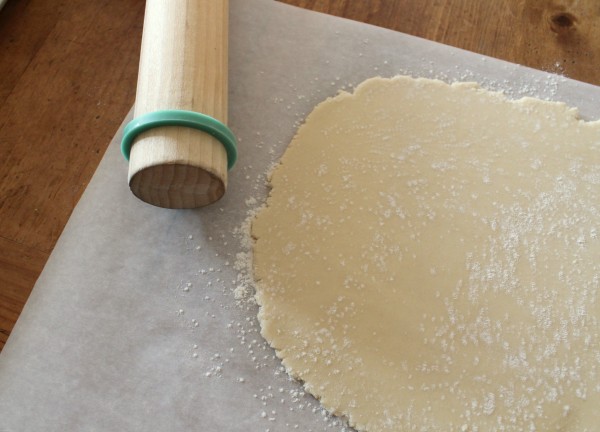
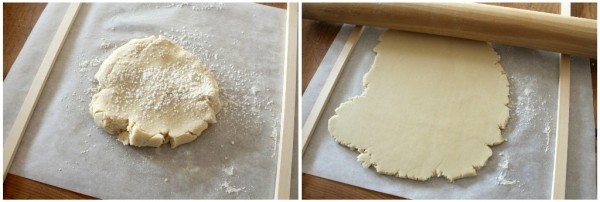
Beginning with a six to eight inch dough round, I lightly dust it with flour and begin rolling, turning the parchment 45 degrees at a time, until I have a 1/4 inch thick circle of dough. After baking, will expand to 1/2 of an inch thick.
Have you ever wondered how to roll perfectly even sheets of dough? It’s easier than you might think. I use rolling pin rings, which are basically big rubber bands that fit on my rolling pin to create a perfect space between the surface and rolling pin. I love them, but if these aren’t for you, there are many products on the market that will do the same thing, like Do’ Boards, the preferred tool of Cookie Crazie Pam.
If you don’t have the time or funds to pick up any of the tools above, don’t worry…you can also use square dowels. They can be found at almost any hardware and craft store. Just choose the thickness you prefer {I recommend 1/4 of an inch} place them on either side of the dough, and roll the pin over the dowels.
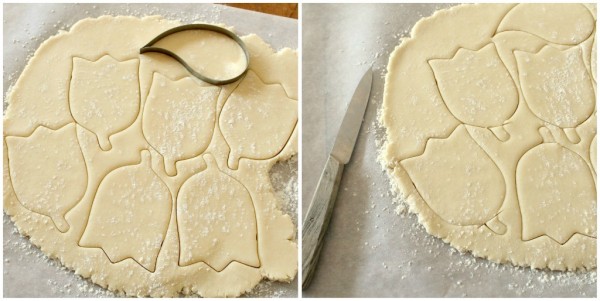
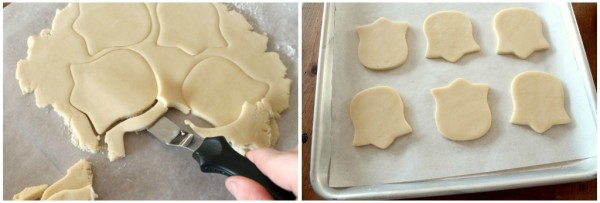
After the dough is rolled, cut out the desired shapes, as closely together as possible. You can use cookie cutters, or plastic and paper templates and a paring knife. Also, don’t be afraid to trim existing cutter shapes to make them work for the project at hand, or even piece together shapes from multiple cutters. Add the scraps back to the dough and continue doing this until all of the dough has been used.
When the cookies are cut, use an offset spatula to transfer them to a parchment lined baking sheet. I am pretty good at this, but if you don’t feel comfortable moving cookies once they’re cut, I suggest rolling them on parchment and transferring the entire sheet to a pan after removing the scraps.
If I happen to have extra dough, I use it to make minis or circle and square cookies to freeze. They often come in handy later.
As the sheets are filled, bake the cookies. Seven minutes at 400 degrees works best for me BUT, my oven and I are old friends. Until you are comfortable with the recipe and your oven, I highly recommend buying an oven thermometer and sitting right by the door until you know what works best. It may be five minutes, it may be seven minutes, it may even be eight. The key to perfect cookies is to watch them until you know exactly what the end result is going to be.
Keep in mind to not open the oven a whole lot while baking them. It will affect how they turn out. Just peek in here in there to keep an eye on things. It may take a few batches to get it right, but once you figure things out, the results will be pretty consistent..
Be sure not to over bake the cookies. Some recipes are meant for a little color. My recipe is meant to create a lighter, softer cookie. If you’re looking for brown and crispy, this isn’t the recipe for you.
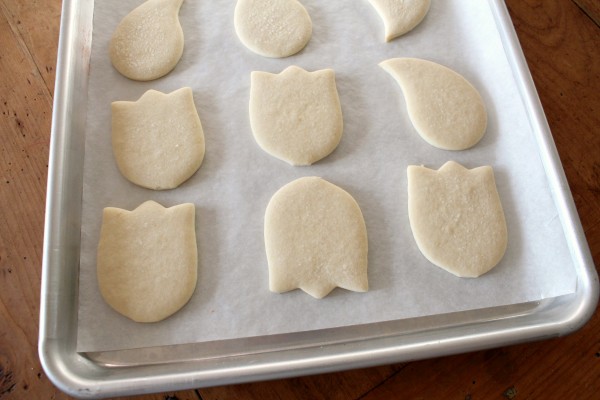
Most of the time, the end result is a smooth flat cookie that makes a wonderful base for decorating. Every once in a blue moon the cookies have crackly tops, but I think that is from adding a bit too much sugar or letting them sit too long before baking. I don’t spend a lot of time worrying about it though, because they are usually hidden by icing.
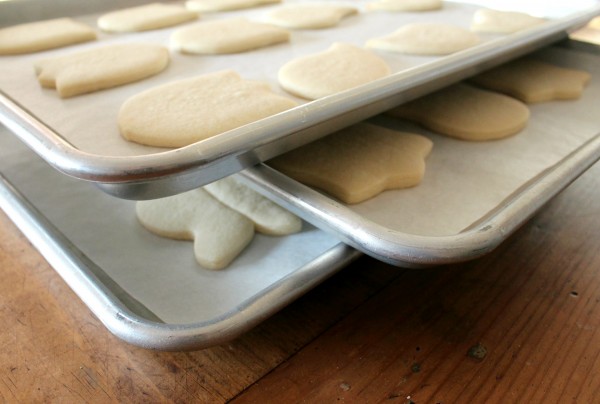
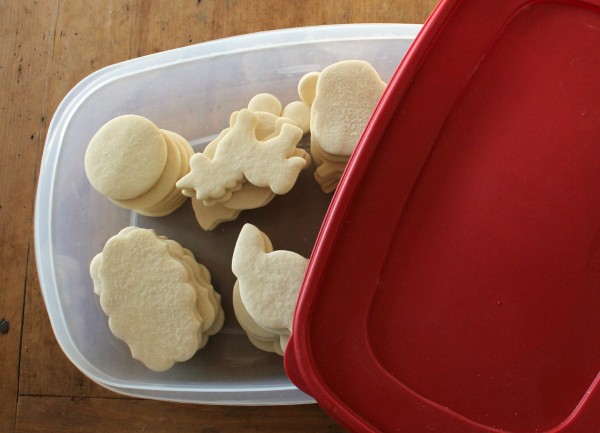
Freshly baked, the cookies will be a bit fragile. I always let them cool on the sheet for at least four hours, sometimes more before moving them into an airtight container.
I prefer waiting until they are a day or two old before decorating them to reduce the chance of oil from the cookie leaching into the icing and causing icing spots.
Once again, this is how I make perfect sugar cookies every time. It works well for me, but do encourage everyone to experiments and try what works for them.
Now, for some frequently asked questions about baking:
- How far in advance can you bake the cookies? I bake the cookies up to a week ahead of time and store them in an airtight container until ready for use.
- Can your cookies be frozen? Yes, they freeze well after baking. They don’t need any special treatment. I don’t even waste wax paper. I just stack them in an airtight {Tupperware} container and pop them into the freezer.
- How long should the cookies thaw before decorating? I have taken them out, put them on a cookie sheet and started decorating within fifteen minutes, but I am a procrastinator. It’s probably wiser to pull the container out about an hour ahead of time, give them a bit to thaw and then start. Either way, it’s not something to get too wound up about.
- Can you freeze decorated cookies? Hypothetically yes. Do I do it? Not so much. I’ve done it TWICE and then never again. It’s too nerve wracking for me. Bad things can happen. Long story short, if you do decide to freeze them, layer the cookies between sheets of waxed paper, and when you thawing DO NOT OPEN THE CONTAINER UNTIL THEY ARE COMPLETELY THAWED. I could go on, but that’s a whole other post.
- How far ahead of time can you bake the cookies? I would say a month or two, if you freeze them. If not, about a week, maybe a little more.
- How long are the cookies good for after they are decorated? Ideally, I’d serve them within three to four days of decorating. But this isn’t always possible. The thing about cookies is that they have an amazing shelf life in most cases. Think about the cookie aisle of your local grocery store. I’m betting that fresh Vanilla Wafers and Oreos are to die for, but even if they are days or maybe even months old, they are still edible, and pretty darn good. Same goes for decorated cookies. Keep them in an airtight container, and they will last a LONG LONG time.
- I’ve always been told leaveners are the ENEMY of cut out cookies. Your recipe has a LOT. Can I just leave it out? Yes. BUT, it will change the recipe. I’ve done just about everything that can be done to my recipe. The baking powder contributes more to how the cookie rises than how it spreads. If you leave it out, it will be a flatter, denser cookie. You’ll also have to roll it to exactly the thickness you’d like it to be, because it will not rise much at all.
- Do I have to use confectioner’s sugar? Won’t real sugar work? Again, you can do anything you like. It’s always good to experiment. But I’ve tried real sugar and it does not produce the same cookie. They are thinner, and greasier, and spread a lot.
- I don’t like almond extract. Do you have any other flavors of dough? Changing the dough is as easy as changing the flavor of the extract used. You can use any flavor that suits your taste, just make sure to use the same amounts called for in the recipe.
- Why do you prefer to decorate “old” cookies? Cookies that have had a day or two to sit are less likely to leach oil into royal icing.
- I followed your recipe and it didn’t work. What happened? This is one of those things I can’t help you with, unfortunately. If you measured the ingredients, weigh them. Otherwise, I’d have to be standing beside you to help. There are so many variables, oven, climate, quality of ingredients, etc. that can affect the final product. My best advice in this case is to try again, making sure that you added all of the ingredients and have not mis-measured.
This is how I make perfect sugar cookies time and time again. I hope this helps you to make beautiful cookies too. If you have any questions, feel free to leave a comment. I’ll do my best to answer them.
The most important thing of all is to keep baking and find what you like.Stay tuned for in-depth posts on decorating with royal icing, my favorite baking tools, storing and freezing cookies, and more. Have a wonderful weekend!
Happy baking!



Muchas gracias por modificar las cantidades de la receta tu me estas sirviendo de modelo porque eres muy buena, espero en dios hacer alguna galleta tan buena y bonita como las tuyas
que DIOS te bendiga a ti y a tu manos
I loved the way you have decorated the cookies. This to me looks like a perfect cookie recipe. Not too sweet and sweet enough to eat without icing too. I have just one question. Have you tried it without using egg. I would prefer to make it without egg.
I tried this recipe yesterday…it works great! Just found that a lower oven temp works better 180 C, baked for 10-15 min…Thanks for great inspiration!
I’ve used this recipe many times and it’s the best! My only issue is that when I roll on parchment, the parchment slides on the counter! Any suggestions?
Non-adhesive shelf liner 🙂
I always keep a piece with my rolling pin for just a thing.
How stinkin’ SMART!!!!!!!!!!!!!!!!!!!!
smart…I meant smart, LOL!
Doh! Why didn’t I think of that!
Thank you very much for your explanations. I tried to make cookies dough refrigerating, but I didn’t like the results.. Now I’ll try to make it like you.. I hope to be lucky!
Pingback: Monster Cookies for my little monster | Abusymom's Blog
Love your website! Your designs are beautiful and your tutorials very helpful! I don’t know if this has been mentioned before (since I didn’t read through all of the comments), but in the recipe itself you list baking powder. Then in the 4th paragraph below that where you start saying that mixing the dough is simple, you mention mixing the baking soda (not powder). Is that just just a typo? Just curious which it is. Thanks!
It’s a typo! Sorry I should fix that, LOL! =)
Hello! I really love your work. You’re truly gifted!
I was a bit sad though, because the recipe is not in metrics anymore…since I’m from Portugal, it’s a bit difficult to do it with the american measurements.
Can you fix it??
Thanks!!!
Great post, really enjoyed it!
— Taylor
http://www.bigconceptdesigns.com
I made 5 dozen of sugar cookies but i store the dough for 4 days because my family can’t eat a lot of cookies in one day so i decided to put the rest of the dough in the fridge. i had my own recipe and it turned out still very good and easy to roll.
Pingback: Sugar cookies hygge | by Busk
Help,I can’t see the recipe converted to grams.
Please can someone post the recipe.!!!!
Than you
I also would like the metric recipe. I have a children’s home in Mexico and want to try your recipe this year (which would be this week!) Love you ideas. THANKS.
Amazing recipe!! I just tripled it, and made perfect snowflakes and stars. The time for me was a 6 minute bake on regular cookie pans, but 8 minutes on an air pan. 52 -5″ Snowflakes, 66 – 2 1/2″ snowflakes, and 85 – 2″ stars. I used almond extract as suggested, and the taste is awesome. I am making a double batch today so I have more large snowflakes, and making the royal icing so I can decorate tomorrow. Thank you so much for this great information. It really made life easier!!
Oh, and the spritzer (which I bought and will dedicate just for making cookies) worked great on keeping the dough moist while I worked with it! :o)
I can’t see the metric measurements.
Hi.. I am so excited to try your recipe, but also am looking for the measurements in grams.. can you repost?
I had two problems with this recipe: I procrastinated and…it just wouldn’t work for me. I usually make a roll out dough and refrigerate it overnight, but for some reason that is still not known to me….I didn’t. And now it is Christmas Eve. I made your recipe this morning and followed the instructions to a tee, but the dough was too soft and would not work at all. I’m not sure if it’s because it’s hot down here (I’m in Georgia) or if I somehow did something, I don’t know. I tried refrigerating some of the dough, but that didn’t work either. It was just entirely too soft and would not roll and when I did get it to roll, it wouldn’t unstick from my counter.
Wondering what causes my iced cookies to break? They are baked to the correct time … any hints?
gostaria de receber receitas dos biscoitos e da decoração deles
I can’t see your recipe in grams! Could you help me please?
Thanks
Laura
Me neithet
These turned out very salty… any suggestions of how I might make them sweeter without adding icing?
I tried this recipe to great success!! thank you very much! I halved the recipe since the original made too much for me 🙂 all the cookies turned out perfectly pale and smooth with no bumps anywhere. I had my oven set to 200 degrees celsius and had to cook the cookies for a bout 10mins, but they still turned out fantasically soft and yummy. Again thank you so much for the wonderful recipe!!
Yet another one that cant see the recipe in grams and since I can’t get hold of american mesuring cups it would be really nice to have.
The rest of the blogg is great 🙂
I did my best to convert it to grams and for me it worked great with theese mesurementa:
228 g {two sticks} of REAL unsalted BUTTER, softened
216 g confectioner’s sugar
1 egg
2-3 tsp flavoring {pick what you like, I prefer almond}
360 g – 396 g all-purpose flour
2 tsp baking powder
1 tsp salt
Since I don’t like almonds I used the zest of one orange and 3 tsp fresh squeesed orange juice for flavoring and it was superb.
Thank you so much for this recipe!
Your sugar cookie recipe is the only one I will use now. I really love the texture and taste of your recipe. Baking is hard for me but your website has really helped me become a better cookie baker for birthdays and Holidays! Thank you!
Hello, you could put the recipe with grams? :\ pls
I find it funny and sad that you have to beg people not to be mean to you about this recipe! What has happened to us, people?
I thought the same thing! Like she was almost apologizing ahead of time! People are rude I guess! Anyway this is a wonderful recipe and huge talent!
Do you recommend using the convection baking setting or just the regular baking setting on my oven? I’m not sure I’m sold on convection…
Thank you!
I just want to high five you! You answered all of my questions!
Hi! Could you please email me with a recommendation
On what company cookie pan to buy. I have bought
Many different types but they all start looking browned
And terrible.
Thank you!
You are an amazing cookie expert and your website is unbelievable! Thank you for sharing all of your beautiful ideas!
These really are beautiful blonde cookies.. mine came out slightly toasty, so it’s time to try again.. but the flavor was very yummy. They didn’t even last until decorating.. That’s very bittersweet for me.. we eat them SO fast. {-smile-} Thanks for the super easy recipe!
I am sure this piece of writing has touched all the internet visitors,
its really really fastidious article on building
up new weblog.
I love sugar cookies – these are awesome! Although I hate cookie cutters, these just might be worth it.
I’ve just made my first batch for the baby chick cupcakes and Easter bunny cookies. They are perfect. They don’t take long to cook don’t get distracted. Thank you
Pingback: Festa da Rapunzel | Minhas Coisinhas
I made these cookies last night and they turned out amazing! Planning on decorating them today with your 20 second frosting!! 🙂 thank you so much!!
I just tested this recipe and I think it’s perfect! I was concerned about the baking powder causing spreading (my oven is psycho, I struggle terribly with spreading), however this recipe yielded beautifully shaped, light and fluffy, delicious (kinda salty and it rocks!), blonde cookies. On top of that, the dough is so amazing and lovely to work with (yes, lovely), and on top of that, they only take 8 minutes to bake!
I tweaked the process a little bit and chilled the dough, it helps me get a cleaner cut-and-transfer. I rolled the dough immediately after mixing (between wax paper) and chilled the rolled dough in the freezer for 30 minutes before cutting, transferring to a baking sheet and baking.
This recipe makes my dream cookie, I doubt I will ever use another. I can’t wait to taste it with zests and other flavorings. Thank you so much for sharing your recipe!
Hello! The grams are wrong!! is only 300gram Flour! Flour not weight the same as butter! cant say 1cup butter is the same as 1 cup flour!!!
just fyi: The link to http://http//www.sweetsugarbelle.com/blog/2011/06/basic-sugar-cookie-recipe-2/ is not working.
@Melanie, I found that too! the “blog” needs to be omitted from the web address. Click here to go to the CORRECT site –> http://www.sweetsugarbelle.com/2011/06/basic-sugar-cookie-recipe-2/
http://www.sweetsugarbelle.com/2011/06/basic-sugar-cookie-recipe-2/ <– THIS is the correct link 🙂
Hi, i world like to know if I can use regular sugar processed in the food processor instead of the confectioner’s sugar. Thanks 🙂
By the way, love your page, I wish I can do cookies like you!
Your blog is amazing. You are so so talented and have that unique gift of making things look easy. I have been completely inspired to start making cookies- I just hope I can produce something even close to your designs. May I ask, do you know what confectioners sugar is called in the UK? Would it be icing sugar, caster sugar or something else entirely?
Thanks in advance 🙂
Icing sugar, but make sure it’s labelled ‘pure’ icing sugar, not icing mixture.
tu receta es maravillosa yo usaba otra pero cuando encontre la tuya no puedo usar otra me ancanto y las galletas quedan maravillosas , hasta para comer en casa la uso es grandiosa felicidades y gracias por la receta saludos desde México …
Pingback: The Search For The Perfect Sugar Cookie Recipe | Sweet Iced Cookies
Hola, me ha encantado tus comentarios principalmente el de no refrigerar la masa porque ésta se endurece……es verdad, es preferible hacer las galletas de inmediato……probaré tu receta y comentaré cómo salieron…..gracias por todo. Saludos desde Lima-Perú
just used your recipe for the first time – PERFECT! I used 2-3/4 c flour and baked for 8 min – PERFECT! Thank you (and my kitchenaid mixer bc I believe it helps everything taste/bake/cook better). 🙂
hello, how are you today? I love your cookies, they are so beautiful…I just started making some cookies to see if I can make them for my baby”s birthday party. I just did the cookies and added the royal icing…It’s a Hibiscus flower…I finished them around 5:00 p.m. I can see that they are dry but still soft. I just want to know id I can leave them at room temperature overnight to let them dry (I have to add some other details with a piping icing but the recipe says I have to wail until dry)…So my question is: Can I leave them at room temperature, while working, and they are going to be ok? After I finish, can i keep them also at room temperature? How do I storage them? Thanks
Hi! Thank you for this recipe. I have tried it once (for the first time) and it turned out great. Now I’m doing it again, my question is, can I make 2-3 batches at the same time (just multiplying the ingredients). I have 6 quarts Kitchen Aid that’s why I’m thinking of just making the batches (3 batches) at the same time rather than doing it 3x. Is the result the same?. Again, thank you 🙂
Thank you for the recipe! I made the best butter cookies!
Hai i’m from surinaam. And I love make sugercookies. And I make fore my self cupcakes. And i wanna learn more. About how to make a butercream
Ok..I love baking and experimenting in the kitchen I’ve started doing cookies but my only prob is I can never get them smooth or close to smooth in order to decorate them what is the most important part of the rolling and cutting process that would help me achieve this…HELP !!!
Thank you so much for the in-depth article! This was my very first attempt at a rolled sugar cookie and they turned out perfect! I plan on taking these to my first Wilton Decorating Basics class. Thank you again for the valuable, easy to understand information.
I just tried your recipe, actually a bit different from the one i have been using (more flour, granulated sugar, no baking powder) and i must say i was impressed! Really tasteful cookies and very easy to roll dough! It worked just fine for me! Now i have to decorate them, in order to have a whole picture!! Thinking to switch to your recipe already! Thank you so much for sharing! Hello from Athens, Greece!
Thank you so much for this post. I have tried different recipes and they all seem to spread too much. You have great detail in this post so I’m sure i will succeed.
This is great
Hi, thank you for the recipe. I tried it and i love it. I hate when i have to wait chilling the dough. I have a question: have you tried to make cookie pops with this doug? Thank you so much for your tutorials, you aré a cookie goddess!
Pingback: Shana Tova! Decorated Cookies
That certainly was the worst cookie dough I’ve ever made, too sticky even after being in the refrigerator. Also the cookies rised and spread toooo much. I did the recipe just as it’s written; guess this one is not for me. Thank you though.
Yesterday I tried your grams-converted recipe and it worked out just fine. Only real difference to my usual recipe was the powdered sugar. Now that there are plenty of beautyful cappucchino flavoured -Paris themed cookies (the dough worked for stamping on it too and did’nt spread, whoohoo!) on my counter im still deciding about my opinion on the recipe.
One day old, they are much softer than the ones with granulated sugar. Very positive is, that they do not post-oven-grease at all – that must be the powdered sugar.
I just think it depends on what you do with them and wether they are for children or like mine for a birthday present. Thank you for sharing a second grams-converted version.
Many greetings from Esslingen, Charlotte
how can I get the instructions on what rubber ban to use for the thickness of the cookie
Mildred, try DoStix. Same idea but slightly different product. http://www.dostixonline.com
My husband and I created a product called DoStix that help you get perfectly even dough every time. They come in 1/8″ 1/4″ and 1/2″ thicknesses. It works the same way the rolling pin rings do except you don’t need a specific rolling pin.
Thanks for putting so much effort into your tutorials! I have been studying at Uni for the past few years and have been putting all my baking on hold. Now that I have finished I am keen to start again and looking over your blog makes me so excited to get into it! Can’t wait to try these out!
Thanks again
Pingback: Is It Christmas Yet? | My Baking Pal Blog
I apologize if this has been answered in the comments section. When you have multiple pans that need to bake, what do you do with the unbaked cookies that are waiting their turn to go into the oven? Will they mess up if they get too warm? Put them in the fridge until it’s their turn? Thanks!
Could you please share in comments here just what brand of butter you prefer. I think your recipes are all great but I bet there would be much interest to someone who didn’t have luck following the recipe to know exactly just what brand you use…..particularly butter, there is such a difference between store brands and highly priced European brands etc. I’m sure we might not be able to find “your” brand but it might add to the success of our using your recipe. Thanks so much, if you can’t answer here, please email me privately. Thank you for such a top-rated blog….love it.
I’m so very gratefull for this amazing recipe and all your great tips!
I have made about thousands of cookies but YEAH I did it! I’m very happy with the result.
So once again thanks a lot! Thanks to you I managed to make my dream come true and make some extraordinary Christmas cookies with a visible pattern on them for this years holidays! You made my project come true, so I give you absolutely all the credit about it!
Have a look if you have a moment and any tips how to improve them!
https://www.etsy.com/listing/172138364/engraved-rolling-pin-merry-christmas?ref=shop_home_active
I have found that by keeping metal spatulas in the freezer I am able to pick up the cut uncooked cookie. Just make sure to dip the spatula in flour before hand. This is vital to me because I live in So. CAL where it is warm most of the year
I just wanted to thank you for taking the time to post all of this. I am going to try these today with my kiddos. I haven’t ever been able to make that “perfect” sugar cookie and have been researching online and with my friends. I’m excited to try this (and I CANNOT believe anyone would call you stupid…SHAME on them 😉 Thanks again !!
I love your cookies i’l try to make them soon!!!!Kisses from Greece!!!!!
XOXOXOXO =)
Hello! I live up in the Rocky Mountains. Do I need to change anything on your recipe for high altitude? Thanks 🙂
This recipe is lovely. I live in North Queensland, Australia, where the humidity is high and it can get very hot. I had to work quickly before they softened too much after cutting. I also had to add a little more flour, but this might only be due to the moisture content of the flour. Thanks for the detailed recipe.
Pingback: Things I Wish I’d Known… About Cookies! | The Simple, Sweet Life
Helloo,
Firstly Thank you for your website, I love it so helpful! Secondly not sure if i’m doing something wrong or if its my oven? but my cookies always spread loads and merge into each other? I haven’t yet tried your recipe, its on my to do list! do you think this may help with the spreading?
Thank you!
Steph
Hi, can you please give me the recipe using cups and tbsp?
thanks
all the time i used to read smaller content which also clear their
motive, and that is also happening with this post which I am reading here.
My stand mixer doesn’t have the paddle attachment. It’s a vintage Kitchenaid, and they didn’t make a paddle attachment for it. I know whisking would aerate it too much, so would mixing it with a fork be ok? Any other suggestions for us without paddle mixers? Way more time consuming, I know, but I can’t really dish out the money for a new mixer.
My sister couldn’t find her paddles so we used a hand mixer until it was time to add the flour. Then we added flour little by little and mixed it by hand. The cookies came out surprisingly well. Surprising because they were the only good thing that came out of the kitchen that day. lol
I’ve decided to get into cookie decorating once I’ve graduated uni (only 2 months to go) your blog has been incrediably useful.
I know this is an old post but I must say I really hope people don’t actually leave you nasty comments about conversions, your posts are so helpful and link to absolutely everything, people can easily google the conversions themselves so should be thankful you have even bothered to try! (I only learnt of measuring cups a few years ago now I never weigh stuff !)
You have A good day !
Hi dear, thanks for the graceful post and nice instructions! You rock!
I have a question: WHERE DID YOU BUY THE UNICORN CUTTER (appears in the end of your post)? I LOVE unicorns and never found a nice cutter to buy. Thanks! 🙂
I have the same unicorn cutter that I purchased through a vendor on the Luvocracy app. Let me see if I can grab the link for you.
Hi Cynthia,
I have the same cookie cutter that a purchased through a vendor on the Luvocracy App. I’ll see if I can get you a link, if you still need it please let me know 🙂
Hello! I was wondering, how many cookies does this recipe turn out? I couldn’t find it anywhere! Please respond soon, I have to start baking my Easter rabbits and carrots by tommorow afternoon! XOXO From Denver! 🙂
To any commenters, if you like these cookies but don’t want them to spread, what I do is just put them onto the pan, and stick them in the fridge for about 6 minutes before baking. I’ve tried not refrigerating them, and they taste the same as when I do refrigerate them, mine just don’t spread.
Pingback: When Will Pizza Hut Types Of Wings | Pizza Cooking
Hi Sugarbelle,
I was going over the ingredients, and I wanted to check with you. On the “Sally’s Baking Addiction” site, she shares that a cup of powdered sugar is 128 grams. A cup a and a half of that would be 128 (cup) plus a 1/2 cup of 64 grams, which would be 192 grams of confectioner’s sugar, not 175, right? And then on the flour, it is the same as powdered sugar. 128 grams per cup, so just 2 1/2 cups of flour would be 2 x 128 grams plus 64 grams for the half cup. I think that comes to 320 grams of flour. Can you tell me if you were using your regular Sugar Cookie recipe? That is where I took your recipe from and in converting it, I found that it differed a lot from the one you converted. Thanks for your help!
I actually weighed what I do, rather than did an actual conversion if that makes sense. Since we all measure differently, instead of plugging in numbers I wanted to give the actual weights of what is working for me to ensure success.
i’m interpartested in baking and cooking so would like
to be part of the group/ discussion and receive recipes.
i’ll appreciate your positive respond
Pingback: Cheap Home Wood Pizza Oven Plans | Pizza Cooking
How do you store cookies after decorating? Dont they smudge while transporting?
Not if you decorate using royal icing. If you use buttercream or those gel writers, then yes they will make a mess. But royal icing dries very hard and cookies can be easily stacked. (Put parchment between them, though, so no fat from one cookie reaches the icing ofthe cookie beneath, as this can discolor it.)
I made these cookies yesterday with my grandson after coming across your site. I have to say they came out perfect, just as you said they would. I also chilled half of the dough to use later and I just went to my fridge earlier and sliced a few pieces of dough off, baked them for 10 minutes and they were just as lovely. Thank you for your wonderful recipe and for helping out with all your Q and A’s. I don’t understand how anyone could possibly want to leave nasty comments. This is the best and easiest recipe ever xx
Pingback: When Will Homemade Pizza Sauce Youtube | Pizza Cooking
Greetings from Costa Rica
Thank you I love this recipe, I am new making cookies and I am having one small problem… the problem is the cookie spread out SO much that now they look like a baked blob! it loses completely the shape.
I did the recipe just as it’s written! So what’s wrong?? Costa Rica, specially Orotina It’s a warm place, so, you think that interferes? I need to refrigerate the dough a little bit?
Please HELP me I really want to try making pretty cookies like yours!!
Thanks in advance 🙂
I hope you don’t mind me replying! I’ve done that but I started freezing my cut cookies for 10 minutes and they NEVER spread. Hope this helps
I freeze them before baking them
Hello and Namaste from India,
Hope you are pink in health.
I love your cookie designs and am an ardent fan of your FB page..
I have tried your above Basic Sugar cookie recipe and it’s wonderful but here in India most people are vegetarians and don’t eat stuff with eggs too. Can I replace anything for the egg in your recipe??? We don’t even get good quality egg- replacer here. I have to order it online but again it’s meringue powder (egg whites again are a no-no)… Please help as my kid and her friends love cookies but I can’t lie to them about the eggs.. It’s not right on my part so I have stopped making these cookies for a while now. But looking at yours, I am tempted again.
Also do you ship your cutters to India?
Thanks & regards,
Apurvi Sharma
I do not know the answer to this question. I am very sorry. What cookie ingredients do you use in India?
i hope you don’t mind me replying
i was a vegan for a while so i know a bit to much about egg replacers
i don’t know what they sell where you live but here are some
for 1 egg:
2tbs cornstarch (or potato starch) + 2tbs water (mix well until gelatinous)
2tbs instant mashed potato’s
1tbs chia seeds + 3tbs water (let it sit for 5-10 minutes until gelly looks weird but works)
1tbs flax seeds + 3tbs water (please don’t buy grinded flax seeds than it losses almost all of it’s health benefits)
(there are for baking (binding) please don’t use these (other than the flax seeds) for puddings and frosting and stuff like that cause it won’t work)
Olá, sou do Brasil! Encontrei seu site por acaso… estou louca para tentar e se Deus quiser, acertar sua receita! Tentarei fazer, depois aviso se deu certo! Obrigada, beijos.
Hiii..i lovee lovee yr cookies..they look like they should b kept in a display stand for looking only..now wana ask u can i use self raising floyr then omit d baking powser cu i cant seem to find all purpose flour..or is it d same as plain? Thanks and ur d best cookie maker or downloader iv ever seen!! Keep it up
Reena
Hello from Portugal,
I was looking for a cookie recipie that was easy and tasty, and you presented it!
Thank you so much for all the information given.
My girls love your recipies.
Good luck and god bless.
Laura
Thanks for the grams version, I totally forgot about it and used the original one, I had to made my own adjustments and I’m really close to get as great dough ad yours.
I have tried other receipts including Cookie Crazie receipt, I keep coming back to yours!
Hi, I have a question. As this recipe makes so many cookies, I want to make and bake half and save the other half for another day. What should I do, bake it all and freeze the rest or bake half and keep the rest of the dough wrapped up in the fridge?
If I freeze the baked cookies, will the be stale when they are thawed??
Thanks very much! Looking forward to trying this recipe!
Hi
I have made this recipe quite a lot and had no problem, but the last couple of times, I noticed that my dough spread instead of puffing up,,please note that I add half of the baking powder (1 tsp only), is there any reason for this ?
Puffed up cookies look way better than flat thin ones, please Help I love these cookies a lot
Thanks
How many times can you multiply the recipe and still get good results?
Can I substitute oil for butter to make a non dairy cut out cookie?
I just came about your homepage today and I like it very much. Thank you for all the useful ideas!
I tried your cookie recipe this evening – unfortunately the “grams” – version and I ended up adding a 2nd egg and some more liquid.
400-425 grams of flour seem to equal 3.2 – 3.4 cups instead of 2.5.
Anyway they taste really nice. Greetings from Switzerland.
stumbled across this recipe and made it for the first time today. They came out amazing! I halved the recipe and I had about 30 lovely cookies. I used a Minnie Mouse cutter as I’m experimenting for an order I have. The taste was lovely. When I rolled out the dough I sprinkles desiccated coconut on top and they tasted lovely! Thank u. Can’t wait to decorate them
I just love your site and all the tips and tricks you provide. It has helped me become a much better cookie decorator. I wanted to know where you bought your unicorn cookie cutter. My daughter loves unicorns and this cookie cutter would be perfect!