Houndstooth Cookies {Guest Post}
Houndstooth is my cookie nemeses, right up there with The Little Mermaid. I might be the only girl on the planet who doesn’t have warm feelings toward Ariel. Trying to turn any cartoon character into a cookie, EVEN with a cookie projector, is enough to give someone a complex. Especially that blasted mermaid.
Same story with houndstooth. I’d toy with the idea from time to time, but always came to the conclusion that it would be more trouble than it was worth and left it at that… until I needed to make these.
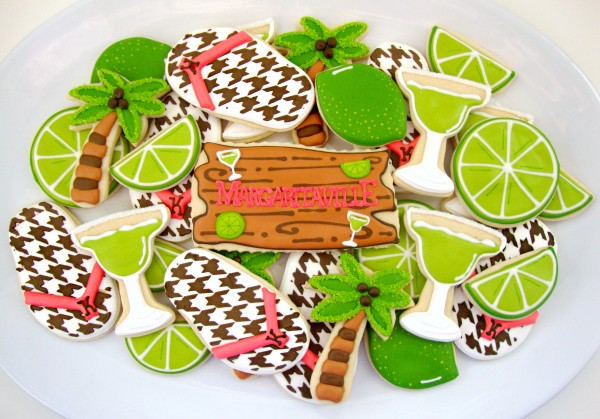
I TRIED to think of alternatives, but I knew I’d need a stencil. An expensive stencil. So, I bought one.
I’m a big believer in having the right tools for the job, so I found 101 different ways to justify buying this stencil, which was fine, except none of those things ever happened. I used it once. ONCE! Not even enough to cover the expense. Talk about feeling dumb. I spent way too much money {about $50 at the time} on a one-hit wonder.
Definitely a learning experience, but one of those things that comes with the territory. Lots of us have paid for useless “toys” that end up hidden so our husband doesn’t remember them when we *need* another expensive gadget…RIGHT?
So the story goes. My overpriced houndstooth stencil was tucked away and forgotten until I stumbled upon these.
I. WAS. STUNNED.
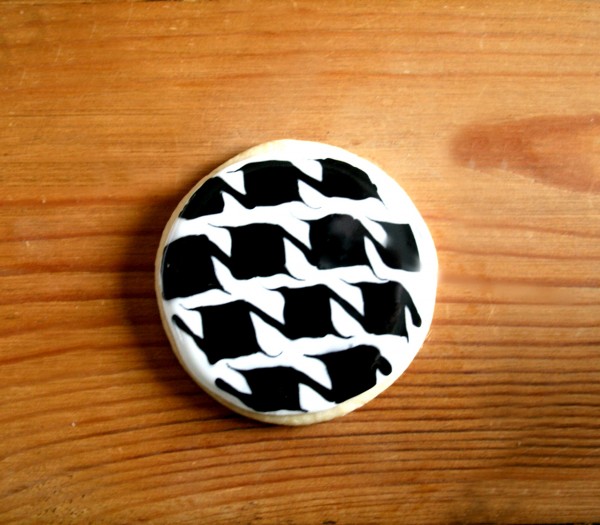
I know, I’m lame. While all the cool people in the world are getting excited over reality shows, I’m getting starstruck over cookies. Especially cookies like this one.
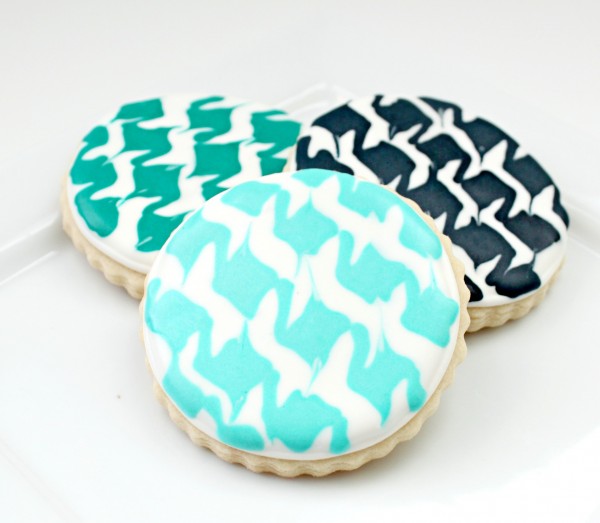
This is no ordinary cookie. It’s genius really. It takes a LOT of thinking to come up with something like this. At least more thinking than I was capable of.
Do not let the simplicity of the colors fool you. This is not as easy as it looks. It takes some practice, but it sure beats the heck out of buying a stencil you’ll only use once.
ANYWAY, I was so impressed with this cookie that I asked Katie Dunn, the genius behind the design, to show us her magic. Here’s what she did.
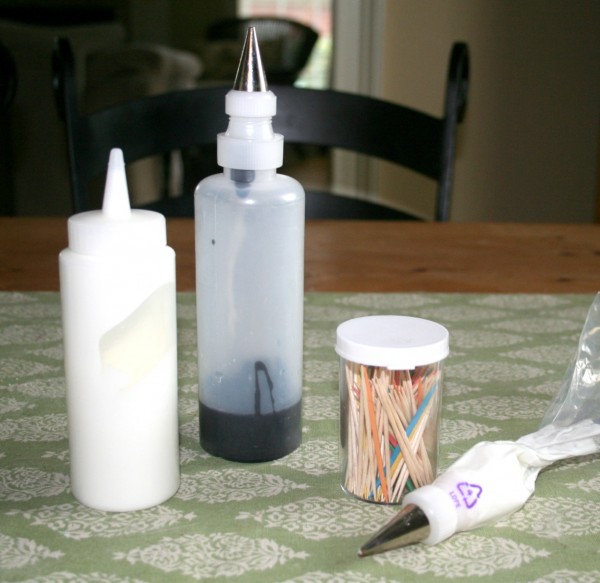
To make these cookies you will need:
Cookies
Black flood icing in a squeeze bottle {I used a #2 for }
White flood icing in a squeeze bottle
White piping icing in a bag with tip {I used a #3}
toothpicks
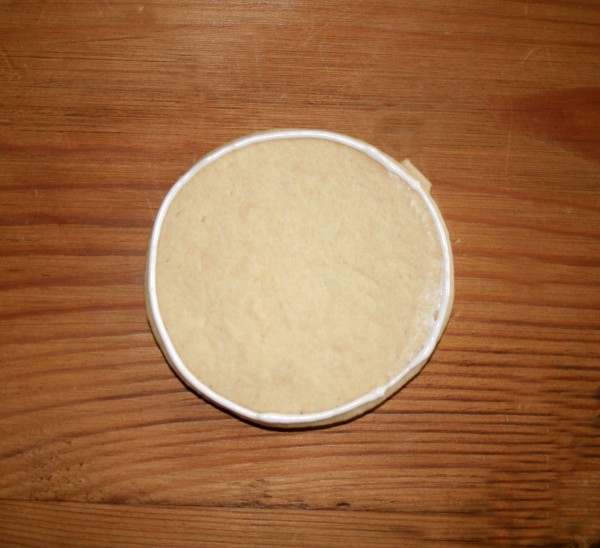
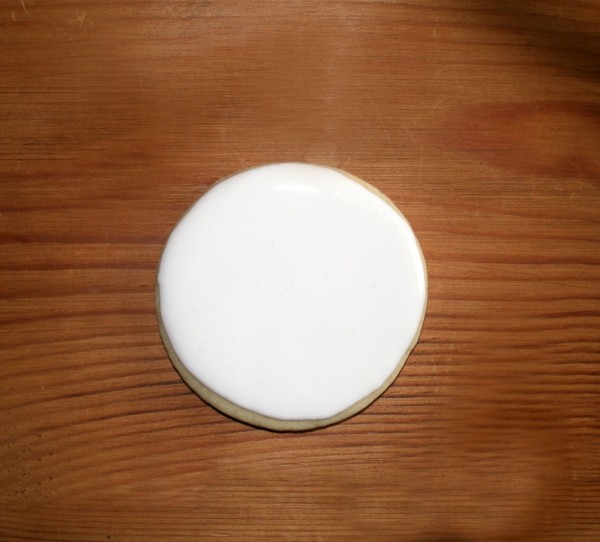
Now you’re ready to begin. Decorate one cookie at a time and be prepared to work quickly. Outline cookie shape in white and let harden a little bit.
Next, fill with white flood icing.
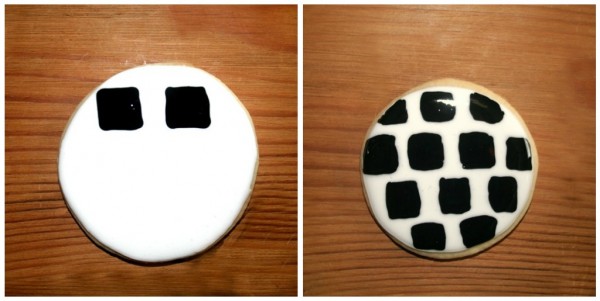
While STILL WET, draw black squares into the white base with black flood icing.
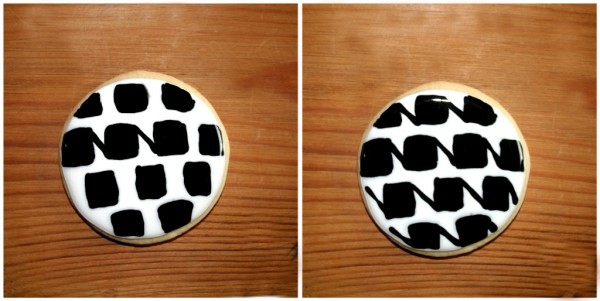
Still using the black flood icing, draw diagonal lines from the top right corner of one square to the bottom left corner of the square next to it.
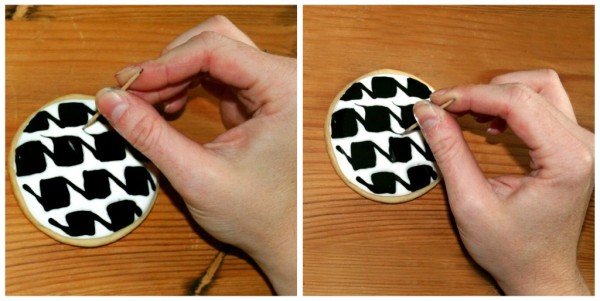
To finish, drag the corners of each square {the ones not touching the connecting lines} diagonally outward with a toothpick.
Let them dry thoroughly.
Originally, I planned to post this last week while I was on vacation, but I got so excited when I got the pictures that I wanted to try it myself first. As soon as I got home, I got to work. You wouldn’t believe how many of these I made for practice. It was addictive. Once I started, I couldn’t stop.
At first it was a little hard for me to relax and just decorate. Sometimes, I am SO literal, it’s hard for me to interpret a design. I get SOOOOOO hung up on PERFECT I forget to improvise, create, and just have fun. Guess I better work on that one.
As for tips, I would suggest making extra. Also, be careful when flooding the cookie not to fill it so full that it runs over when you add more icing. Oh yes, and don’t wait until the night before you need cookies to try this! It takes a little bit to get the hang of it. Crunch time is not the ideal time for a trial run.
To you Katie, thank you, thank you for teaching us something new! I cannot wait to see what you come up with next, like maybe alligator print, *hint hint* before I buy another stencil I don’t need!
As for the rest of you, be sure to drop in on Katie and say hello. You can find her fan page, Cookie Vignettes, on Facebook.


Houndstooth purses would be AMAZING!!
Now that is one creative idea! It must be an extremely time consuming process, piping all those little squares onto flooded cookie (not to mention how fast you must have to work) but the results are worth the time and effort. Really neat!
I would have never even thought houndstooth on a cookie was possible!
Crazy awesome!
Great cookies! The limes would go great with my lime bars I posted earlier today 😉
Phenomenal! (And I have the same feelings towards cartoon cookies.) I’ll post a link on Edible Crafts!
No way…I can’t believe anything would befuddle you for long, you are always coming up with amazing tricks. These cookies are pretty fantastic. I hope I never have to make them….LOL!
Those are gorgeous! How do you not have your black bleeding into your white when they dry? Love them!
Please pinch me Hard to make me believe that these cookies are REAL!! No words to appritiate these out of the world creations, sweet sugar belle.
Oh Sweet Sugerbelle, how this tutorial will make my hubby so happy! This man says ROLL TIDE in his sleep. His birthday is September 3rd and I’m positive that if I make him these cookies I will forever stay his favorite first wife!! LOL! Me on the other hand, I say GEAUX TIGERS in my sleep!
They are adorable ! Real cute ! Check out : http://nothinlasts.blogspot.com/
Oh they are FABULOUS! I love it! You are so clever!
Very cool! I’m going to have to think of an occasion to try these, they are very pretty!
Awesome! Thank you!
I’m with you on the reality programs. They don’t do a thing for me. I’d much rather be baking and decorating cookies than sitting in front of the TV watching those shows! Love these cookies, by the way!
I had no idea what houndstooth was while reading the first part of your post and figured it must be another character of a Disney movie I’m not familiar with. 🙂 Then I kept reading and now I understand.. it’s a very complicated design, and one that I see all over the place here in SoCal. Huh, I’m now educated in cookie designs and southern California fashion. Thanks! 😉
Love the houndstooth cookies (both your original stenciled ones and Katie and your own free hand ones. It’s quite the technique that I’m sure takes a lot of practice but the finished effect is amazing. Katie and Callye (what a team name 🙂 ) thank you both for sharing this with us.
Now this get’s the BEEs KNEEs Award of the week! WOW…cool to the both of ya! Thanks for showing.
What a wonderful idea – may just have to try this out….Thanks!
LOVE the cookies! So cute I don’t even think I could eat them! I love the houndstooth pattern too and just stenciled it onto a stool.
Best. Lesson. Ever.
Period.
Those are awesome….I love the information I pick up here at this site……never ceases to amaze me what can be done!
LOVE your Margaritaville cookies. You’re such a talent lady. Just beautiful. And LOVE the tutorial from Cookie Vinettes. Very clever!
Pingback: Confetti Store Blog
I love these cookies and tried them today. I think I finally got the hang of it, but when mine dried, the black bled into the white. Is there some tip you could offer so that this doesn’t happen?
Pingback: {Luxury} Houndstooth | cremedelacurves
I just found you and I am THRILLED! What a wonderful website and wonderful recipes! Thank you so much for sharing. How do I get on your list to get all of your postings? Thanks and Happy Holidays!
Download | 007MRLUKIAN Blog I was recommended this web site by my cousin. I am not sure whether this post is written by him as nobody else know such detailed about my difficulty. You’re amazing! Thanks! your article about Download | 007MRLUKIAN Blog Best Regards Craig Yoder
I wanted to jot down a brief note to thank you for these stunning items you are giving on this site. My incredibly long internet search has now been paid with wonderful points to go over with my family and friends. I d state that that most of us site visitors are truly lucky to exist in a notable network with many special professionals with valuable solutions. I feel very happy to have used your entire website page and look forward to tons of more awesome times reading here. Thanks a lot once again for all the details.
How to Make Houndstooth Cookies I was suggested this website by my cousin. I am not sure whether this post is written by him as nobody else know such detailed about my problem. You’re wonderful! Thanks! your article about How to Make Houndstooth CookiesBest Regards Lawrence
Pingback: 101 Essential Cookie Decorating Resources
Looking at your flip-flop-cookies I’m dreaming that I take sunbaths and drink cold Moxito)