DIY Colored Sugar Pearls {Guest Post}
HI!!! I’d wave, but I am currently sporting a crippled arm. I had a little surgery not long ago, and I’m still super sore.
Yes, I know, it kind of sucks…especially when you decorate cookies for fun and they got my good arm. But lucky for you, in the meantime, I found something REALLY cool to keep you occupied.
I stumbled upon this little trick on my friend Linzy’s blog, Flour and Sugar, and I was so tickled with it, I couldn’t wait for her to share. Besides being a baker and decorator, I feel I need to mention, she’s ALSO a doctor. Yup, a doctor. Impressed? I sure am!
Wowza! I am so blown away to be guest posting here today, seriously somebody pinch me! I have spent numerous hours days months oogling over Callye’s amazing creations and I couldn’t be happier to share a little tutorial with you all today! So what are we waiting for!
Have you ever found yourself sitting in front of the beautifully colored sugar pearl display at your local baking supply store, attempting to justify to yourself that buying a whole container of bright pink sugar pearls is a worthwhile investment? Even though, you know the project you need those beautiful pink pearls for will only require about 20 pearls and then you will be left with the remaining 2 or more ounces of pearls just sitting in your baking supply, waiting for another opportunity to shine. Truth is, I bet you will never use them all, and then you will find yourself doing this same justification down the road when you need some green, or purple, or blue pearls. Am I right? So unless you plan on creating your very own display of multi-colored sugar pearls to rival your local baking supply store, stay tuned to save yourself not only some cash-o-la, but also some oh so precious storage space!
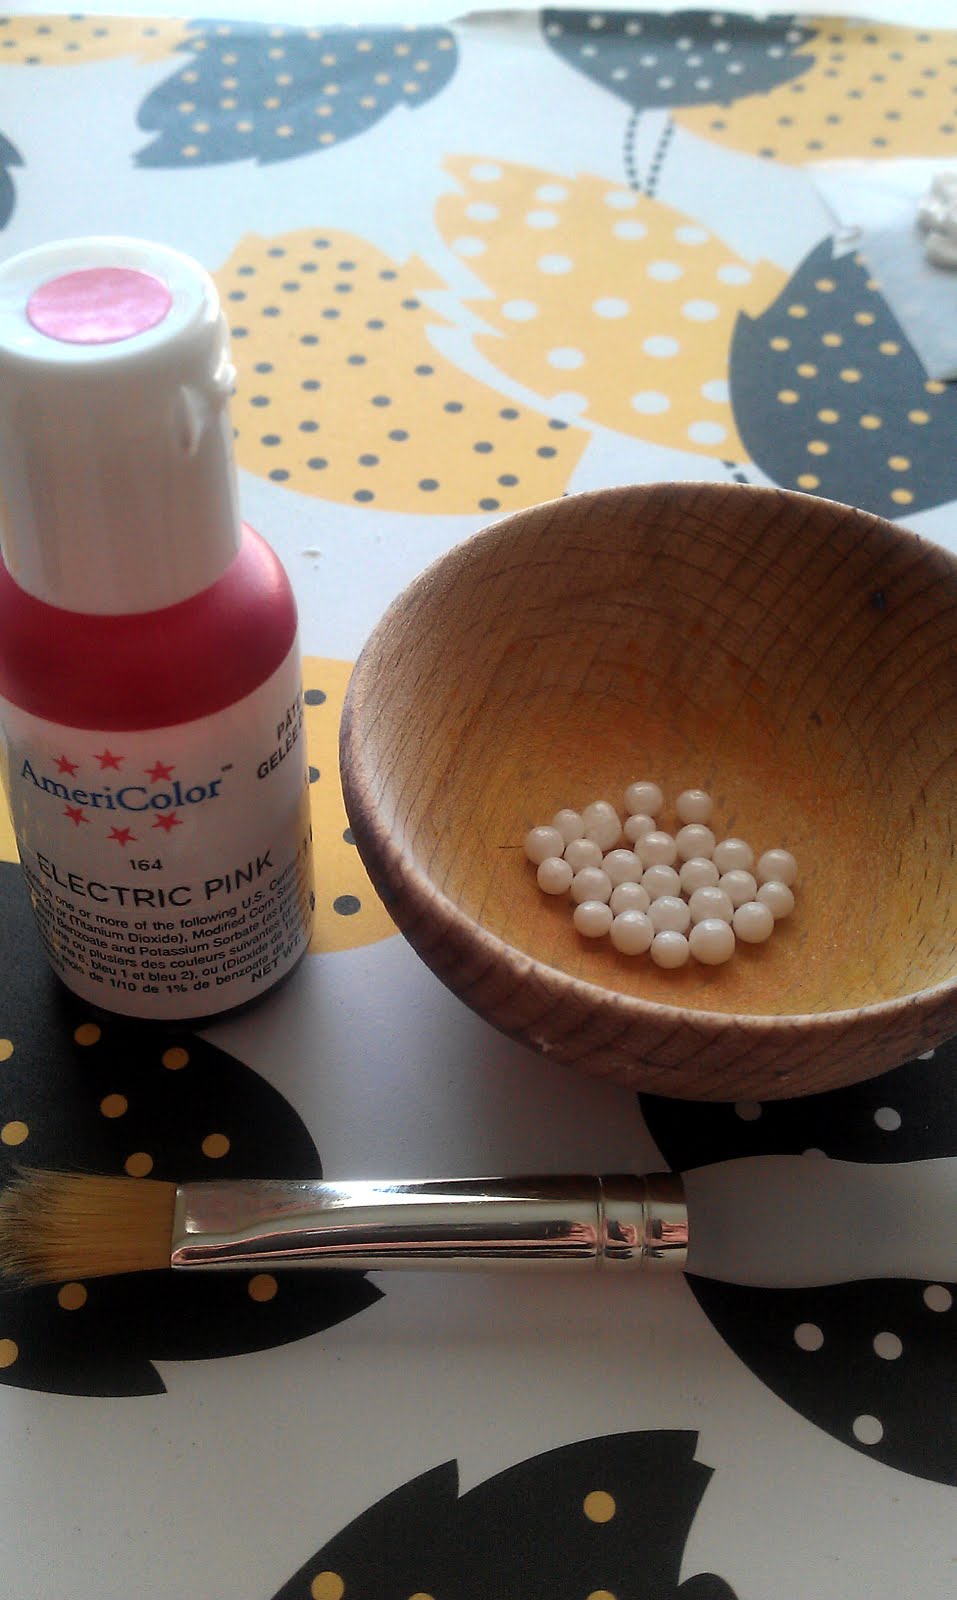
All you need are the following:
- white sugar pearls
- soft bristled food safe paintbrush
- color of your choice
- small container you don’t mind staining

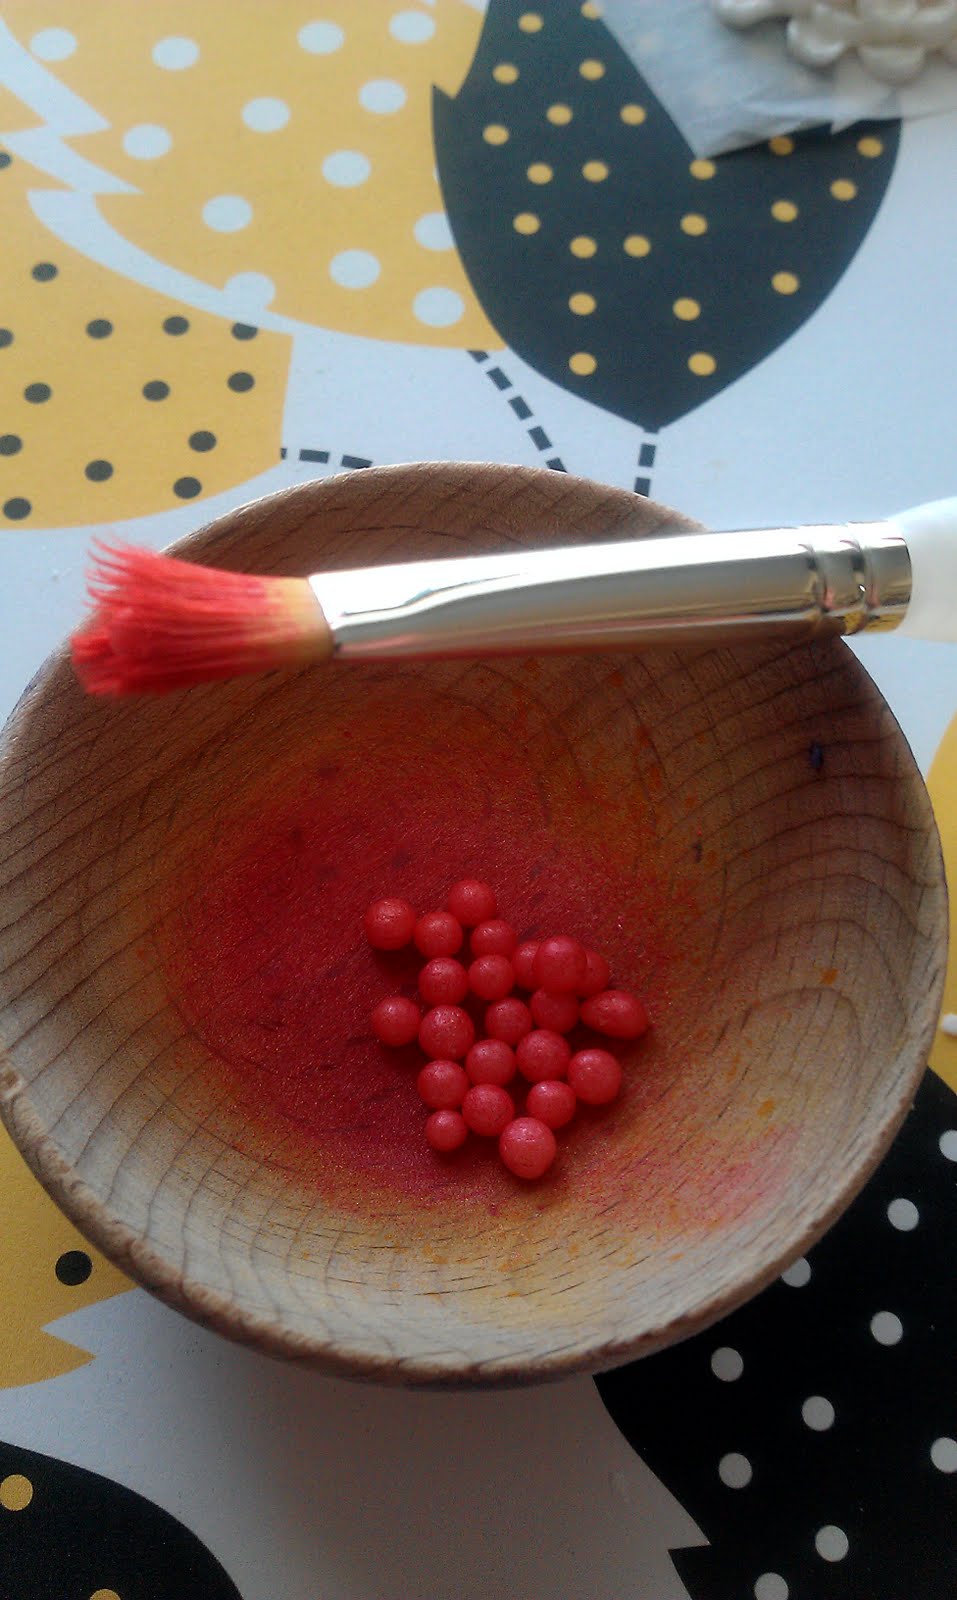
Place your white sugar pearls into your bowl and start stirring the pearls around with your brush. You may think that you will come out with patchy colored pearls, but fear not, continue stirring and stirring and stirring and I promise, they will come out even.


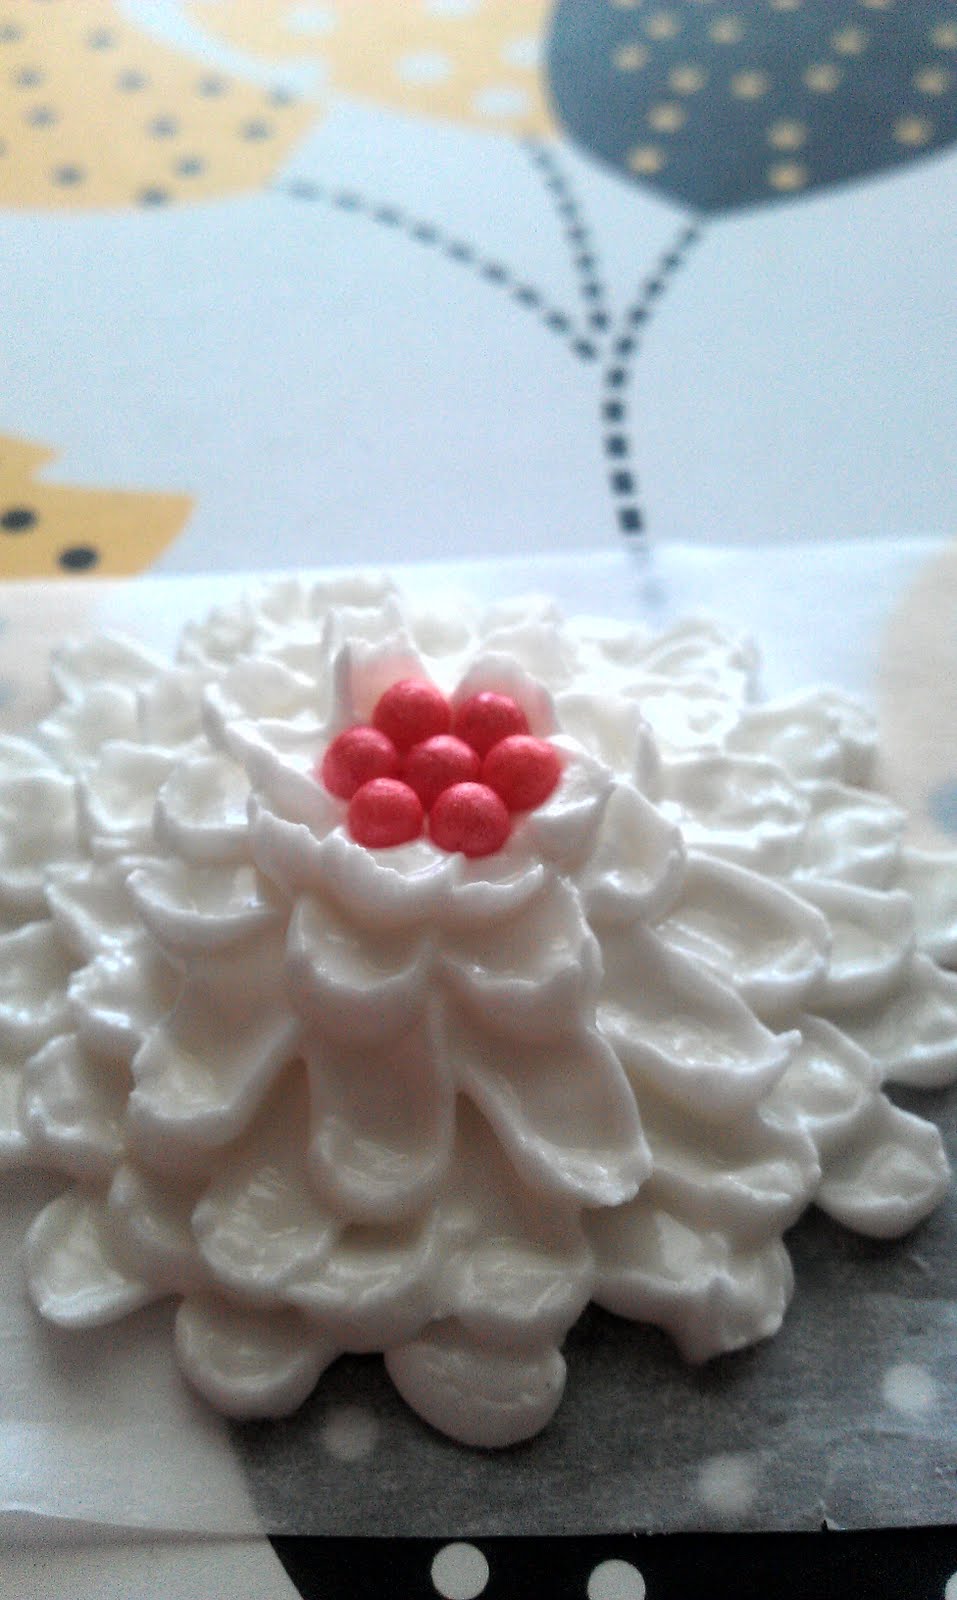
Now you say you want a simple yet sophisticated project to do with your pretty little pearls? Turns out, you are in luck! This next little tutorial is not only pretty, but rather resourceful, and who doesn’t like that!
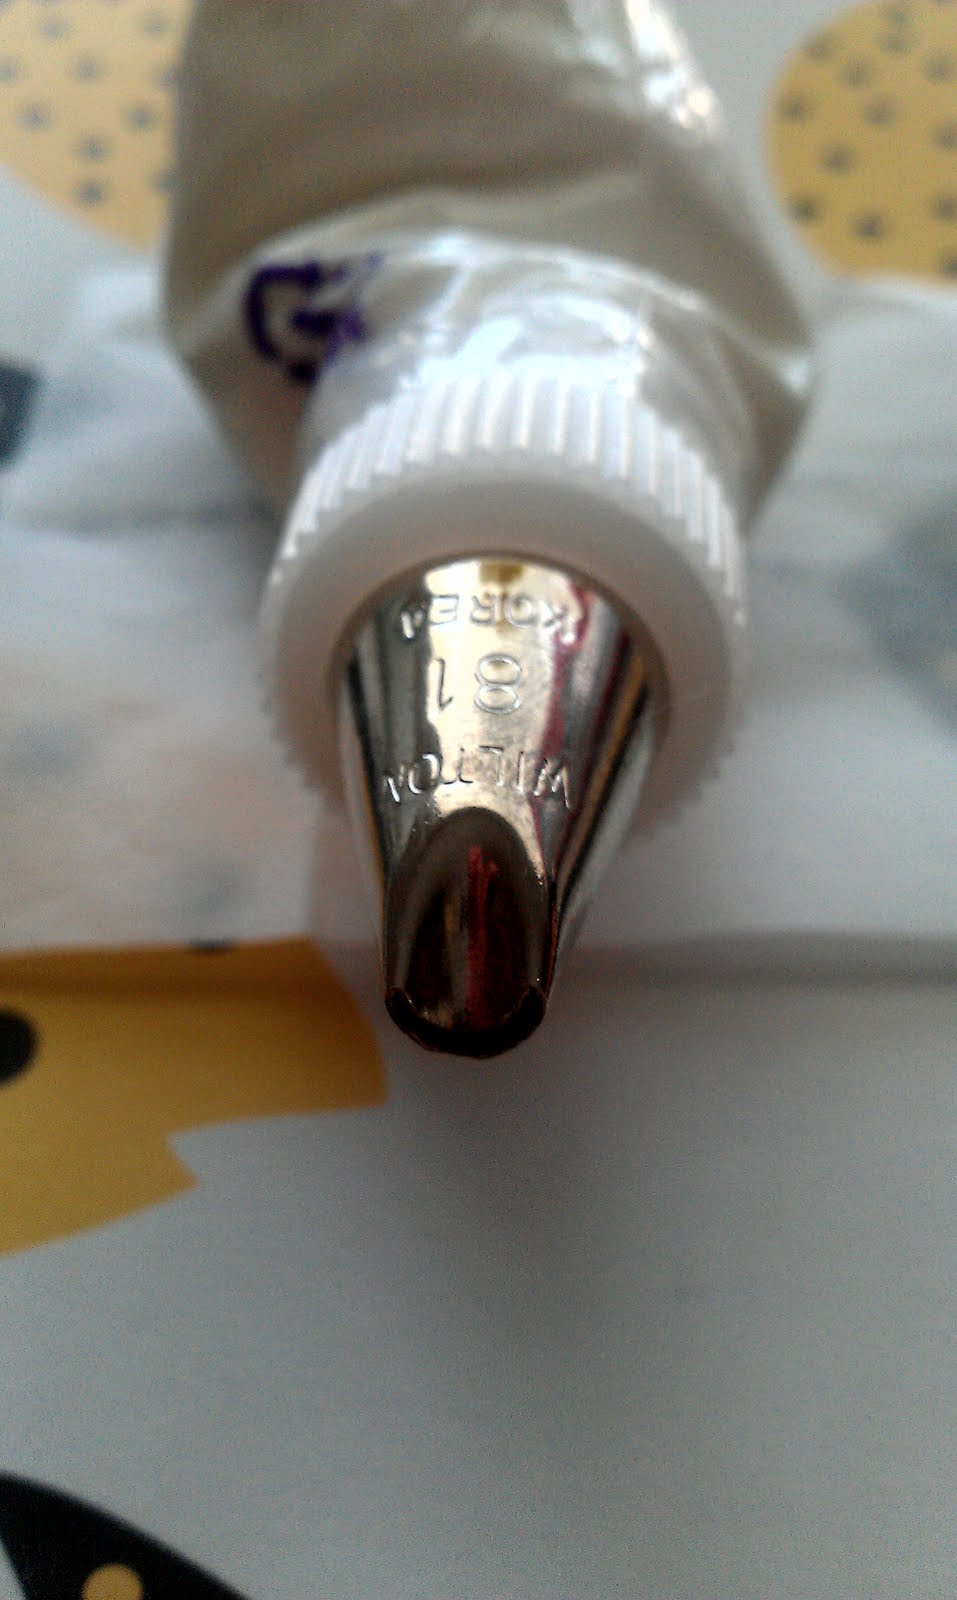
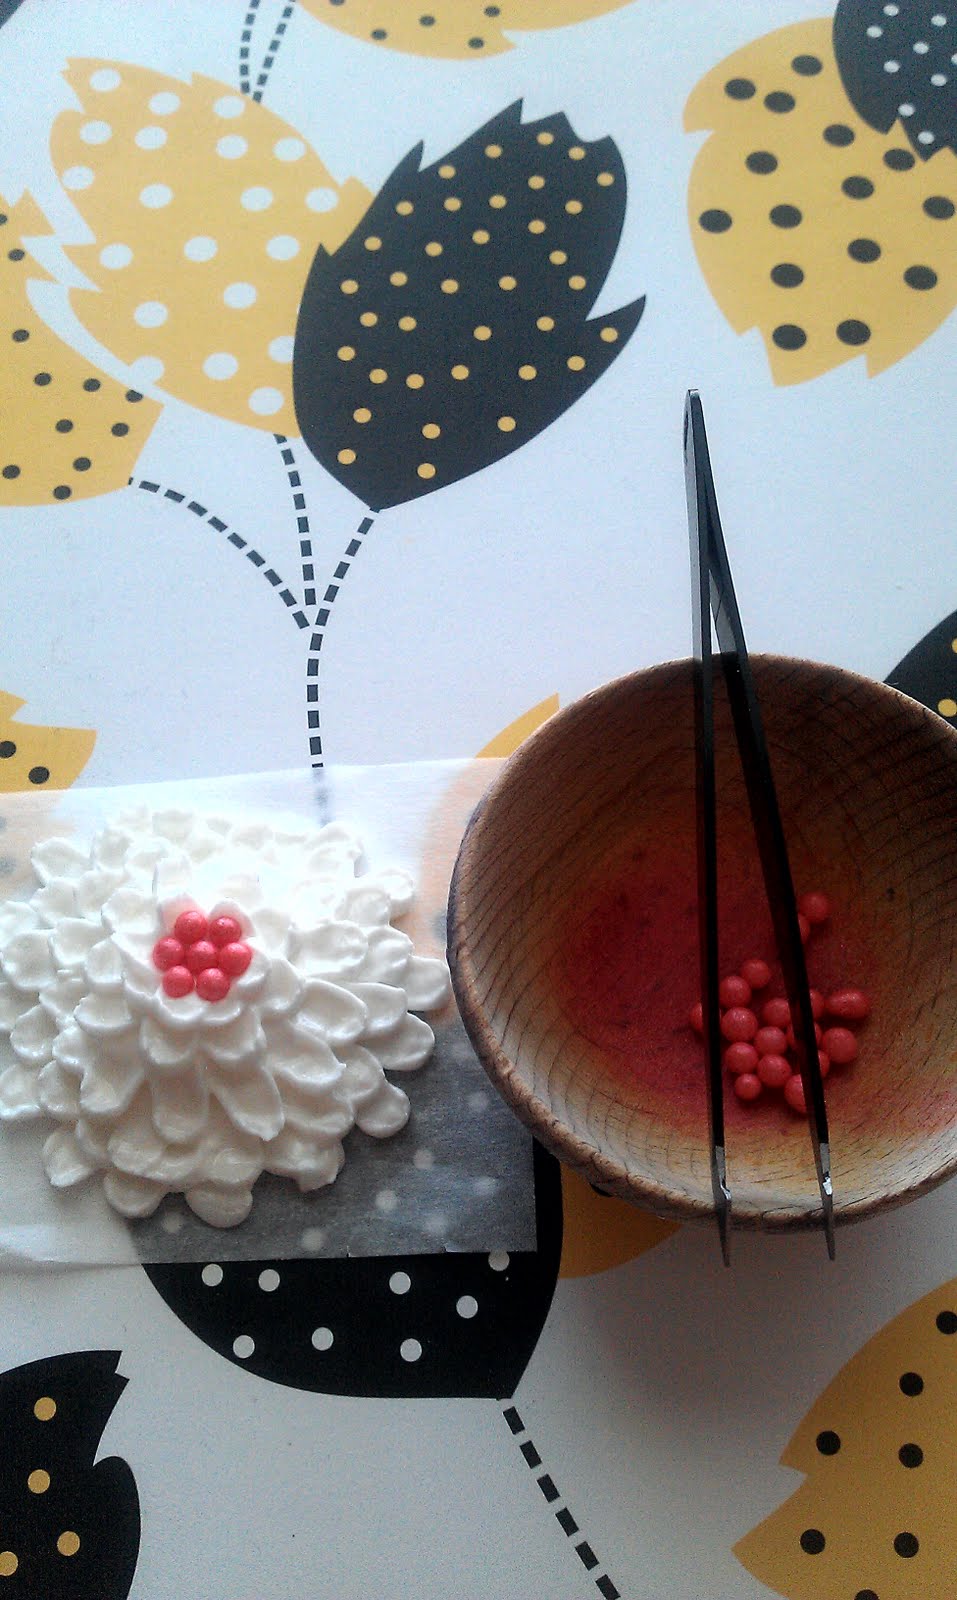
To make these pearly mums, you need the following:
- piping bag fitted with a coupler and
- parchment squares
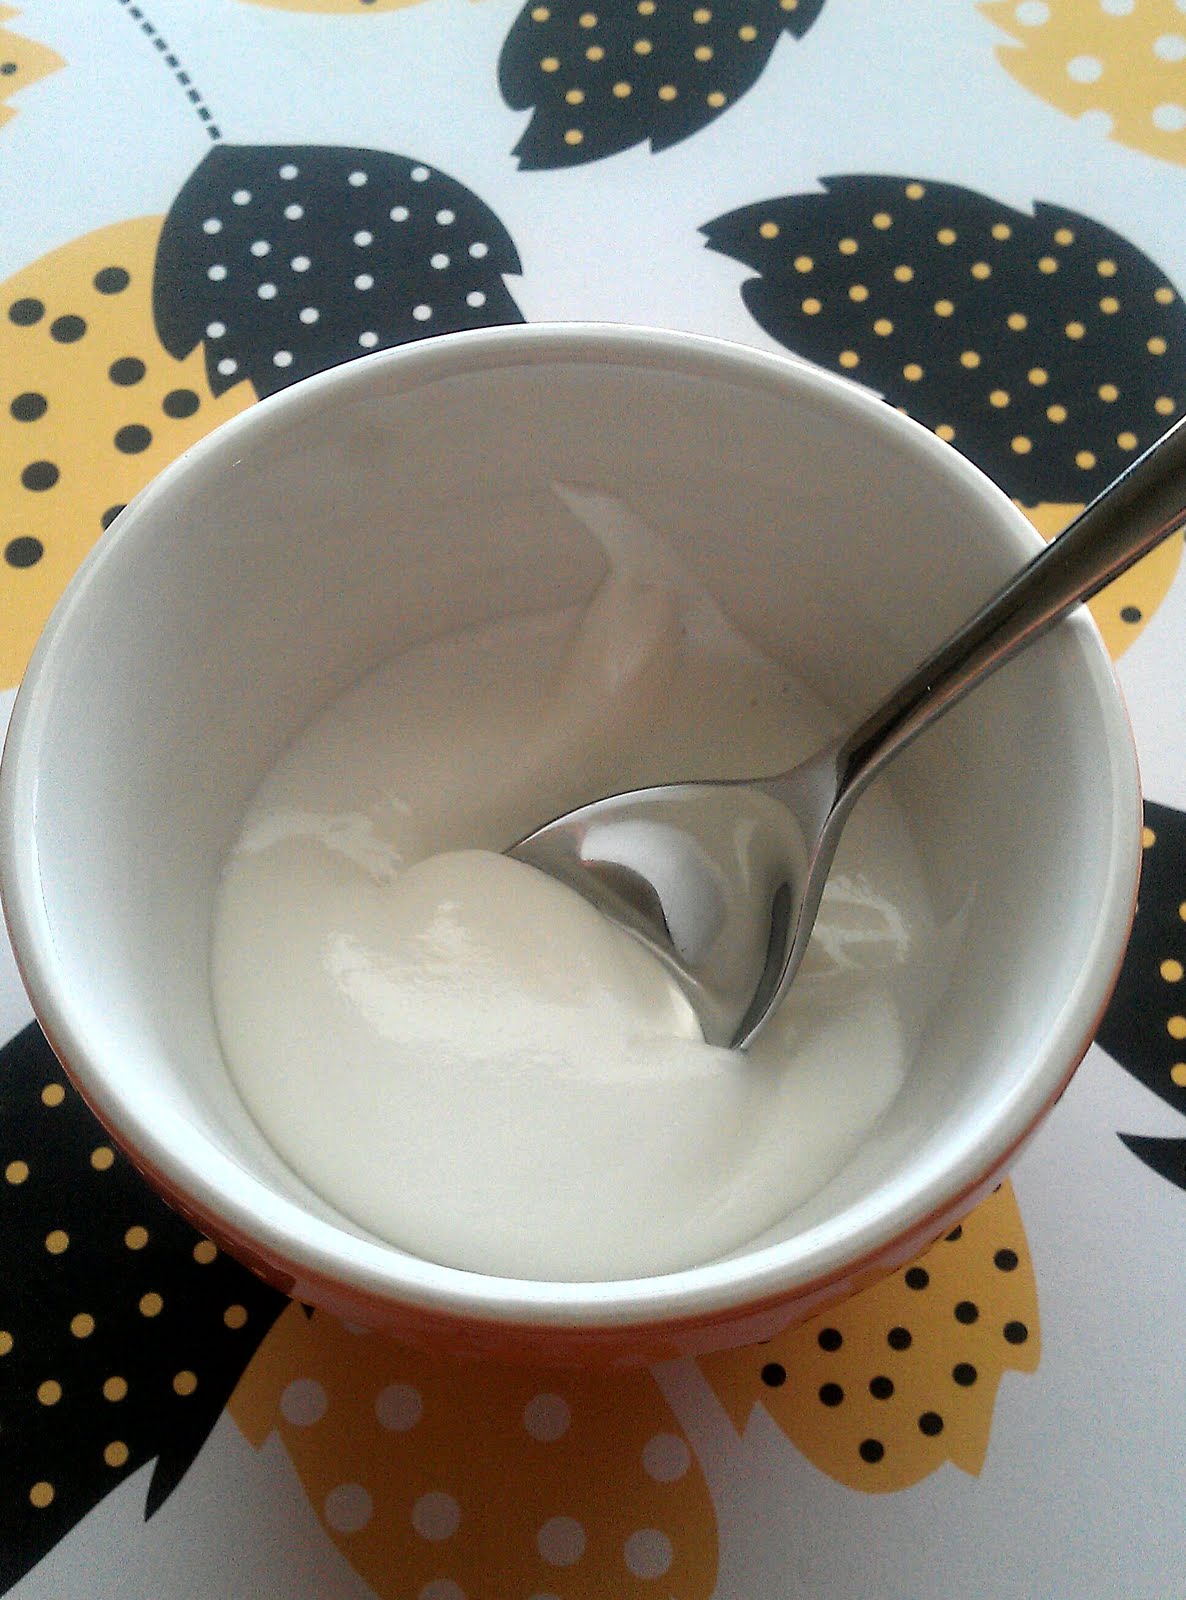
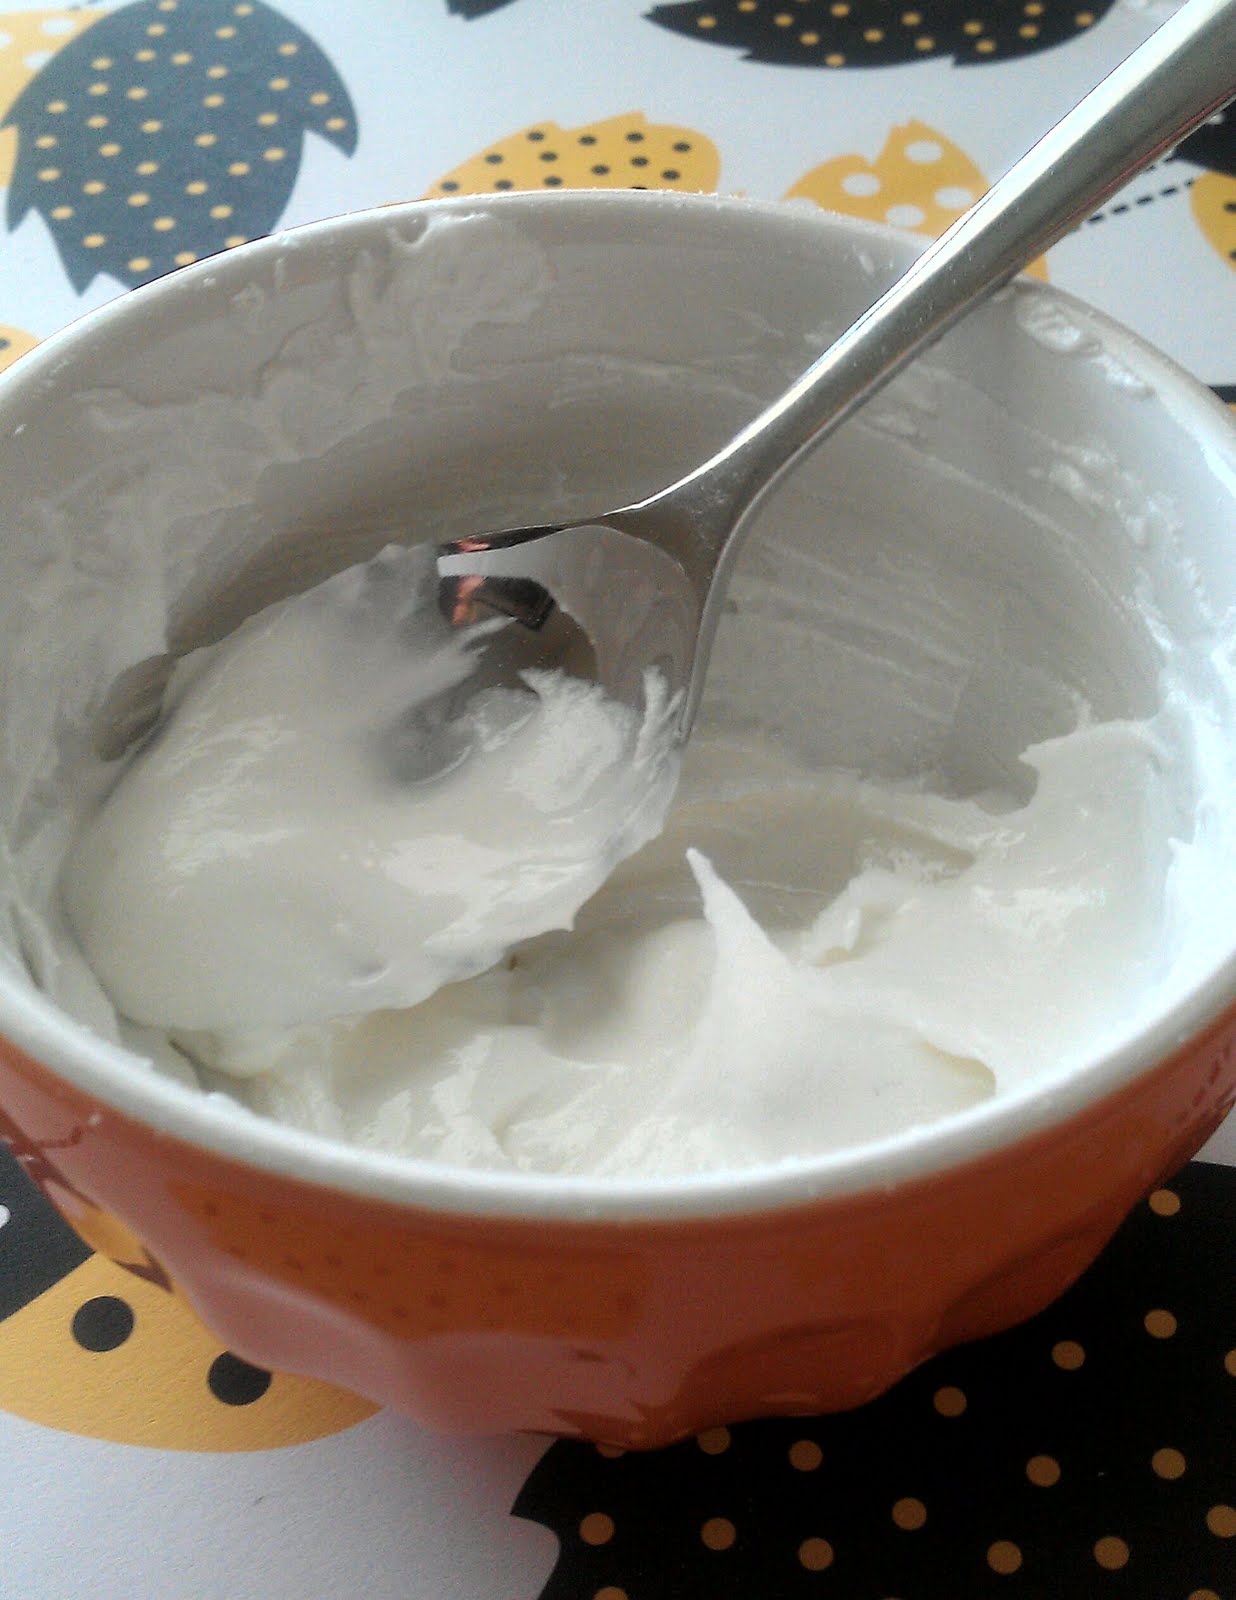
- really thick royal icing (see pictures below), now this is the resourceful part, you can take your leftover royal icing, thicken it up, and voila, you have the perfect mum icing!
- sugar pearls
To get started, thicken up your left over royal icing by adding a teaspoon at a time of confectioners sugar. Stir in between additions until thick, stiff peaks form.
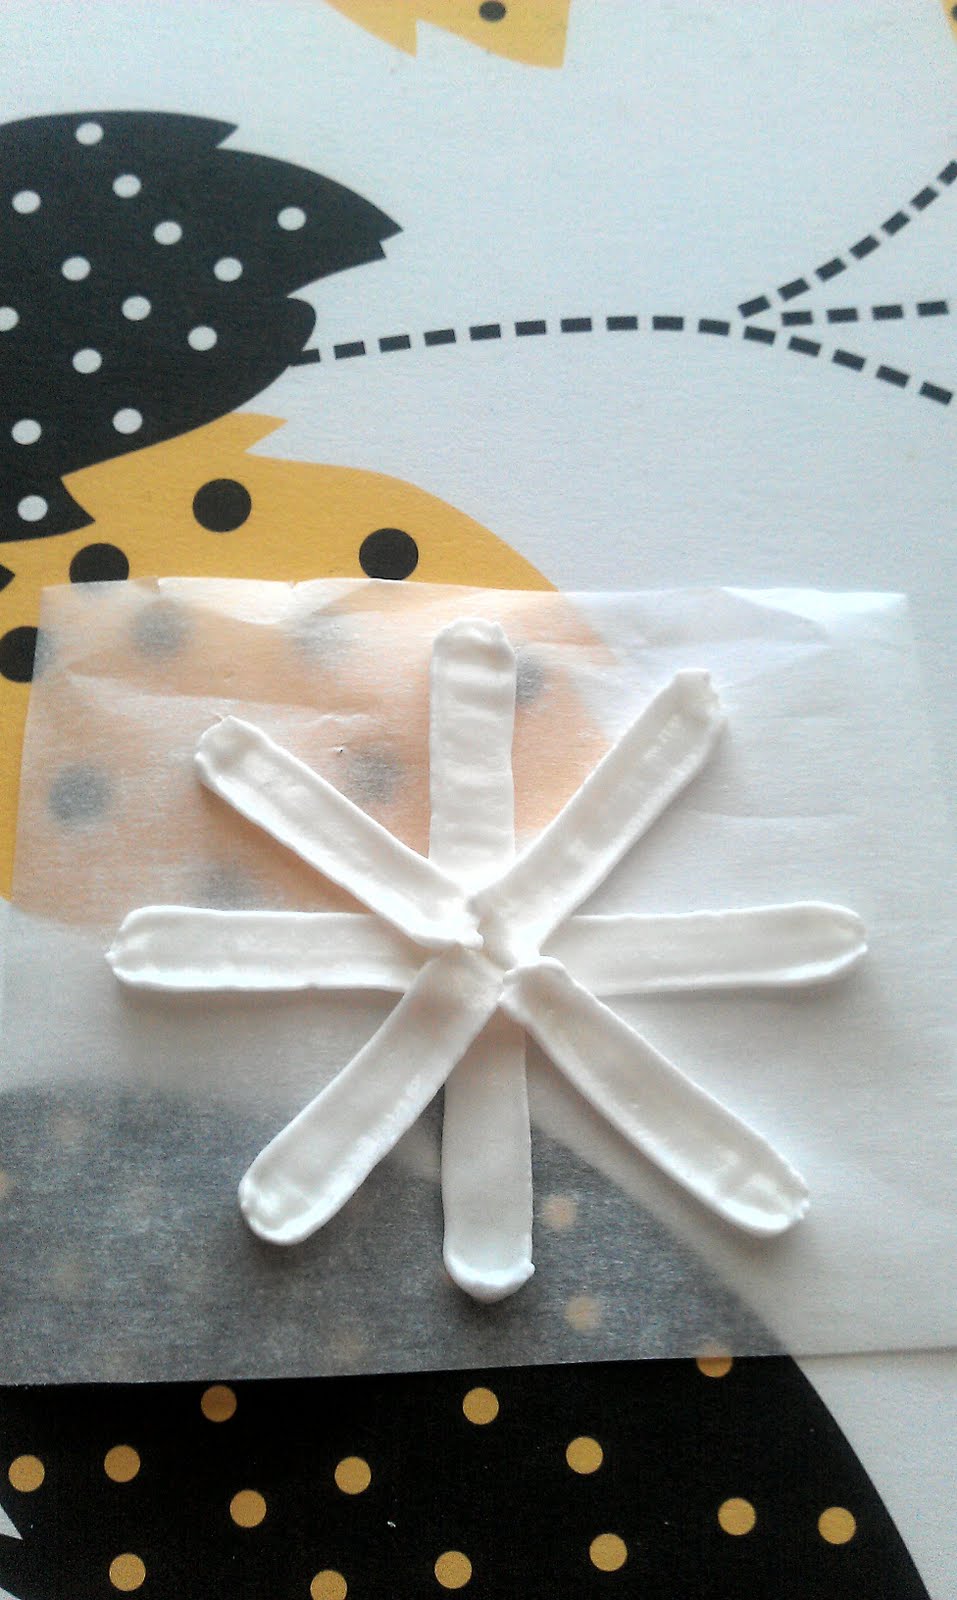
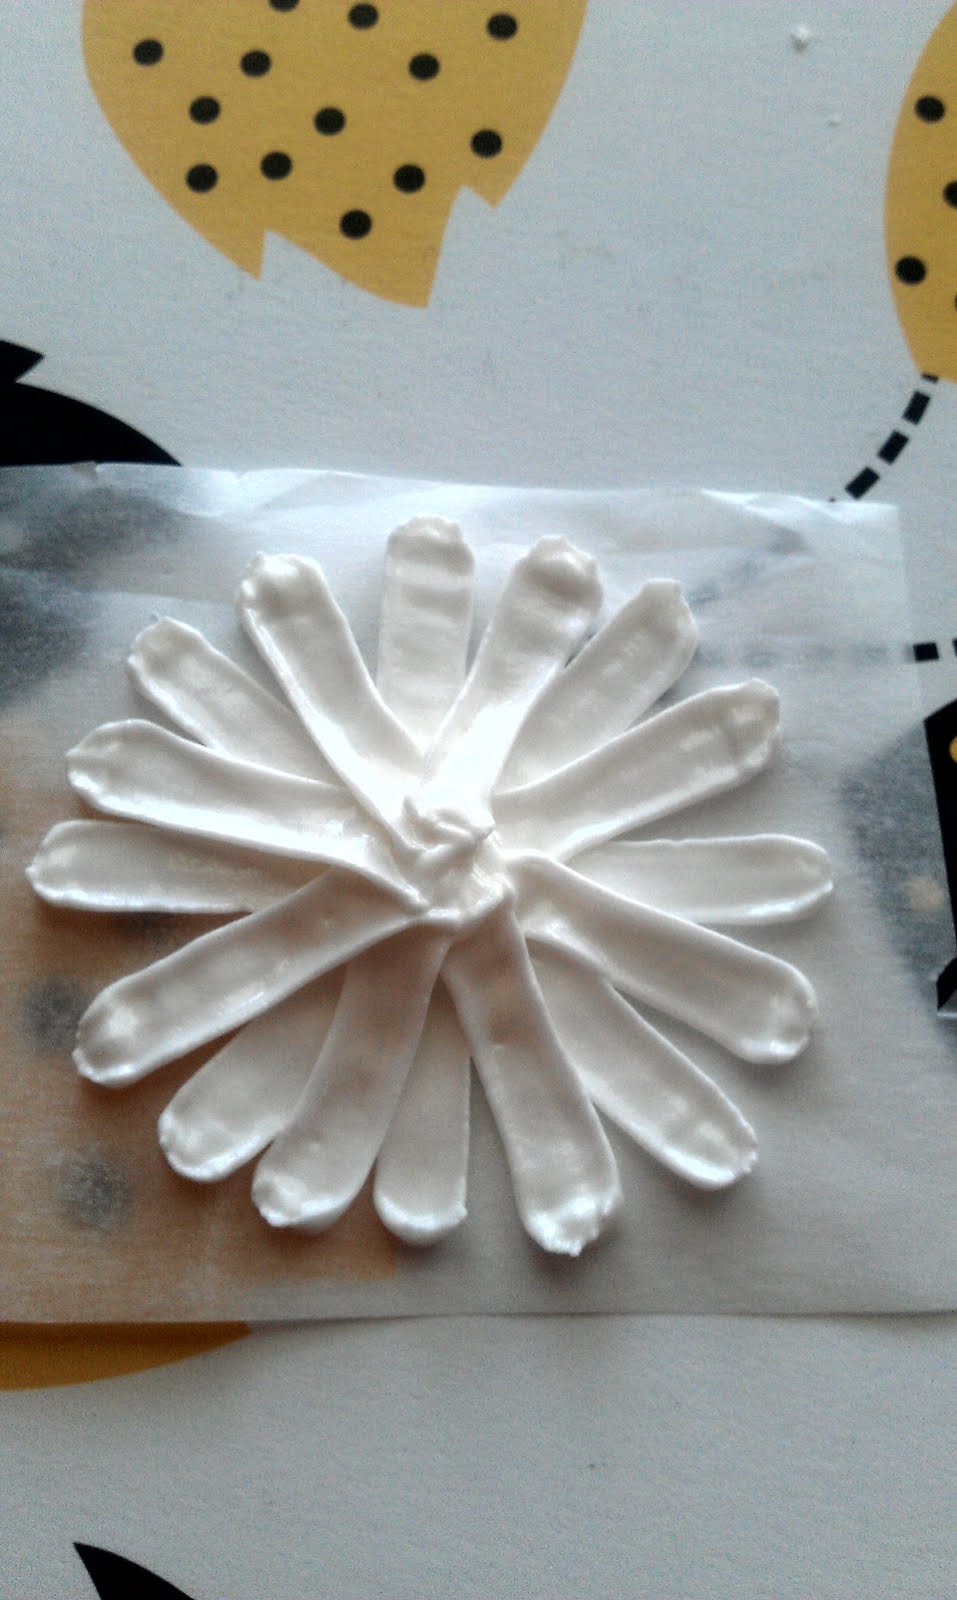
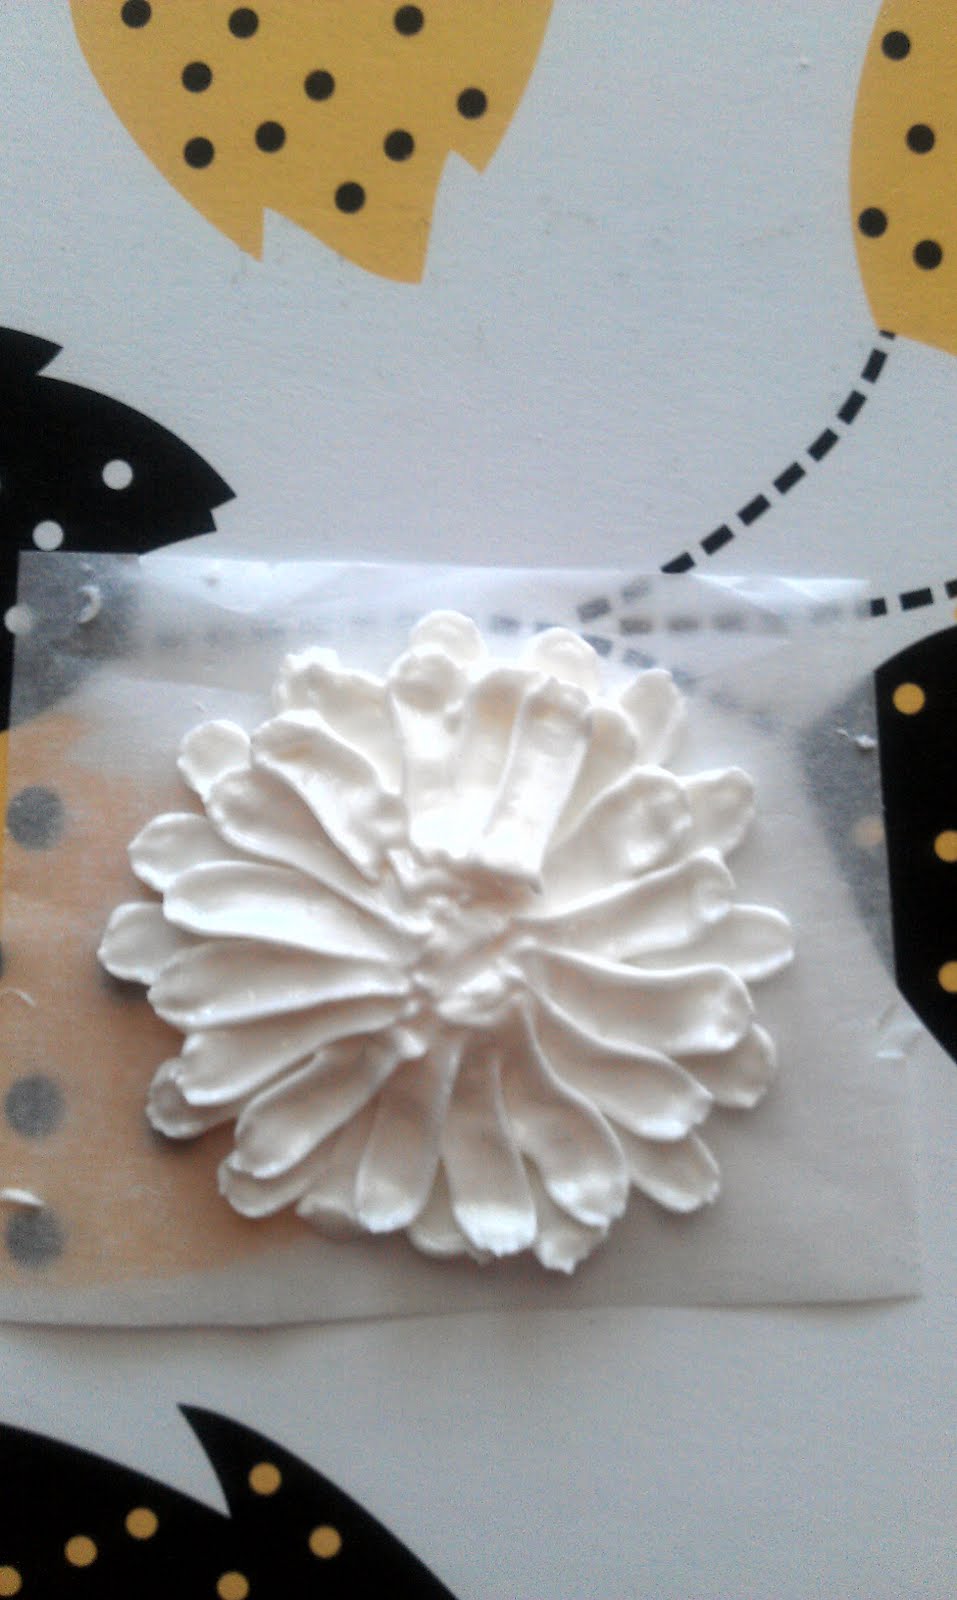
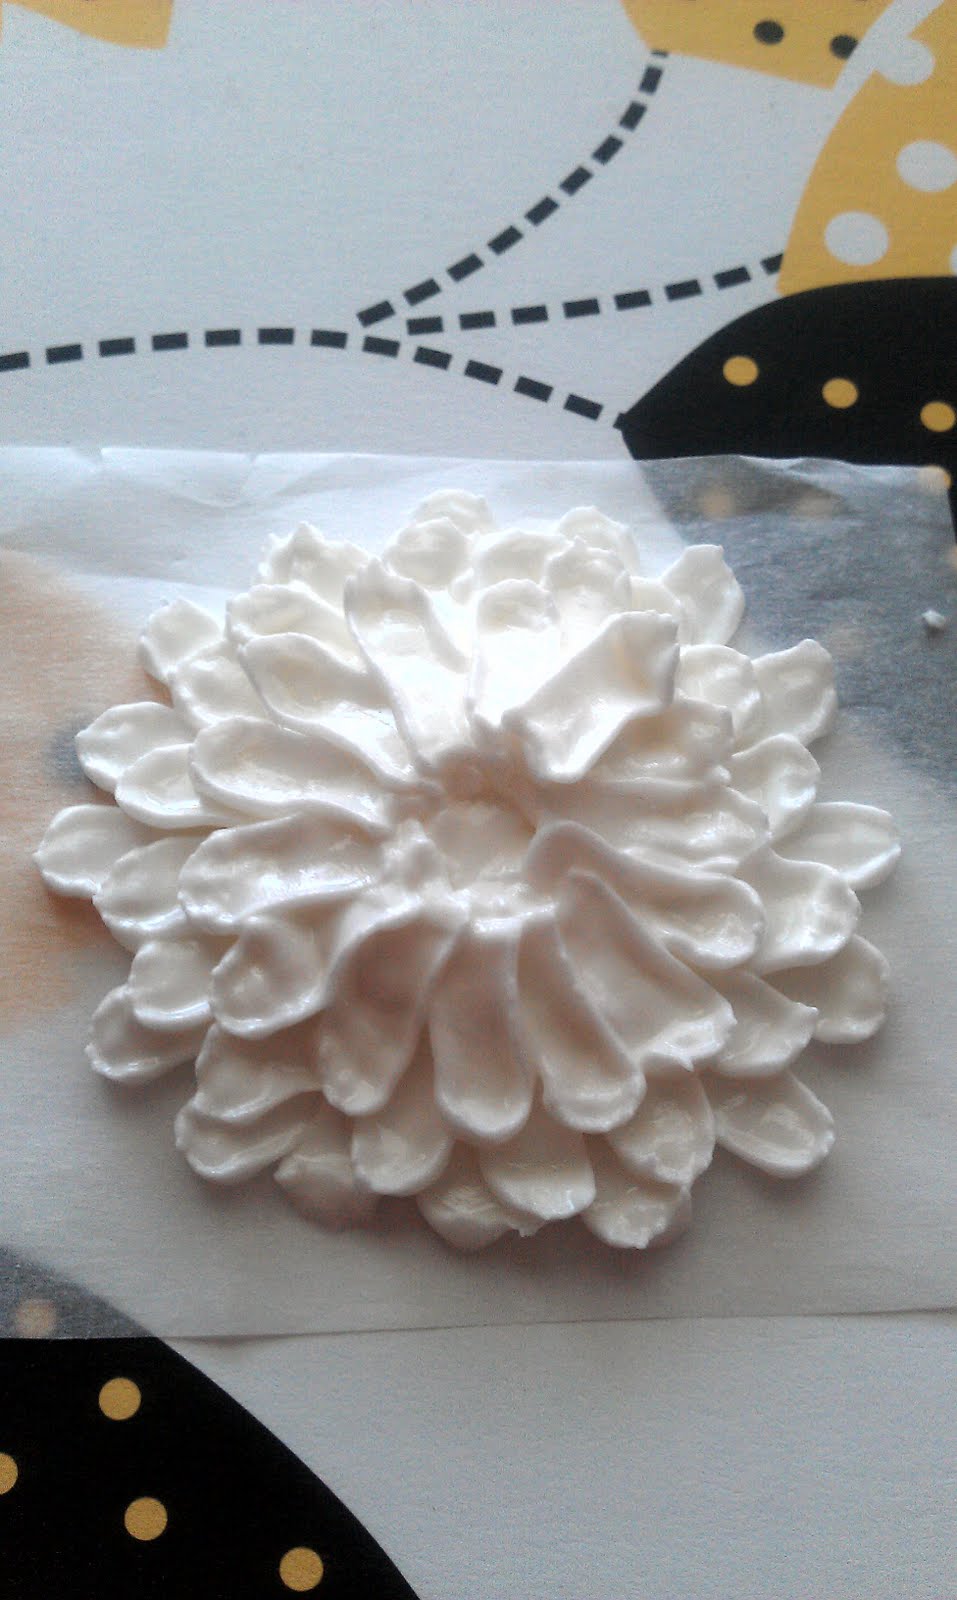
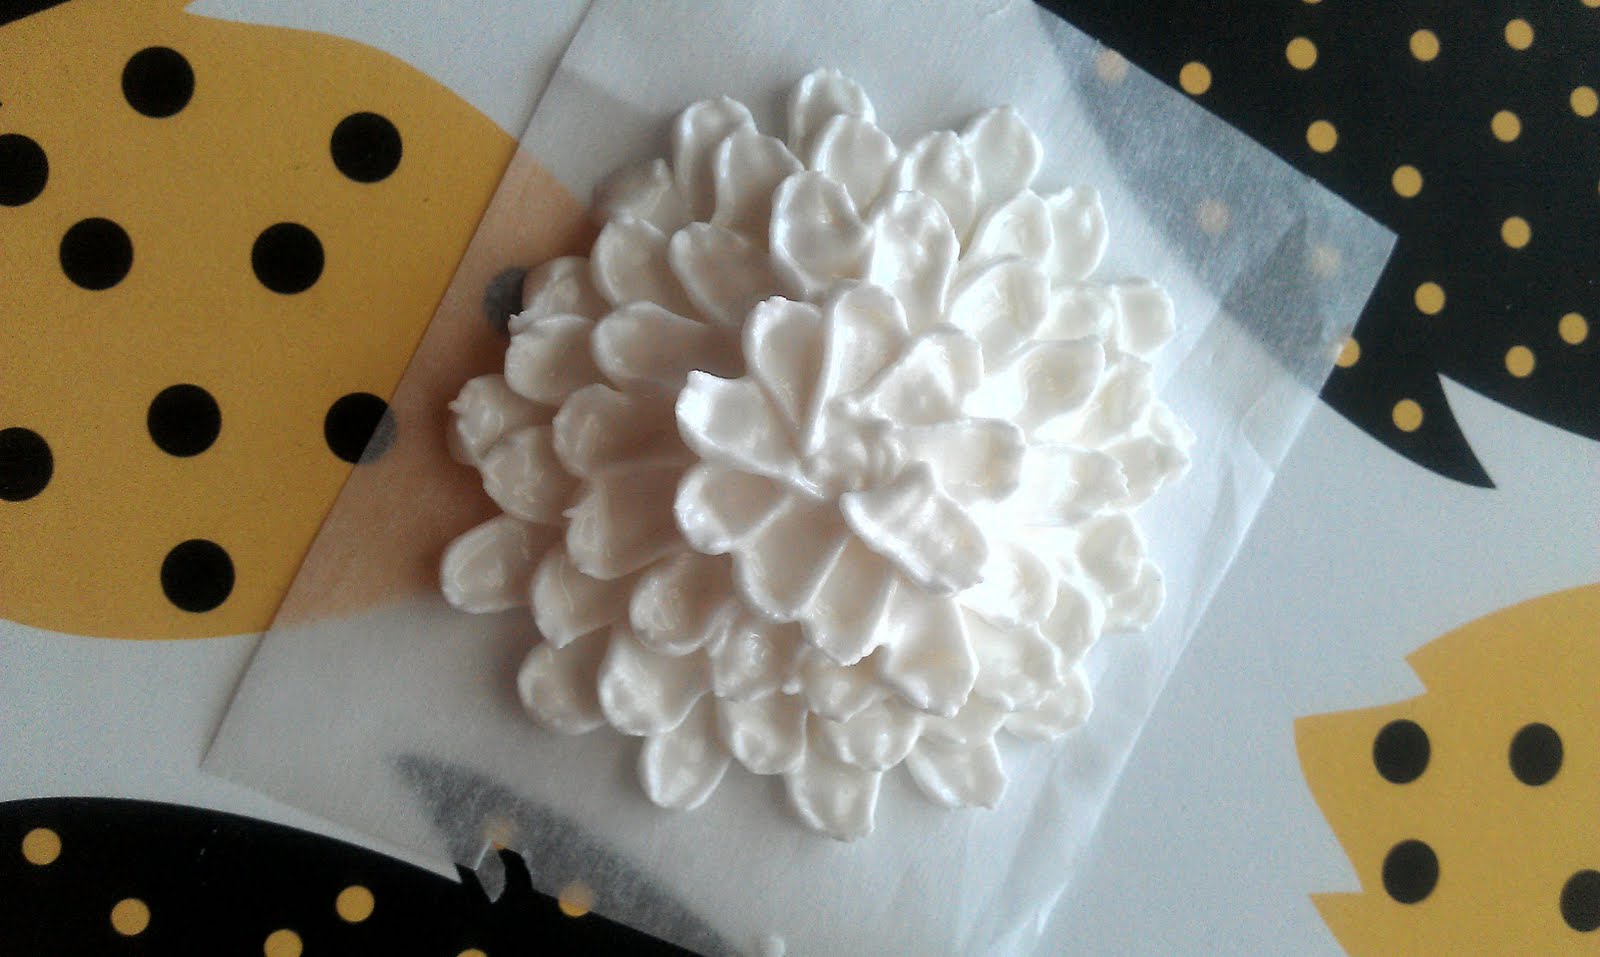
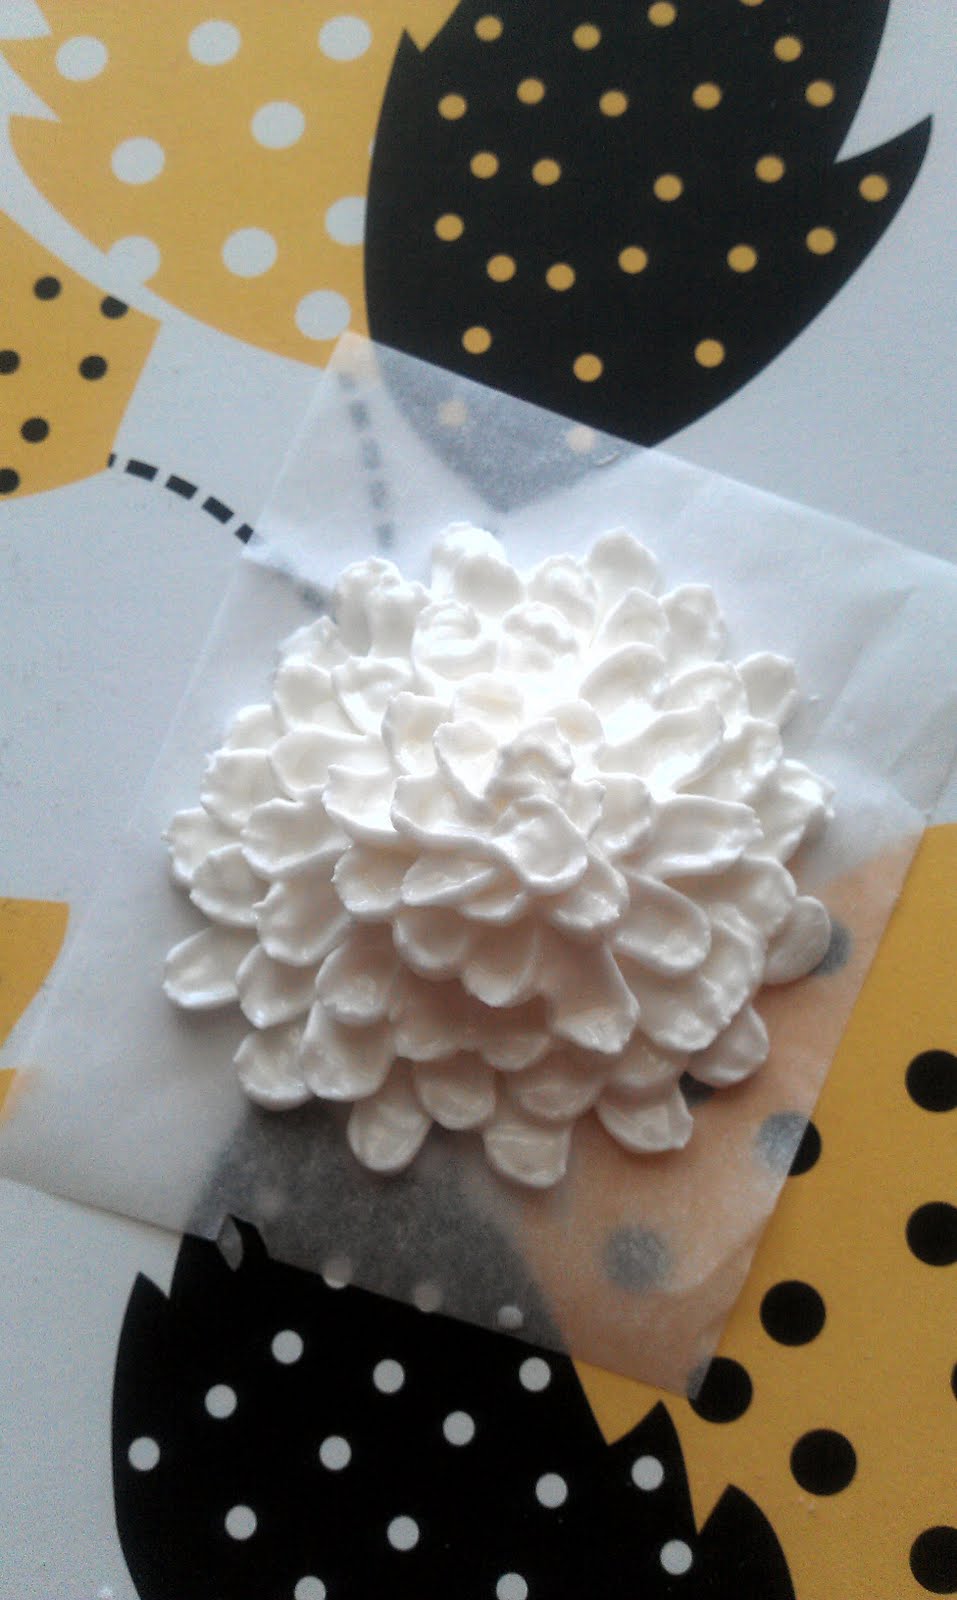
Take a parchment square and pipe a “plus sign.” With this tip, you should have the curve side closest to your parchment, in other words, it should be making a smile not a frown. This is the bottom of your flower, so this will determine how large your final product will be, you can make them as small or as large as you like, just remember to allow extra time for drying the larger they are.
 ?
?
?
*******************************************************?
Thank you again for coming to my rescue and teaching me a fun new trick, Linzy!


Beautiful! How long do you let it dry? Do you just put it on the cookie that is already iced?
Pingback: Make Pretty Poinsettia Cookies
Is there any way to make them shiny? I’m just wondering.
Can you use the AmeriColor gel colors or did you use a powdered product.
I need gold pearls. Gold is hard to find
how can prepare white sugar pearls?
Will they bleed into white buttercream frosting