Roses? For Me? {How-to Make Ribbon Roses}
Prepare for a little flashback. I’ve talked about ribbon roses before, but I love them so much, I felt like they deserved a second round. So, here we go again.
I’ve had a thing for ribbon roses since the first time I laid eyes on THESE GORGEOUS COOKIES from Ali-Bee’s Bake Shop.
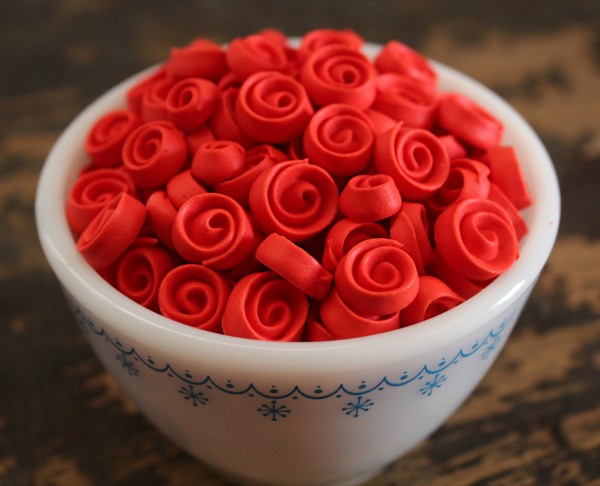 I could go into a whole long winded story, but the short version is, Ali led me to Loren, who’d recorded THIS VIDEO on making ribbon roses and soon after came HERE to share her technique.
Hope ya’ll are still following me…
Anywho…somewhere in the middle of all of this, I decided to do a three part series on royal icing roses, one being simple roses, the next mini-Wilton style roses, and the third a PICTORAL version of ribbon roses.
I did the first two but for some reason never got around to posting the ribbon roses until now. So, FINALLY, here they are…ribbon roses SweetSugarBelle-style.
To make ribbon roses you will need:
- stiff piping icing in the color of your choice
- a 101 petal tip
- #9 flower nail
- 1*1 wax paper squares
Ribbon roses are simple to make unique to the person making them. This is just a basic idea to get you started. Once you’ve got it down, I’ll hope you’ll take this information and practice until it feels right to you.
Use a tiny bit of royal icing to attach the waxed paper to the flower nail. Then, with the thin side of the tip pointing up make a little cone-ish shaped blob in the center.
 Without breaking the ribbon hold the icing bag at an angle and begin spinning the nail with your fingers while guiding the icing around the rose center.
 Keep in mind that the angle at which you hold the piping bag makes a difference in the appearance of the rose.
 Keep wrapping until the rose is a good size, then remove it from the nail and place on a cookie sheet to dry. To be safe, I usually give them 24 to 48 hours before using. However, I’ve used them way sooner in a pinch.
 See the difference between these three roses? I used the same technique and tip, but completely changed each flower by applying at different levels of pressure and piping at different angles.
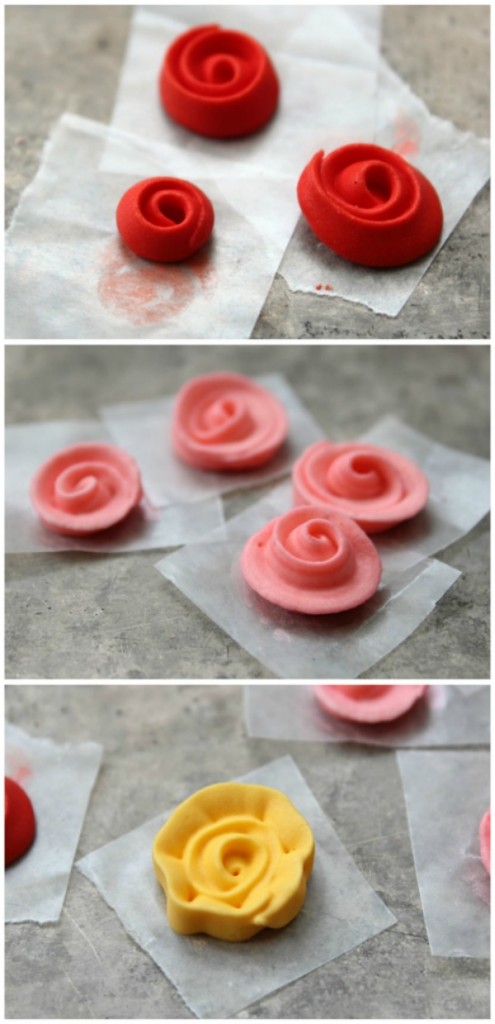 Ribbon roses can be stored in a cool, dry place and they will last for a very long time. Just be sure to keep them out of sunlight, because they can fade.
For added protection you can also add gel silica packets to the storage container, as my friend Haniela suggested HERE.
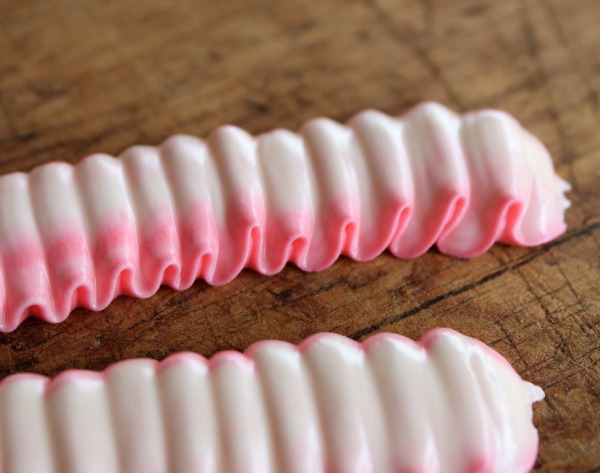
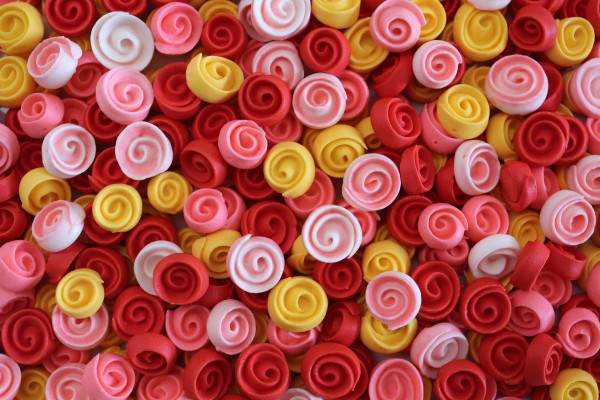 Before I go, I’d like to share is how I make shaded ribbon roses. You can do this several ways, including using bags like THESE, or KAREN’S BAG TRICK to create your own version, but I always opt for the the lazy way.
First spread a thin layer of color onto plastic wrap. The stripe can be as wide or narrow as you like. Next spread another layer of color over the first. Then, wrap it all up, add a tip and you’re ready to go.
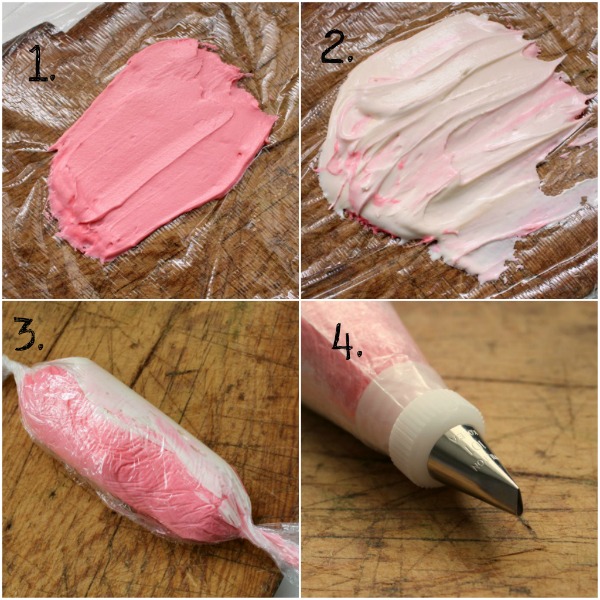 See the shading this creates? You can change things up by loosening the coupler and turning the icing tip a few degrees.
 Ribbon roses make beautiful accents for cookies such as these, although do admit, this set may be better for looking than eating. In any case, you get the idea.
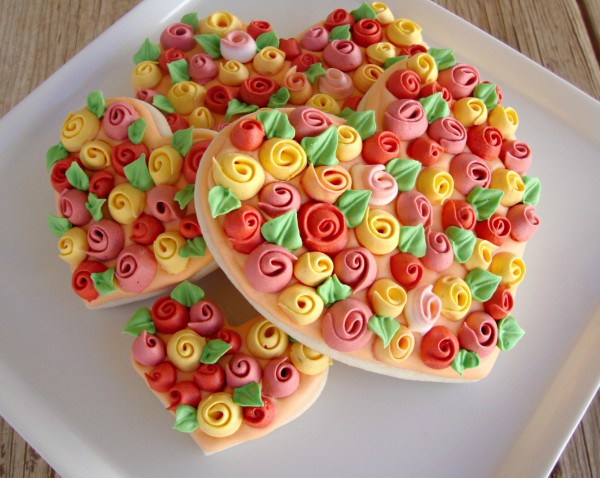 TRY THIS SOON! Besides being pretty, they are also a great use for leftover icing.
If you like making ribbon roses, I think you’ll love these fun tutorials also.
If you prefer to learn these things by watching a video, Loren has a great one HERE, or you can also check out Ali-Bee’s latest HERE.
Remember what I said! It’s perfectly okay to adapt this technique to what works best for YOU, so keep practicing until you find your way!
I hope everyone is having a wonderful weekend!


These are so cuuuute! Love it!
Pingback: How to make Ribbon Roses « Sugar & Spice Baking Club
Que precioso el decorado esta excelente, que imaginacion.
These are so pretty! I have to try this with all my leftover Valentine’s colors!
I am amazed at all the things you can do with Royal Icing. Your heart cookies are a perfect example of that. The icing can be smooth or you can make roses depending on the consistency. You have mastered it and can do anything with it!
The picture of all the colored roses should be wallpaper on my phone! I would LOVE it!!
Thanks for sharing!
What a beautiful cookie! And I LOVE the shaded ribbon rose tip! I’ll have to give these a try when I ever get the cookie thing down! 🙂
I love this; it’s super adorable!!
Cool, I definitely want to try this out.
Seems everyone is making royal icing roses but me! Just watched Ali’s video on her *lazy* method and I love your photo tutorial (not to mention those gorgeous cookies). I’ll be watching and reading all of the *lessons* and then I’m going to get busy and make me some roses.
I was going to make meringue ribbon roses tonight and then I saw these. you know I would love to have that picture from above, bird’s view picture as my screen save,r they are so beautiful and I love reading about all your tricks and tips. love the two tone ones too. I’ve only made them from royal icing once, not sure why, because they make a perfect decoration for a cookie or even a cupcake too.
Thanks for linking, I love silica gel packets, they really work?
I love how cute they look, so adorable.
simply put these are wonderful – those cookies are works of ART! I would love to try this technique. Great step by step.
These baby ribbon roses are the cutest ever! I need them in my life:)
NICE – I always love ways to use up extra royal icing and these look so much easier that the normal petal by petal rose version I usually do. Thanks for sharing your sweet find 🙂
How beautiful! both the roses and your cookies. I’m going to have a look at the video later, see if I can manage myself 🙂
so pretty !!! so well explained… as allways…
I love your ideas.
ADORABLE!!!!!!!!!!!!!!!!!!
Thank you so much for sharing all of your knowledge and experience! I have learned so much from you. I finally decorated cookies for the first time this weekend. You made it seem like it was possible. I had to share my first try with you:
http://secretstitchclub.blogspot.com/2012/02/arizona-birthday-cookies.html
Thanks again!!
I LOVE that you came back for these. I keep telling myself I need to try this with my leftover icing…and never do it. (And that picture of all the roses? GORGEOUS!!)
Que maravilla y que buena idea la mezcla de color. Un saludo y feliz dia de los enamorados
So pretty and simple! I ALWAYS make too much icing and I hate wasting it (especially considering how long it takes to make it, color it, and bag it!). It will also give me an excuse to use my flower nail, which I have never done before 🙂 I wish I had thought of this earlier this month – I made sassy Valentine’s Day cookies and it would have made pretty pastel flowers. Thanks again for the awesome tutorial!
Callye. I just gotta tell ya how much you are killing it lately! KILLING ME! Your chocolate royal icing, your red velvet cookies, these adorable roses…I love everything that you do and I really think that you are a genius. And I wish we were neighbors too!!! I dream of the cookie experiments and fun we would have. If you don’t stop being so awesome, I might just get on a plane and buy a house in texas! jk. Not a stalker, just your friend! 🙂
I miss you! Tell me when you’re ready to do another joint deal!! I already have an idea for ya!!!
I’ve always wanted to learn how to decorate cookies like this. I took a stab at it a few weeks ago and it went pretty good…. i’m just super excited to have found your website. You are AMAZING and i’m more than inspired!
You have found your gift from God and are using it. What fun for you!
Congratulations and thank you for sharing all your helpful hints, recipes and ideas!!
Brie
Thanks for this great tutorial. The roses look great & I love the technique for shading! I am definitely going to have to give these a go.
Love these! I learned from Loren’s video too(I think I even linked it from here…). The shaded royal icing thing is genius! Can’t wait to try that tomorrow!
These are so pretty! I really need to make some! Those heart cookies at the end are so gorgeous! (P.S. Love you)
Wow, these are awesome! They look so much easier then working with gum paste, like esy enough for me to try! I LOVE them! When i saw them on instagram i HOPED that you would post them here! Thanks so much!
Wow, what a beautiful technique! I love the pictures of the roses clustered together. SO pretty!
Soooooooo pretty! I love the modern look to the rose. Gorgeous and fun!
Just too pretty to eat…oh, well maybe not !!! 😀
Spotted these shared on FB, and just had to come over and see the full post. Great, very thorough tutorial — and such pretty, pretty results!
Super adorable cookie!
I love these!! So much faster and easier than the fondant version, and how amazing do they look covering the entire cookie?? Gorgeous!!
It’s been a while since I made roses..these look simple and they’re so pretty!
totally gorgeous! the time that goes into these is crazy, you make it look so easy!
Pingback: Lovebird Cookies and a Valentine's Day Linky Party
I so need to try this! Yours are so beautiful! Love the rose covered heart~Gorgeous!!!
Wow. Seriously, wow.
I have GOT to try to make these again. It hasn’t worked for me in the past, but you make it look like I should be able to do this! I will try, try, again. Thanks for the inspiration!
Thanks for sharing this. This will definitely come in handy 🙂
Pingback: Thank You Cookies « by amber's hands
veri nice
Pingback: Spring Bird Cookies {A Tutorial} «
Pingback: Make Icing Accents From Leftover Icing
Pingback: Making Roses From Royal Icing
Pingback: Don’t Pinch me!
Pingback: This Week’s Favorites
Pingback: Learning about Icing Consistency
Wonderful tutorial! Just found you today and I am thrilled. Love your writing style…the details and photos are so beautiful and clear. Thank you for offering your experience to us!!
i very love this 🙂
I’m wondering…could you make “cookie roses”? Same concept but with cookie dough. Like you did with the piped cookie dough.
I really think that idea is GENIUS! If you try it, let me know!!!
Hi Callye,
I love this tutorial…thank you! I really appreciate the time you take to do tutorials…they take forever! I haven’t tried ribbon roses yet, mostly because I’m lazy and like to stick with what’s familiar…lol…but I love the way they look! I’ve really got to give them a try.
Pingback: Elizabeth & Nate’s Wedding Cookies « by amber's hands
I just found your site yesterday, and seriously, it has become my guilty habit. Whenever my (year old) daughter naps or is nursing, I am on here getting ideas. You don’t know how wonderful it is to have gotten tips on baking sugar cookies, ideas for photography, and new decorating techniques all in one place! These are all things I have been wondering about lately. I constantly bake cookies and cakes for family and friends because it is such a hobby, but it can definitely be a labor of love at times…especially when you are very detail-oriented. Thanks so much for the tips and inspiration.
Could you show us how you made those Cookie Roses?
hello….
I have the cookie fever alright! I love your website…however, I am having a bit of trouble with my royal icing….i made up a batch…i’m not sure what i did wrong but maybe whipped it too much?…it seems very airy and light….when it comes out of the tube it isn’t smooth but looks rough….sort of like when you whip eggwhites too long? …get the picture? I guess I should throw it out….got any ideas or can you tell me what I did wrong? Help!
Pingback: 101s Tip
Pingback: 101′s Tips – Ribbon Roses « Sugar & Spice Baking Guild
Pingback: How To Make Frog Cookies | sugarkissed
Pingback: Easy Swirl Roses
Pingback: Glorious Treats » Luau Cookies with Fondant Flowers
Pingback: Chocolate Cake Cookies
Pingback: Cake Decorations | Pearltrees
These are adorable! I will start making these with leftover icing. You said they keep for a long time in the dark, I’m guessing in a sealed container. But how long can you store them, 3 months, a year? Thx!
When you spread the 2 colours onto plastic wrap and roll it up how do you add the tip?
I made these in a golden-ivory color. So much fun! The recipe came out well (I made a 1/4 recipe). Great tutorial!
so lovely! beautiful idea, great photos and very good idea about using leftover icing to just blast out a bunch of cute roses for future use! ^__^
Pingback: Color Palette Inspiration: Frosting Ribbon Roses
really creative !!!!please keep me updated..
nice
I would love to see/hear your ideas about rosebuds. The Wilton kind, where you’re looking at them from the side instead of from above. One could possibly use these on the side of a cake or on a cookie for a different perspective. (I hope that’s clear as mud!) Thanks for all your inspiration!
Pingback: ???? ???? ????????…??????? ????-????
So cute and simple, yet still very stunning presentation. I may need to make some of these out of royal icing and/or buttercream to have on hand. Thanks for the great idea!
Pingback: Royal Icing Transfers-Stocking Up - The Bearfoot Baker
Pingback: Decorated Rose Cookies
Pingback: DIY: Roses Ruban ou Roses Express en Glace Royale - J'amène Le Dessert
Pingback: Witch Cookies for Halloween - The Bearfoot Baker
Pingback: Decorated Rose Cookies
Pingback: Easter Chick Royal Icing Transfers (Tutorial) – Sweet Petite