Piping Lace On Cookies
You can do this!
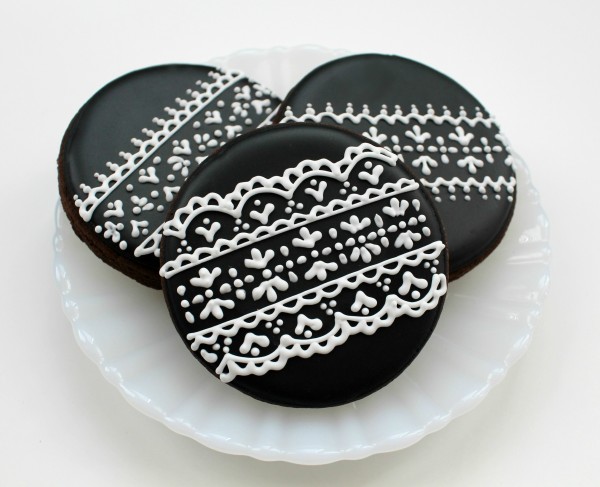 I wanted to start out with that sentence so you’d stay with me.
You might not believe me yet, so I’ll say it again. YOU CAN pipe intricate lace designs on cookies.
When I first started my cookie adventure, I saw these lace cookies by Rosey Sugar {Yukiko Mori} and said to myself, “I MUST LEARN TO DO THAT!”
But when it came time to try, I was so intimidated I put it off. After a couple of months I finally worked up the nerve to experiment. I was shocked at how easy it was. I made THESE on my very first try!
Now I am here to tell you…Don’t waste another moment being afraid.. I’ll show you how easy lace can be. Are you ready?
To pipe lace on cookies you will need:
- flooded cookies in the color of your choice
- piping icing in the color of your choice
- push-pin
- notebook paper
- 1-2 PME #1.5 tips {you can find these art Karen’s Cookies and Country Kitchen Sweet Art}
- toothpicks {for unclogging your tip as you work}
- damp towel {keep your tips clean so icing will go where you tell it to}
I could get really long winded about this, so I am going to jump right in and save the tips for last. Kind of backwards I know, but I think the info will be a bit easier to process that way.
Okay, here we go…
When creating designs like this, having a guide is very helpful. I use a simple trick that I refer to as “the push-pin trick” to make my line.
Cut a strip of notebook paper along the straight edge to make a flexible “mini-ruler”. You want it thin so you can see enough of the cookie to properly position the guide. I like notebook paper because the lines act as a secondary way to make sure that things are evenly spaced.
Begin your design but using the push-pin to mark a line down the center of the cookie.
 Try to remember, lacework is a cumulative design. Each detail is simple in itself, but they come together to form an intricate whole. Once the cookie is marked, pipe on the first layer using a #1.5 tip. Consistency is KEY. You’re looking for something along the lines of toothpaste. If you’d like a visual, I have a helpful video HERE.
Anyway, I started with a simple line of dots, then came back and added a few more details. Try to keep things symmetrical because that’s an important characteristic of real lace.
 See how I keep adding details? I went from a line of dots, to teardrops, then fleurs. Once I built up a nice center design I added small ruffles to either side. Ruffles seem easier if you start with a straight line then pipe the scallops. Do this quickly so the two lines will flow into one another, creating a seamless design.
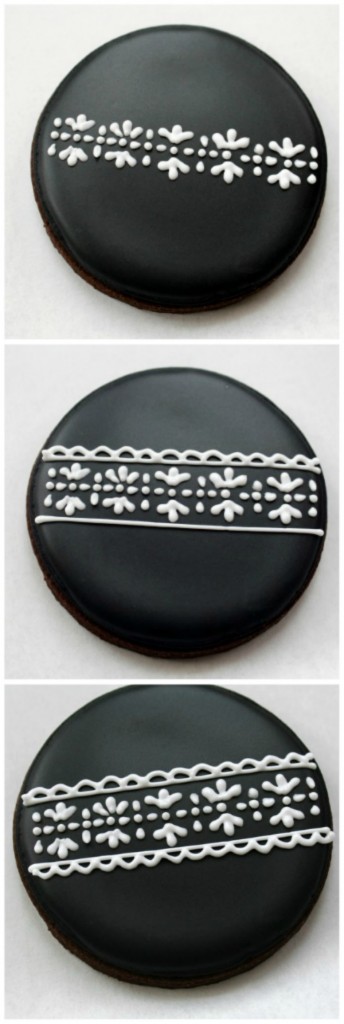 At this point, I decided a larger ruffle would look nice. To make sure the two sides were symmetrical, I used the paper ruler to mark my cookie once again. This time, though, I marked it every two lines instead of one like before.
 Once I piped the larger ruffles, I added more scallops and filled in the naked spots with dots and hearts.
 Once you get going, it’s hard to stop. Lace is kind of addictive. It’s very gratifying to see how each step transforms the design. I could pipe lace all day, or at least as long as my hand held out.
 As a whole, this design looks a little scary, but when you break it down there’s nothing more than dots and lines. After a bit of practice you won’t even need the guide anymore, I PROMISE!
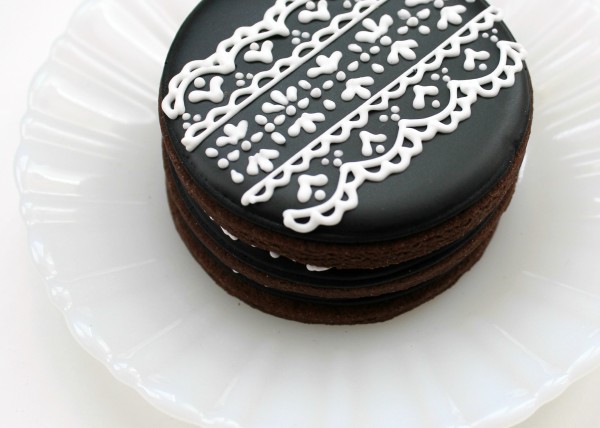 Start practicing NOW and by Valentine’s Day, you’ll be making cookies just like these!
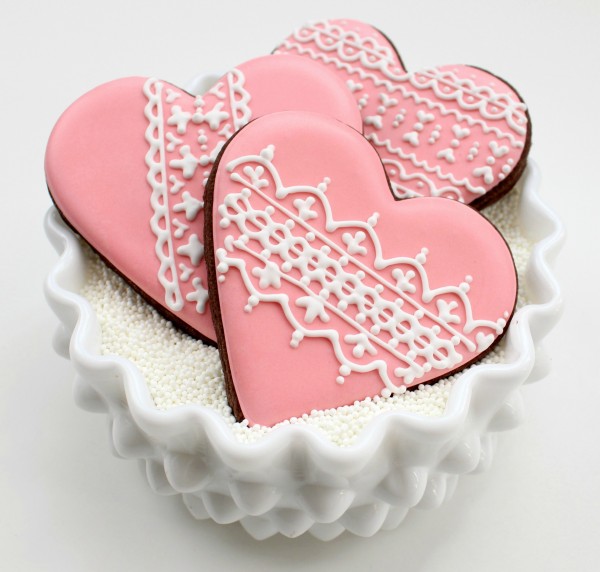 Here’s a quick summary and a few more tips to help you along:
- Use a push-pin trick as a guide until you build up the confidence to attempt free hand design.
- Icing consistency is KEY! Watch THIS VIDEO for tips an getting the perfect piping consistency.
- To save time, try flooding your cookies using THIS TECHNIQUE from Created by Diane. If you look closely at Rosie’s work, she uses a similar method. This works well for those of you who use corn syrup icing because you can use that as a base and royal icing for the detail work.
- PME#1.5 tips are your FRIEND. You can use use #1 and #0 tips to create a more delicate design, but I don’t have the patience for pantyhose and clogged tips. However, if you are DEAD set on smaller tips, Sweetopia has a great post on managing clogs HERE.
- If you would like to create a doily-like design like I did HERE, use a round cookie cutter to make a circular template for marking.
- Sketching really helps {and I should practice what I preach}. Map out your design BEFORE piping so you’re not piping blind.
- If you like having pictures for reference Google LACE EDGES or LACE CLIP ART and click on IMAGES. You’ll find enough inspiration to last a lifetime.
- Scrapbooking sites also have great lace graphics. If you need something simpler to refer to, I suggest looking there.
- Lace designs look BEAUTIFUL on a variety of color combinations. Design Seeds and Photo Card Boutique are wonderful resources for complimentary color pallets.
- I ran across THIS IDEA on My Little Bakery’s cookie blog yesterday and was floored! It was so simple, I was almost embarrassed to post this. Cookie BRILLIANCE, for sure!
If you love the lacy look, you should check out these ladies also. I can manage in a pinch, but these women are the MASTERS of fine piping.
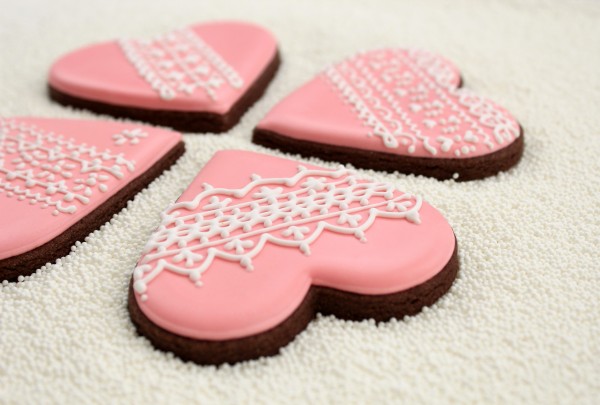 Now go. Make cookies. Then come tell me that I am always right {where my husband can see, of course} and that it was the easiest thing you’ve ever done. Then, when you’re finished, swing by my Facebook page and show them off {and tell my husband AGAIN that he was pretty lucky to marry the girl who’s ALWAYS right}.
Seriously, though, you can do this! All you have to do is try!
Good luck!
This week I am linking up with:


Pingback: El encaje está de moda y tartas y galletas también se apuntan!
‘You can do this’ – OK, now I’m intrigued and will certainly try!! Thanks for a great set of instructions.
Pingback: Cookies and Royal Icing « Cupcakes with Siddiqa
Pingback: Sweet and Simple Lace Cookie Tutorial | Cake Arcade
heej,
wauw those cookies are beautiful…
I’m definitely gonna make them some day but I have tips that
are a little bit bigger, so you won’t get it so pretty as you have.
Can I just use a piping bag and cut the end a little bit, so you would
get a smaller line. Or use a cornet ( I don’t know if that is the right word in english:)
Haha i’m sorry for my english I’m from The Netherland so…:)
Pingback: Popular Country Wedding Songs Blog
Pingback: Lace Patterned Heart Cookies for Bridal Shower Love | Make Me Cake Me
Pingback: Luulla Handmade Blog » Blog Archive » Wedding Inspiration: Delicate, Lovely Lace
Pingback: DIY: Piped Lace Cookies
hey i really love the idea and will definitely try this at the weekend.
i was wondering about the perfect black icing color.
how did u get this black color? is it store-bought or mixed? and which technique did u use to get the perfect layer of color on your cookies .
i love to read some reply soon. thank you very much
ygor
Oh! Thank you so much for posting this tutorial. And all the posts you share! Spent some time today re-reading about 20 second icing and really paid attention to my royal icing consistency. Made some cute lacy valentine cookies and didn’t go crazy trying to do it 🙂 Thank you, thank you!
Pingback: Airbrushing Lace on Cookies
Dinajpur IT is a Training Institute About IT, Tutorial, Joomla, WordPress, Web Design, Article Writing, SEO, Google Adsense Photoshop & Online Money Maker.
Pingback: Easter Eggs | Wren's Flight Photography
Hi! I wanted to let you know I have searched far and wide for a recipe I really like and yours is the winner!!! Thank you so much! What cookie is this dark”chocolate ” mAybe cookie on this? Would love to try these. Thanks so much!
Hi. What is the dark cookie you use above? Is that gingerbread? Or do you have a chocolate roll over recipe? I didn’t see one but was curious. Thanks so much!
Wow! I’m gonna try these for Valentine’s cookies. Thank you for the tips. You do amazing work!
Pingback: 35 Cookie Recipes for Valentine’s Day | Recipes
Pingback: Comic Cookies and Design Transfers | The Simple, Sweet Life
Pingback: Heart Lace Cookies | Gotta Make That!
is it easy for beginners?
Pingback: Birthday Boardgame Bonanza | Sugar, Spice, and Everything Nice
Pingback: Black And White Wedding Decorations With Lace | askervani.com
Pingback: Galletas decoradas con puntilla | doctorcookies
Pingback: Make This: Lace Easter Egg Sugar Cookies – Celebrate the Big & Small
Pingback: Cake Trends 2017 – Melbourne Suppliers & DIY