Lollypops on a Stick Cookies {Guest Post}
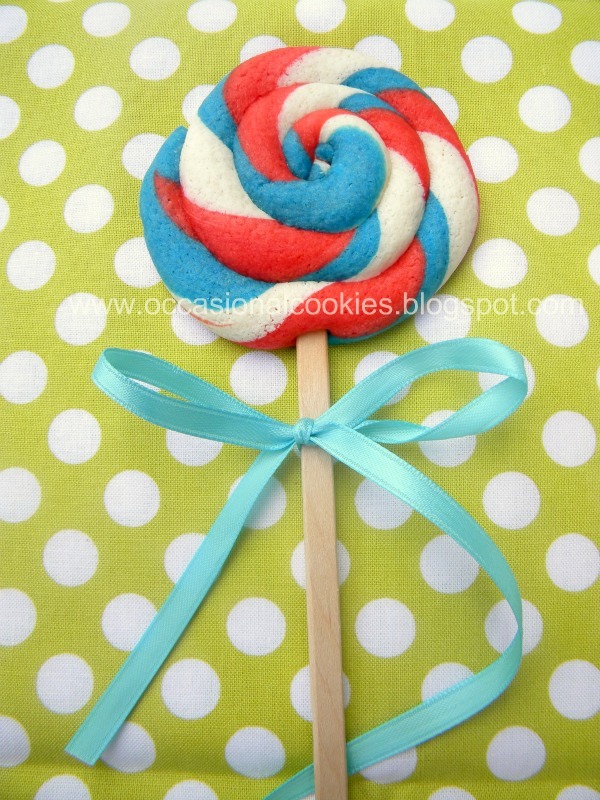
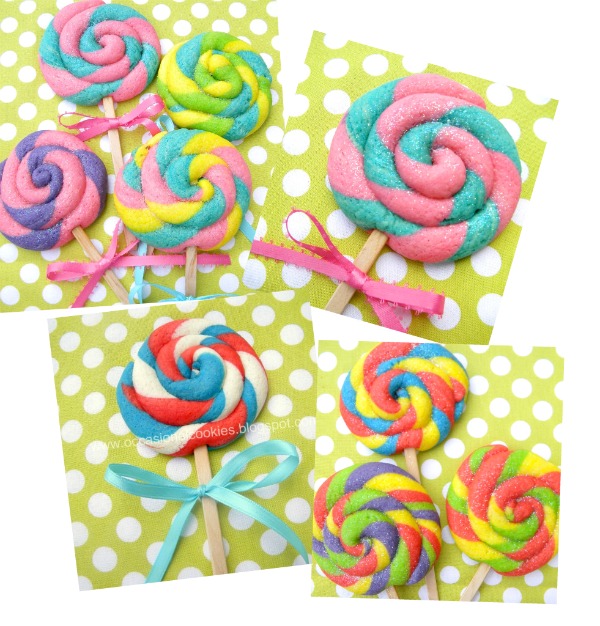
A few days ago, I ran across these cookies on Flickr, and was so impressed that I shared them on my Facebook page. Instantly, there were requests for a tutorial. So, I went straight to the source!
Luckily, Carolyn was more than happy to share and immediately prepared this amazing tutorial!
I’ve seen similar cookies before, but I have always been a little intimidated by them. But after reading this, I feel like I can do it.
I also love the fact that these are a perfect last-minute fourth of July cookie, because they don’t need to dry overnight. Now, I better let Carolyn take over!
***************************************************
Hi, I’m Carolyn from Occasional Cookies! As a tremendous fan for Callye’s cookies, it is a real honor to be guest posting! I remember the first time I stumbled upon her designs I was completely “cookie-struck”. I was pretty new in my own decorating and could hardly believe the amazing things she was creating. I am inspired by her designs consistently, so for me to inspire others is a huge delight! So thank YOU!!!
The idea for these cookies came to me at school one day, (I’m a PE teacher), when the art teacher and I enjoyed some real lollipops in the teachers lounge. We were admiring how pretty they were when I was hit with the cookie whammy! “I could totally make a cookie like this.” My cookie mind went home that night (in cookie overdrive) hoping that my 2 year old and 3 month old would give me a sliver of time to try out my idea. I was so excited that it worked exactly as I visioned. Here’s what I did.
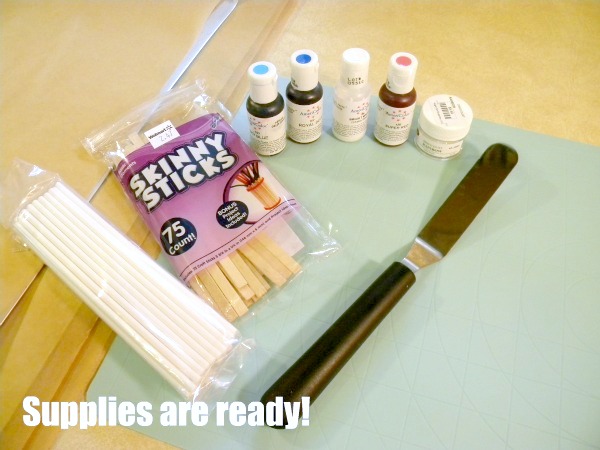
Gather these supplies:
-
your favorite sugar cookie recipe
-
a silicone mat to work on
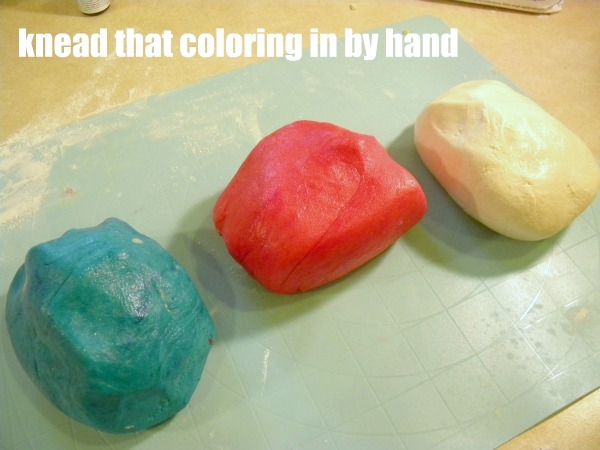
Seperate your dough into thirds. Coloring the dough-the messy part. Use a generous amount of white to color one portion (8-10 drops, depending on how big your section of dough is). You may need to add a little more flour as you go since you are adding a liquid coloring. You do not want the dough to be sticky, so just sprinkle flour in as needed. Start with about 5 drops of red in the other section and 5 of blue in the last section.

Knead the coloring in with your hands. If you want to add more color in, go for it!
You can chill your dough for 30 minutes or so, but it’s not always necessary if it rolls out without sticking to your hands or mat.
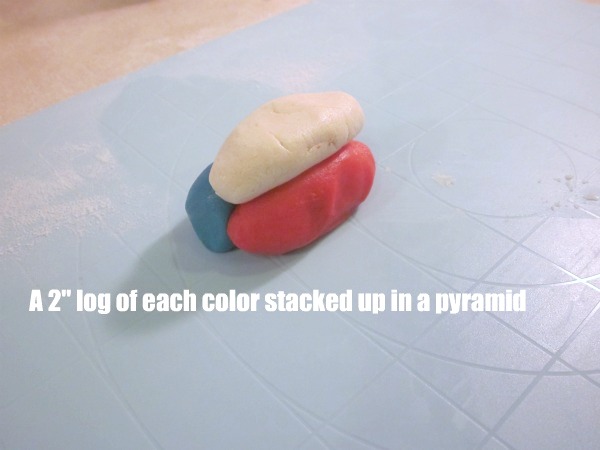
Pinch off about a 1 inch piece from white and roll into a 2 inch log between your hands. Repeat with red, then blue. Stack the logs in a pyramid on your silicone mat. I don’t flour the surface. You want a little “traction” between the dough and mat as you are rolling it out. If your dough is too sticky add more flour or chill in fridge for 30 minutes or so.
Start, with one hand, to roll the dough into a snake. Think back to your days of playdoh!
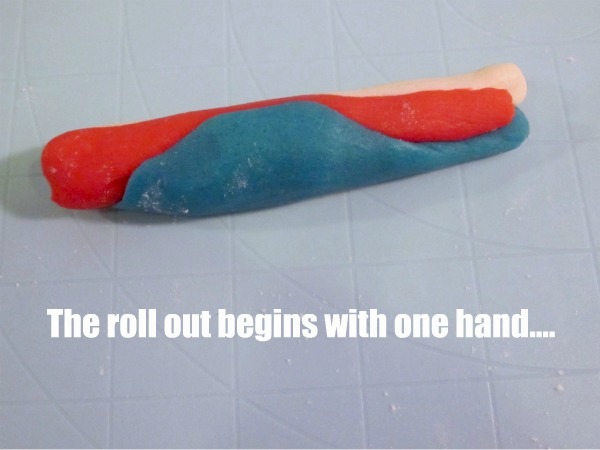
Eventually you will need both hands to roll out a 12-15 inch snake. Don’t let the snake to too thin, or you will have issues with breakage.

Now it’s time to twist the snake. I do this by rolling the right side up and the left side down. So my snake now is vertical.
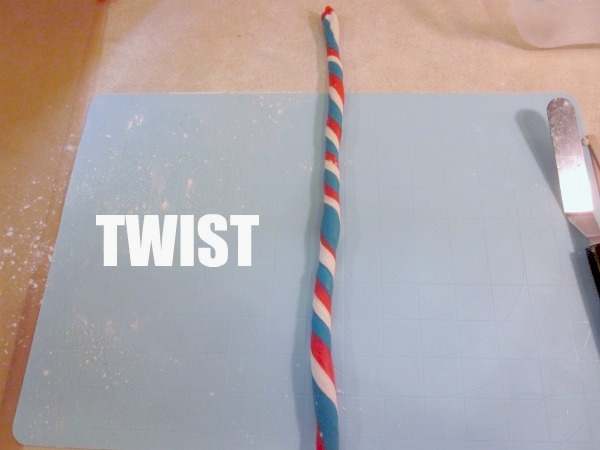
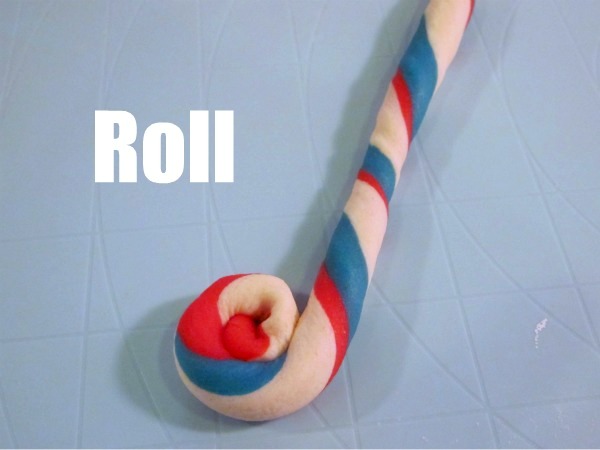
Coiling the snake. Start at the bottom and coil up.up.up. There is no need to press the sides together, they will bake together.
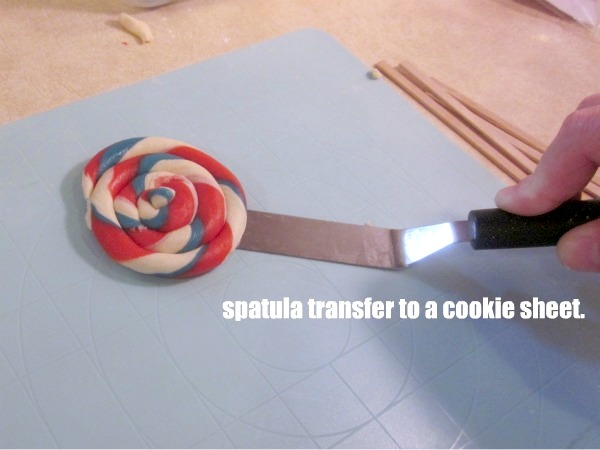
Use your offset spatula to transfer your coil to parchment lined cookie sheets.
When your sheet is full chill in the freezer for 5 minutes. You want to chill it just enough so that inserting your stick is easy and does not deform your coil.
Insert your sticks. I push the stick about 3/4 of the way up.
I like the look of the skinny popsicle sticks, but sucker sticks work too.
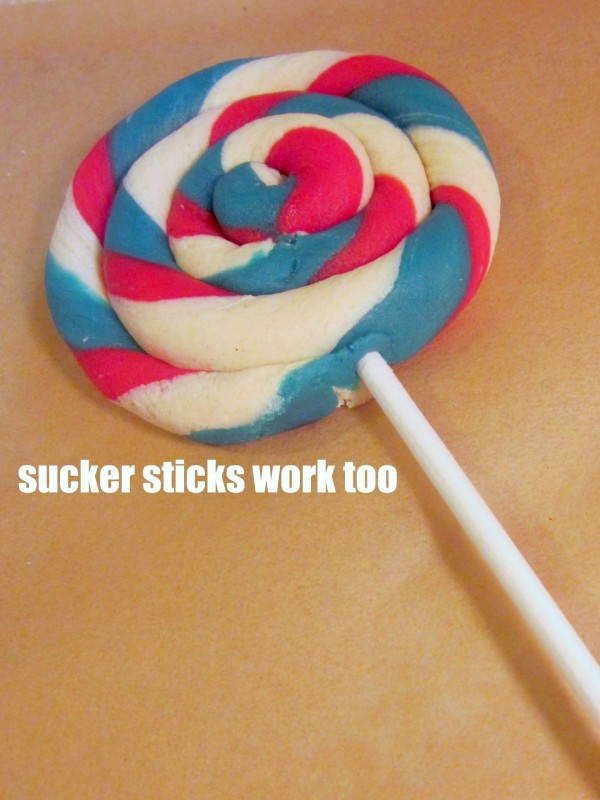
At this point you can also sprinkle on some sugar or disco dust. I like to take a pinch of rainbow disco dust and give a light dusting on each cookie. It really sparkles it up.
Bake them up. Make sure not to underbake. Let them cool completely. Wrap in a clear treat bag an tie with pretty ribbon. What a happy treat! I hope you have fun creating these. What a great cookie project for the little ones in your life too. The color combinations are pretty endless.
Exciting huh!!! Just looking at these pretty colors make me want to start baking! I would like to thank Carolyn again for preparing this EXCEPTIONAL tutorial! Please take the time to thank her too! You can see more of Carolyn’s work by visiting her Flickr Page, or also at her blog, Occasional Cookies.
I’m hoping to see these on a lot of your baking lists for this weekend!
Happy, late night cooler baking!



OH MY GOODNESS! Those are the cutest cookie EVER! I am in LOVE! I am SOOOOO making these for the 4th of July! My mom is always asking me for cookies without glaze on them, but I hate the plain look….now I can give her plain cookies that look good too! Thank you SOOOOO much!
Love these!
LOVE this! I can’t wait to try this. And what a great tutorial!
I made these accidentally when my candy cane cookies didn’t work out right, but I didn’t add the stick. I think I’ll make them on purpose for my daughter’s birthday party this year. 🙂
I absolutely LOVE this tutorial and all the beautiful colors. Thank you soooo much for sharing!
Great tutorial Carolyn and a great little cookie idea to celebrate the 4th of July! I can see these being used for many occasions, Hallowe’en and Christmas etc. Callye, thanks for introducing us to Carolyn.
Hope you both enjoy your 4th of July celebrations!
My kids love lollipops and these would be so much better to eat as a bedtime snack!
I’m definitely making these this weekend! I was just trying to come up with some dessert to make when I ran across your blog. Thank you!
Happy 4th!
Carolyn these look SOOOO fun! I’d love to give them a try when I finish my current Independence Day cookie project. I just love the look of them! Thanks so much for sharing your amazing idea! I love them! Callye, thanks for the fun guest post!
Beautiful cookies! I’m definitely making them for my children, thanks so much for sharing!
Yup, that’ll do it. You have my apprceiation.
These are way too fun! Thanks for the tutorial and guest post, Carolyn, and thanks Callye for offering it!
LOVE your Lollypops!
These are fab! So is the new blog design!
You never cease to amaze me with your creations! I pretty much have a blog crush on you. You make everything look so easy! I attempted to make the flag cookies this week and although they look OK, I am in awe at how much better yours are! I don’t know how you make your lines so straight! I love your blog!!!
These are great! Thanks so much for another great idea… (I’m not sure my husband will share my enthusiasm. I guess I’ll have to work on cleaning the kitchen first 🙂
OMG I LOVE LOVE LOVE these!! So stinking cute!! When I was a kid, those lollipops were my favorite…but impossible to eat. These would be so much easier! 🙂
WOW! I love these cookies and what a clever idea. I am definately going to try them out when I get home from vacation. I love all your and your guest post ideas!
I’m new on the whole cookie adventure so im curious if wilton gel coloring would work just the same???
yes, but as far as I know wilton doesn’t make a white coloring.
super cute!
Love the stained glass cookies! I’ve made these a few years ago for Christmas. Has anyone seen the tutorial for the pretzel, popcorn and gumdrop cookies?
I.haven’t posted the tuto for those yet, Renee. Soon…
Thanks everyone! Hope you make some beautiful lollipops!!!
These are awesome! I luva luv luv them!
This looks great ! Thank’s for sharing the tutorial ! Check out : http://nothinlasts.blogspot.com/
I love these!! I can’t wait to create many color combos! Thanks Carolyn and Sugarbelle for posting this! 🙂 Happy 4th of July!
I love these cookies, really make me smile. Thank you for the opportunity to learn from you.
I’m making these right now!! I got a tray just out of the oven, hoping they dont fall off the sticks when I take them off the cookie sheet, they are so cute!! thank you so much for this post!!
These are fantastic! Excellent tutorial too…thanks!
wow. amazing. someone should get into the candy business! LOL
I Love these and am featuring you today at
Thanks for the ideas! Happy 4th of July!
Sorry the link didn’t pop up but your being featured at Port of Thoughts today!
http://portofthoughts.blogspot.com/2011/07/4th-of-july-sweetness.html
These are soo cute and look really delicious!! I’m LOVING your blog and so glad to be your newest follower! Hope you’re having a fabulous 4th of July weekend 🙂
Oh, these were such a hit with EVERYONE at our Family 4th celebration yesterday. I loved the bright eyes and surprise of all the little children. Thank you for sharing this.
These are so dang cute!! It makes me want to run home and make some!
these would be wonderful for a client I designing a Willy Wonka Bat Mitzvah party for! Thanks for sharing!
I am so pleased with this tutorial! I have been planning a birthday party for my 4 yr old granddaughter and I wanted some large swirly lollipops for favors, but they were either too expensive or made in China (which I feel uncomfortable giving to children). I plan to serve strawberry lemonade and the cupcakes are strawberry lemonade flavor. I happend to see your post for a Strawberry Lemonade Party so of course I checked it out and lo and behold, I saw the picture of the Lollypop Cookies. Her party is “Fancy Nancy” and the colors are pink and purple, so these cookies are going to be pink and purple with the rainbow disco dust on them. Thank you so much for posting this and solving ONE of my dilemnas!
Just want to make a correction – The Strawberry Lemonade Party is on Cupcake Chatter’s blog and she posted your link for the cookies.
Very sweet lollipop. The combinations of the color was good.. I like this one.
I did give these a try on July 4th weekend….they are so cute…I did realize, however, that my favorite cookie dough is far to dry for rolling…they just refused to do it at all…My cookies suffered and were not so pretty, but my 3 boys still thought ugly cookies on a stick were awesome! Do you have a certain dough you would recommend using for this particular cookie?
These are adorable!
These cookies are adorable! Great for parties!
I want to try this but am afraid my sugar cookie dough is too soft & sticky to incorporate the gel coloring. Can you please suggest a cookie dough recipe? Would Sugarbelle’s favorite sugar cookie recipe work well for these lollicookies?
I have atempted to make these with a couple diffrent recipes that I have and they have failed. The dough is just too dry. I am new to making cookies from scratch and could really use a diffrenet recipe that will work for the lollies. Also if you can please add step by step it would be greatly apreciated.
I can’t say anything else but cool !
I put forward on my French blog with a link to this article.
I cant wait to do this ! they are so cute!! I would love to do it for my daughter’s 1st birthday … Just a question, how long this cookies could last?
thanks a lot!
Oh my these are awesome! I’m inspired to make them this weekend! What a great tutorial!
Has anyone tried these with store bought sugar cookie dough ? Just curious ?
which cookie recipe is better for make these lollipop??!?! i saw one call playdough cookie but wich one you use
gorgeos cookies!!!
They are so cute! Thank you for sharing the recipe, I have to make these for a friend of mine, she will love it.
I use this recipe here http://allrecipes.com/recipe/the-best-rolled-sugar-cookies/detail.aspx
I do add about a 1/2 cup more flour so that they aren’t too soft. Refrigerating the dough after coloring helps when you are rolling too.
This is a great idea for cookie play date. Thanks for sharing.
Me gustaria aprender
it’s very beautiful !!
Pingback: Play With Your Food – Candyland Version! | Life's a Batch
Hi there,
I was actually trying to make these lollipop cookies but every time i try to roll them, they keep breaking. i made them exactly the way you described. Any suggestions please.
Thank you.
Hi…
Para que no se te pegue puedes refrigerar la masa cubierta con papel film y no te olvides de echar un poco de harina al rodarla…
Can these be frozen prebaking?
yes.
Can you please share with me the dough you used for these? I would love to make them for my son’s 1st b-day party in just a few days. Every site I’ve seen with a cookie like this is almost melted together, or spreading.I do not want that. Thank you so much!
The sugar cookie recipe that I use calls for 2 cups butter mixed well with 2 cups of granulated sugar. Add 2 tsp vanilla and 4 eggs (0ne at a time). Then mix in 5 cups of flour. If the dough seems too sticky I will often add a little more flour. Color the dough and refrigerate. If the dough is too stiff after refrigeration, let it warm up at room temp for a little bit.
It takes a little practice to roll out the dough. I’ve had times were it cracks and breaks and other times it has been too soft too. Just be patient and keep trying. 🙂
Pingback: Gumball Machine Cookies
Hi there, is it possible to freeze the coloured rolled dough?.
or can I bake it one week before my party? is it gonna taste fresh?
thanks
Just made 3 batches of these for a bake sale at school. They turned out so cute – I even did one with our school colors. Super excited to set them up tomorrow. Thanks for your excellent tutorial. I live in a hot/humid climate (no a/c in my kitchen) so it took a bit of trial and error to get my dough to roll properly but it all came out beautifully in the end 🙂
How long and what temperature should I bake these?