Christmas Mouse Cookies with Yankee Girl Yummies
“T’was the night before Christmas, when all through the house, not a creature was stirring, not even a mouse…”
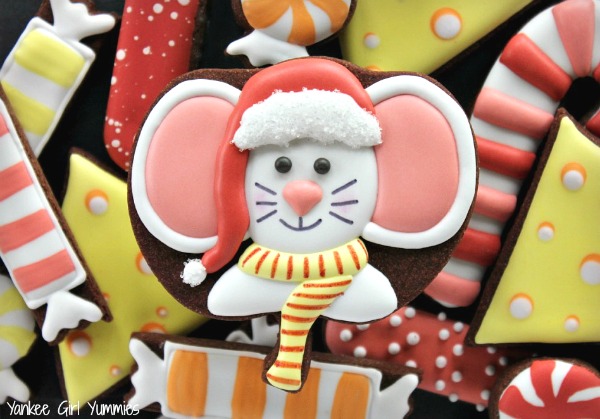
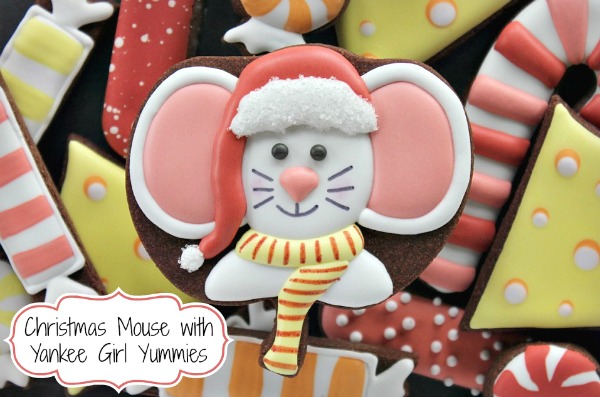
Normally, I wouldn’t be thrilled to run into a mouse, but when it’s an adorable Christmas cookie mouse decorated by my talented friend Kari, of Yankee Girl Yummies, who can complain?
Follow along step-by-step as she demonstrates how to make these sweet little treats!
![]() Hey there everyone!
Hey there everyone!
It’s that time of year again! The most wonderful time of the year! Rosy cheeks, roaring fireplaces, cozy mittens, shopping for special gifts… and cookiers pulling all-nighters while popping Ibuprofen!
Don’t fret! I’m here today to show you a new, cute holiday cookie design!
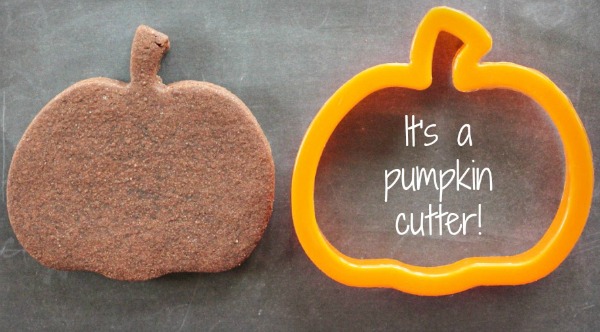
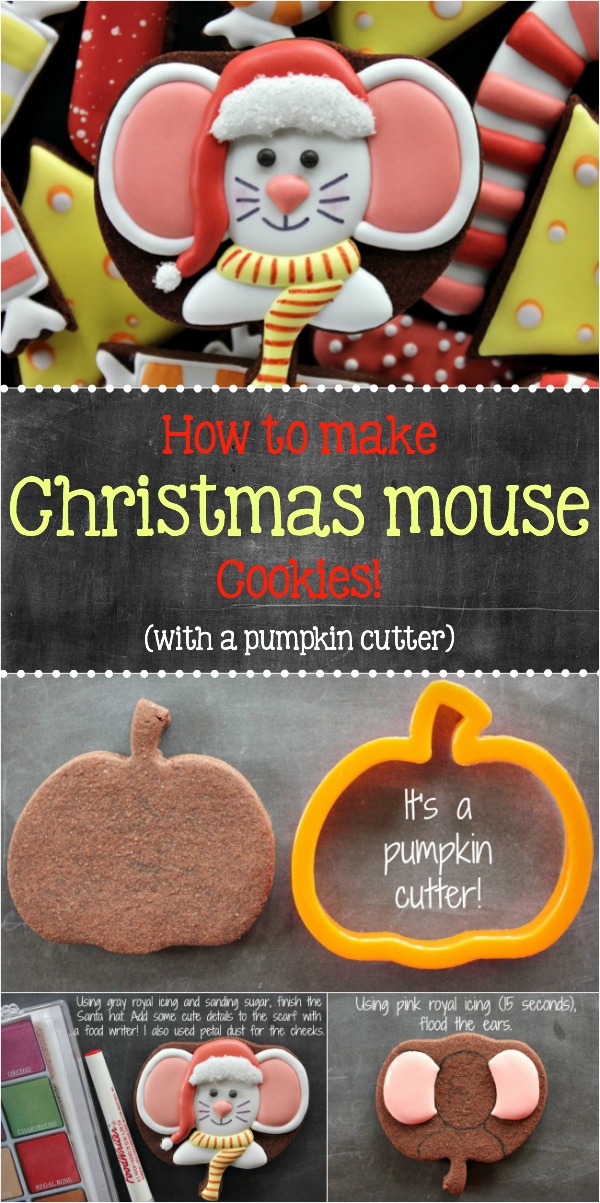
I hope that you didn’t put away your fall cutters yet. Maybe you’ve got a pumpkin cutter laying around somewhere still? I hope so because that’s what you’re going to need to make ‘Christmas Mouse’!
You are going to need:
- A pumpkin cutter (with stem)
- Black and red food writer
- Pink royal icing (15 – 20 seconds)
- Very light gray royal icing (15- 20 seconds)
- Sanding sugar
- Red royal icing (15 – 20 seconds)
- Yellow royal icing (15 – 20 seconds)
- Black royal icing (60 seconds)
- Toothpick or scribe tool
- Heat fan (optional)
- Pink petal dust
- Q-tip/paint brush for petal dust
Let’s get started! Bake up your pumpkin cookie.
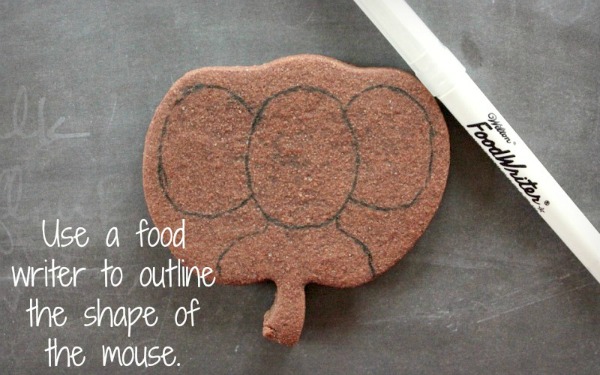
 Using a food writer, outline the mouse. Skip the details, just focus on the outline.
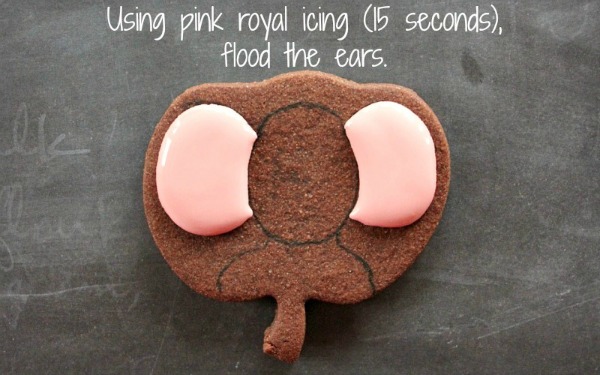
 Flood the inner part of his ears using the pink royal icing. Be sure to cover the food writer line that you drew on him!
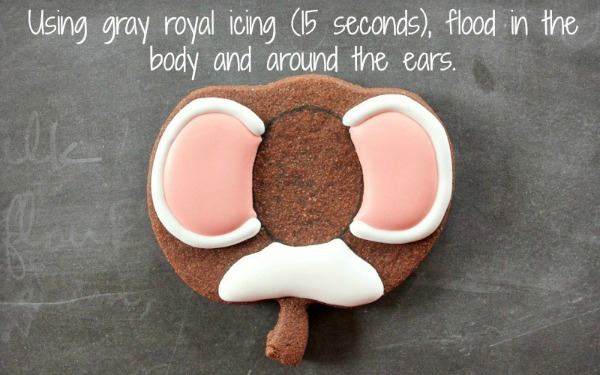
 Flood his body and the outer part of his ears using the light gray royal icing. Remember to cover any food writer on the cookie! This is a time when I’d use that *optional* heat fan. It will help you with any potential craters. The cookie really just needs a few minutes in front of the fan for the royal icing to set. If you don’t have one, ask Santa to bring you one. A dehydrator would also work as well!
 Flood his face and let it dry before going onto the next step.
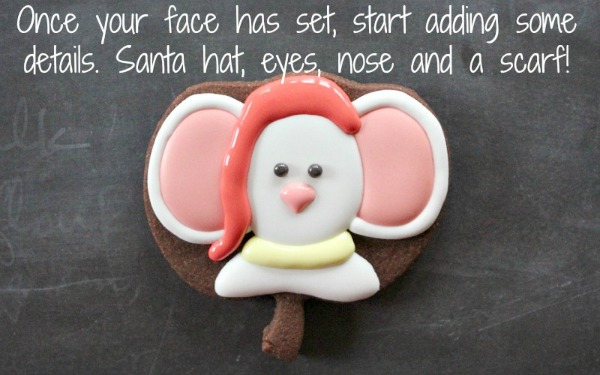
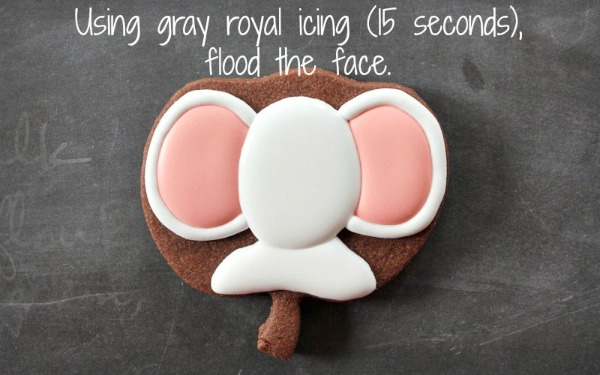 Now that your face is dry, you can start adding some details. Using red royal icing, add his Santa hat. His nose and eyes can also be added. Use your toothpick or scribe tool to move around and smooth out the icing as needed. I used a thick black icing for the eyes so that the icing didn’t spread at all. The part of his scarf around his neck can also be added now. I placed my cookie in front of the heat fan after adding these details as well!!
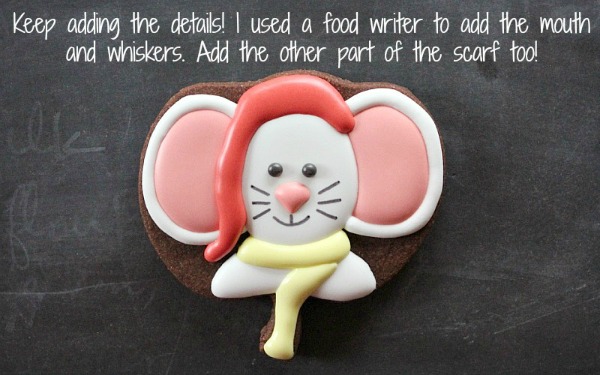
 Keep adding those details. I used a food writer to add the mouth and whiskers. The second part of the scarf can be added now.
 He’s almost done! Before moving on though – make sure that all of your icing is pretty much dry. We’re about to break out the sanding sugar and you know what happens when the sanding sugar comes out! It’ll stick to any surface that’s wet. With that being said, use the same light gray royal icing (that you flooded his body with) and sanding sugar to finish up his Santa hat. For his rosy cheeks, I used a Q-tip to apply a bit of pink petal dust. And to finish up his scarf, I used a red food writer to draw on some cute stripes.
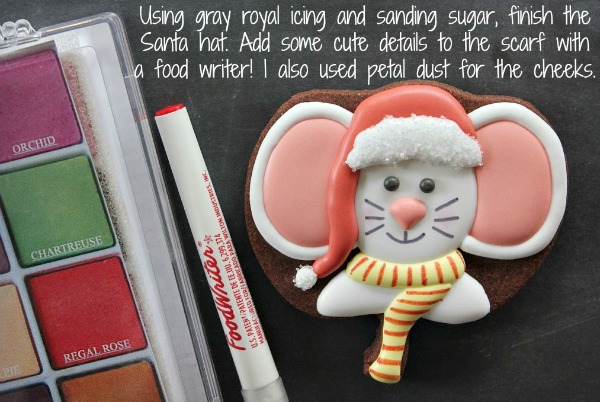 And he’s done! Pair him up with some decorated candy and cheese chunk cookies and you’ve got yourself a sweet holiday platter!
 To watch a video of how this cookie was made, click here.
Thanks so much to all of you for reading along! And thanks so much to Sweet Sugarbelle for inviting me over!


Absolutely adorable! Thank you for sharing!
Amazing!
Such an adorable cookie! Thanks for sharing!
Thanks Kari and Callye!! Your generosity in Sharing your know leg is overwhelming!!
Oh… these are perfect! Have you heard about Santa Mouse? I received the book when I was about 6 yrs old and still have it. Every year we leave a wee bit of cheese in the tree for Santa Mouse and he leaves a wee gift in return. It is a sweet tradition I have shared with my kids. There is even a couple of sequel books. Here is the Amazon link: http://www.amazon.com/gp/product/0760703558?keywords=santa%20mouse&qid=1449693712&ref_=sr_1_1&s=books&sr=1-1 . Merry Christmas everyone!
you are so very clever I am new to this and am in awe of all of you Cookiers you are true artists…one question if I may please ask where did you get the palette of colours of dust powder.
Where could I get the petal dust pallet??
What an adorable Christmas cookie you have made, from a pumpkin cutter. no less!
Thank you for sharing your beautiful talent and ideas.
Merry Christmas!