How to Make Mermaid Cookies with a Snowman Cutter
A few weeks ago I did something I thought I’d never do. I went through my cookie cutter collection and got rid of the ones that I rarely use.
Okay, before anyone faints, it wasn’t quite that dramatic. I didn’t actually get rid of them, I just put them into storage for awhile. We’re preparing to move, and for some reason my realtor thought that a dining room was a better selling feature than a cookie cave.
I know, I know…who wouldn’t want a cookie room? But he’s the expert, so, I sorted through all of my boxes and picked out four-hundred of my very favorites.
Among the four-hundred (you can stop rolling your eyes now) were many Wilton cutters, old and new. The snowman cutter, a definite keeper, is included in the 101-Cookie Cutter set and has appeared in many of my creations over the years.
Besides being a snowman (in more ways than the obvious), its also been a hula dancer, polar pal, nerdy graduate, ballerina, football player, scarecrow, monkey, giraffe, potted flower and a leprechaun (that I can remember), and I’m sure there are many more to come.
Today, it’s back, this time as a mermaid.
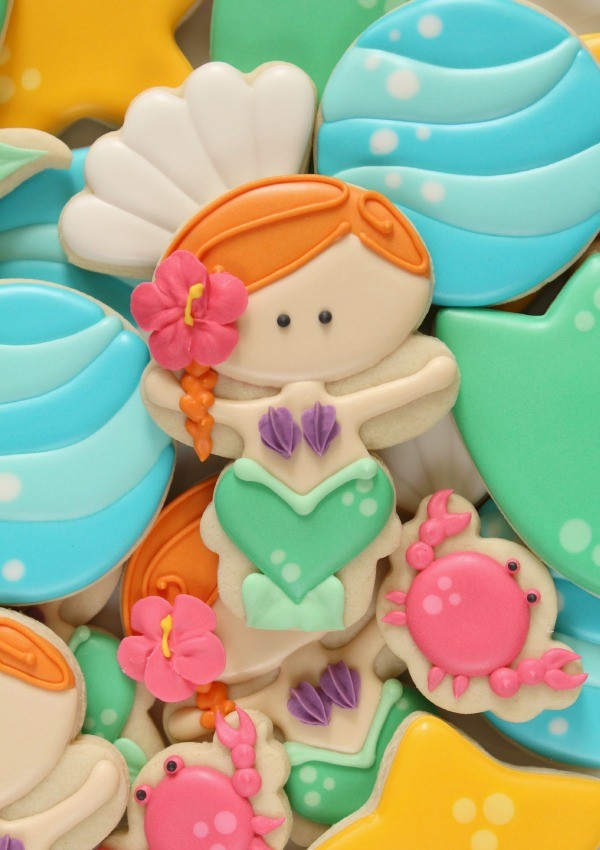 I’ve used this cutter to make a mermaid before, but after thinking about it for a year, there were a few design changes I wanted to make. So, this mermaid is actually the 2.0 version, but that’s neither here nor there.
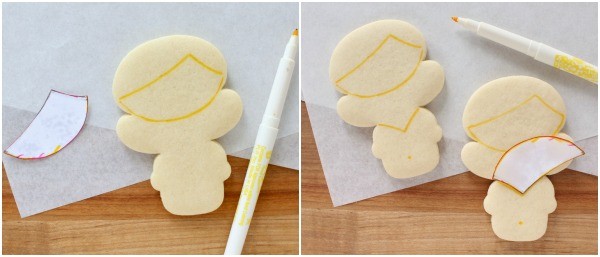
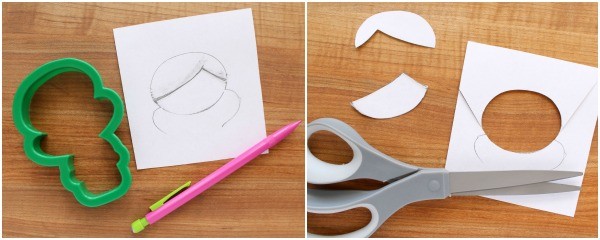
Before getting started, use plain white paper to make a template like the one below. You can always skip this step, but I’m a big fan of templates because they’re a great way to create consistent cookies without a projector.
To decorate these cookies you will need:
- Food color marker (I prefer yellow)
- Flesh tone 20-second icing
- Mermaid green piping and flood icing (mix teal+ electric green+a touch of sky blue)
- Light mermaid green piping and flood icing
- Orange piping and 20-second icing
- Royal icing flowers (you can find a great written tutorial here but I highly recommend this class from Craftsy)
- Yellow piping icing (a small amount)
- Black piping icing (a small amount)
- Stiff purple icing (a small amount)
Begin by mapping out the design with a yellow food color marker. Notice that I used the same template to mark the tail. I also added a dot at the bottom of the cookie to mark where the tail should end.
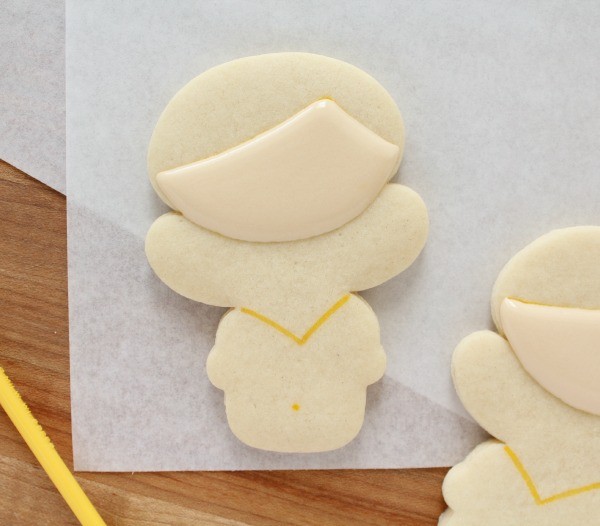
 Now you’re ready to decorate. First, use 20-second icing to flood the face.
 Next, outline and fill the tail with mermaid green icing.
While we’re on the subject of tails, I’ve just gotta say, if Beyonce were a mermaid, she’d look like this. Baby got back.
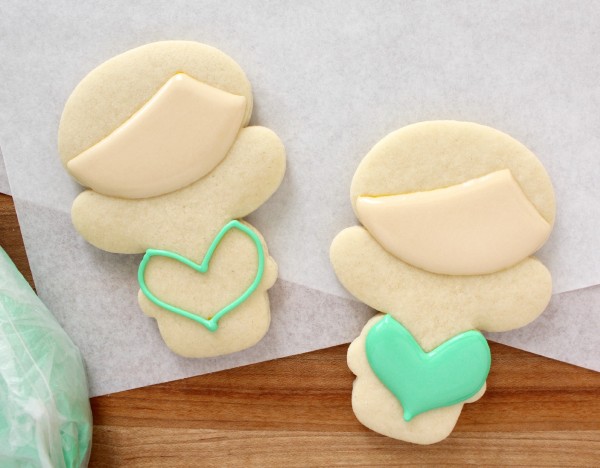 Immediately drop a few lighter dots into the dark green as accents.
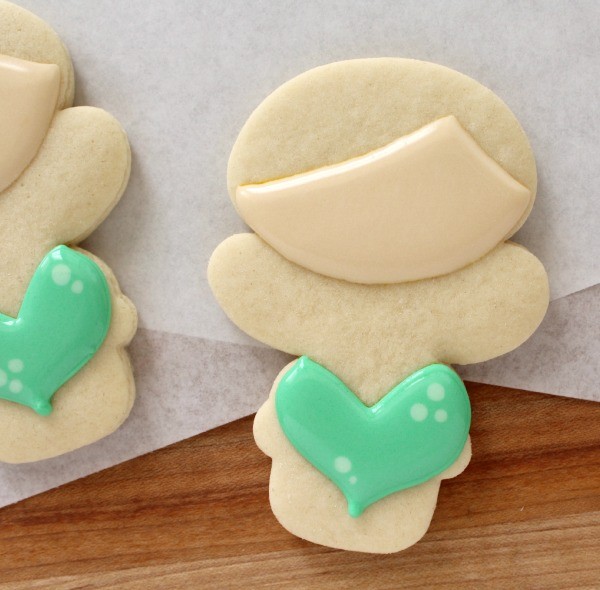 Next, use orange 20-second icing to make hair. A pointed tool like a toothpick or boo-boo stick is very useful for drawing icing out to the very edge of where the colors meet.
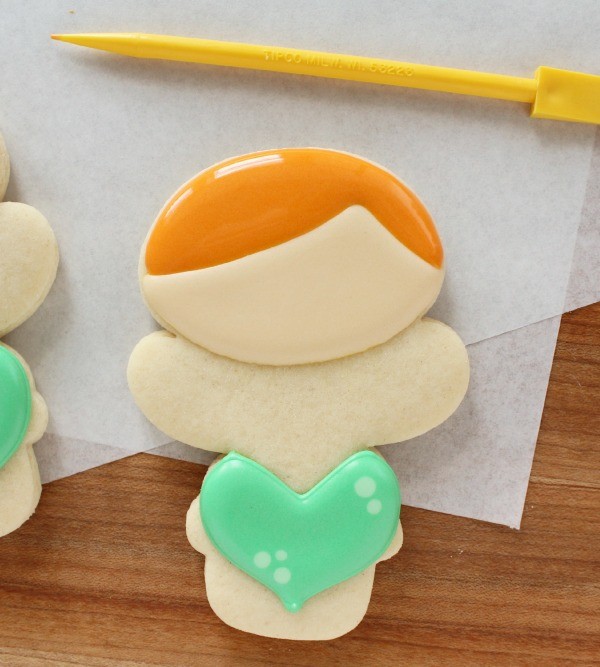 Give the face and hair a little time to set, then pipe the torso. At this point, it’s best to wait until the cookie is completely dry before moving on.
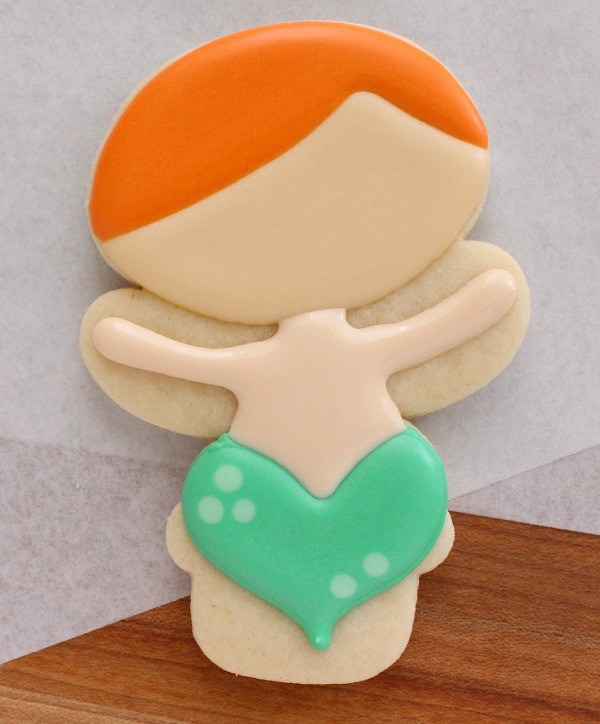 When the cookie is dry, use a #3 tip to pipe the top fin, and a #67 leaf tip to add tail fins.
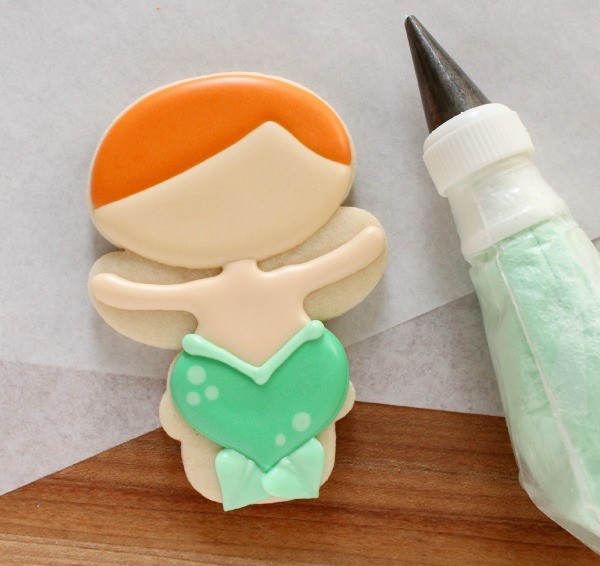 Next, use a small round tip to add a swirl of hair and to pipe a braid. A royal icing braid might sound complicated, but it’s nothing more small hearts piped so that they are touching.
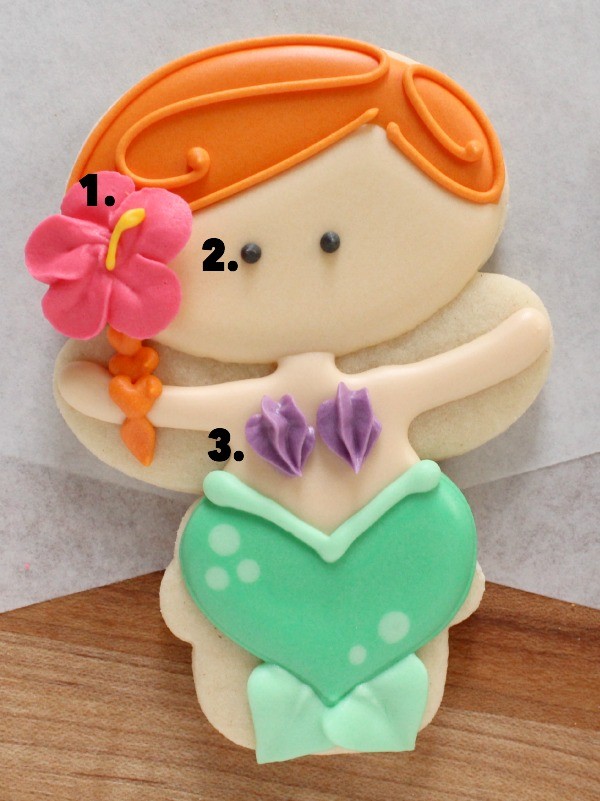
Complete this step by attaching a royal icing flower with a dot of orange icing. For more on how I made this flower, click here.
 To finish up, add a few final details:
- Pipe a pistil (the fancy name for that yellow thing) with a #1 tip
- Add eyes
- Use a #16-#18 tip to pipe a shell bikini top
If you really want to go all out, use a bit of petal dust to create rosy cheeks
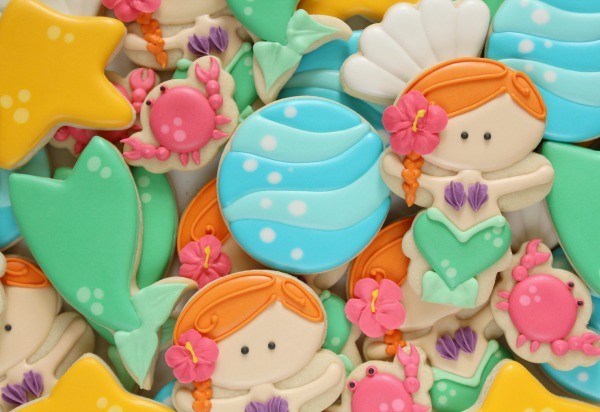
 Use leftover icing to create coordinating accent cookies such as crabs, shells, starfish, and mermaid tails.
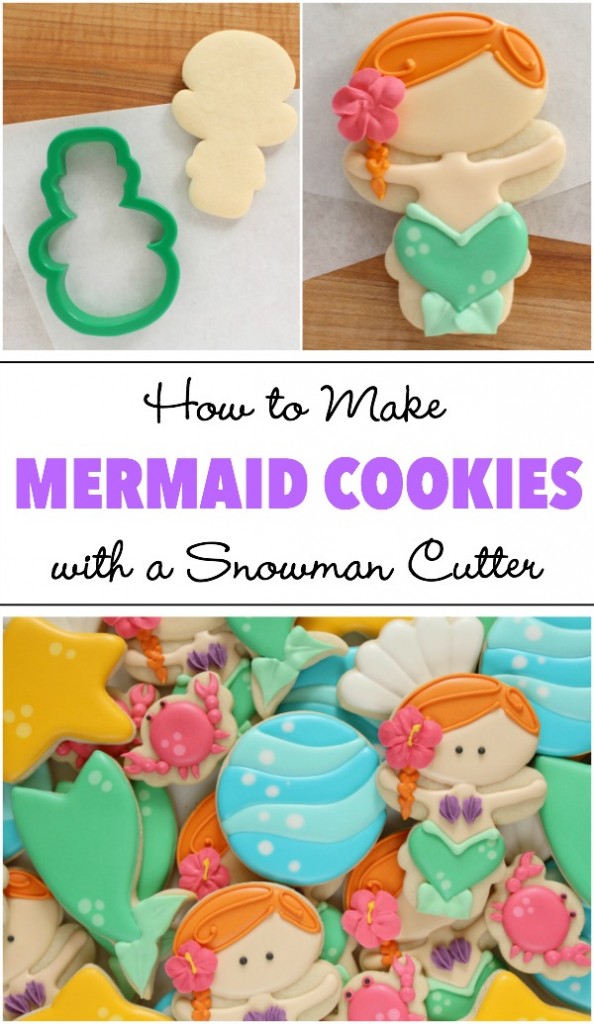
 And remember, whether you’re a beginner or experienced decorator, Wilton cookie cutters are a must have. For more inspirational ideas check out the following links:


You continually amaze me with your creativity. These cookies are adorable.
Hl ! Great tutorial. Thanks for sharing… , I only wish I could decorate mine to loo like yours.
Congrats on the move. I hope all goes well.
Fantastic use of the snowman cutter. One quick question though: After you’ve flooded the face (and done the Beyonce butt), how long do you wait for before doing the orange hair? I’ve had trouble in the past with colours bleeding in the past unless completely dry. Might be the UK humidy though since I use Americolor in my royal icing.
It’s honestly almost 100% dependent on your climate. If you live in a bleeds place (lol) I’d wait hours, rather than 20-30 minutes. Do you use an oscillating fan to dry? That eliminates bleeding almost completely for me:-)
The shell bikini top is sooo cute and such a great use of your snowman cutter turning a winter icon into a warm summery mermaid. Also I am not sure that your real estate agent knows what is going on in the world. I turned my dining room into a creative space too and we all know pintrest doesn’t lie.
I chalked it up to him being a man ???? if it had been a man cave, he’d have been down!
Seriously, you always manage to blow my mind with your creativity and the perfect colors!
Your Alice in Woderland and now the little Mermaid are my favorites
Love from Guadalajara.
😉
Youre amazing. Truly blessed.
These are precious Callye! You always make the cutest cookies with a snowman cutter! Love them!
Hi Callye! I love this tut…she’s totally precious! You make it look SO easy! I don’t think I’m anywhere near 400 cutters but I’m already confiscating any and all available closet space! I’ve yet to buy the wilton 101 cutters…absurd, I know. Curious to know if there are any other cutters in that pk that are “must haves” ?
Me encanta!! Esta super linda. Y la idea de dar mas utilidades a un mismo cortador. Gracias.
parece tan facil….pero hay que ponerse y asi saber realmente el trabajo que lleva.
felicidades.
She is super adorable! That snowman cutter is so versatile! Great tutorial…..:)
Thank you so much for the detailed tutorial. The instructions are so helpful!
You are Amazing!!! I love your blog. Thank you for sharing your brilliance. I’m new to these kind of cookies, being more of a chocolate chip kind of girl. I devour your blog. Thank you.
Darling!!
Love these, especially the puffy crab! Hope the new house has a great space for your own cookie room!!
And how did you possibly limit it to just 400 cookie cutters?! Hope your new house has a great space for your own cookie room!!
Thanks for such a fantastic tutorial! Your mermaid is so cute!
Those are precious! I’m trying to figure out which tutorial of yours I want to try first! Beautiful work.
Love! Ya did it again! How about that little crab–what cutter is that? I like that it doesn’t have those tiny little pieces for legs.
Thanks!
These are so creative and pretty!!!
Pingback: Baking News / Under the Sea: Mermaid Cookies
Do you make your own icing for piping and flooding or do you buy it? If so what kind do you buy or what recipe do you use?
I use royal icing, thinned to different consistencies. Here’s the link to the recipe: https://www.sweetsugarbelle.com/2014/02/royal-icing-for-cookie-decorating/
Pingback: How to Make Mermaid Tail Cookies
How did you make the pink crabs? What shaped cookie cutter?
I love these cookies. Very creative and inspiring!
What cookie cutter do you use for that cute little crab?
It was a tiny girl’s head. I shared a link to the set on my Facebook page, but a mini-butterfly cutter would also work well!
I just wanted to say thank you for all your awesome instructions and tips! I am NOT artsty nor creative AT ALL, but I promised my daughter mermaid cookies for her school birthday celebration. I had a bakery lined up to make them, but at 8 bucks a pop, I couldn’t justify $200 without attempting myself, so I went on the lookout for a mermaid tutorial and came across yours. I have to say, mine don’t look nearly as perfect as yours, but they look pretty damn awesome and my daughter is thrilled. I wish I could attach a picture here to show you that even the most non-artistic person was able to follow your instructions and get great looking cookies! Also, the spray bottle trick was awesome and so convenient!! THANK YOU!!!!!!
Just wanted to say that these are gorgeous! I’m planning on trying these out for my daughters birthday and I was just wondering how long before do you make cookies/frost them? I’m also making her cake and I wanted to know how many days before I should plan on making these.