Quilted Royal Icing
Quilting? Tufting? Whatever you call it this easy technique is a simple way to dress up decorated cookies. It’s pretty much my new favorite thing.
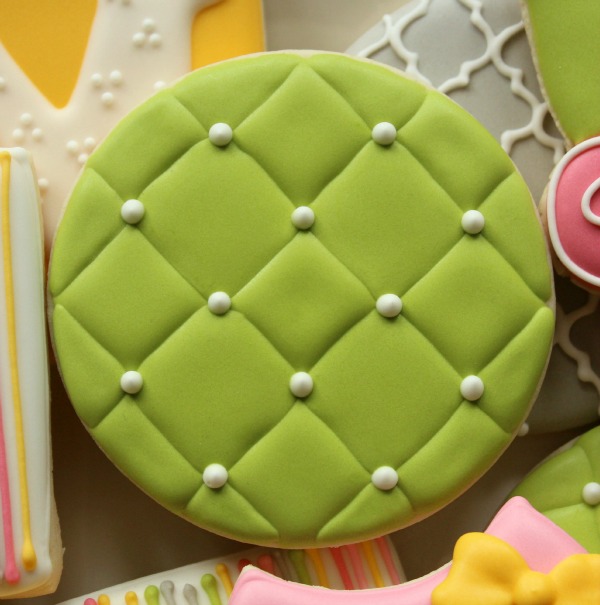 It’s possible to make quilted cookies without special equipment but to save time I prefer to use a Kopykake. If you don’t have a projector, check out Sweetamb’s tutorial on Celebrations.com or purchase her how-to video here.
To make quilted cookies you will need:
- Printable quilting template {also includes a template for stripes}
- 20-second icing in the color of your choice
- White piping icing
Start by printing out the quilting template. Once the image is trimmed and secured in the projector, it will look like this. Center the design and adjust the Kopykake lens so the image fits the cookie.
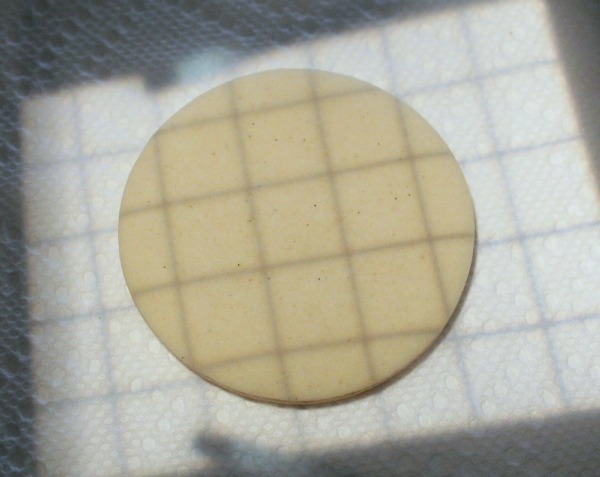 Carefully fill alternating sections with 20-second icing. If necessary use a toothpick to draw icing into the corners.
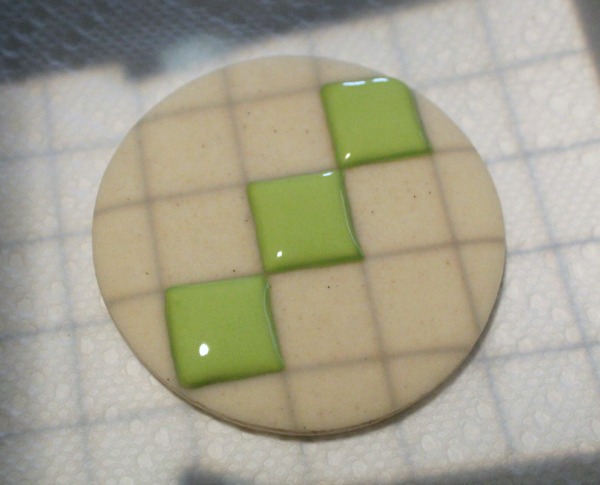 Its okay if the corners touch because they will eventually be covered, but for a cleaner look try to keep it to a minimum.
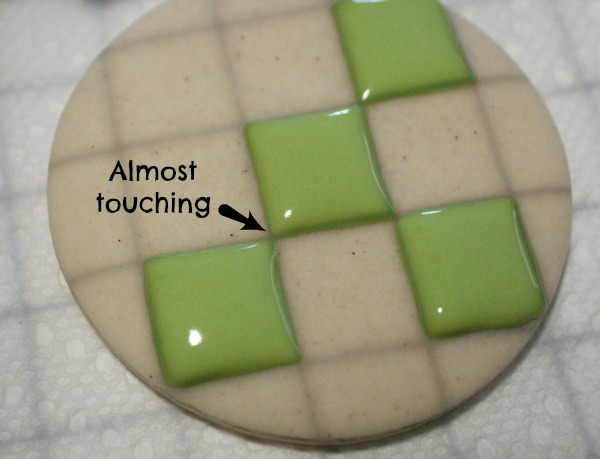 Let the first layer set long enough to dry a bit. Patience is the most important part of creating a dimensional look.
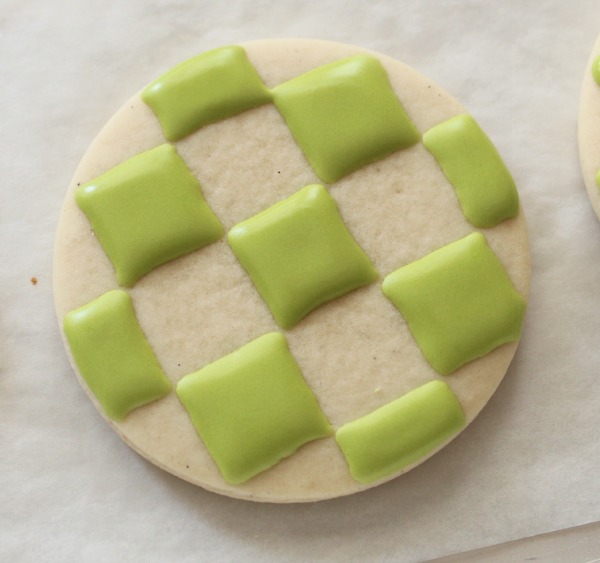 Next, fill in the remaining squares. At this point, you won’t need a projector. It looks a little messy but don’t panic, it’s easy to fix.
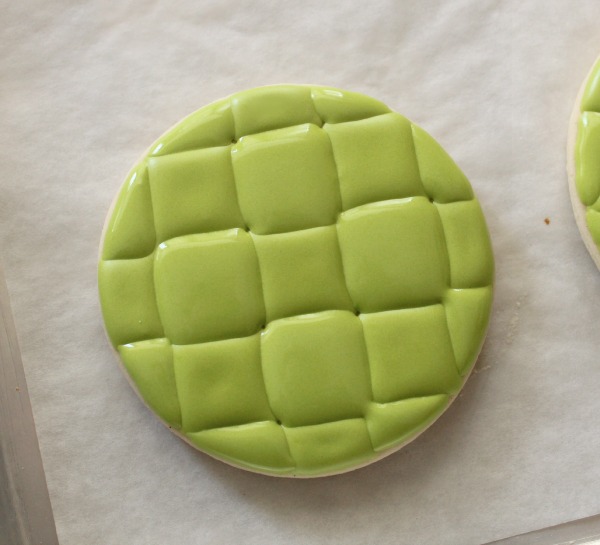 Finish up by adding dots in where the squares meet. It always amazes me how such a tiny detail can completely “clean up” a design.
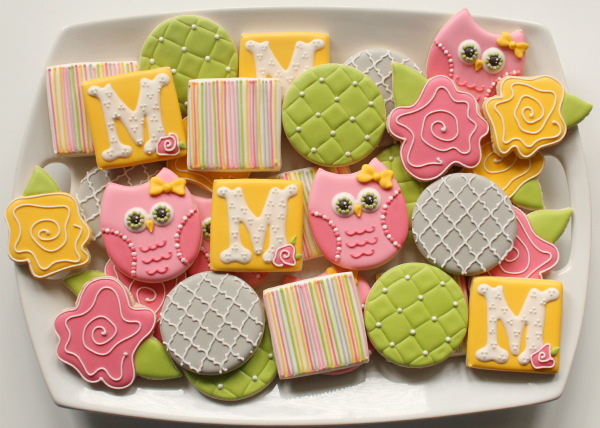
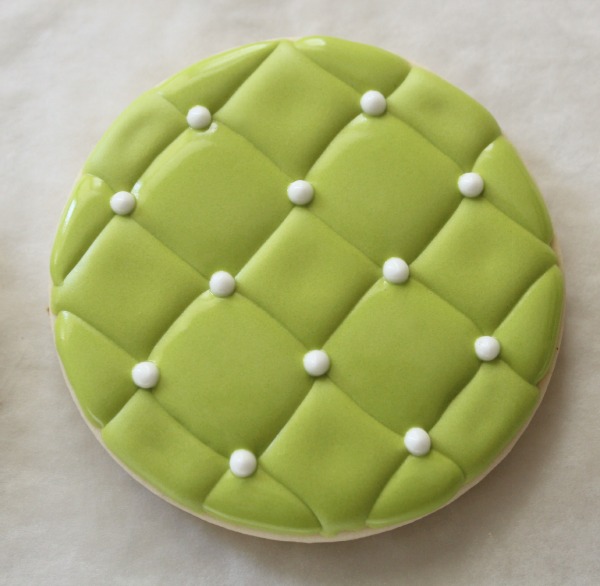 This simple design is a great way to dress up any cookie collection. Whether you have a projector or not, they’re easy to make.
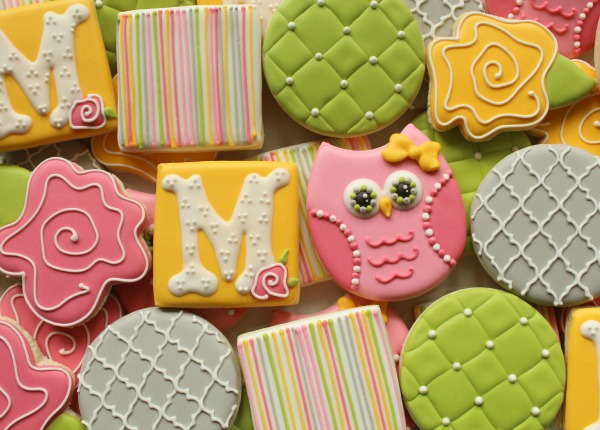 If you like these cookies you can find helpful tutorials for each cookie design by clicking the following links:
- How to Make Perfect Monogram Cookies
- Simple Owl Cookies
- How to Make Quatrefoil Print Cookies
- Simple Striped Cookies
- How to Hand-cut Cookies with Paper Templates
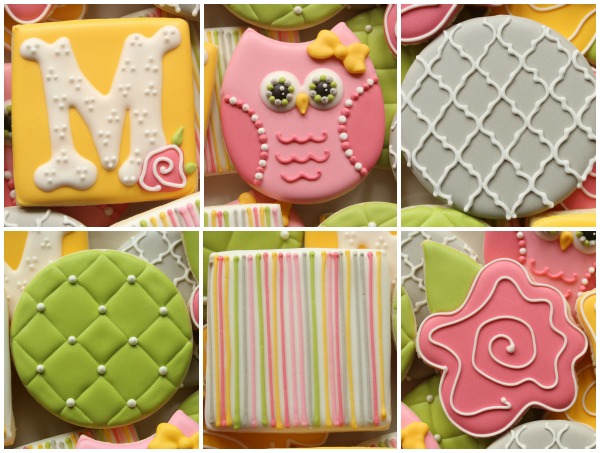 These are my favorite kind of cookies to make…simple, cute, and colorful. What’s not to love?


Callye, when you put your 20 sec icings next to each other, how do you keep your line so very striaght? I can’t seem to get that look.
I usually make it a little thicker and/or use a smaller tip. I draw the line first, pulling ahead them come back and swirl/fill everything together.
Will give it a try! Thanks!
Thanks so much for all of the pictures you included! I print them out and follow them step by step. I know it’s a lot of work for you to give so much detail but it’s exactly what makes you the BEST instructor!
These are so cute. Thank you for sharing your beautiful style & ideas. 🙂
I’ve been eyeing Sweetamb’s tutorial on quilted cookies for some time. I’m so glad that you showed what the tufting looked like before adding the dots to cover up the small gaps. I haven’t tried it yet because I was worried that the corners wouldn’t line up perfectly, but now that I’ve seen your tutorial, I feel more confident about it. Thanks so much!
I am SWOONING all over the place! These colors just knock my socks off! Such pretty designs <3 fantastic set Callye.
Let me see if I can find my socks!
xoxo
It’s posts like this that make surfing so much plauesre
Such a beautiful design made so effortless – you make everything look so easy! 🙂
Gorgeous platter, as always!!! Thanks for sharing!
Gorgeous!!!! I am going to have to drag out my KK:)
I am scare of these cookies, but you make it look so easy that i will have to give it a try and make them. I love the color palette. Sending you cookie hugs!
So cool how adding the sugar pearls makes the boxes look perfect!
P.S. I’m lovin the owl cookie!
I love how this collection has such a variety, yet it’s so cohesive at the same time! Very inspiring! It’s nuts how those dots “clean up” the tufts. (I’d place them around my house if they only had the same “clean up” effect.)
Lovin’ the quilt cookies, actually lovin’ the whole collection!!
I love, love, love this platter. They are all so cute! The quilted look has been on my list, your reminder has me thinking how I can incorporate it!
I was overwhellmed by to beauty of these cookies. You actually made me break down a buy a kopykake today. Can I blame you when my husband finds out? 😉
Tell him he’ll thank you when he sees all the time it saves and how much less stressed you are. I’m quoting my husband 🙂
A.M.A.Z.I.N.G.
So pretty! How can I make these if I don’t have a projector?
Click on the links to Sweet Ambs tuto in the second paragraph.
ugh, wonderland is the. best. farbic. line. ever. so disappointed it’s gone. you were smart. all i have now is a layer cake and a mother in law scouring every quilting shop in the state for me for any leftovers. i say, if you have any left, keep these quilts coming! i had just decided to cut my layer cake in quarters for my quilt, but now i’m thinking I might leave them whole thanks for another idea!
Pingback: Bowing Ballerina Cookies
Thank you so so much for tutorial on quilting royal icing!!!!
And always for all the knowledge and tips that you share…. You are such an inspiration!!!!
Pingback: Friday Favourites – 16 August 2013 – Life in Ryans'
Pingback: Quilted Monogram Cookies for a Little Baby Gal | Make Me Cake Me
Absolutely amazing cookies
Your work ALWAYS blows me away. Thank you for your generosity. How is it that 20 second icing isn’t too runny for the quilting technique? I would have guessed a lower number that would yield a thicker icing that is less likely to go past that line and is more controllable.
You are so clever! You have no idea how appreciative I am to have found your website!! Thanks for all of your tutorials and tips. I look forward to going over all of the tutorials on this site!
Glad to have ya!
When you say let the icing set for a while, how much time are you talking about? 10 – 20 minutes, couple of hours or a day?
Pingback: COOKIES | Pearltrees