Cheap and Easy DIY Cookie Cutters
It’s no secret that I am OBSESSED with decorating cookies. I make them every chance I get, and I am constantly coming up with new designs. Although I’d love to have a custom cutter for EVERY shape I make, it’s not really economical or practical to do this for every design.
They sell cookie cutter making kits, but to be honest, I have a really hard time using them without the help of my husband and his tools, and to make matters worse, he doesn’t always get the design how it was in my head {I HOPE he’s not reading this} or do it on my schedule. Does this sound familiar to anyone?
So, nine times out of ten , if I need an odd cookie shape, I make a plastic template. If you want to learn how to make them too, here’s my plastic cookie template tutorial.
However, there are some times that I really need a cutter and since I’m not one to wait around for the husband, I went on a quest to find a way to make them without any assistance.
I searched up and down the Internet, and eventually I ran across a tutorial to make cookie cutters from easily available household items.
Unfortunately, I was never able to find it again, but using the basics I learned from that tutorial, I began making my own custom cookie cutters.
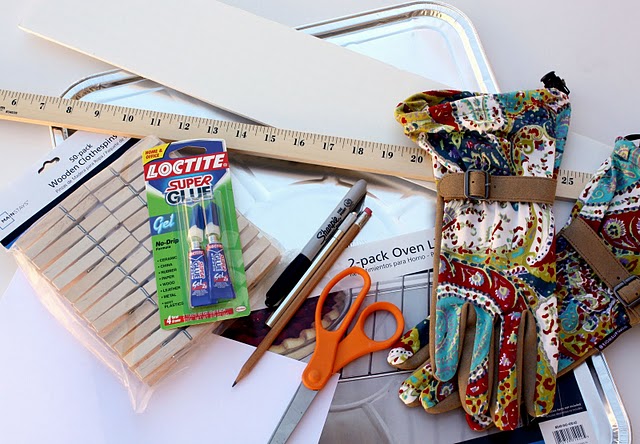
This is what you will need:
- aluminum oven liners
- scissors
- gloves {very important}
- permanent marker
- pencil
- Exacto knife
- 4 inch template made from foam board {buy thepre- measured type and cut along the lines}
- yardstick
- clothespins
- super glue
- printer paper
First, trim all of the edges from the aluminum liner. PLEASE PLEASE PLEASE wear gloves! The raw edges of aluminum are as sharp as razors and can REALLY hurt you.
For the record, I got the COOLEST pair of gloves from Woman’s Work, and I love them so much that they inspired the whole color palette I used for the cookies.
I love the fact that they are made for smaller hands and I can work in them comfortably. Plus, like I said, they are CUTE! Just because a girl does tough work, doesn’t mean she can’t do it pretty =)
After the edges are removed, use the foam board template to mark off a four inch section on the aluminum.
Use the yardsitck to find the mid point of the section, and draw another line down the center. {There will be two 2 inch sections}
After you have marked it, cut along the farthest line, indicated by the arrow. The middle line is there to serve as a reference point when you begin forming your metal strip.
After you cut, fold the strip in half along the 2 inch line. I always do it along a straight edge such as a table to keep the folds sharp and precise.
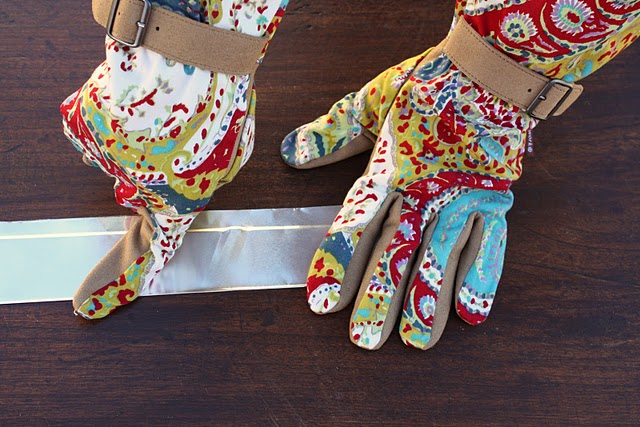
Once you have done this, unfold the strip, and fold the left side in to meet the center line.
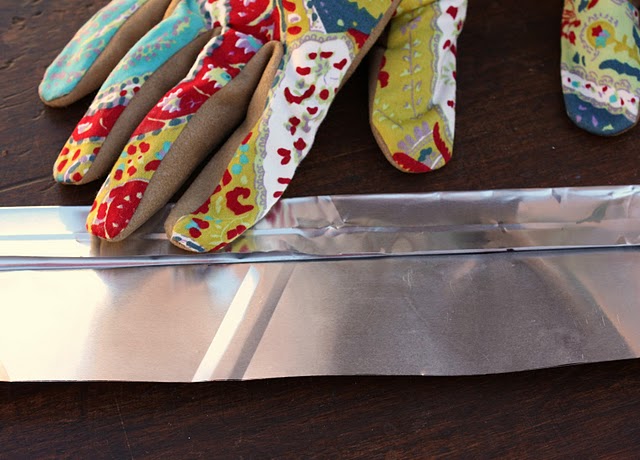
Do the same to the right side. Carefully fold it to touch the center 2 inch mark.
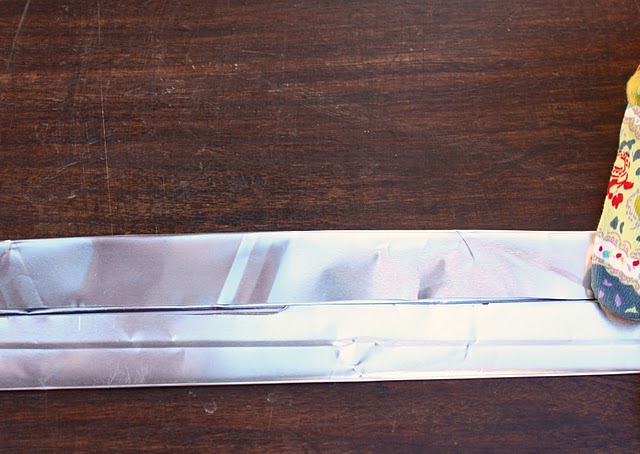
Then, fold this in half again, making sure the sharp outside edges are folded to the inside where they cannot harm you.
Just in case it was hard to understand by the photos, I also included a diagram of the folding steps.
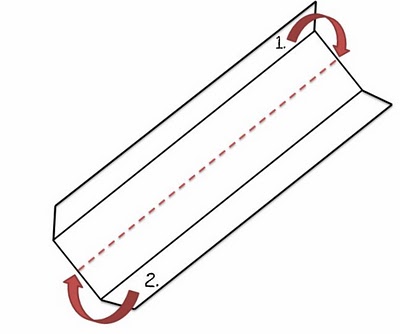
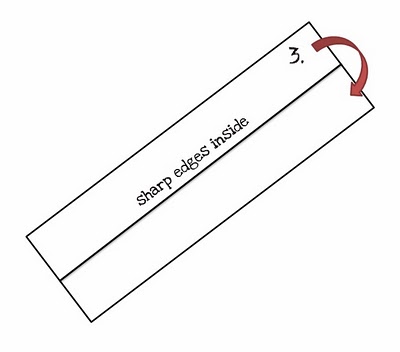
When you reach step three, fold it in half once more.
All this folding will leave you with a strong but flexible aluminum strip.

When this is done, I always take my scissors and run them back down the strip to really straighten and flatten the edge, which will eventually be the cutting edge of the the cutter.
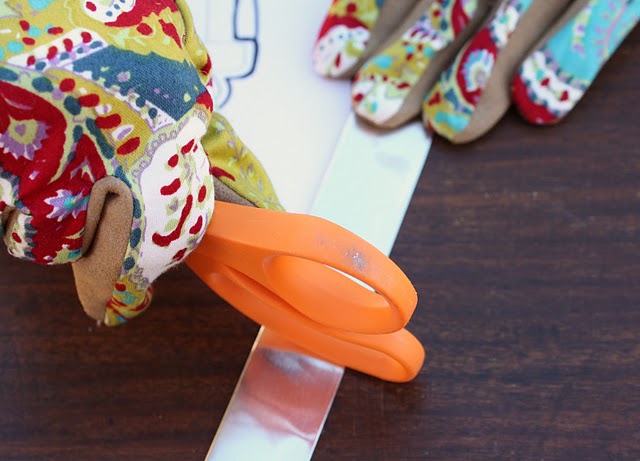
Now you are ready to make a cookie cutter.
A while back, I saw an adorable set of lower case serif font alphabet cutters that I really wanted. I was really bummed that they weren’t available to purchase, so I decided to make my own.
Before I began, I sat down and sketched out the way I imagined my letter cookies to look. You can also print an image from your computer, but since I already had a pretty solid idea, I sketched mine.
The sketch doesn’t have to be perfect, it’s only a guide. If you look at mine you’ll see I did alright on the “j” but the “t” got a little bit scratchy.
When I finished I used a permanent marker to outline the drawing, taking care to avoid a lot of the more intricate little curves and corners.
It’s a common misconception that an EXACT cutter is needed to make cookies in a certain shape.
Personally, I am not really concerned with exacts. I take a basic cookie shape and use my icing to tweak the design. It’s a lot less stressful this way, and also leaves room for a little creative flair.
Now for the fun part!
The next step takes a little practice and patience.
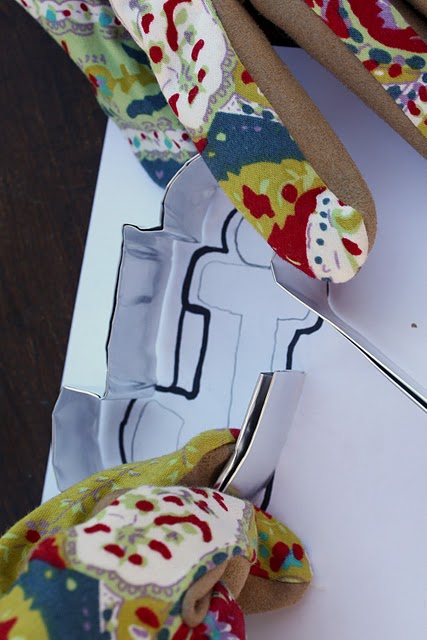
Using your sketch, start shaping the aluminum around the design.
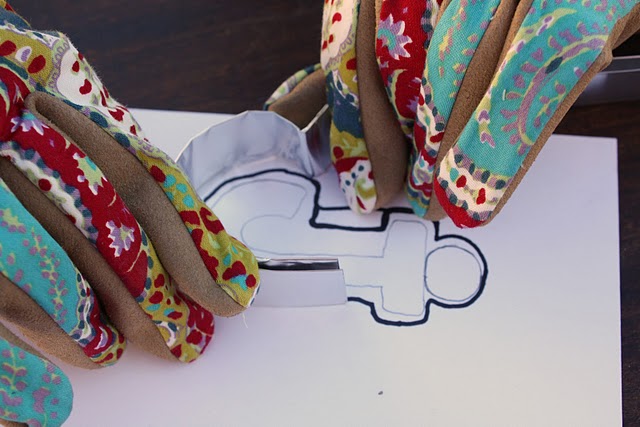
Just a little tip, when you are forming curves, find something round to bend the metal around. I used an old rolling pin here, but you could use dowel rods, PVC pipe, or anything else around the house.
It’s also helpful to keep a pair of needle nose pliers handy, just in case. Most of the time, I don’t use them but you never know when you might need them.
When you get the shape just right, tighten everything up and measure where you should cut off the overlap.
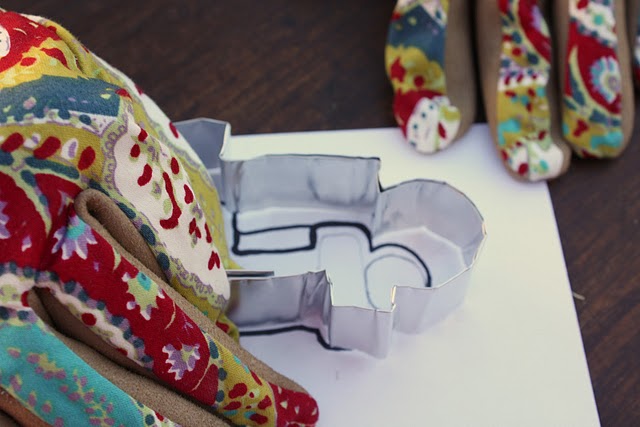
I’d give it about an inch or so, then snip off any excess.

Use super glue to attach the ends and clothes pins to secure them until dry.

I’ll admit, it’s not the prettiest cutter ever, but it will make beautiful cookies. I have several of these that have lasted a very long time. Every once in a while, one will come un-glued, but I just re-glue it, and it’s as good as new. In a pinch, I’ve even used hot glue and and staples to close the cutters.
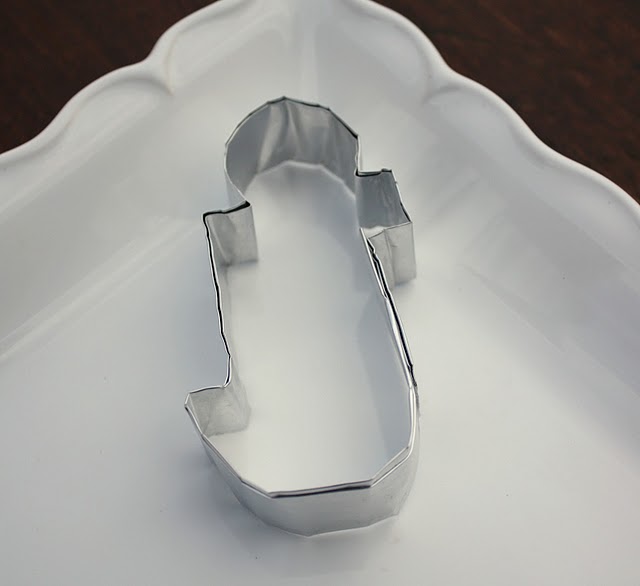
I use this method most often to make cutters for” fad” designs. It’s great in situations where I am making too many cookies to hand cut, but I won’t use it often enough to justify investing in a custom cutter.
I also live in a rural area so I don’t have access to specialty supplies and have to mail order almost everything. This allows me to make my own cutters with things I can pick up locally and without waiting on shipping.
Is anyone surprised at the end result? It always amazes me that such simple everyday things can be used to make such pretty cookies.







This is a great tutorial! My daughter’s having a Paris party this year so I want to make Eiffel Tower cookies!
my daughter is having a paris theme party 2…and i’m trying to get everything on time..cakes,cookies,deco, etcc..hope to get some ideas from u on everything u did for u’r party..thanks
Found the website i believe it is:
http://blog.jugglingfrogs.com/2007/10/make-your-own-cookie-cutter-from-clip.html
Great Tutorial. will use this to make cookie cutter for my next cookie/ and cake order featuring the Disney Movie “UP”…. they will turn out great. I was having trouble finding any cutters, so I’ll just make my own…. Thank you, so much.
You are SOOO clever, this is genius !
Thanks for sharing your wisdom! I was trying to figureout how to make a jig for forming metal wire art, and this will technique will work great!
Pingback: Guest Post on Bakingdom
Thanks for your excellent tips, this cookie cutter idea is amazing. I realy love to visit your site, always something that keeps me to visit it again.I’ve tried to make cookie stencils and cut it out on ‘novilon’ carpet. The stencils are great but you must use it with care otherwise the smaller parts of the stencil will brake. I’m still a starter on icing cookies, but your side keeps me inspired to try and try and keep praticing, as they say : practise makes perfect.
Okay girl. You are just BRILLIANT! I love everthing about this – but especially the cookies. I’m totally obsessed with letters and numbers. They are my favorite cookies ever! I was also looking for lower case letter cutters and haven’t been able to find them. Now, what I would like better though is for you to make me a set of these and I will buy them from you! Haha
Great tutorial!! This is the exact method I have resorted to on a number of occasions, only thing I did differently was I made an extra link of foil to join the cutter and applied tightly instead of using super glue… I was a little bit hesitant about the glue because I wasn’t 100% sure it was going to remain ‘food safe’ after that. The cutters worked a treat though, albeit you have to be a little bit gentler using them unlike the store bought ones! Each cutter got me through roughly 120 cookies each before I decided to bin them 😀
Thanks for the tutorial, but I would end up in emergency for sure! I will just sit back and admire your cookies!
I love looking at your cookies and your never ending wonderful tips and tutorials. Thank you for sharing! You are so talented!
Too funny! I found your site a few weeks ago and have really enjoyed it. But this post kills me! I am making 120 cookies for a party, and couldn’t find a cutter I liked for either shape I’m making. I was going to use a template, but when I was facing knife-cutting 120 cookies yesterday, I decided to make my own cookie cutters. Since I live in a small town, I also have limited options, and I spent ALL day trying many different materials with no success. (Yesterday was supposed to be my bake day for these cookies!) Until late in the evening when I finally decided to try strips cut from the bottom of a disposable lasagna pan, folded in half. Pretty much exactly what you have posted RIGHT HERE on this site I have been looking at EVERY DAY all week long! Gracious. ; ) (I did find a great website to order rolls of copper that would be perfect, though. Maybe for the next project. http://basiccopper.com/cocuco.html )
Also – a neat trick I discovered when I (finally!) made these myself was to use one leg out of a clothes-pin. The edges work great for making all kinds of bends, the tip works well for really sharp turns, and I used the sides to straighten out mistakes or adjust the degree of some curves. And it’s small enough to be able to work with in tight areas.
Pingback: UU Chalice Cookies « Ozark Pagan Mamma
I tried this tonight after reading over your instructions a few days ago. I forgot the all important step of getting rid of the sharp edge on the top, so mine is single layer and may cut me when I try to use it, but I think it turned out wonderfully, although the test will be tomorrow! Thanks for the inspiration, because doing this would never have occurred to me in a million years!
This is awesome! Thank you!
Pingback: Custom Alphabet Cookies
Just awesome!!!!!!!
Thank you so much for such a precise tutorial! Inspires me to make one! Blessings from Bama!
YOU ARE AWESOME! What a terrific idea, and it’s so simple!
Pingback: Summer Cooking Projects: DIY Cookie Cutters and Fruit Sculptures
You can also 3D Print a Cookie Cutter! I teach people how to do this and see it happen just about every week now: http://3dprintingninja.blogspot.com/2014/12/how-to-make-3d-model-from-image.html
Hello! I actually tried this pin earlier today and it actual worked pretty well for me. I put the cutters on the sheet parchment paper underneath and also buttered the cookie cutters. One broke trying to get it out though. I will admit you have to slowly push them out and i found using my fingers worked best. So this pin may be false but you can still kind of make it work
You are brilliant, talented and a creative genius!! Thank you!!!!
Wow, this is a great idea! Pi day is coming up, and I would like to make a pi pie. I was going to make a pi cookie cutter to cut pieces of pie crust to put on top of the pie. Great job here! Also, love the gloves. 🙂
Pingback: 2 inch letter cookie cutters - Ais.gencook.com
Pingback: cheap letter cookie cutters - Ais.gencook.com
Pingback: Mana Symbol Stained Glass Cookies – Dark Ritual
Thank you so much for sharing this tutorial, especially with the photos! I cannot tell you how much the photo of your own cookie cutter meant. Too many times I read these tutorials and get so discouraged a third of the way through because my project looks nothing like the lovely fabulous project of the tutorial’s instructor. If the project comes out well and I try it a few times more it does come out photo ready, or at least somewhat. :-p It is just nice to see that there are people who make tutorials that are not daunting to us first timers. Again, thank you!
Thank you so much!,, you saved my day! How creative you are. Thanks for posting and helping people! You make the world a better place! Thanks
Thank you for sharing!!!!
Clever! Also, I think I found the original site or something close to it. https://www.craftsy.com/cake-decorating/article/diy-cookie-cutters/
Thanks for the tip, but that isn’t the one. This post was published in May of 2011, so it’s about seven years older than the Craftsy post you linked.